Pirate’s Passion – the Sunburst Bra

It is a foam cup with a seamed section of lace and a neat little sunburst on the bottom. The original has a little semi-circle (which I don’t like) but other that that, I knew I was just waiting for the right student to come along and want this on her own bra. Last week, at Boob Camp, such a student appeared. So I will share the steps that Sonia took to cover this cup.
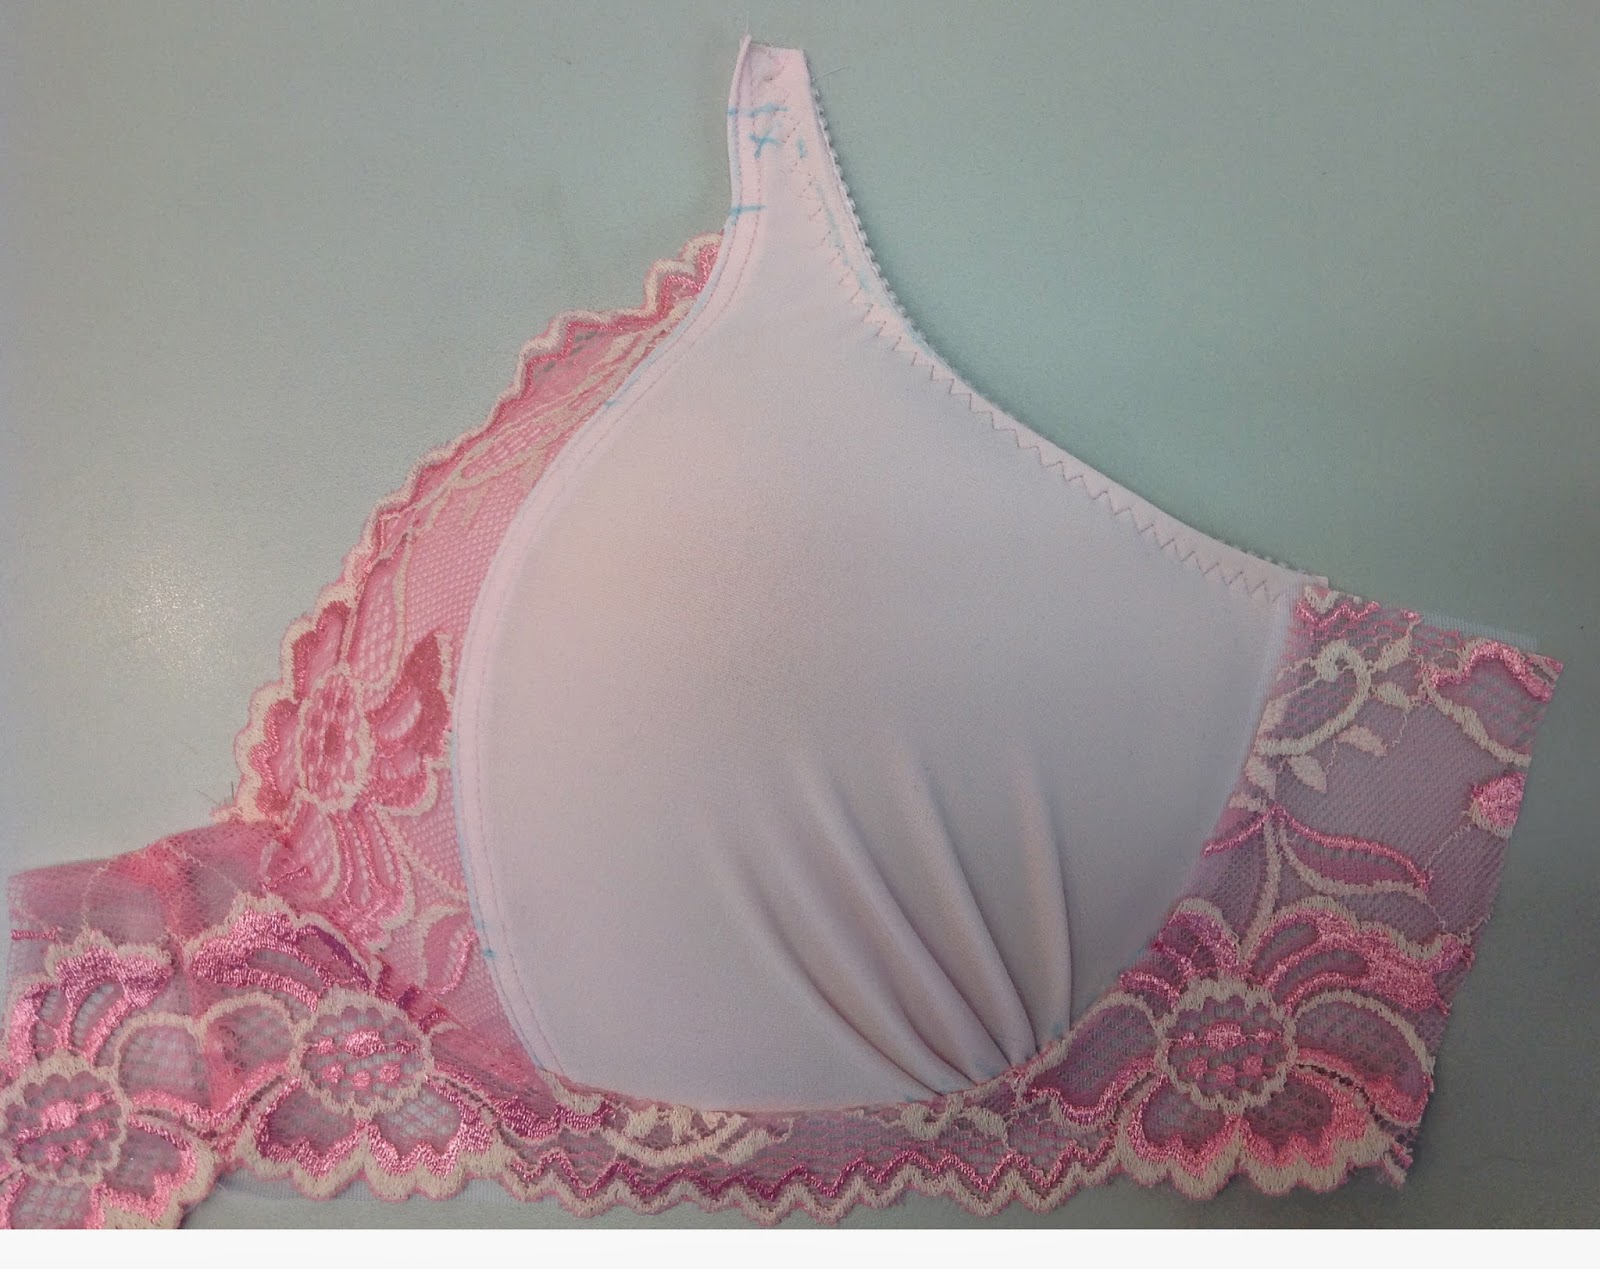
Choose a foam cup that has a strap tab, such as the MH style of cup. This one is a larger size, #44 in fact, which typically fits 38D and 42C (whereas the Chinese cup is a 32A or something)

Draw the style line to resemble the original cup. I use a Clover wash-out marker to draw the lines. It took me a couple of tries to get the curve just right. Draw some match points on there too. It will make life easier when you place the fabric.

Shaping the Fabric
What fabric to use? It must be stretchy, and the thinner, the better. If you can get really flimsy fabric, the sunburst will be tinier than if you use thicker fabric. We used Venice, which is really thin, and we could have used thinner still.
Sonia wanted pink lace and pink fabric. However the cups are only available in beige (more colours coming in summer!) so we cheated a bit and used pink fabric under the lace too, to give the illusion that the cup is pink.
Pin a scrap of fabric with the same amount of stretch as the chosen fabric (or use the same fabric) to drape the fabric on the inner cup. Stretch it a little bit so it lies smoothly, then pin it out and trace the style line, the notches and the edges.

Once you take it off the cup, it should look something like this. Add a seam allowance of 1/4″ (6 mm) to what will be the seamed edge. This is your pattern. By the way, LoPoL stands for Low Point Of Lace, so that is where the edge of the lace will go. Yes, I know it is a curved edge.

This is what the lace inner cup looks like all cut out and ready to stitch.

Forming the Sunburst
Do the same draping, pinning and marking for the outer cup. You can’t see it well but the left side of the fabric is pinned along the style line. A this time, you can also pin out the pleats along the bottom edge. Pull enough on the fabric so the pleats radiate from a centre point.

Mark the edges with the wash-out marker. I also marked where each pleat folded, and marked the starting and stopping point of the pleats on the foam cup as well.


The pre-formed foam cups are more substantial than fabric, and pulling the fabric into the pleats might prove problematic. The seam in this case is also above the apex so the cup style would have to be converted to a vertical seam in order to achieve this look. It could be done, and one of these days, I will have to paly with that design in fabric. Why don't you experiment with it too?
I am a large cup small band size so foam cups really aren't for me. Can this be done in a regualr classic bra pattern or only with foam cups?
GRACIAS POR COMPARTIR. FELICITACIONES. Y BENDICIONES
This is so pretty and so inspiring. Thank you!
Well, now….you CAN sew, you know! Or maybe you can talk Marsha into sewing one up! lol
Thanks for the kind words and you are most welcome. I love this part of being the Fairy Bra Mother!
Thanks! I love writing these posts and turning women on to bra-making!
Just love that look !
Great tutorial, thanks for sharing & inspiring us like this!
I so love your posts. You make the step by step instructions look easy. Thanks for all the detail as these will be my reference for when I am ready to start my bra making challenge.