The 4 Tips you NEED to know!
1. Choose the right needle
When sewing with lace, it is important to use a thin, fine needle that won’t damage the delicate fabric by creating snags. Sewing needle sizes 60/8, 65/9, 70/10 or 75/11 are all recommended for sewing lace, though the size of the needle will vary depending on the type of lace you have. We also recommend being mindful of the type of needle you have, as microtext is (in our opinion) best for non-stretch lace, where as stretch needles are best when working with stretch lace.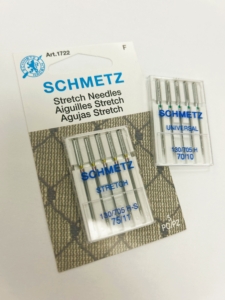
2. Test your stitches
The best stitch for lace depends on the type of lace you are working with, and how you’d like the end result to be. For stretch lace, which is typically quite flexible, consider using an overlocker or a narrow zigzag stitch on your sewing machine. Starting with a zigzag stitch with a width of 1.5 and a length of 2.5 is our recommendation, but feel free to adjust it to suit your lace. For sheer lace, especially when a lining is involved, straight stitches or French seams work well. These stitches provide a clean finish while ensuring the lining stays securely in place. For patterned lace, which may require lining, the zigzag stitch is the way to go, as it allows you to seamlessly join the lace pieces together.
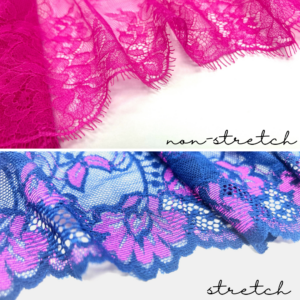 (Most of our ‘regular’ laces are stretch, though typically our eyelash lace is not. Our premium laces are always non-stretch unless otherwise specified, as they are created by embroidering fine mesh.)
Some people just “have an eye for it” and can tell without touch whether a lace will be stretch, or non-stretch. Are you one of those people? Take a look at the image below, and see if you can figure out which trim is non-stretch and which one is stretch. 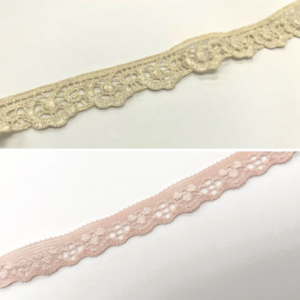
3. Match Up Your Lace
Sewing two pieces of lace together to create a seamless flow may seem difficult, impossible even. However, you can make this easier by lining up the edges of your lace, especially with lace that has repeat patterns. Before sewing to connect your lace pieces, try multiple ways of ‘joining’ your lace together, so you can choose the option that looks best to you. Often times, it is easier to overlap your lace, to get a perfectly matched pattern.
4. Finishing Touches
Hemming lace is often unnecessary and may result in an unappealing finish. Instead of hemming, you can leave the edges raw. This is especially true for lace where you have cut around the distinct lace shapes, such as flower petals, zigzags, and scalloping. If you believe that your project would look better with hemmed lace, use a baste stitch. If you decide that you like the look of your lace, then sew a straight stitch over the baste to secure it.
")


Great hints, thank you! I need to take the plunge and sew a lace bra!! (Loved the Denise pattern and swimsuit kit!!)