Re-purpose a Nifty Notion
If you own a cover stitch machine, you may be aware that it can do some amazing things. One of the things it can do is to make 3/4″ (18 mm) strapping for bathing suits, sundresses etc. A smaller version in a 3/8″ (9 mm) width is great for belt loops. To do that you need a fabric folder. if you don’t have a fabric folder, I will show you how to re-purpose a nifty notion you likely already have!
A fabric folder, as the name suggests, folds fabric to the back side as it travels through the opening. It is positioned right in front of the presser foot so as soon as it comes out of the folder, the folded fabric edges can be stitched down.

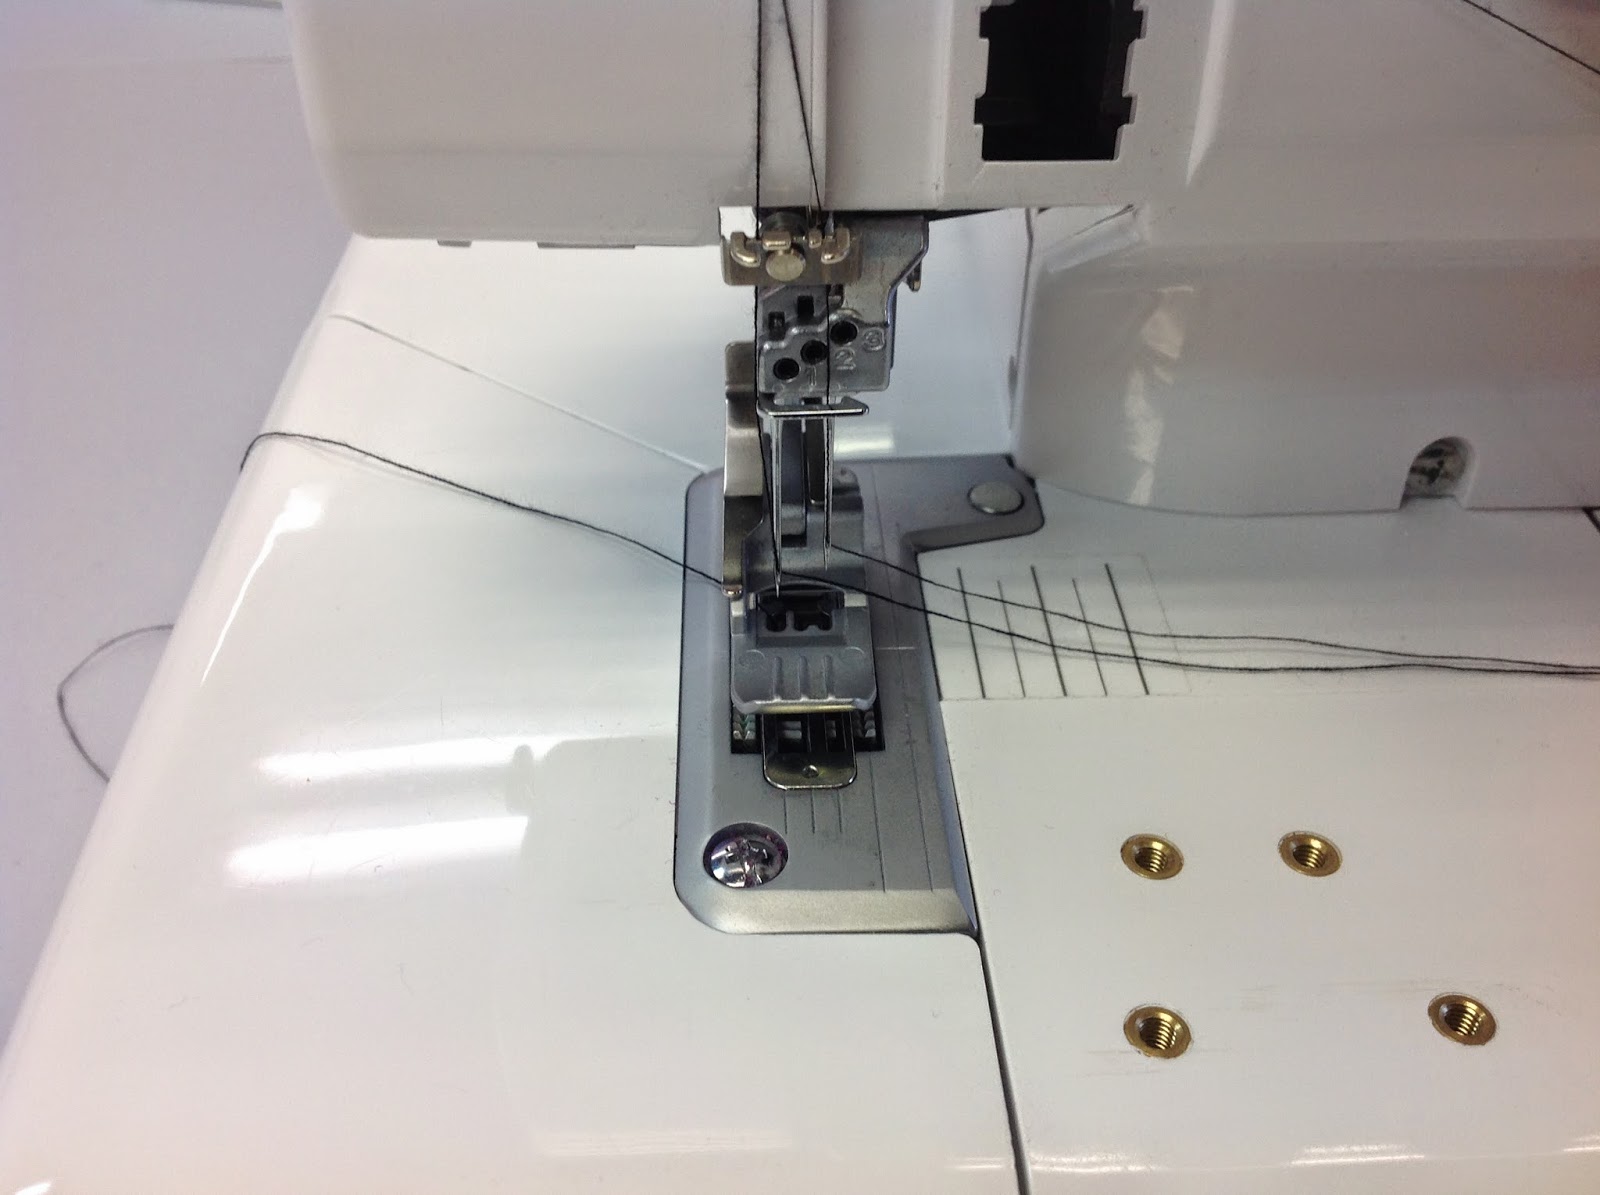
The folder fastens to the bed of the machine in the holes conveniently provided by the machine company, such as shown here.
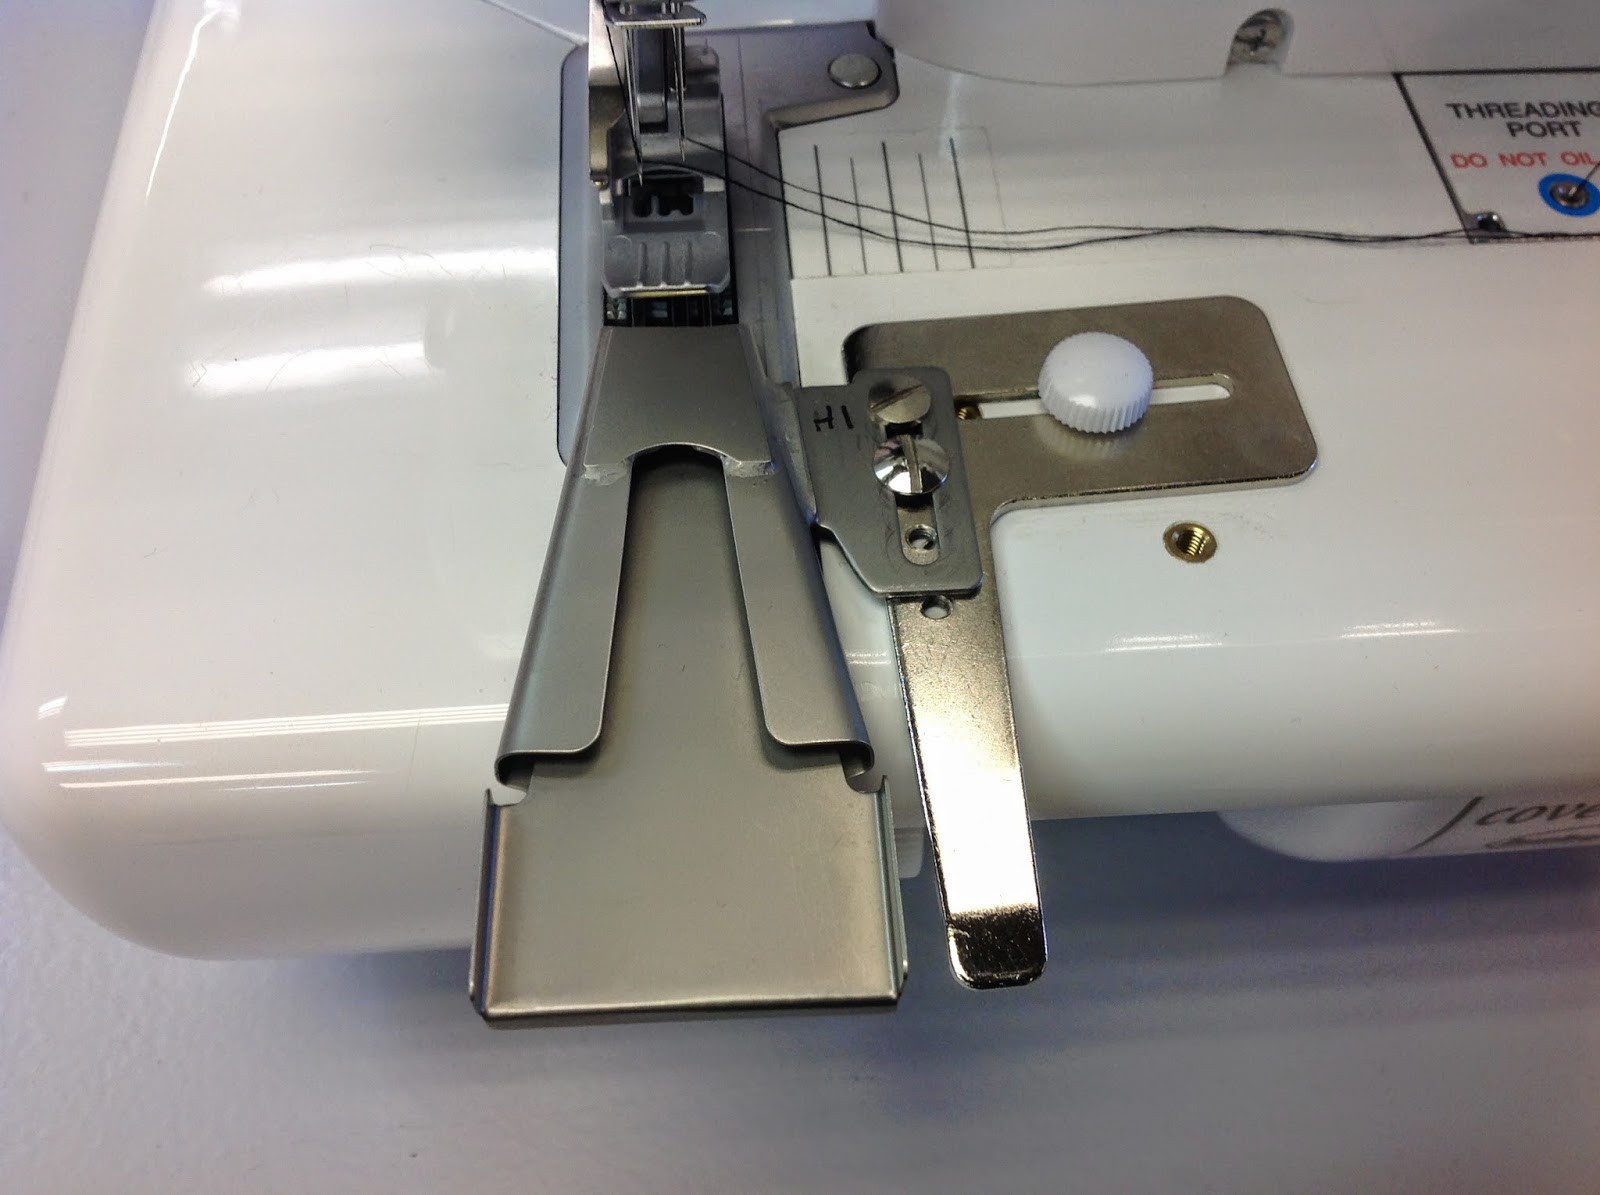
Here is is fastened down. You you push the fabric strips in the wide part of the folder and like magic, out of the small end appears miles of folded fabric, ready to use. Well….not always. There can be issues…<sigh>
- Not all home Cover stitch machines have those convenient screw holes in the bed. My BabyLock does but not many other domestic machines do.
- The plate that fastens the folder to the machine, doesn’t always line up with the holes. You can see I could use only one screw to hold down the plate, which could cause it to rotate when in use.
- Folders are expensive and if you have to buy an adapter plate, that’s often extra
- You can’t always buy them in the sizes you want, and you may have to order them in.
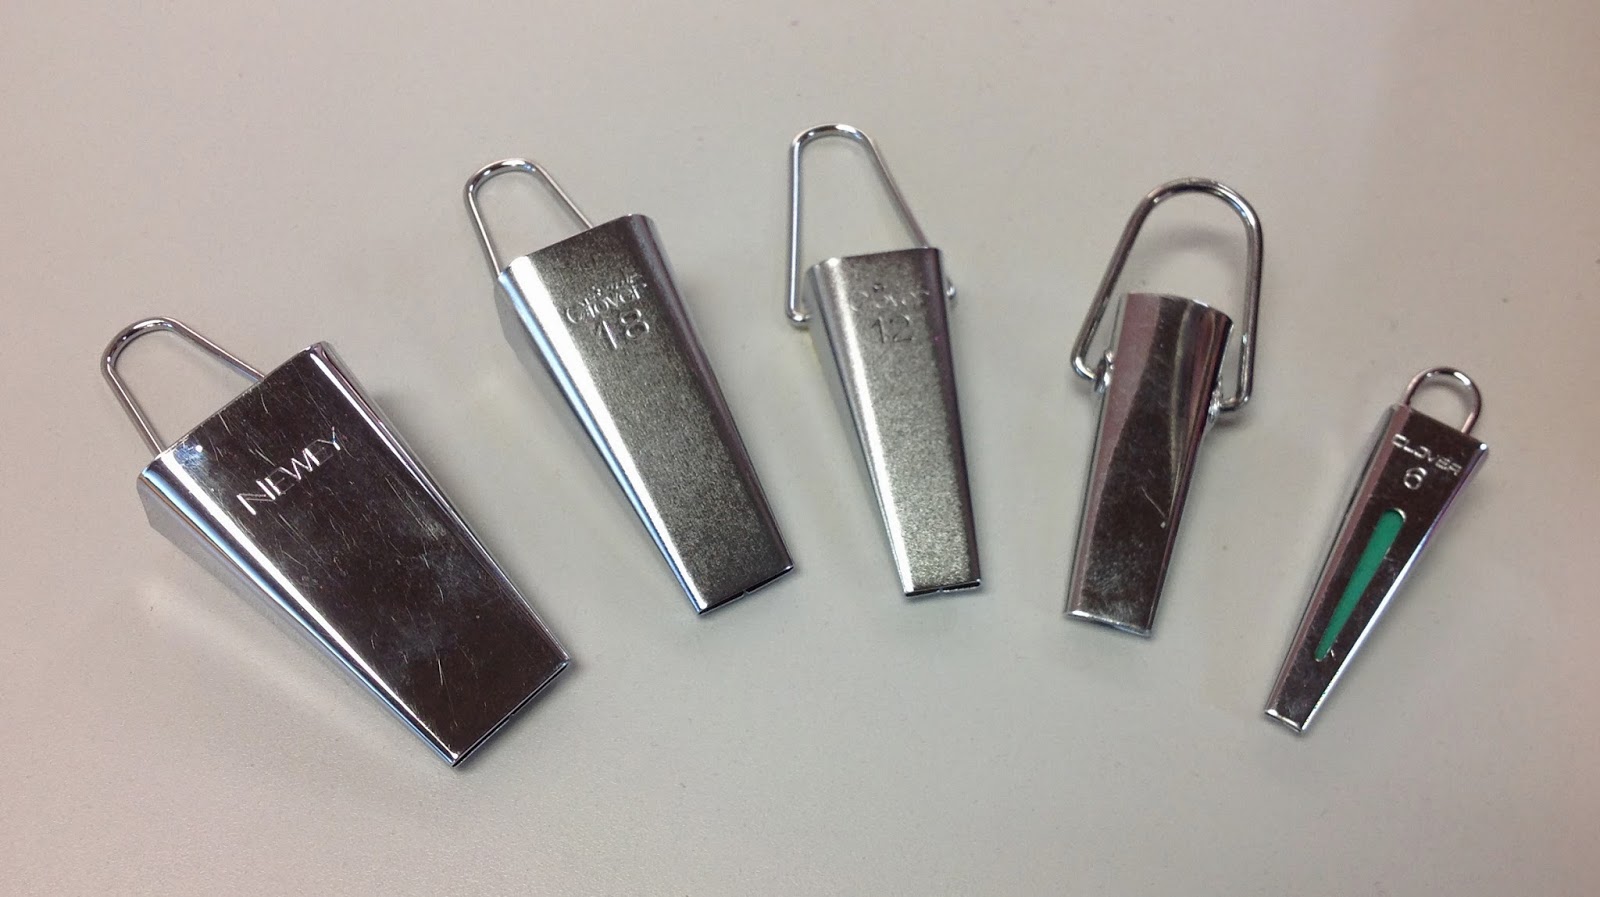
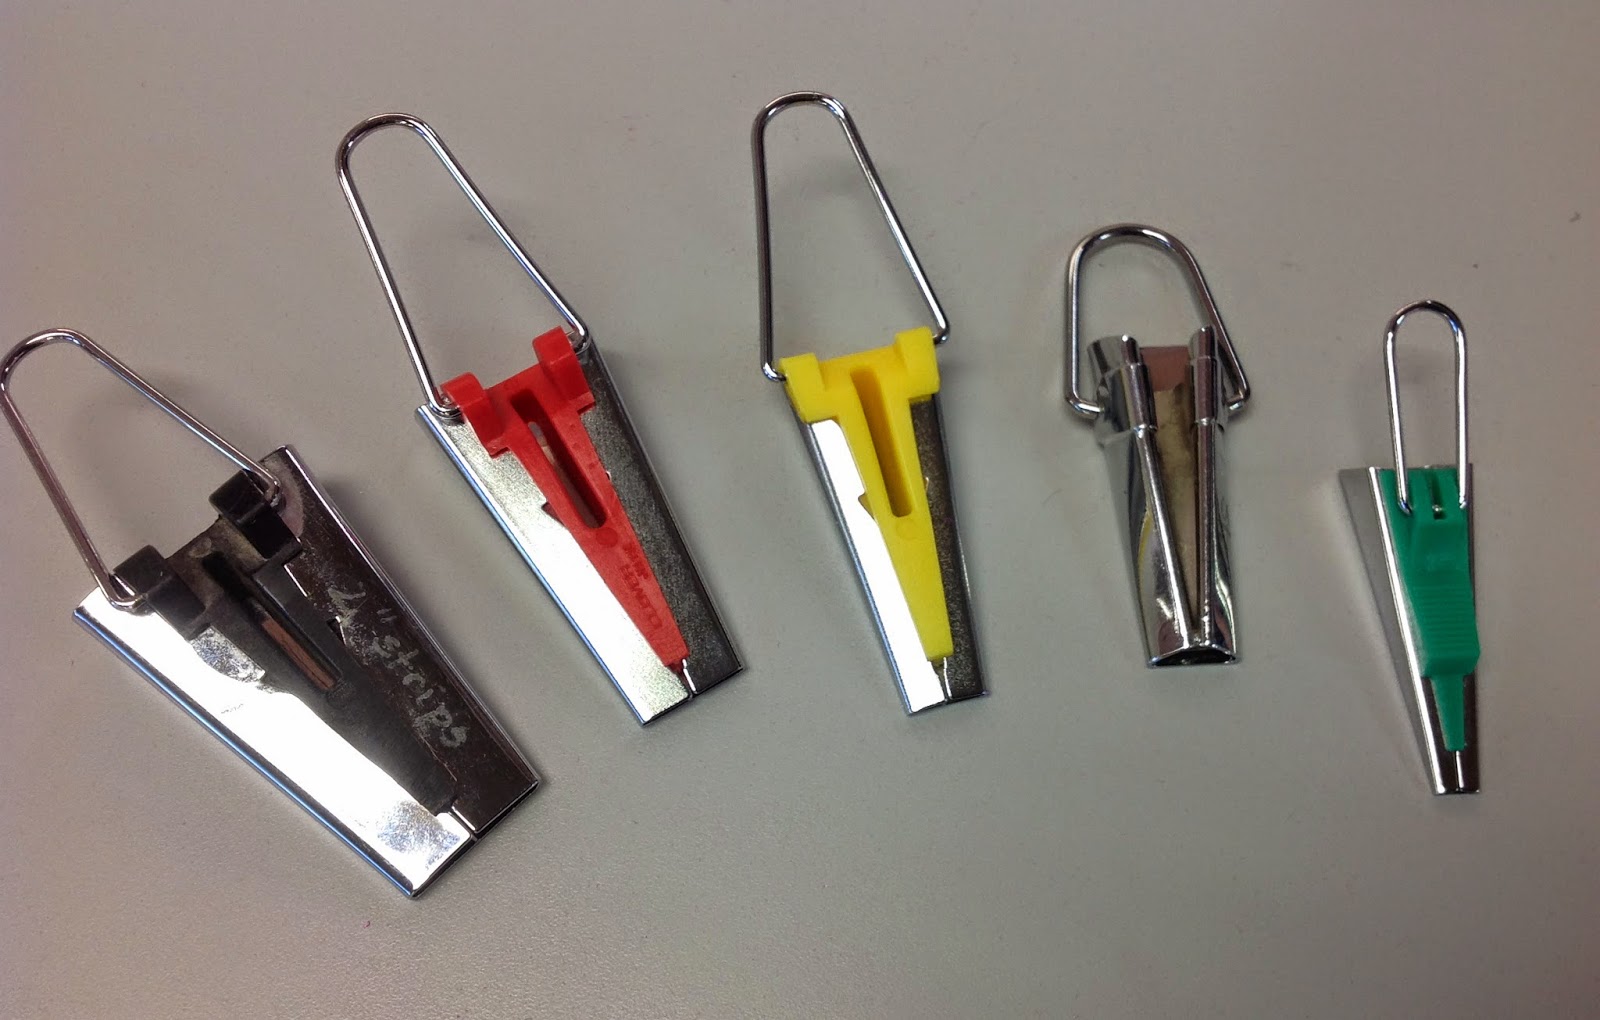
What can you do? You can re-purpose something from your sewing room! In fact, almost every sewist has these nifty bias tape makers hiding in a drawer somewhere. They are available in several sizes and by several manufacturers. Shown here from L-R are Newey 1″ (25 mm), Clover 3/4″ (18 mm), Clover 1/2″ (12 mm), Dritz 1/2″ (12 mm) and Clover 1/4″ (6 mm). You can tell I like the Clover ones the best, although to be fair, most of these are over 20 years old and they still work fine! How do we re-purpose a nifty notion like this?
These bias tape makers can work exactly like a commercial belt loop folder. Oh wait – maybe you noticed that not one of these hand held tools has any way to fasten them to the bed of the machine?
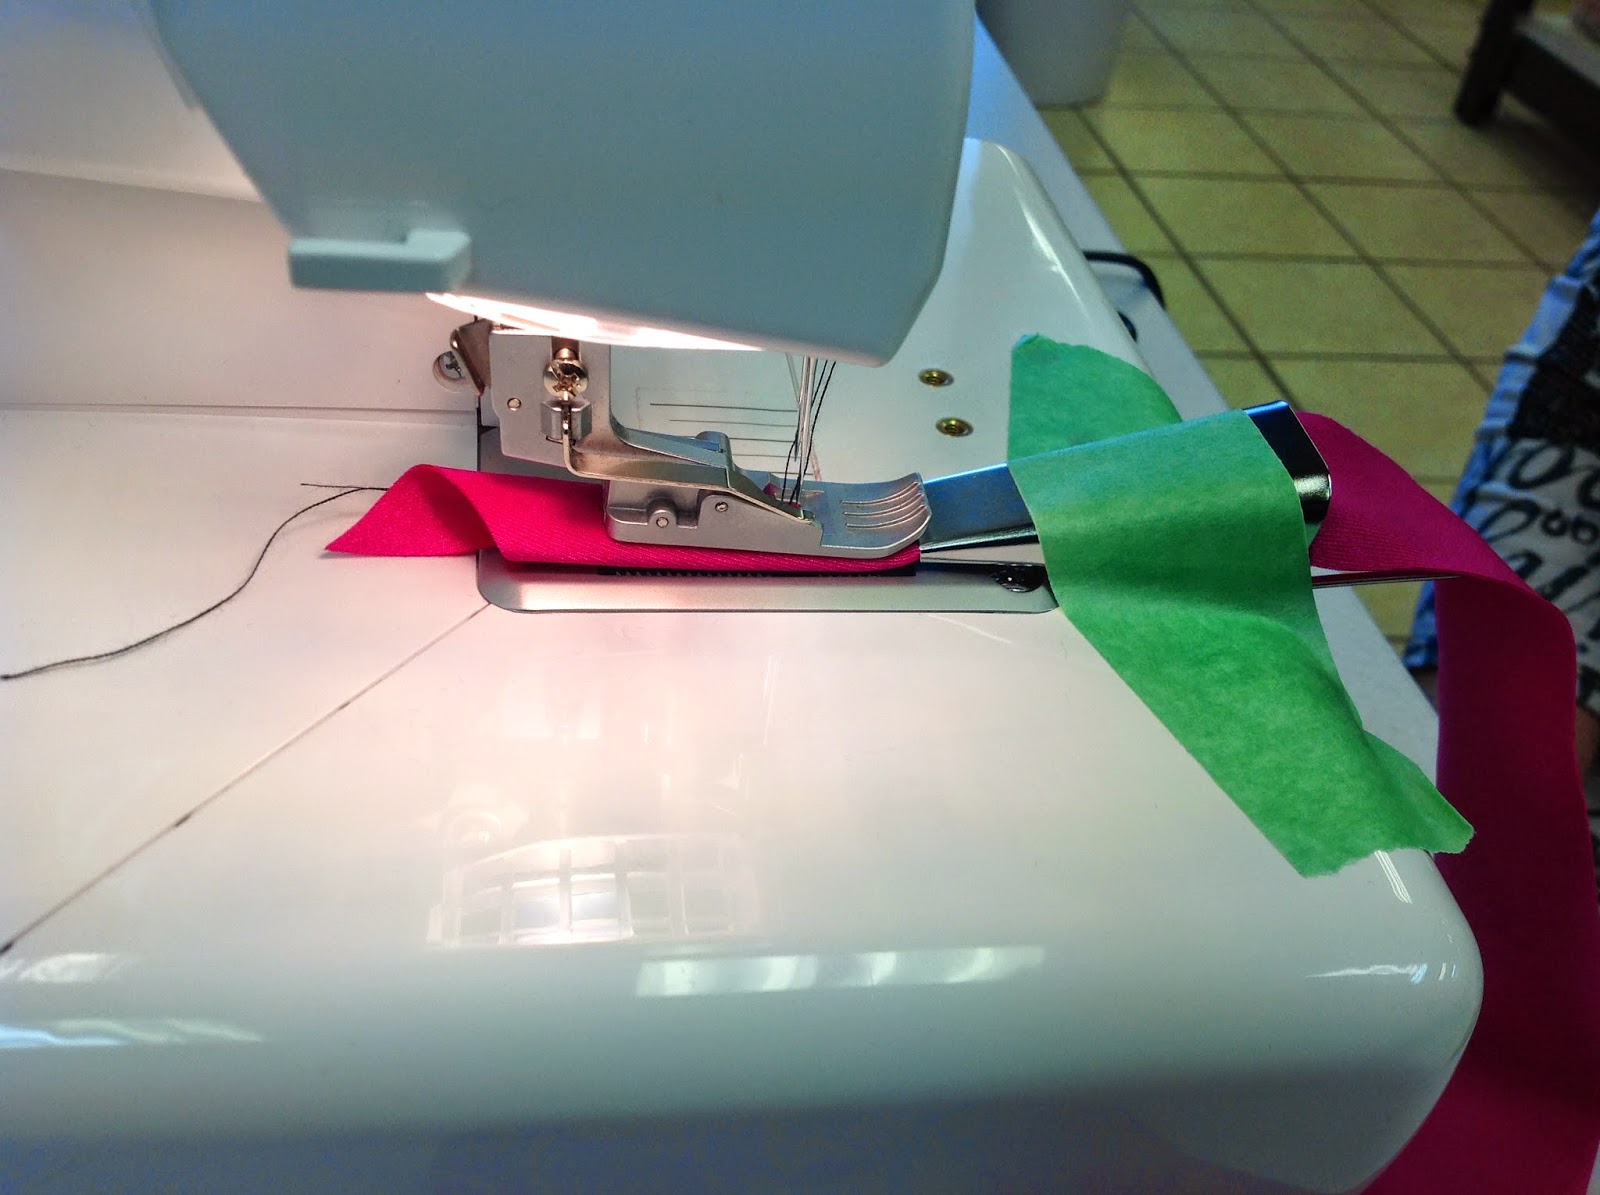
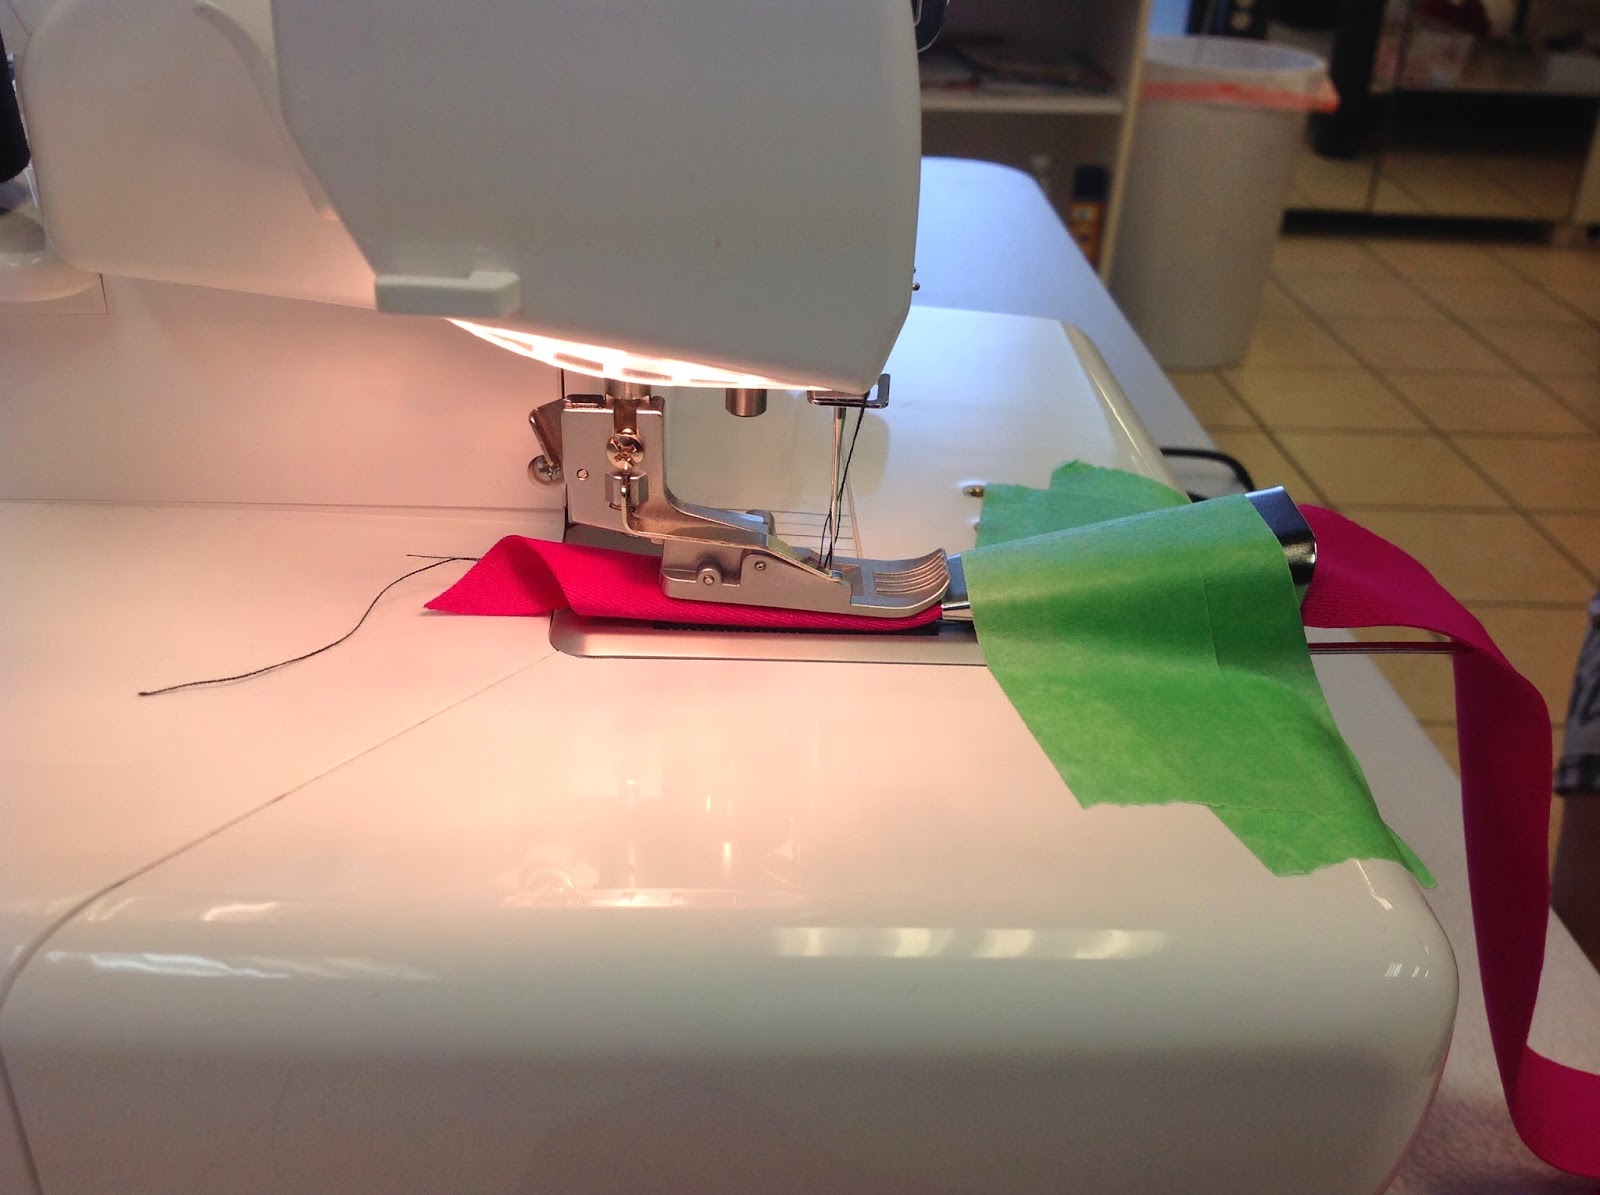
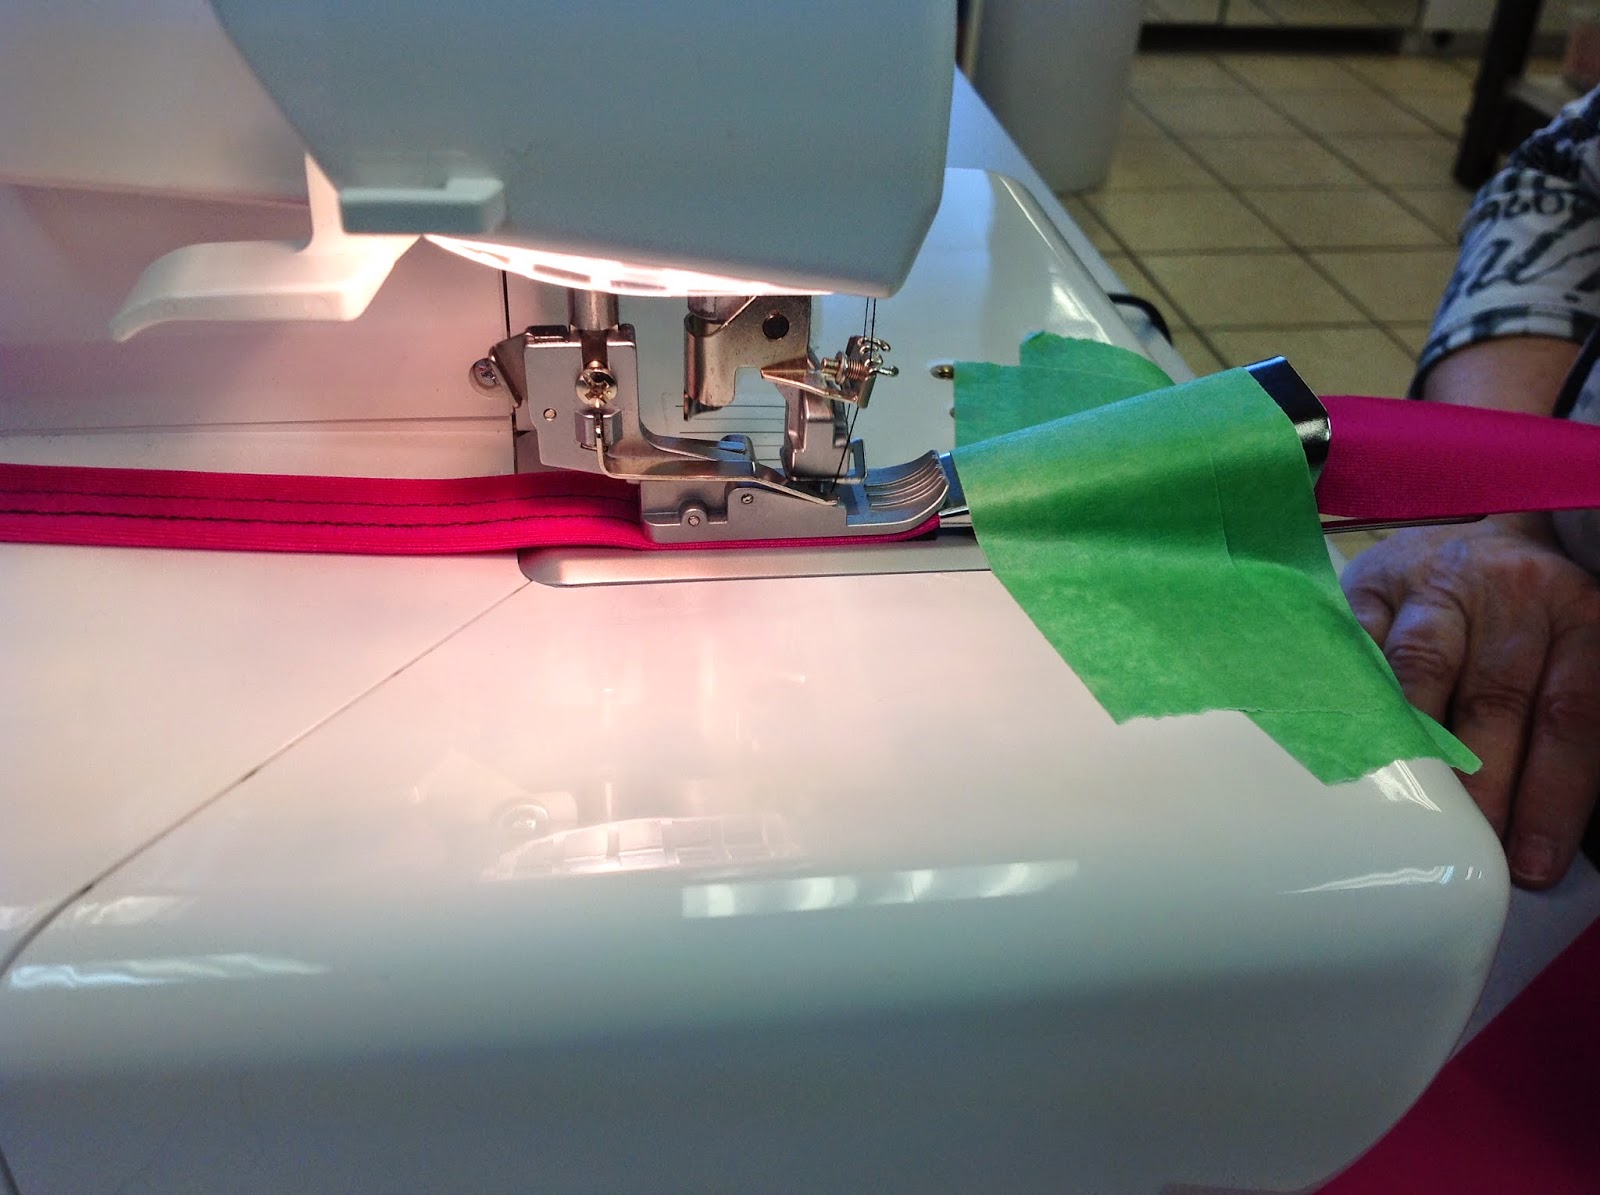
I’ve kept you in suspense long enough! We will tape the bias tape maker to the machine! I used green painter’s tape but almost any tape that will remove cleanly would do. I would think that duct tape or packing tape would leave a gummy residue on the machine bed. Not. Good.
But let me tell you more about the folders first! Here’s the back side of these folders. You can see (hopefully) that except for the little one on the right, they all have a groove or an opening so you can pull the fabric through easily. They all have a little finger pull loop. It’s great when you are making bias tape, but on the cover stitch machine, we won’t need to use that.
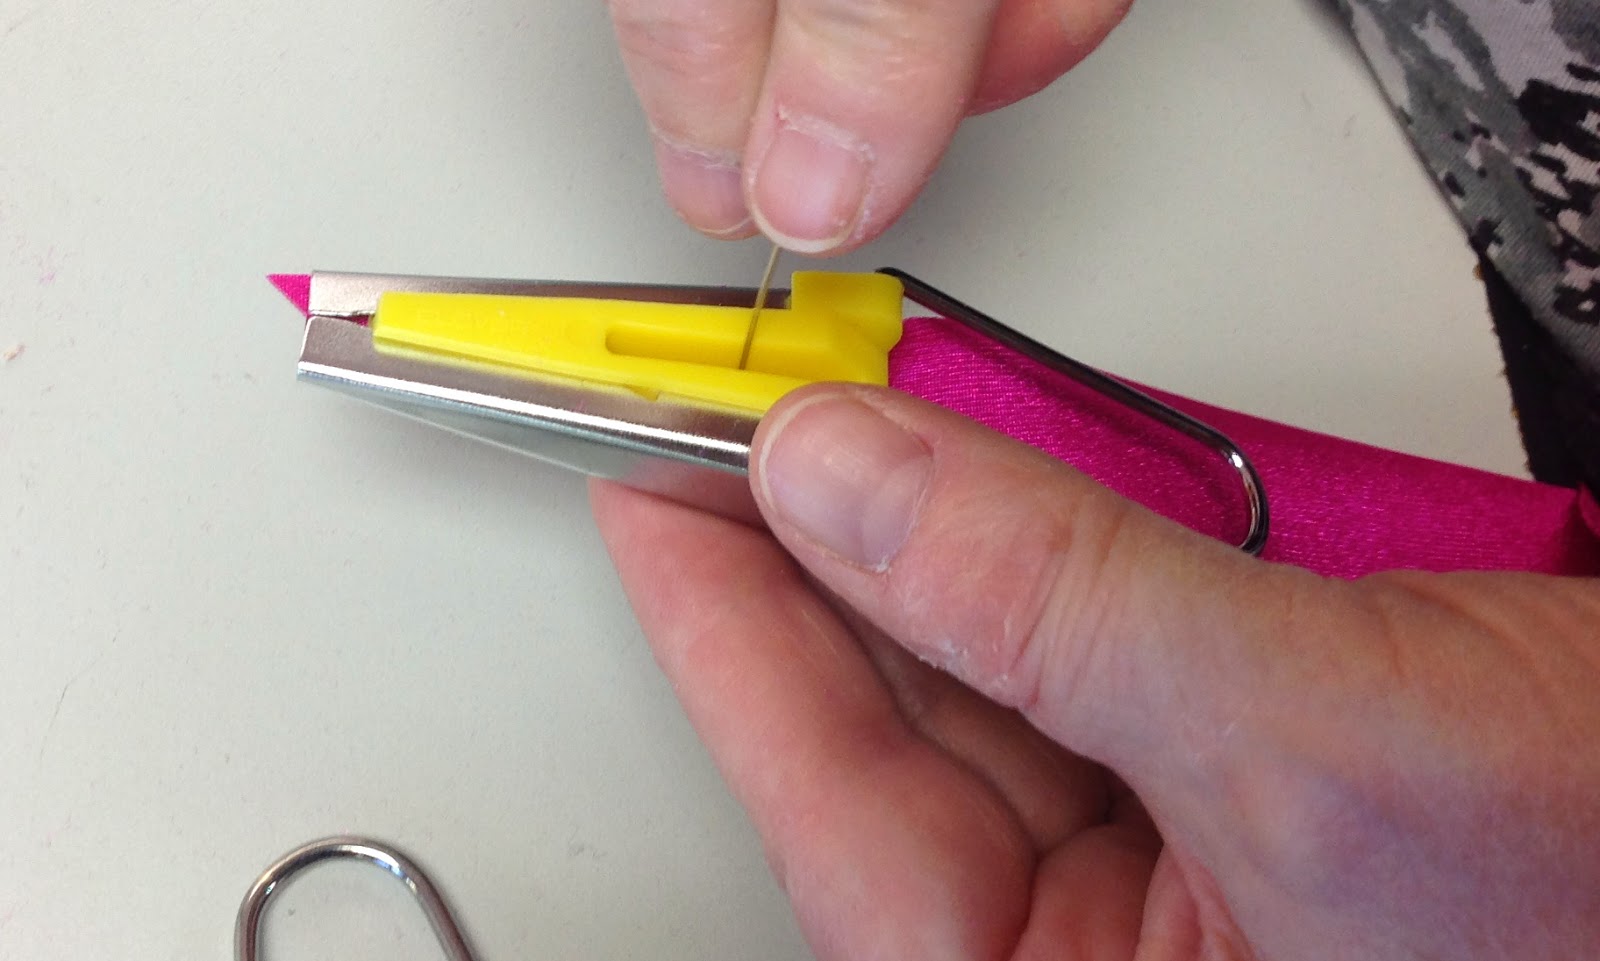
All these folders are the same in that you need to cut a strip of fabric twice as wide as the finished width. I am using a 3/4″ (18 mm) folder so my strips are cut to 1 1/2″ (36 mm). You may need to adjust the width slightly if you are using a thicker fabric. No need to cut spandex swimsuit fabric on the bias either – there’s enough stretch without it. Just cut it from selvedge to selvedge. It is also helpful (necessary really) to cut the fabric on an angle. It makes it much easier to feed through the tool.

Use the Left and Right needles on your cover stitch machine. All cover stitch machines have three needle positions. Using two needles side by side (i.e. Left and Middle or Middle and Right) will make your bottom stitch too narrow and it may not catch both raw edges of the fabric.
Start the fabric through the folder before taping it to the machine bed. Aren’t you happy you cut that fabric at an angle? It goes in the opening really easily!

It will usually get stuck somewhere along the line, so help it along with a pin in the groove.
Pull the tail of the fabric through to the back of the foot so you have something to hang on to. Wiggle the tape maker into position so that the two needles look centered on the fabric.
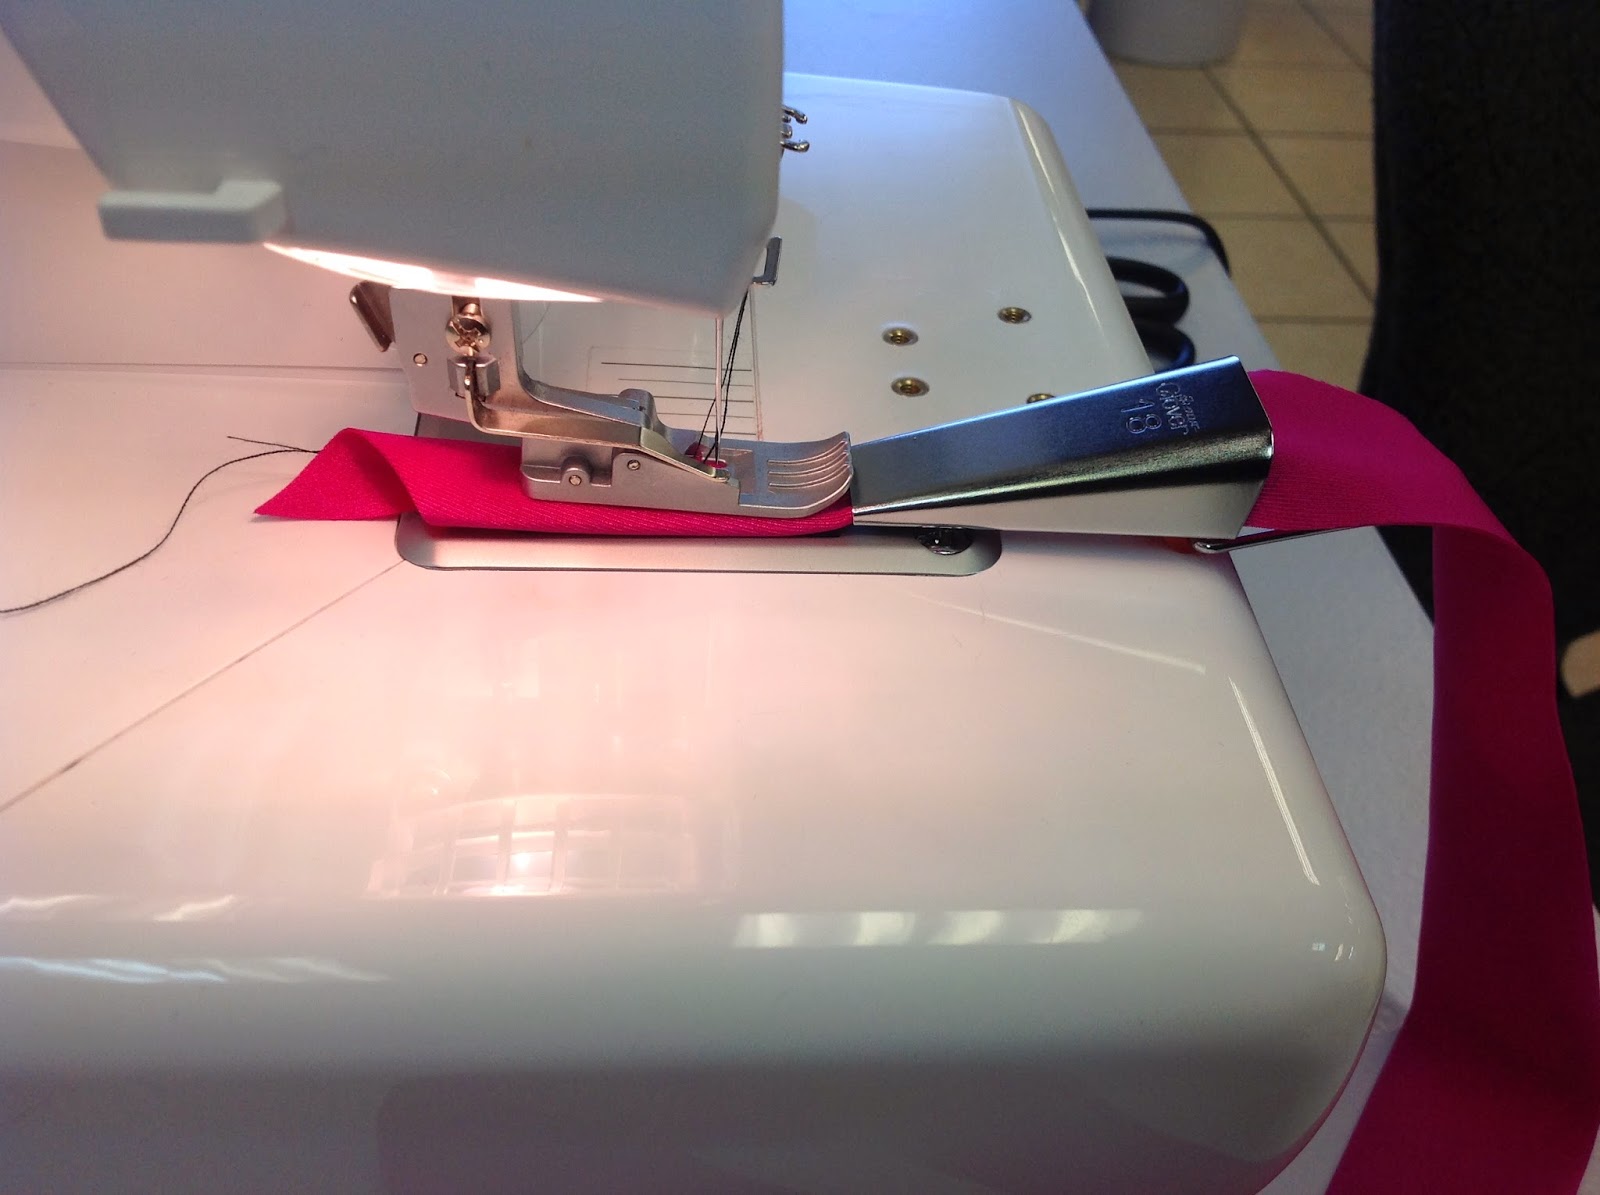
Then tape that puppy down! I used two strips of tape to really keep it in place.
And start stitching! Like magic, our nifty notion folds the edges under and the tape keeps the fabric exactly where it ought to be.
So now you know how to re-purpose a nifty notion! When you get to the end of the fabric, you will want to lock off the stitching so it does not unravel. I’ll show you that trick in the next post right after this one! Stay tuned!


When I was reading your post I thought the same thing about both my double needles on my Pfaff (I have a 9 mm stitch width also) and my Elna serger. It has 2 coverstitch functions so I don't see why it wouldn't work as well as a coverstitch machine (although I have never seen a coverstitch machine apart from photos on the Internet).
I knew about double needle industrial machines – they are quite common in the bra industry for topstitching the cup seam, but I did not know a domestic machine had that capability! Thanks for sharing that info! Who knows who might read this post and talk to the machine companies?
Some more about twin needles: I have an old Singer 401. These machines have a needle clamp that can hold two regular needles side by side, so you can use two ball tip needles instead of a regular twin. Saves money plus it is more flexible solution- if you forgot to buy the right twin. i also bought a similar clamp for my Elna Supermatic on E-bay (expensive). Not sure what other Elnas can use the same clamp. Bot are fairly narrow zz machines but this may be something that can be bought for newer machines too. If not- tell the Cinese.. 😉
You are very welcome!
This is great! I'm inspired. I've had a Janome CoverPro 1000CPX for a year and have yet to use it. I can't wait to give this a try. Thanks!
Absolutely! Not all machines can use all the sizes of the twin needles. I have a Bernina 1630 at home, which can stitch out a 9 mm wide zig-zag – so it can accept the 8 mm wide twin needle. However I also have a Bernina 930 which stitches out only 4 mm wide zig-zag. I am just asking for disaster if I use a twin needle wider than 3 mm. Hmmm…that's a good idea for another post! Thanks, Denise!
You would have to be really careful of swing width measures.
Ooooohhh! Yes, you could!!!! As long as you can tape the bias tape maker to the bed, it would work. The twin needle would work very well since the twin needles on top create a zig-zag effect from the bobbin thread which would catch both sides of the fabric turn-under. If you use a woolly thread (I like woolly poly better than woolly nylon) in the bobbin, it will provide a lot more thread coverage than regular thread. Thanks for that GREAT suggestion!
I'm seeing possibilities here of using a regular sewing machine with double needles with one of the stretch stitches?
Be brave, and get that machine running! Once you start using it, you will wonder how you sewed without it!
Your email the other day prompted this post, Allison! There are a lot of sewists who feel the same way about their machines. I have to admit, sometimes a machine is just a lemon. I hope that's not the case with yours.
I'm going to try this as soon as I get brave enough to use the cover stitch. (these tutes are helping get me there!). I need to buy a couple of thread guides first. Thanks.
Very clever, Beverly. Now if I can just get my stinky coverstitch machine to work properly, I could try this.