Bodysuits are all the rage; whether it’s being worn as the main part of a stylish Underwear-As-Outerwear look, used as the base of a Halloween costume, or simply underneath your clothes to bring out your inner Wonder Woman we’ve been seeing Bodysuits as a wardrobe staple since 2014, and they’re not going anywhere.
If the word ‘bodysuit’ springs to mind images of 1980’s high-cut spandex, fitness and aerobics classes, have no fear- this tutorial (made using a combination of our Diamond Bustier Pattern and Denise Swimsuit Pattern) will walk you through a decidedly modern version with delicate, figure-flattering cutouts and some easy pattern hacks that you can work into your repertoire of bra-making skills.

Materials:
3M – 6 or 7 inch wide Stretch Lace
0.5M- Strap Elastic in 1/2” or 3/4”
0.5M – Skinny strap Elastic
0.5M Plush Waistband Elastic
1 pair underwires in your size
1 2×3 Hook and Eye
1 1inch G-Hook
1.2M Foldover Elastic
0.1M Bamboo or Cotton fabric for gusset lining
Optional:
1M Sheer cup lining
1M Stretch Mesh
0.25M Hook and Eye Tape
Step 1: Cutting your Diamond Bustier Pattern Pieces
Following the Diamond Bustier pattern instructions, calculate your BCD and measure your band size, then trace your pattern pieces for easy fabric cutting. Fold your lace in Half with the Direction-of-Greatest stretch going around the body and align the fold with the Center of your Front Frame.
Align the lace as well with the side edge of the Front Frame Piece.
Narrow the back band by at least 2 inches.

For additional support, you could cut all of these pieces out of Sheer Cup Lining and baste the lace onto the sheer cup and then assemble your pieces.
Construct your Bustier following the pattern instructions until you are ready to apply your Plush Waistband Elastic!

ADDING THE G-HOOK WAISTBAND DETAIL
1. Fit the Bustier and trim the Plush Waistband Elastic at either side of your waist
2. Cut two pieces of Skinny strap Elastic to fit DOUBLE the remainder of your waist measurement
e.g. If your Waist is 32 inches, and the Plush Waistband Elastic is 16 inches you would cut two pieces at 16 inches each (they will each be folded in half to create two 8 inch pieces)
3. Fold each piece of elastic in half and sew onto the Plush Waistband elastic, securing the g-hook onto the right-hand side.
4. Bar-tack the strap elastic on the right-hand side to create a loop for the G-Hook to connect to

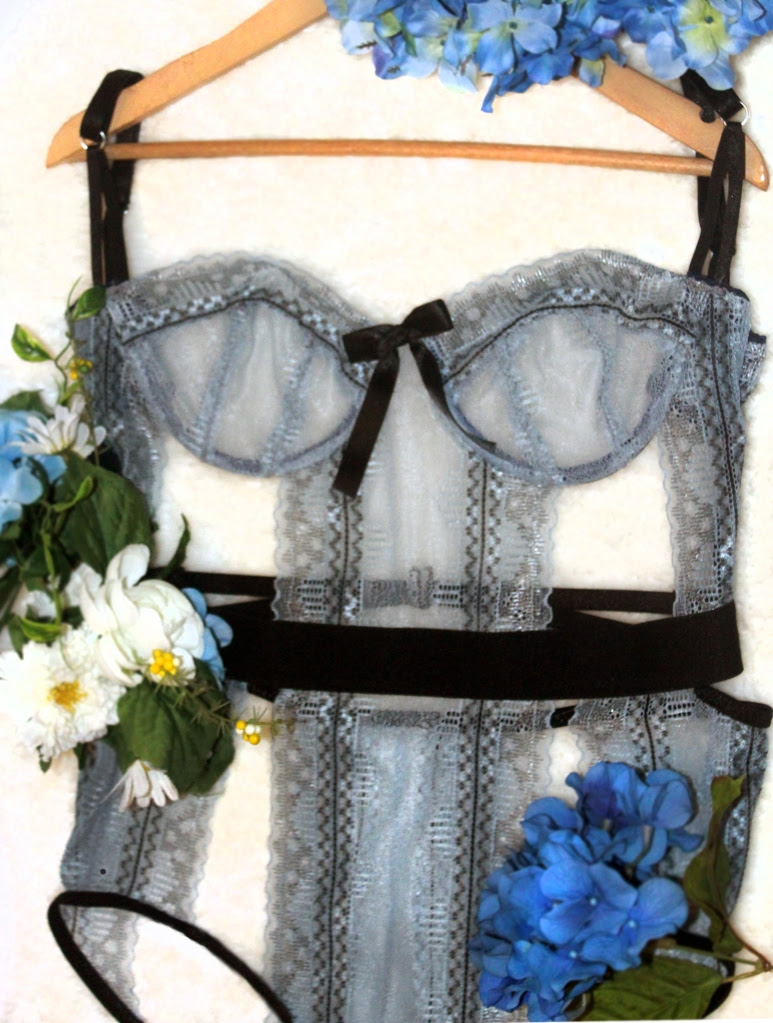
The finished waistband should look something like this!
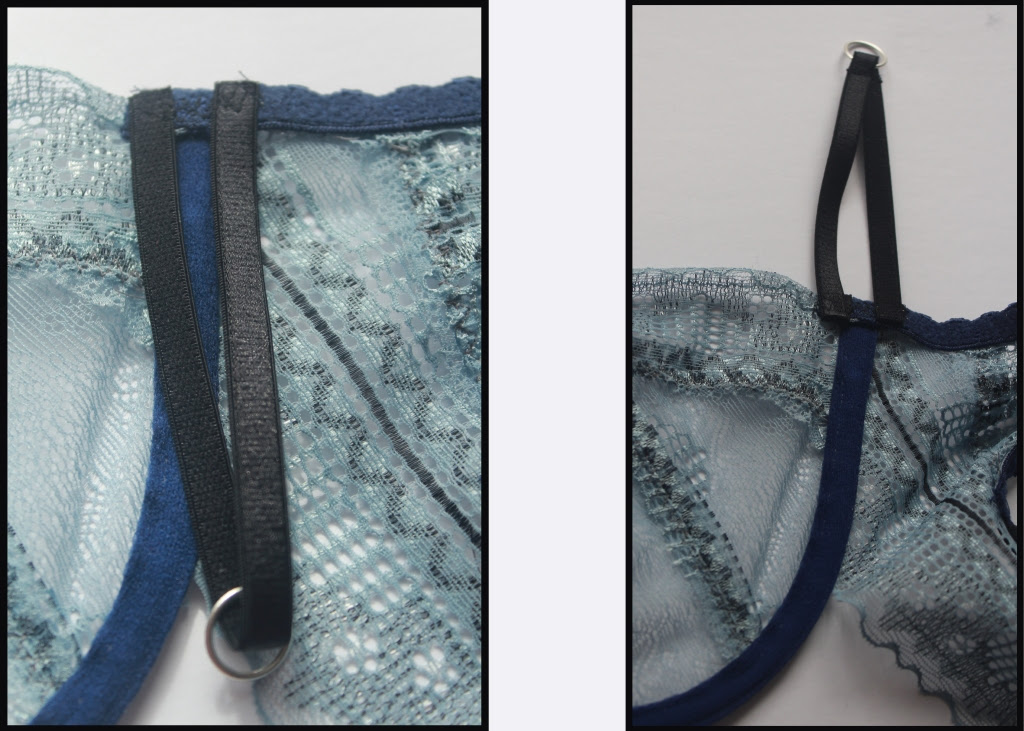
ADDING THE STRAP DETAIL
1. Cut two 8 inch pieces of Skinny Strap elastic
2. Insert the rings ad fold in half
3. Sew with the raw edge facing the top of the Bustier
4. Flip the strap elastic up and sew flat so it sits comfortably against the body
5. Create an adjustable Strap with a slider and feed through the front ring and sew down onto the back band.
TURNING THE BUSTIER INTO A BODYSUIT
1. Cut your Denise Swimsuit View 2 pattern pieces
2. Measure from the gusset seam to where your newly finished Diamond Bustier fits along your waistline
3. Adjust the pattern to reflect the rise of the bottom patter piece
4. Align your lace following the diagram below and making sure to cut on the fold for the centre pattern piece
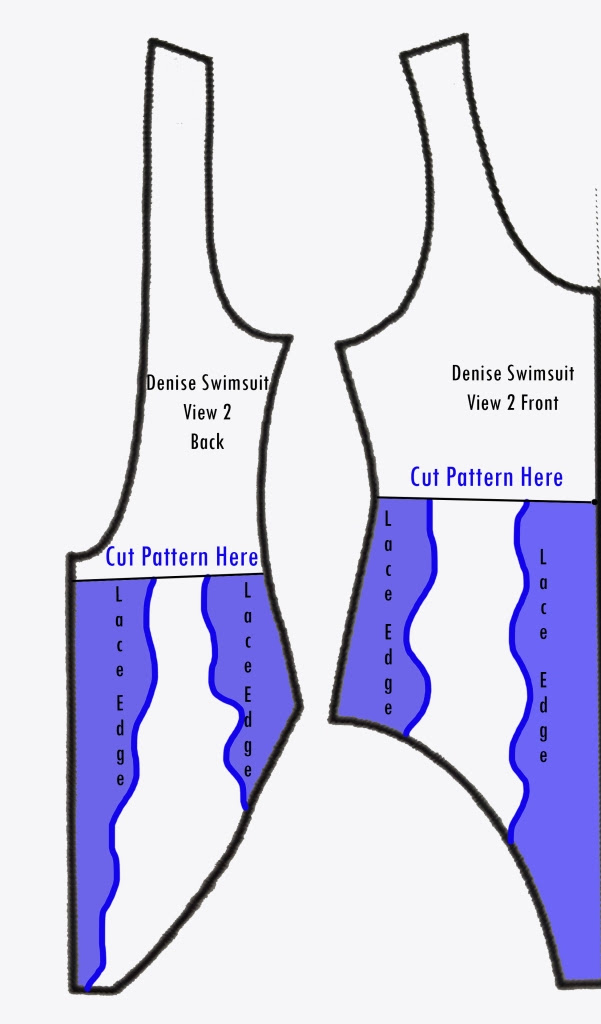
Sew together all of these pieces, and zig-zag stitch a gusset to cover the front crotch seam. the final step is to simply attach the bottoms to the Push Waistband Elastic using a zig-zag stitch and finish the back waistband and leg-holes with Foldover Elastic.


i will like to make a no back bra