If you are new to bra-making, you may be following the pattern instructions to a T. However, there are some changes to the back of the bra that will greatly impact your comfort, but they do not take a lot of drafting skill or sewing knowledge. Here are three Essential Bra Backs you should know.
Changing the Hook and Eye Size
If you want three hooks high instead of 2, or you want 2 hooks instead of three on your bra back, you need to read this. Altering the hook and eye size is the easiest style change that can be done right as you are tracing off the pattern.
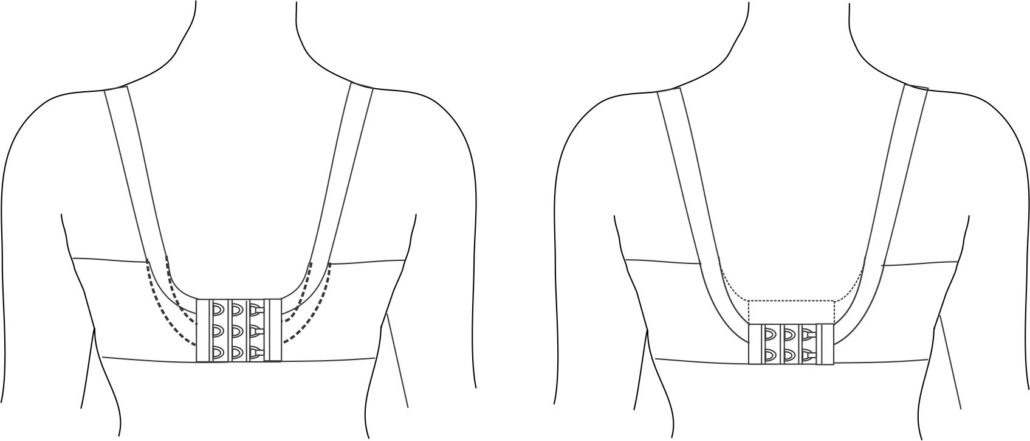
When planning for hooks and eyes, you need to know the distance between the metal parts. If using hooks and eyes with a ¾” spread, the finished size of the band needs to measure in multiples of ¾”, so for a two hook closure, it needs to measure 1.5″ (finished). For a three-hook closure you need 2.25″ and for a 4 hook closure you need 3”.
If your pattern uses strap elastic to finish the cut edge of the fabric, the height of the hook and eye should be equal the height of the pattern centre back, less the width of the bottom band elastic. So if you want to use a hook and eye measuring 2.25″ and the current back is only 1.5″, you need to subtract .75″ from the centre back height. Mark the new height on the back, then connect the point to the same strap scoop point as shown. Do the opposite if you want a higher hook and eye.

With a pattern that uses top band elastic to finish the strap scoop, you must consider the elastic width in the top of the hook and eye area, as well as the bottom. The finished edge that you will be sewing the hook and eye to, is actually lower than the pattern indicates by the width of the top band elastic. If you want hook and eye measuring 3″, add .5″ (bottom elastic width) plus .375″ (top elastic width) to the hook and eye width of 3″ to make a total of 3.875″ or 3- 7/8″. Mark from the bottom edge to a new point 3.875″ up. Connect the new point to the start of the strap curve.
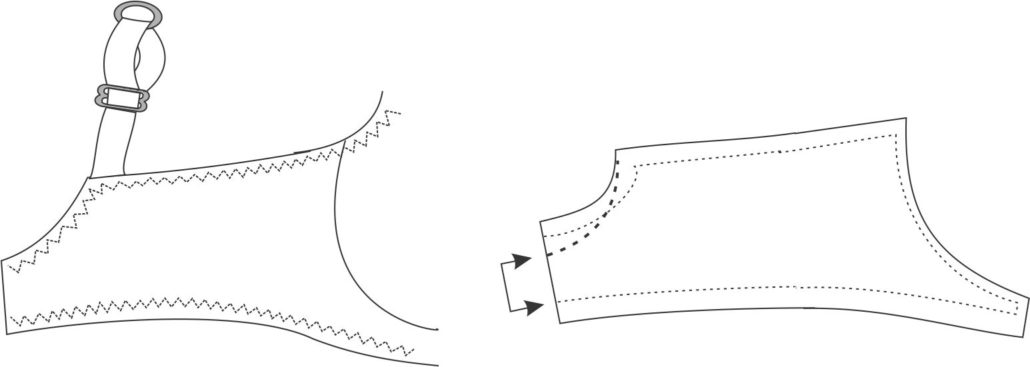
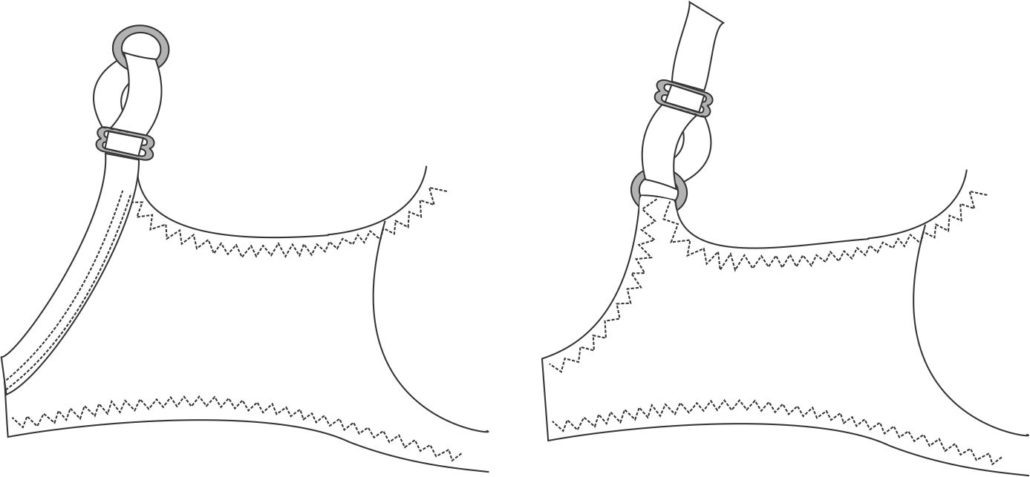
The Back Strap Extension
The back strap extension keeps the straps on your shoulders and can provide fabric coverage that will hide any back fat in that area (not that you have any!) In this case the back has an extension drafted into the back pattern piece. To draft the back strap you need only the back piece. For a pattern that uses strap elastic to finish the strap scoop, continue the line of the strap scoop upward from the hook and eye area, a total of 2-3″. Draw a line at right angles for the strap. Make this line A the width of the strap you are using, plus the width of the top band elastic. Connect the line at A to the side seam top edge in a gentle curve.
In the case of a bra back that uses top band elastic to finish the strap scoop, continue the line of the strap scoop upward from the hook and eye area, a total of 2-3″. Draw a line at right angles for the strap. Make this line A the width of the strap you are using, plus two times the width of the top band elastic. When finished with elastic, the extension will be the correct width to accept a ring to attach to the strap.
Here’s what the two strap extensions appear when finished.
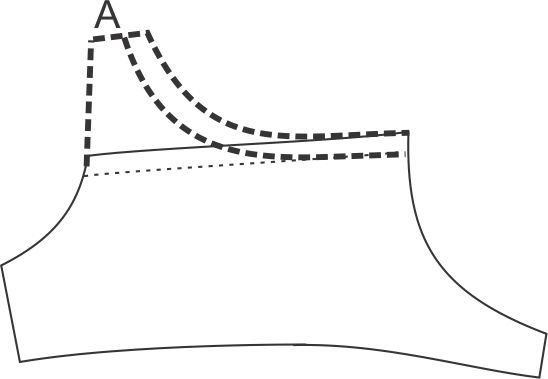
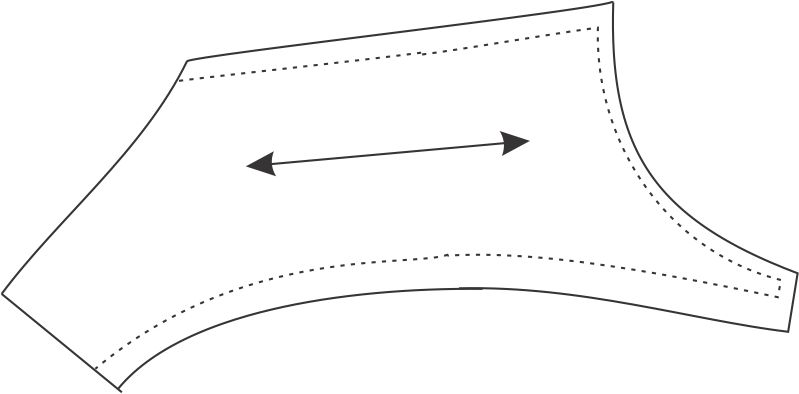
The Downward Hike
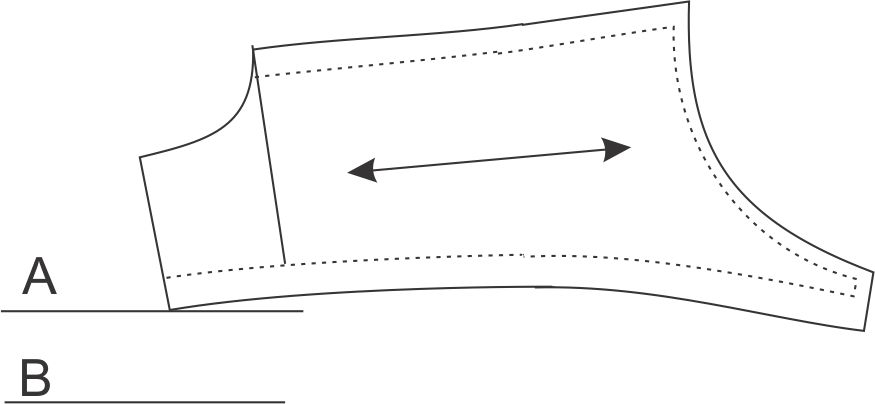
The downward hike band is one of the most comfortable band styles you will ever experience! The downward hike of the back counteracts the tendency for the back to ride up, especially on women who tend to stoop a little. Women who have very erect posture won’t likely find this band will make a big difference.
Take a copy of the band pattern piece and slice it vertically at the strap attachment point perpendicular to the DOGS. You will slash from the top to but not through, the bottom edge. Lay the pattern on a piece of paper. Tape the front half of the band down. Draw a line A at the bottom of the pattern piece. Draw a line B about 1 ½” (40 mm) below line A (it could be more or less depending on the length of the back).
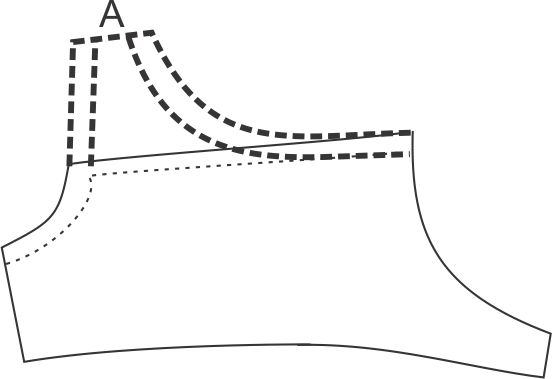
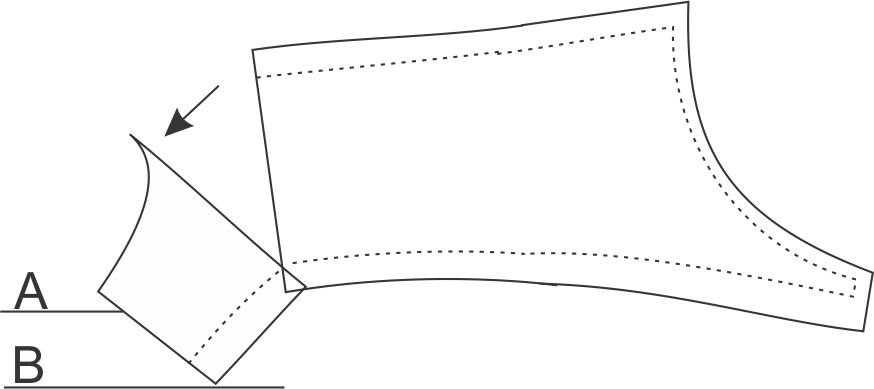
What you are going to do is to make the hook and eye move downward to point B. This causes a dart to open along the top edge. Pivot the piece so the bottom edge now touches point B, tape the rest of the band down.
Because you have added length to the top edge you need to take it out so that the new back won’t be longer along the top edge than it was before. You do that by drawing the curve for the strap up to the innermost side of the split as shown.
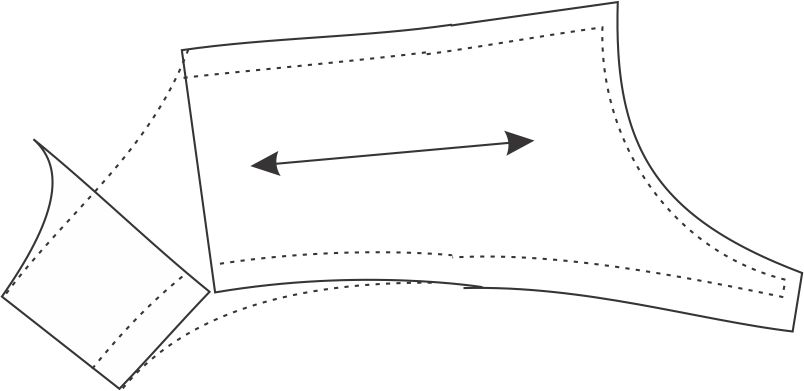
Smooth out the bottom curve as well.
The new back may quickly become your favourite, as it makes the strap much easier to sew on, and best of all, the band stays down!


of course . I will join to be here
I love the back strap extension to keep the straps from falling down. I use it on all my bras!