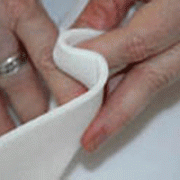
OK, you want to try making your own foam lined cups? Lamination is the simplest one to try. In the Cut and Sew foam lamination method, the fashion fabric and the sheet foam are stuck together and treated as one layer throughout the construction of the bra.
In lamination, the fashion fabric and the foam are temporarily bonded together. But, if you don’t have 100 or 1000 bras to make (you don’t?), you can use something called temporary spray adhesive. You’ll find this at Bra-makers Supply or at local sewing shops. There are two I like; one is called KK2000, made by Sulky and the other is 505 Spray by Sullivans.
The KK2000 is air soluble which means it will dissolve on its own, helped by air and/or heat (no water, please!) in about 2-5 days. This gives you plenty of time to cut and sew, and if it isn’t enough time, consider the other spray. The 505 spray is water soluble, and only water soluble, so don’t go pressing it with the iron; it won’t help. Each has its own advantages and disadvantages, just remember Sulky dissolves with time and heat; 505 with water. if you try to dissolve Sulky with water, you will turn it into a gooey mess (ask me how I know).
To correctly use either of the adhesives, shake the can well and spray the least porous of the two surfaces (which will almost always be the foam), keeping the nozzle about 6-10” away from the fabric, (lest you get propellant on those lovely fabrics). The fabric and foam are now one. Cut the upper and lower cups from the foam/fabric piece. Sew them together with a 1/4” seam and topstitch as normal (this would be 3 lines of easy stitching). The fabric/foam piece co-operates quite nicely during this process. If the seams on the inside of the cup bother you, you can insert a piece of 15 denier bias cut tricot (like Seams Great, but much, much cheaper if you cut it yourself with a rotary cutter) along the seam and catch it in the seam with your topstitching. Trim off the edges afterwards.
Note to industrial machine owners – If you are lucky to have an industrial double needle machine, you might consider buying an attachment that holds the narrow strips of seam covering in place as you stitch from the right side. In that way, you are making one pass to topstitch the cups, and cover the seam all at the same time.
The seams of the foam and the fabric are on the inside of the cups. The cup will be stiffened slightly by the density of the foam, but it is not as dense as a pre-formed foam cup.
If you don’t like to use spray adhesive, you can pin the layers of the fashion fabric and the cup together and seam the cross cup seam. It will require accurate pinning and may take a bit longer but the results are equally as good.


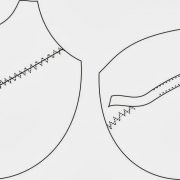
Hello Beverly, thank you very much for all your nice tutorials, they are very instructive. When you say stitch the foam at ¼'' seam allowance, you really mean it? Like, usually, we just put the two edges together flat and zigzag across, like in the picture you put in the article. So, what should I do in this case?
In the case of lamination, you will sew the seams as you normally would. Only when you sew the foam and fabric separately, do you butt the edges of the foam to sew it together. This is a different method for those who do not want the butt-and-sew method.