How to remove a serged seam
I’ve been sewing for over 50 years (gasp!) and I have ripped out more, I dare say, than my fair share of sewn seams. Particularly vexing to sewists of all ages is the thought of ripping out a seam made with a serger. One of the ways I have seen taught many times is to use the seam ripper to cut the threads along the edge of the seam and then pull the needle threads…however that leaves thousands of tiny threads to coax from the fabric and dispose of. I’m going to show you how to remove a serged seam – a better way!
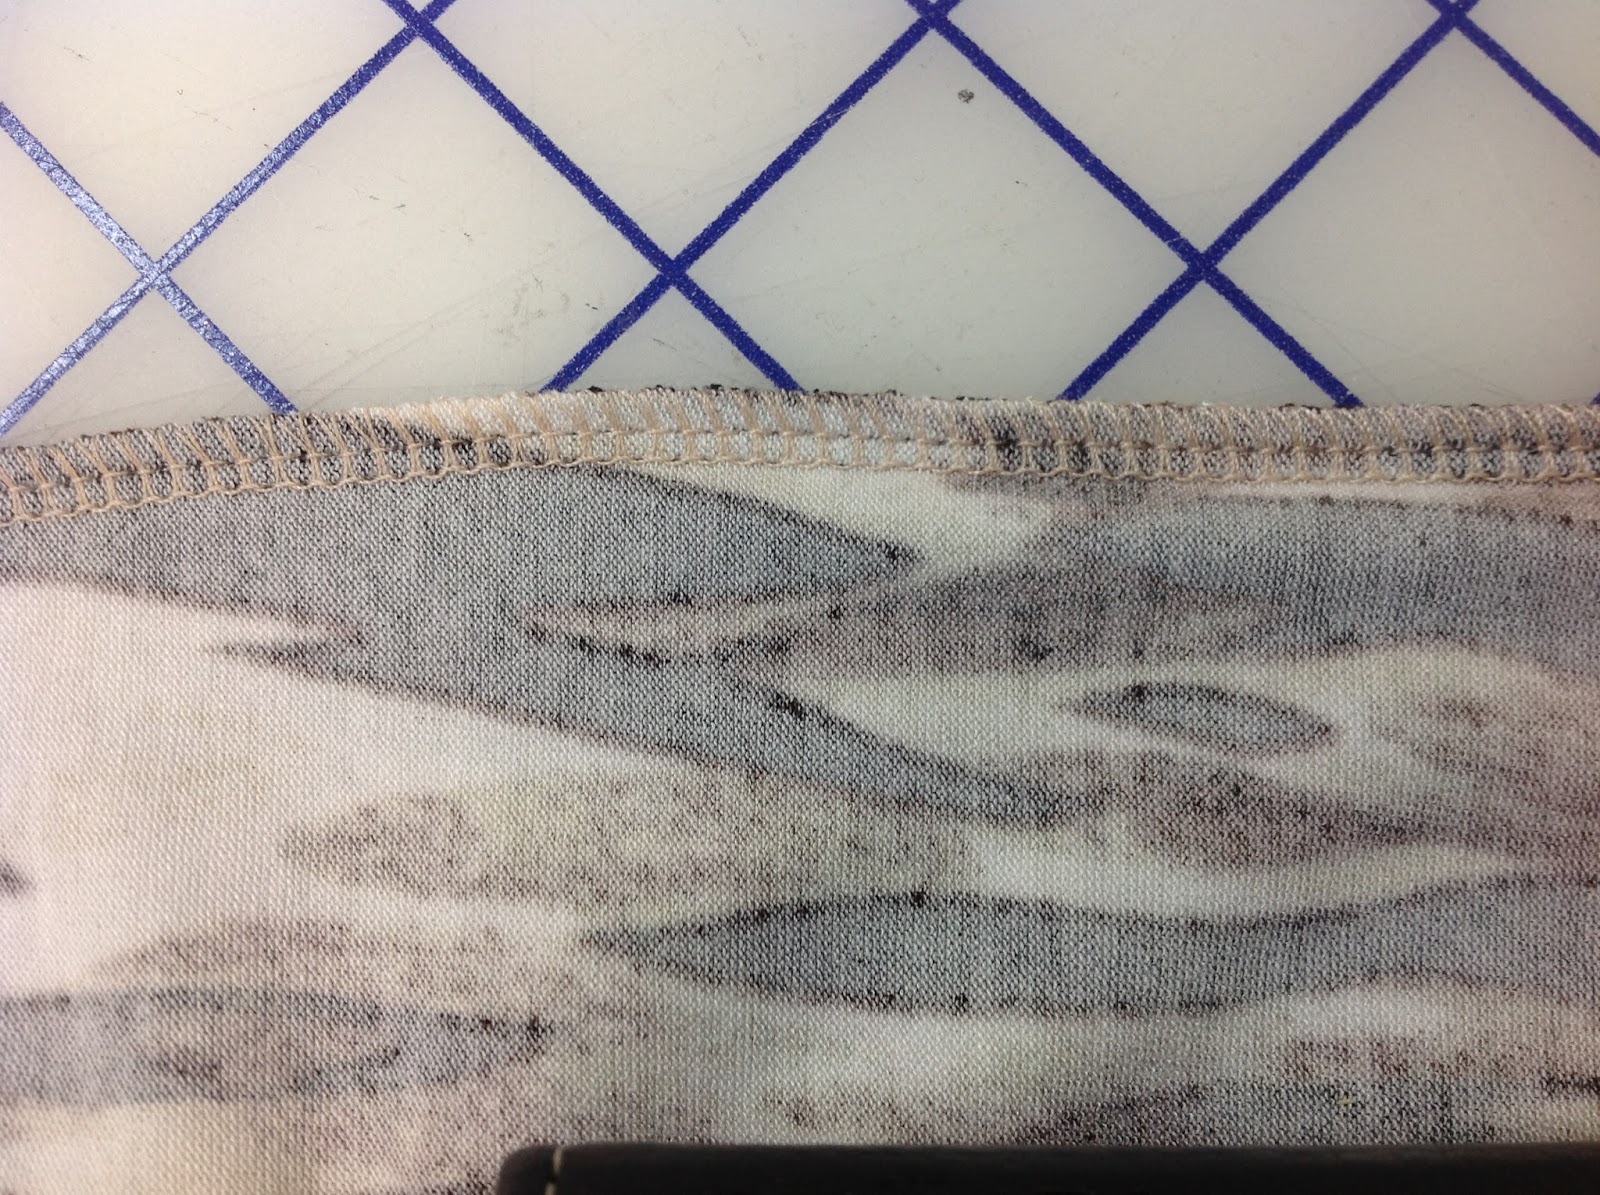
Here is the seam that needs to come out. You can see that there are two “straight stitch” lines toward the bottom of the seam and the looper threads wrapping over the edge

Pull on the middle thread until that entire row is out. It will be easy to pull – that middle thread.

Here’s the middle thread out – you can see the needle holes still in the seam

Once that thread is pulled out, do the same with the first thread – that’s the one on the bottom. If you try to do this bottom thread first, it will not go well for you. You have been warned!
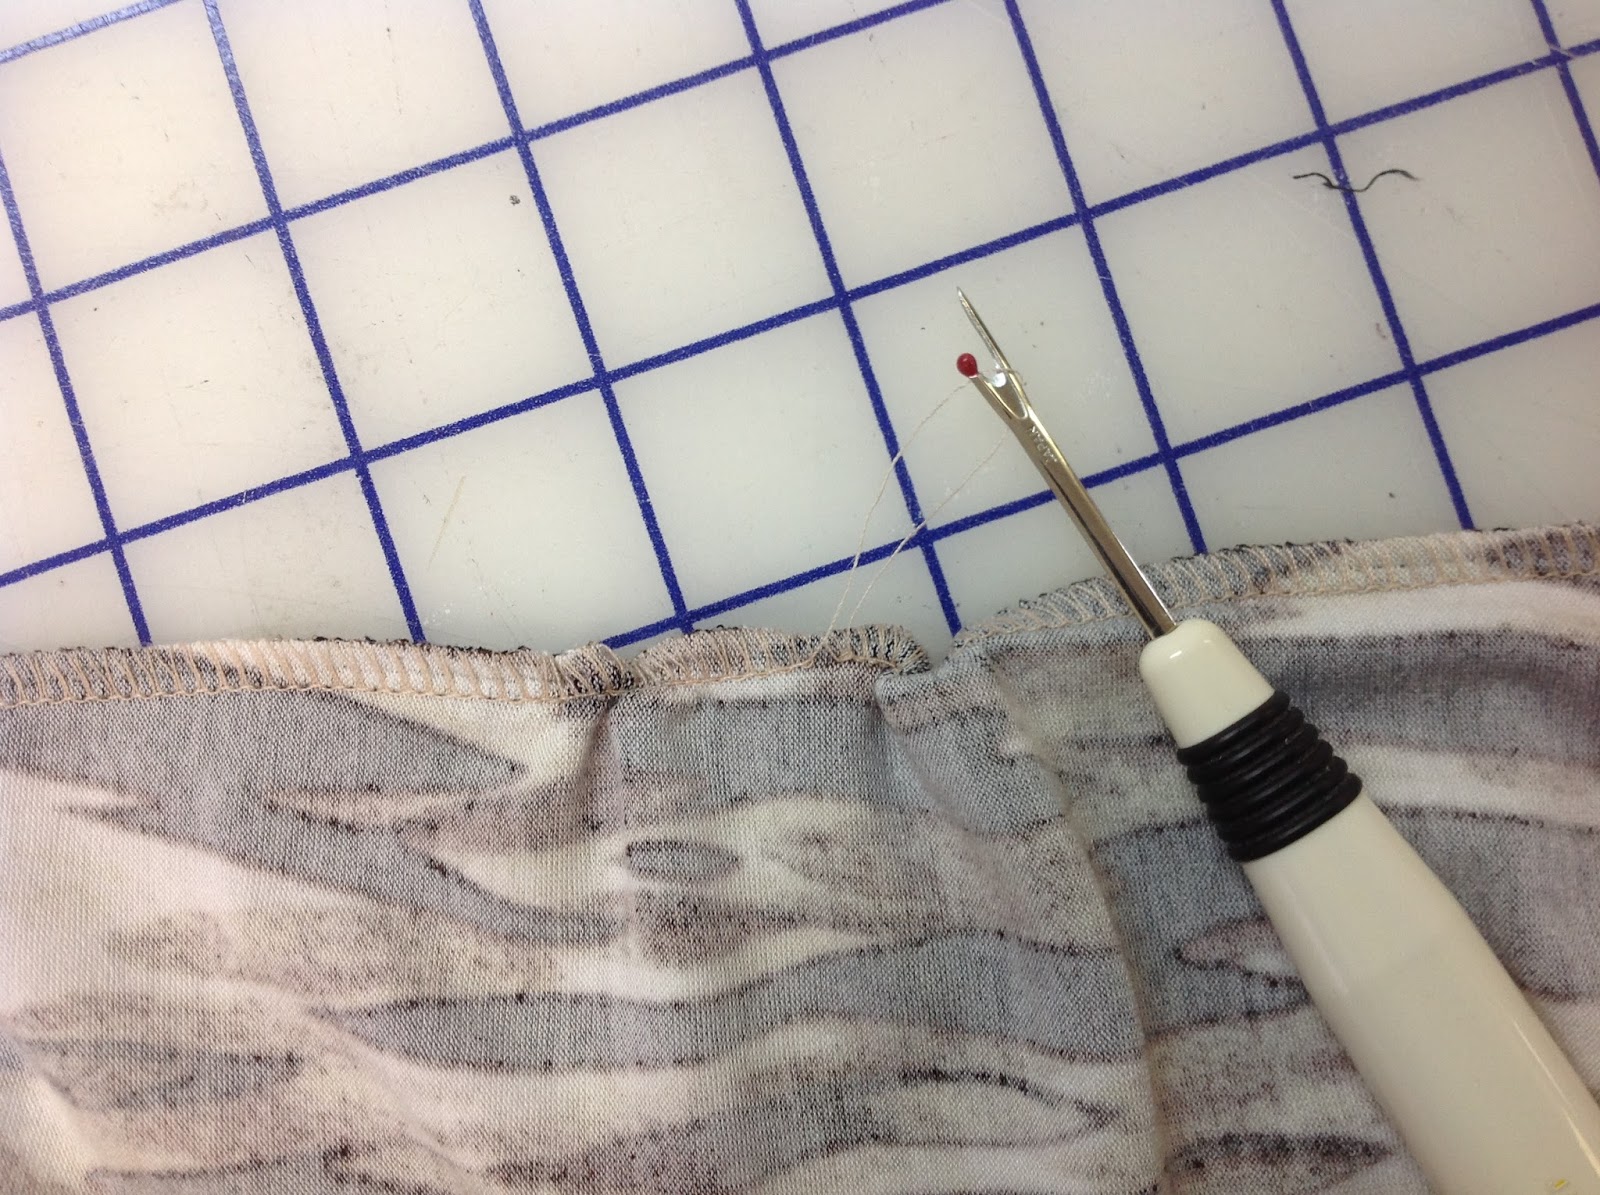
Here’s the bottom thread out

Now comes the fun part! You can grab anywhere along the looper thread edge and it comes out faster than a greased zipper! Wheeee…..
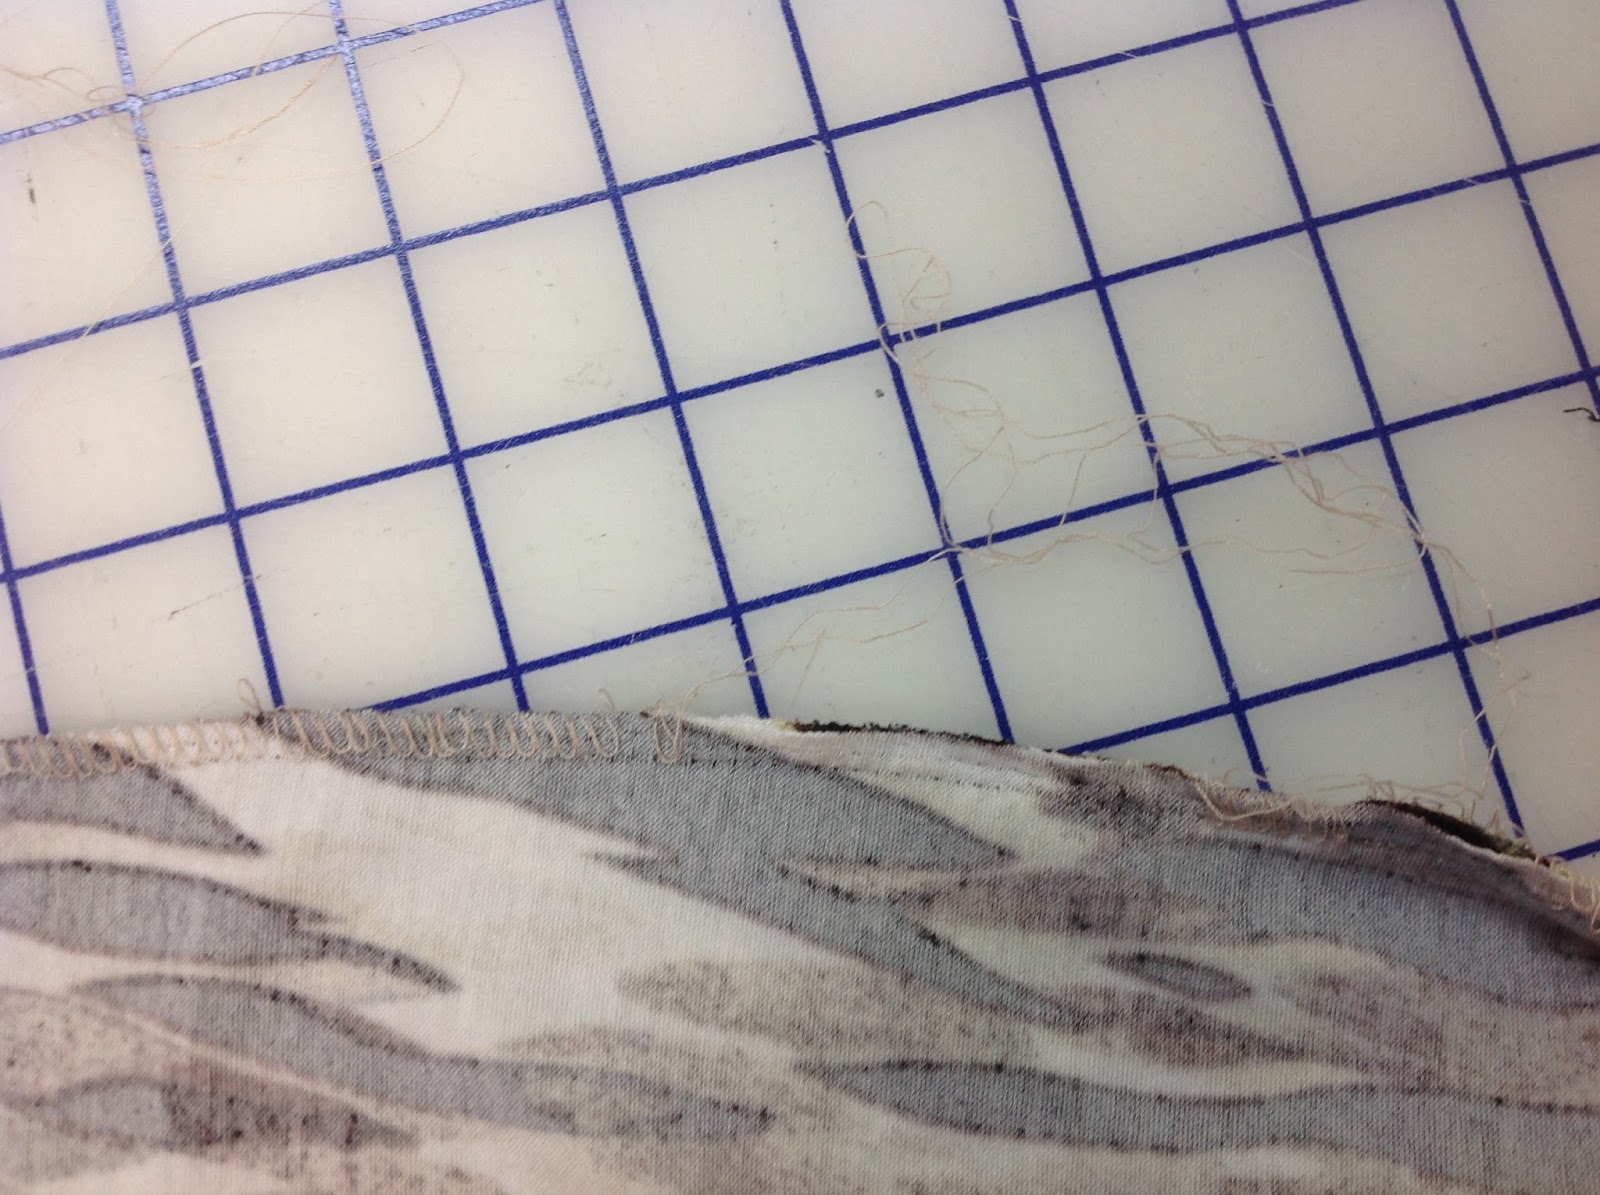
Here’s the seam all un-serged, with no damage to the cloth edge (in this case bamboo), no small thread bits to pick off your clothes, or out of the seam. Best of all, no angst for me! Now, that’s how to remove a serged seam! You’re welcome!


Aww…that's so nice to hear, Andrea! I too hate cheeky panties, and wanted this pattern to cover all of the bum, so to speak. Glad you are enjoying them!
Yes, I do and it is similar to this. I will have to do a post on that one too! Thanks for the idea!
They say when the student is ready, the teacher appears…in this case, I showed up a couple of hours too late!
I knew there was a trick – but I tried to start with the bottom straight stitch and it did not go well, as you say. I needed to know this two hours ago… but I might remember for next time and I'll know where to come! Thank you!
Great tip….I have been sewing for a long long time too!
Brilliant! 🙂
Just LUVERY. What a smart hint. Thank you.
This is a nifty tip, and so fun to pull out those looper stitches at the end!
On another note, I am stopping by to say that I finally got around to sewing your ladies underwear pattern, the hip hugger style, and I am so ecstatically pleased with the result. They are incredibly comfortable, cover my bum (I hate 'cheeky panties'), and fit like a glove. My first pair is all recycled – an old Nike top and lace cut off another garment, but now it's time to cut into the good stuff to make many more pairs. Thanks for the great pattern, Beverly!
That's exactly what I do! Now, do you have a super secret way of ripping out a coverstitch hem? I haven't figured that one out yet….grrrrr 🙂
Awesome tip! Thanks for sharing.
You might just be my newest idol!! I absolutely hate ripping out serged seams! Can't wait to try this! Thanks Beverly!
I use this on both domestic and industrial serger seams. On a three thread, there is only one needle thread, but it is the same idea.
Wonderful tutorial. Thank you!
I have used this method on both 3 and 4 thread serged seams and it works fine. But you really need to make sure you pick up the needle thread. I don't think it is machine related since I have used both Pfaff and Elna sergers
Great tip!
Wonderful tip, I'm still learning all about my serger.
Drat! I should have mentioned that! I almost always work with four thread so I didn't think about that!
Thanks!
Wow. Just. Wow. Thank you so much Beverly. Bookmarked for certain future use!
This works for a four thread overlocked seam but not for a three thread seam – I know, I've tried…
Thanks for the post- I have never been able to find the right thread to pull! Now I know!
Great tutorial. Thanks Beverly.
A great reminder and wonderful pictures!
Brilliant, as always, Beverly.