I finished sewing the Yellow Polka Dot Bikini bottoms this morning in class. All I had left to do after doing the stitch-and-flip lining ( you can see the post on that here) was to apply elastic to the waist and leg openings. As I mentioned in a previous post, Filpar swim elastic is my go-to elastic for swimwear. It is co-operative with the machines and lays flat when it needs to. It is also thin and doesn’t add bulk to the edges. Perfect! So Bottoms Up, ladies, let’s finish this bikini!
I cut the Filpar to 2″ (5 cm) less than the measurement of the leg opening. Then I place the Filpar on the lining side of the suit with the edge of the elastic almost touching the edge of the leg opening. I zig-zag the Filpar to the fabric using a width of 5-6 mm and a length of 2-3 mm. You are just trying to stitch down the Filpar at this point – not trying to finish everything in one go. Elastics need two passes of the sewing machine to sew it down – one to attach the elastic and one pass to finish the outside.

When you come around the leg to the curve at the bum, that’s where you pull the elastic. Remember you cut the elastic 2″ (5 cm) shorter? That reduction will create small gathers in the curve of the bum where they are needed to keep the bikini bottoms in place. Here is a sneak preview of what those gathers will look like after the first pass of the stitching is done.

But back to the elastic sewing…when you go around the leg and sew back to the beginning, make sure the end of the elastic meets the beginning. You can see here where the two ends will butt together. I can trim that wee bit extra to avoid any unnecessary bulk. Repeat for the other leg. yes, sometimes the stitches skip in this step. Unless it is doing it every stitch, don’t worry about it.

The front leg will (or should be) flat, and the back gathered slightly as in the photo above.

Now for the waist. I wanted the waist lower so when I tried it on (the mannequin) it needed to come down a bit. That was easy. I just marked a line parallel to the top edge all the way around.
Cut the elastic 3-4″ (7.5-10 cm) less than the bikini bottom waist measurement. Divide the elastic in four by folding it in half and in half again and marking the three points. This is called “quartering the elastic” and it’s a technique that is used over and over, and not just in swimwear.
Fold the bikini bottoms in half to find the centre front and centre back. My bottoms already have a centre back seam so I didn’t have to mark it, just the centre front.
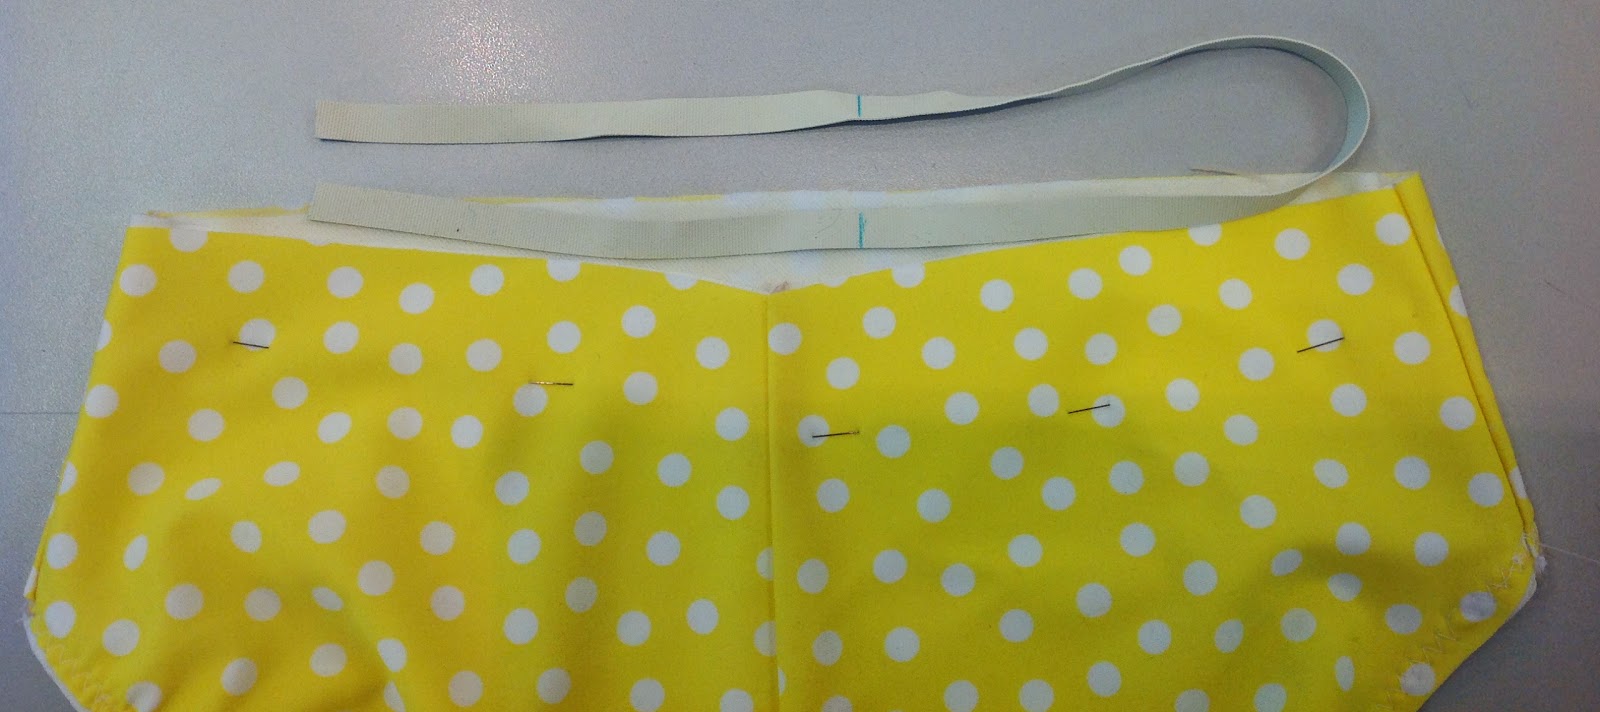
So now my bottoms are quartered and my elastic is quartered – I pin the quarter marks together, and stretch the elastic to fit the fabric. Use a zig-zag as before.

For the second pass, I am going to use a cover stitch machine. I love the look of a cover hem for this type of stitching. My brand-new industrial cover stitch is still causing me some grief (grrrr!) so I am using my Baby Lock cover stitch instead.

This is fairly effortless sewing on my part. Just turn the elastic to the inside and stitch from the right side of the garment on the innermost edge of the elastic. (You can feel where the inner edge is and you will get used to where it stitches very quickly).

When you travel around to the beginning again…here’s how to lock the stitches. Make sure the needles are in the highest position. LIFT THE PRESSER FOOT to dis-engage the tension. Very important.
Now use a small tool (I show the small tool that comes with the machine) to go UNDER the foot but still OVER the fabric and pull those threads forward. In other words, the tool goes between the foot and the fabric. The threads will release very easily IF you lifted the presser foot first. You will have two loops of thread on the tool.

Pull the loops forward about 3″ (7.5 cm) Cut through the two loops.

Now pull the work straight to the back of the machine. This will cause the threads to go through the fabric and lock on the back. Yes, I promise. Now you can cut the one thread that came from the looper. Trim all the threads. Mission accomplished!

I am not sure any manuals teach this method, but it sure beats tying off the threads one by one, which is what some manuals show.
Here are the finished bikini bottoms. Bottoms Up, as they say! The looper stitch on the inside covers the edge of the fabric and elastic. It also stretches with the elastic.

Next, I will sew the binding to the edges of the triangle cups. We are almost done our Yellow Polka Dot Bikini. See you soon!


Glad I haven't missed much then! I went through and read some of the archived posts. I will use a lot of your information. Thanks
Well, thanks Summer, but it really has only been up a week or so! I started it last year, but had some problems getting going. Now I am making up for lost time!
How come I haven't seen your blog before! I love it … it's a lovely blog with loads of information for the things I want to make but not yet brave enough to start. I love your yellow polka dot bikini!