Picture yourself at the beach in your lovely new swimsuit…but you would like to walk along the beach to take in the sunset. Do you take your walk in your swimsuit, bikini or monokini? Or do you go back to the hotel room to change? Here’s the ideal compromise – an easy cover-up to make and wear. In keeping with swimwear month, I’ve taken this bit of information from The Big Book of Swimwear, which I published earlier this month.
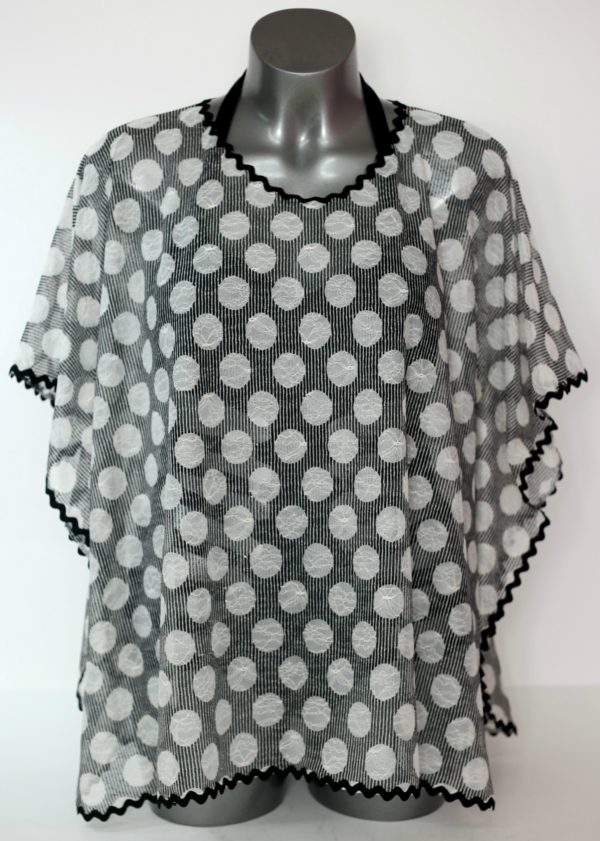
A cover-up can be the perfect addition to your swimwear wardrobe. Not only will it provide a modest covering for walking on the beach or going from the beach to the hotel, they can shield a large part of your body from the direct sun. When you make your own cover-up, you can make it in colours to co-ordinate with a particular suit or in a basic colour to go with all your suits. They make great gifts too as there is no particular fitting needed. This one is easy to make and drapes nicely.
Suggested Fabrics and Trims
Suitable fabrics include stretch mesh, either printed or solid colour or stretch laces. I’ve even seen some made of georgette, organza and other woven sheers. This is one case where having a stretch fabric is not mandatory. However, so remember that woven fabrics will need to have the edges enclosed with a trim or serged to keep them from fraying. How about trimming the edges with pom-pom trim or rick-rack? If you use a fabric that doesn’t fray, you really only need to apply an edge of some kind to the neckline, but not necessarily the perimeter edges.
Construction
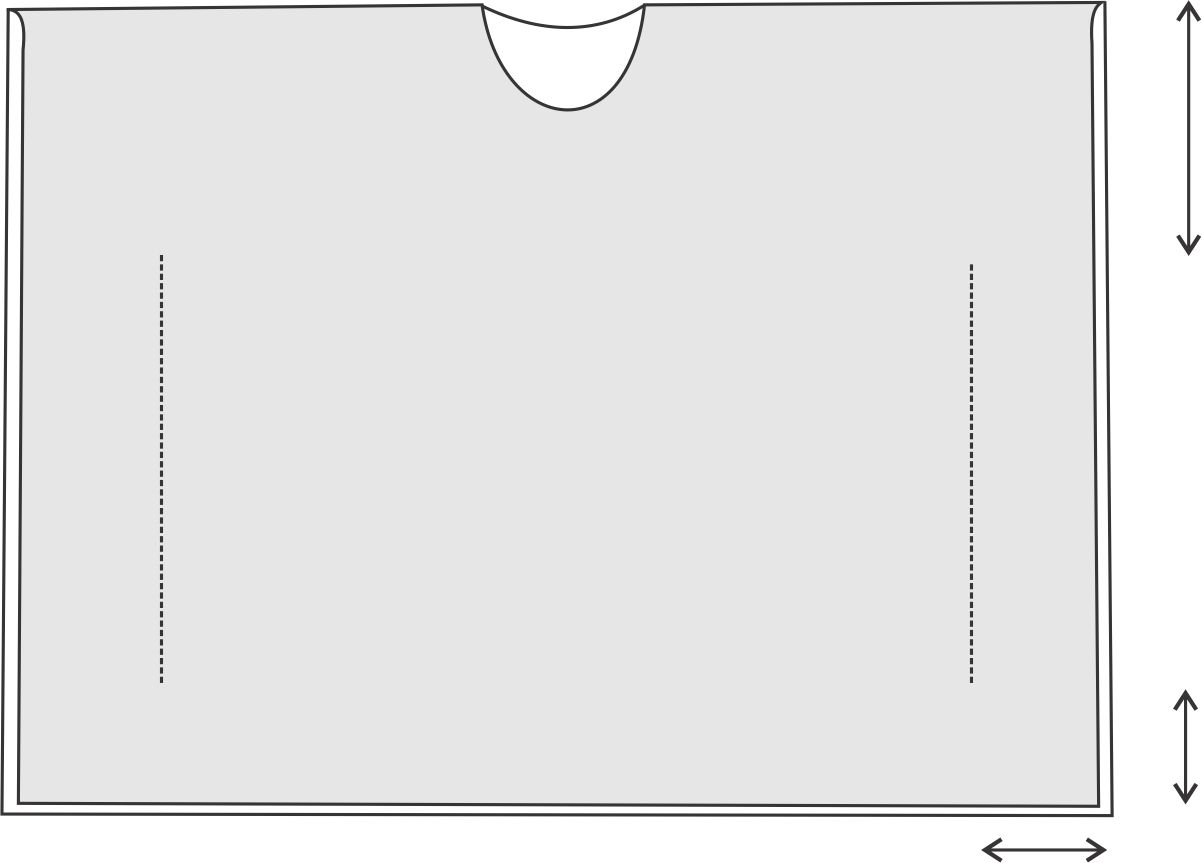
To make an easy cover-up, you need fabric twice as long as you wish the length to be. If you want the cover-up to be mid-thigh length, you may need as little as 60” (1.5 m) of fabric. Those wanting a longer cover-up, to mid-calf for example, might require as much as 2.5 yards (2.25 m). The fabric width could be as little as 30”. For the width, measure from one forearm, just below the elbow to the other with outstretched arms.

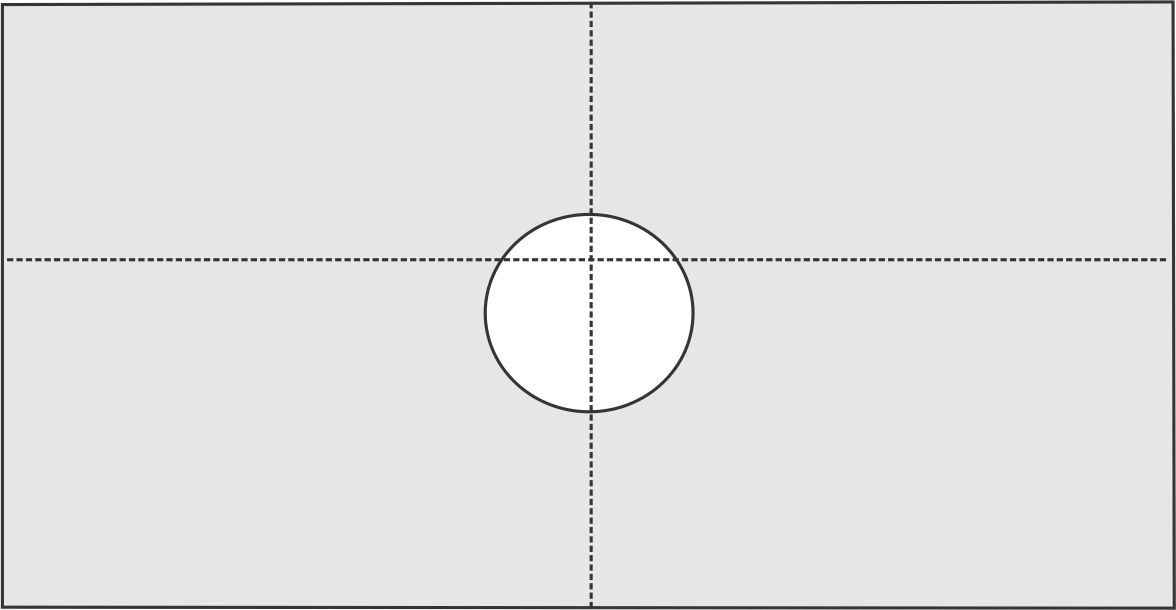
Once the rectangle shape is cut out, lay out the fabric on the table and find the centre line between the front and the back. Also find the centre between the two sides. Draw a circle with a diameter of about 10” (25 cm) or large enough to go over you head. Centre the circle half-way on the width but only 1.5” (3.7 cm) back of the centre line dividing front and back. This is the hole for the neckline. You can vary the hole to be more oval in shape or even to have a V-point in the front if you want. Please note the drawing does not show the entire cover-up but only the portion in the centre.
Now you can add the edge trim such as pom-pom trim, rick-rack or fold-over binding. Apply fold-over binding, bias tape or other finishing to the neckline circle. Or…if the fabrics doesn’t fray – leaves the edges un-trimmed! Finally, fold the cover-up from front to back and stitch two lines to hold it together at the sides. Go in from the side edge about 5-10” (15-25 cm). Start about 10” (25 cm) from the folded top edge and continue until approximately 6” (15 cm) from the bottom edge. Repeat for the other side.
Here’s just one example of a finished cover-up.
I hope you enjoy your easy cover-up!


Oh, love this idea! I am always to “cheap” to buy a cover up! Now I’ll have a wonderful, custom one!!
You know we would love to see pictures once it is done!
I’ll send them
Look so so simple! I’ve had a lacy stretch fabric dying to be a coverup but have not been quite sure how I wanted to do it. I believe this is it!
We would love to see it once it is done!