Foam Cup Pockets? – Yes, you can!
In our Boob Camp this week, we have a student who has had a mastectomy. This is good thing, as all the other students in this class get to see how we put pockets in a bra ( which is useful information for any bra-maker!) One of the bras our student wants to make is a foam cup bra. So we needed to show her how to make pockets in her foam cup – hence this post on foam cup pockets.
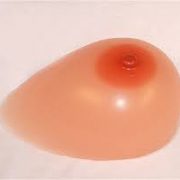
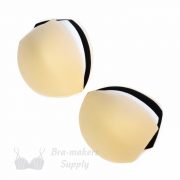
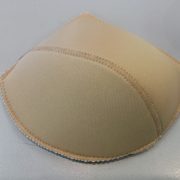
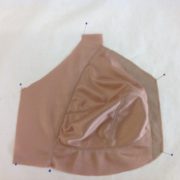
This is what the inside of the finished cup looks like. You can see the opening where the prosthesis would slide in. We used our MH style cups as they have a strap tab and had the best look for this particular situation (not to mention – the best fit on this student)
The directions for putting a pocket in other styles of foam cups are similar. Just make sure whatever style of foam cup you use, that there is adequate coverage of any scarring or other things you may not want to be exposed. Some surgeries cannot be concealed if the cup is too low in the front.

Once the footprint is traced, you will need to prepare it for the opening. I decided to put the opening running from the strap straight down vertically to the bottom edge. This is my go-to choice of opening. All of the perimeter is closed so the prosthesis can’t creep out, and the opening is wide enough to get the breast form in without rolling it up like a burrito.

Once the line is drawn, draw a broken line on each side of it, out from the line about 3/8″-1/2″ (10 -12 mm). These lines provide the overlap we need.

Trace off each side of the drawing. The outermost side of the cup (with the underarm curve) will be traced to the broken line on the right, and the innermost of the cup (nearest the centre front) will be traced to the broken line on the right.

These two pieces are the pieces we will cut out of the fabric. I almost forgot – the DOGS run from side to side as shown here. We need for the DOGS to stretch around the body so the cup can conform to the body shape. Also you don’t want the cup stretching up and down, or the breast form will bounce around.
Lay the fabric for the pocket FACE DOWN and lay the pattern pieces facing up as shown. If the fabric is face up, the pocket will have the wrong side facing the wearer. What fabric do we use? Anything soft that will also stretch from side to side. My go-to fabric is bamboo or Modal…soooo soft, and nicer feeling on sensitive skin than cotton jersey.

Serge the two straight edges. If you don’t have a serger, you can use pinking shears or else leave the edges unfinished. Turning the edges to finish them (as we normally would in sewing) creates extra bulk with extra friction against the skin. Women often are left with extremely sensitive skin after the surgery and the edges may rub in these tender areas.
Pin the pocket into the inside of the foam cup, overlapping one over the other. Once it is pinned, you can sew it all around. I always sew from the foam side, not the fabric side. The fabric side will tend to stretch as you are sewing it (a phenomenon called fabric creep). Sewing from the foam side prevents creeping.
By the way, these are my two pink shoes…one for “everyday” tape and one for “special occasion” (removable) tape! Our foam cup pockets are shaping up nicely!

The sewing should be sewn within 1/4″ (6 mm) of the foam cup edge. This will allow the pocket stitching to be hidden under the elastics or other finishing the cup will receive. Alternately, it could be serged all around, as stitching so close to the edge is not as easy as it sounds.
You can see the fold-over binding has been sewn on the neckline edge. The cup is now well on its way to being sewn into the bra frame. The foam cup pockets are indeed possible and as you’ve just seen, not very difficult to do!

In my next post, I will show you how to make a breast prosthesis from scratch! Yes, it can be done!





Thanks Beverly for sharing! This is so timely as my one of my learning objectives with boob camp is making mastectomy bras for others. Yolanda G.
can I buy the pattern from u. my sister teardrop covers have a tear. need to be replaced to cover breast prosthetis to protect her skin
Each cover would have to be made according to the unique prosthesis she has. If she can sew, she can do this herself. We don’t have a pattern for the covers, as there are literally hundreds of styles, shapes, and sizes.
This is great! Thanks for doing this.
I would like to try this too, and thank you for sharing this!
Thanks for posting! I usually make my opening near the armhole but this looks nice. I'll try that next time.