How to Sew the Ezi-sew Nursing Bra
To add to our posts on nursing bras, here’s a tutorial on how to sew the Ezi-Sew Nursing bra. We actually wanted to see how easily it sewed together, and also how it fit after finishing it. Then we can compare how to sew the Ezi-sew Nursing bra to the self-drafted nursing bra I made in this post. Ready to begin? The Ezi-Sew nursing bra is available in three size ranges, the PZ-109 fits bra sizes 32B – E through to 40B-E. The PZ-110 fits bra sizes 32F-I through to 40F-I. Finally the PZ-108 fits bra sizes 42C-F through 48C-F. That’s a great range of sizes – 36 unique sizes in all! They are sized for the Australian market, however they also have a conversion chart for us over here! (To calculate your US size add 22 to the Australian size, so size 14 = 36 in this pattern)
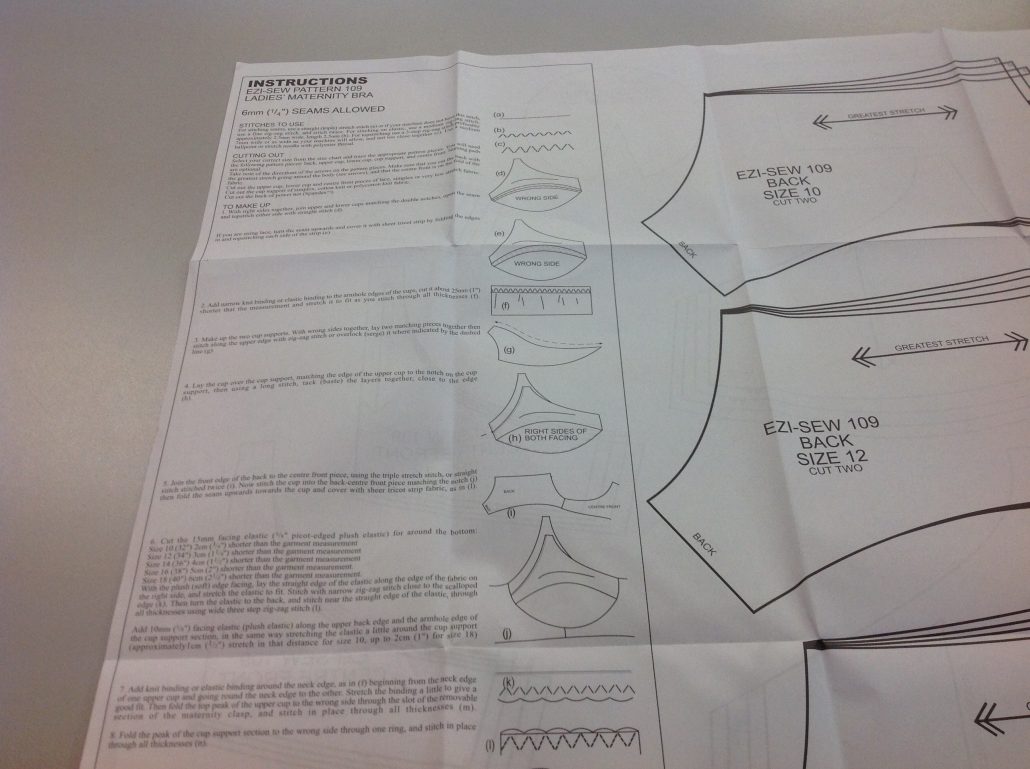
When I opened up the packages, I noticed the Ezi-sew Nursing Bra pattern instructions are printed right on the pattern pages. As well, the page is printed on both sides, so you need to trace the pattern, rather than cut it out.
Alterations to the pattern
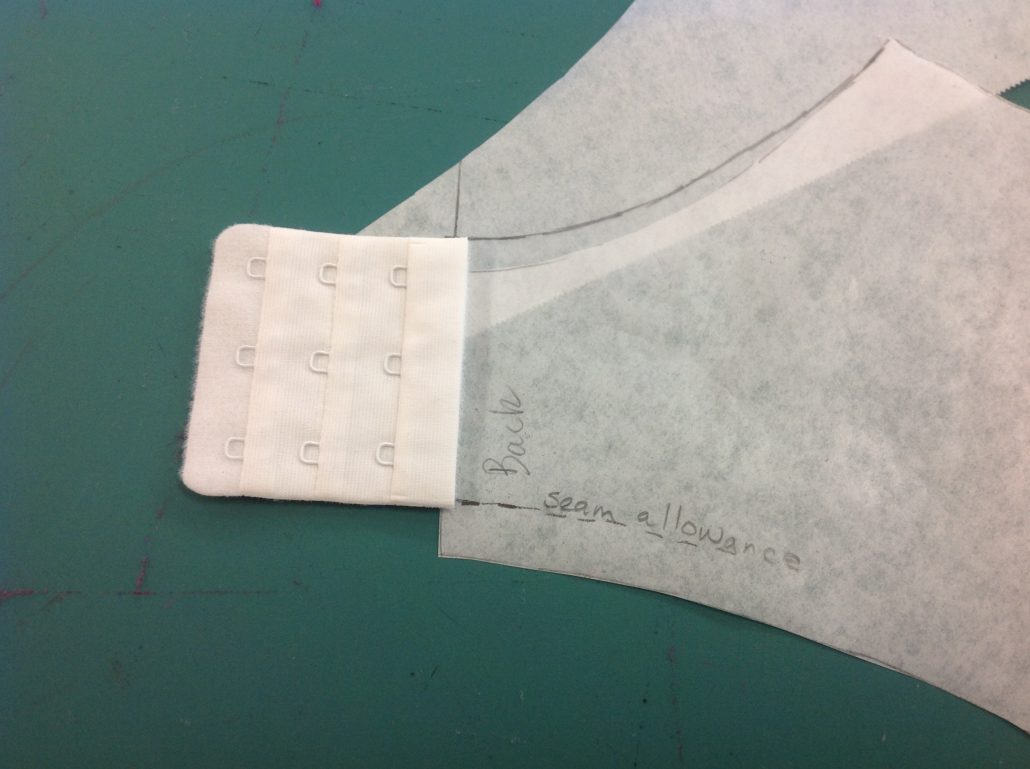
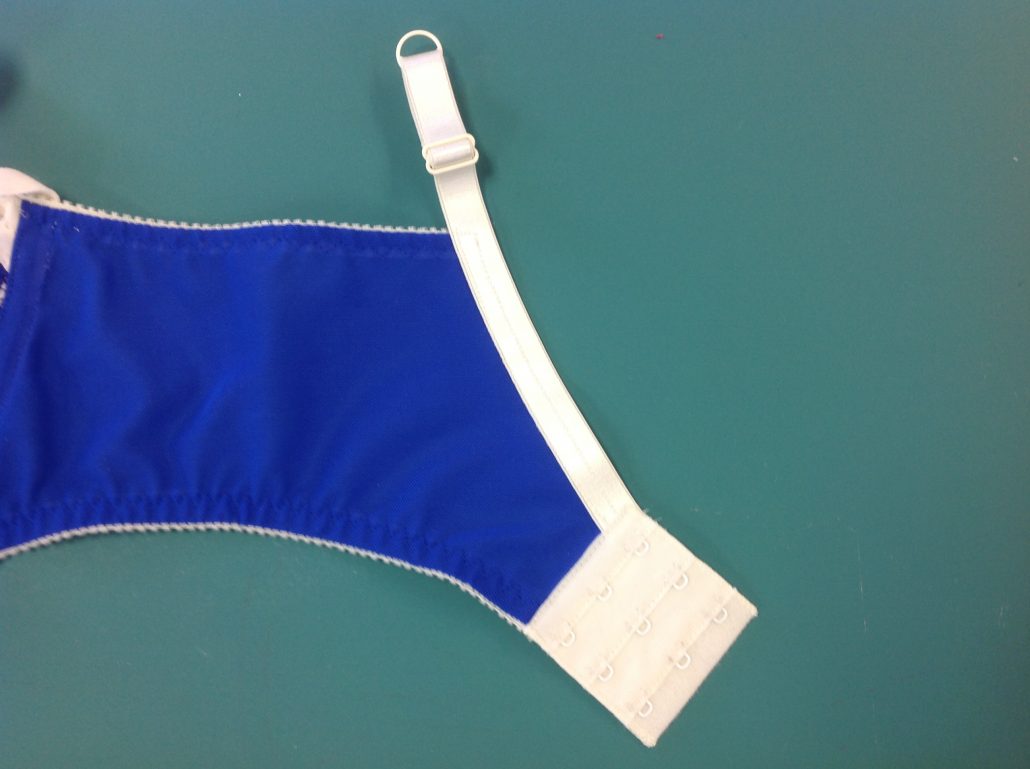
We traced out Ashley’s size which is 36D and I did notice a couple of changes I wanted to make. One is the hook and eye area at the back. I think the spacing on their hook and eye is different from ours. It was a simple thing to change the height of the hook and eye area. Allow for the elastic on the bottom edge, then measure up for the hook and eye. We needed to raise this by 3/8″ (9 mm)
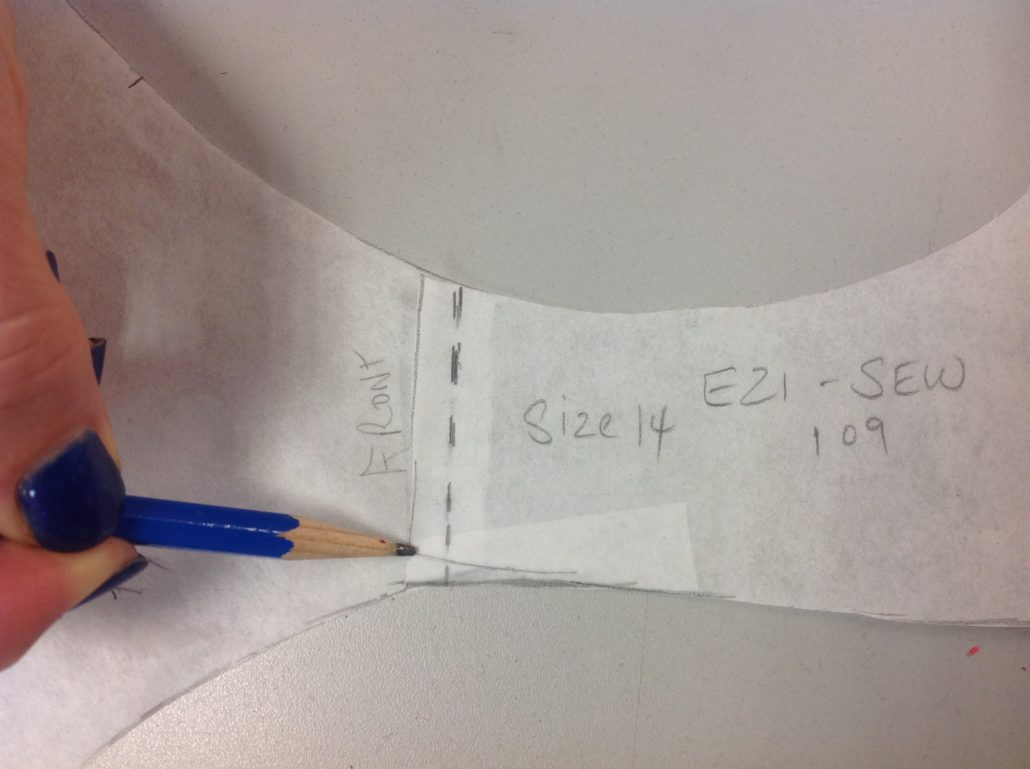
Then we walked the pattern around to make sure it fit. The only bug I saw was at the underbust area. The seam length was a wee bit short. Not the end of the world, and easy to fix.
We decided on a royal blue poppy lace for the main fabric, spray basted to ivory duoplex for support. The findings are ivory coloured
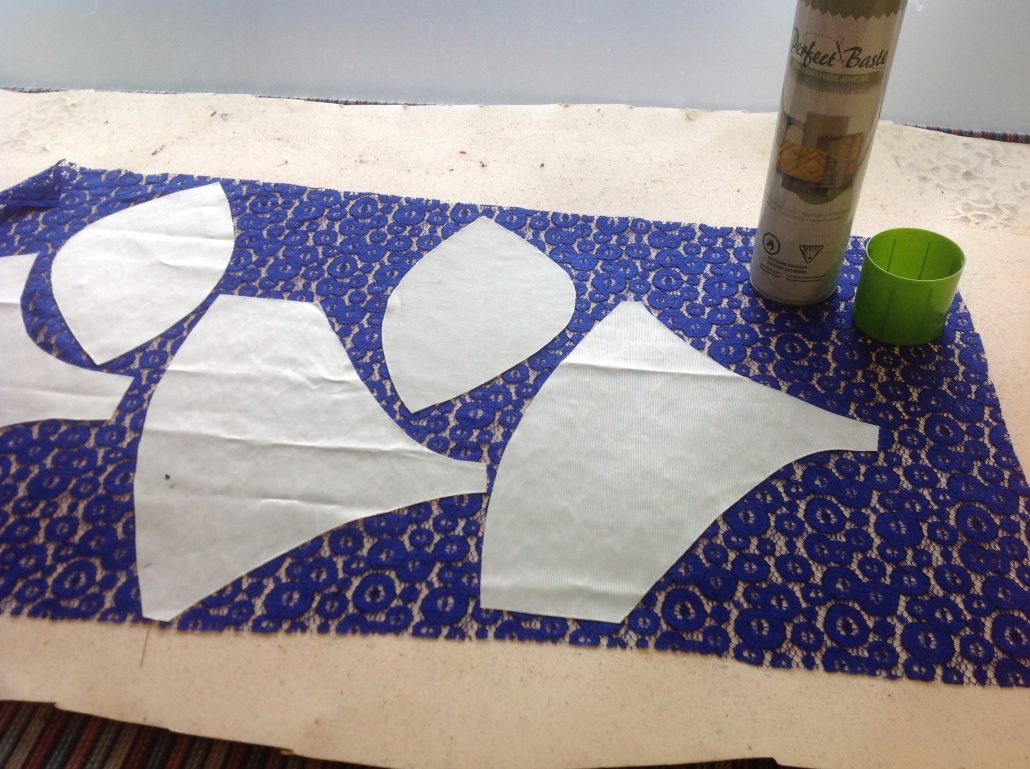
The back band is the royal blue power net. It doesn’t use much fabric!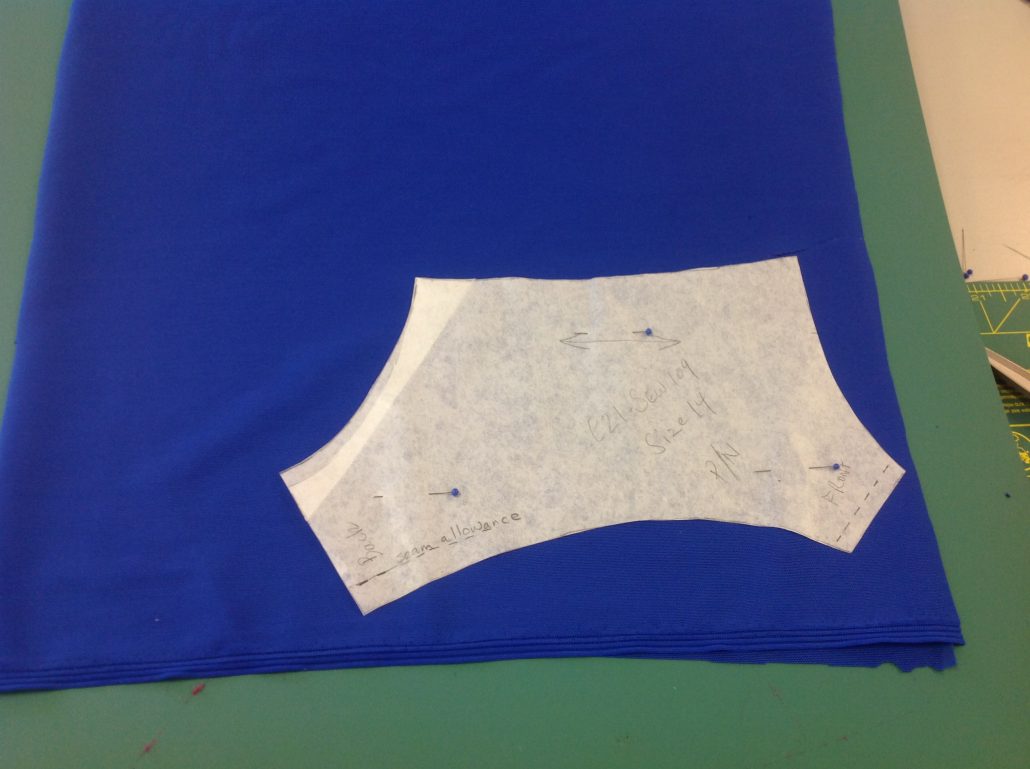
Now for the Sewing!
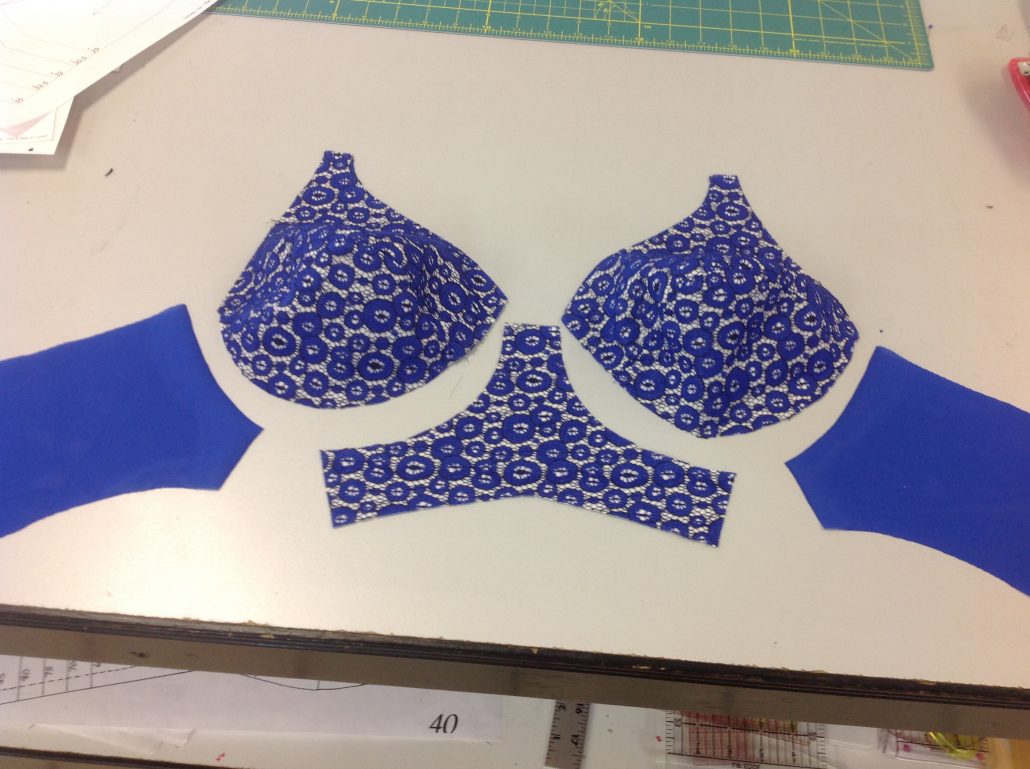
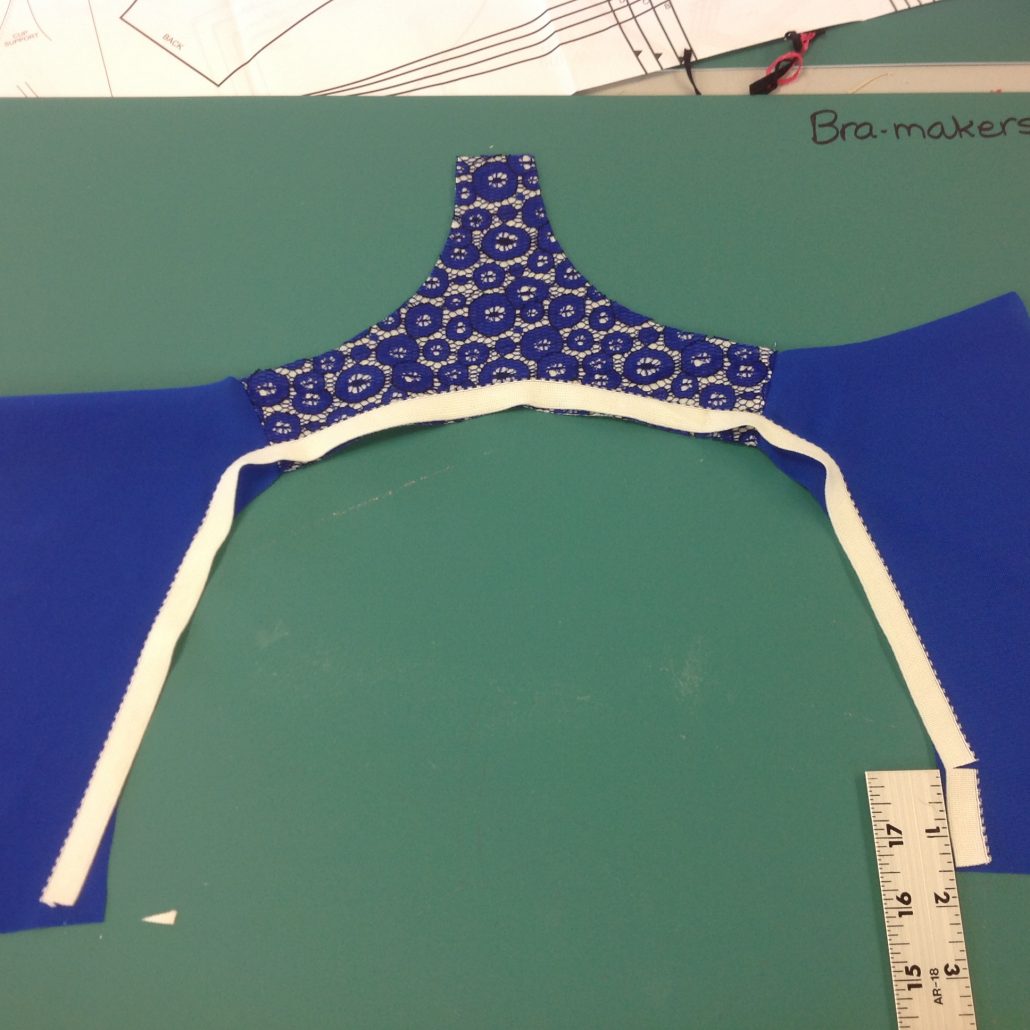
The first sewing that we did on the Ezi-sew Nursing Bra is to attach the upper cup to the lower cup. We also sewed the front frame to the back band. We may as well get that straight stitch sewing done at once!
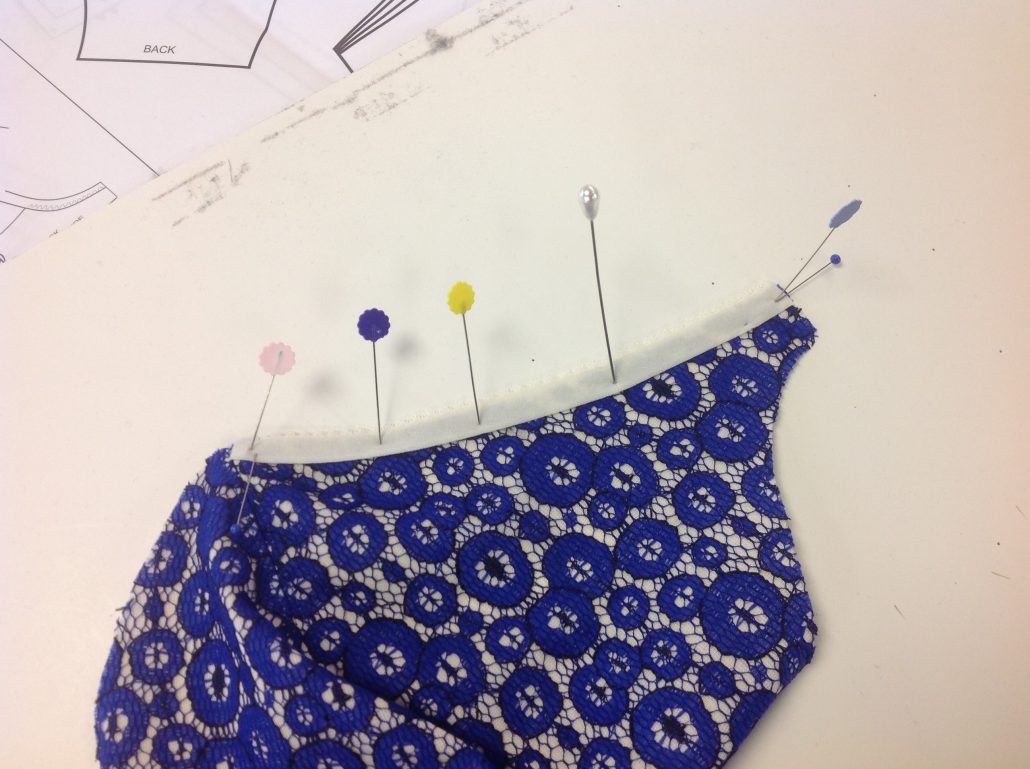
The we added fold over binding to the outer top edge – the edge that sits under the arm. We have it pinned so you can see where it sews. This first edge to cover is the underarm edge of the outer cup.
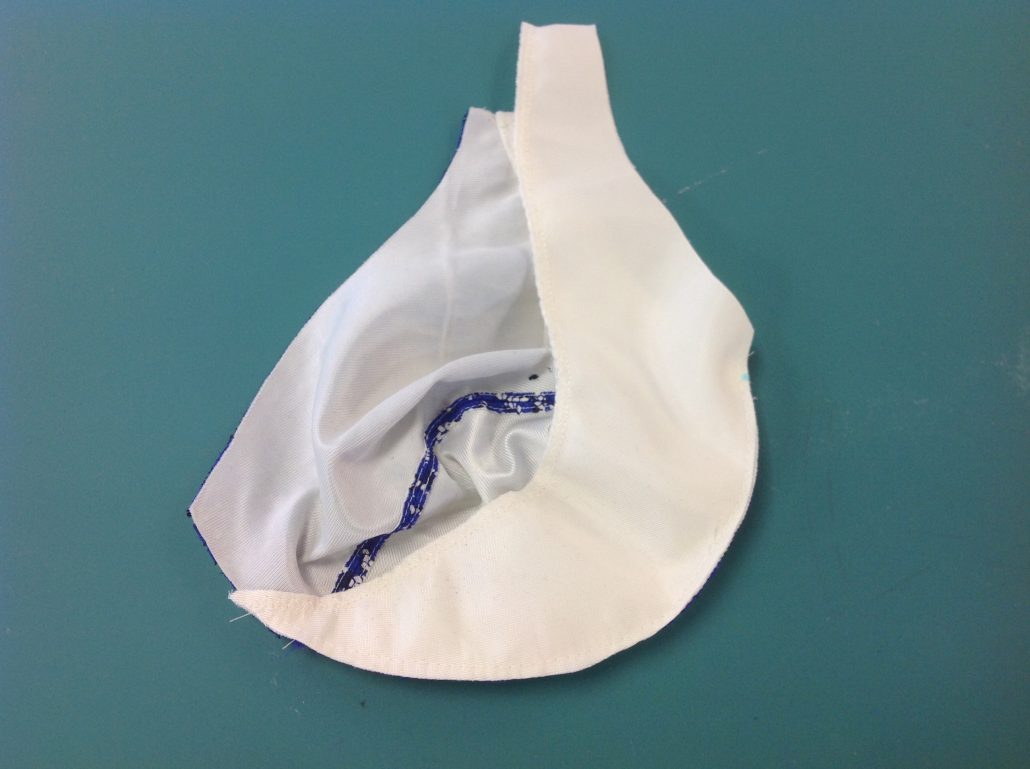
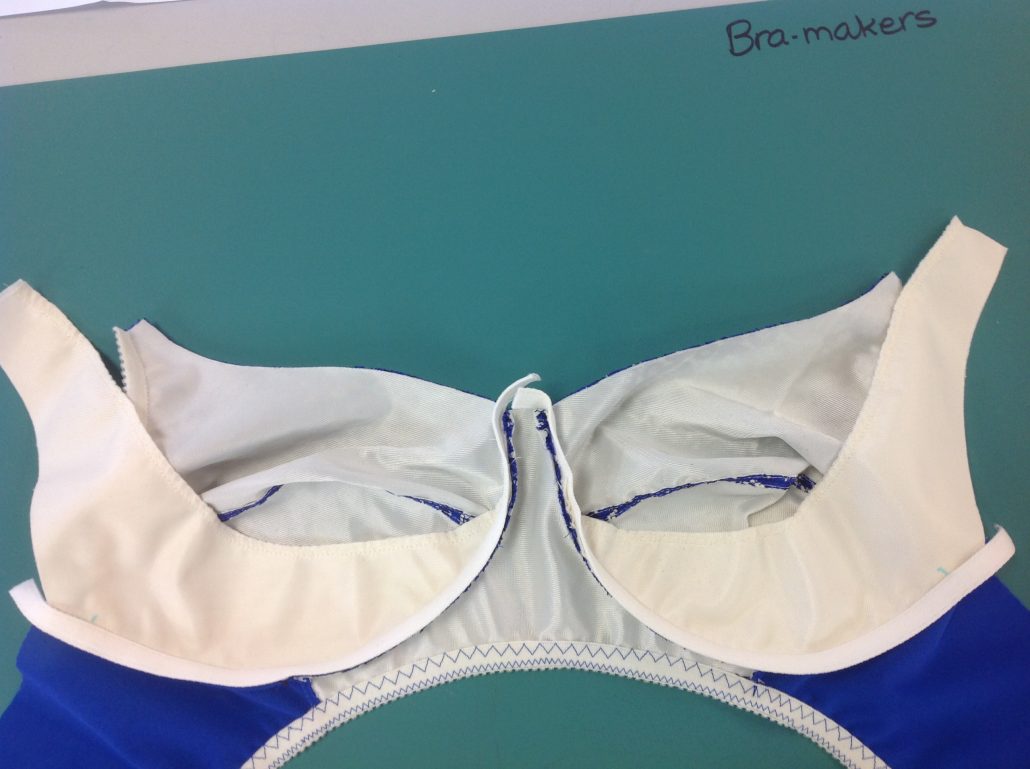
Next, we prepared the sling. The Ezi-sew Nursing Bra pattern calls for two layers of fabric serged together for the inside sling. That seemed very reasonable to us! Here it is serged along the curvy edge and sewn inside the cup.
Sew the bottom band elastic to the whole length of the bottom band. The instruction on how to sew the Ezi-sew Nursing Bra actually ask you to cut the elastic 1 1/2″ shorter than the band, so we did that before sewing the elastic on. In the photo, the elastic hasn’t been sewn on yet. it is just laying there, patiently waiting for us to sew it!
Once the bottom band elastic is sewn on, we will pin the cup into the prepared frame
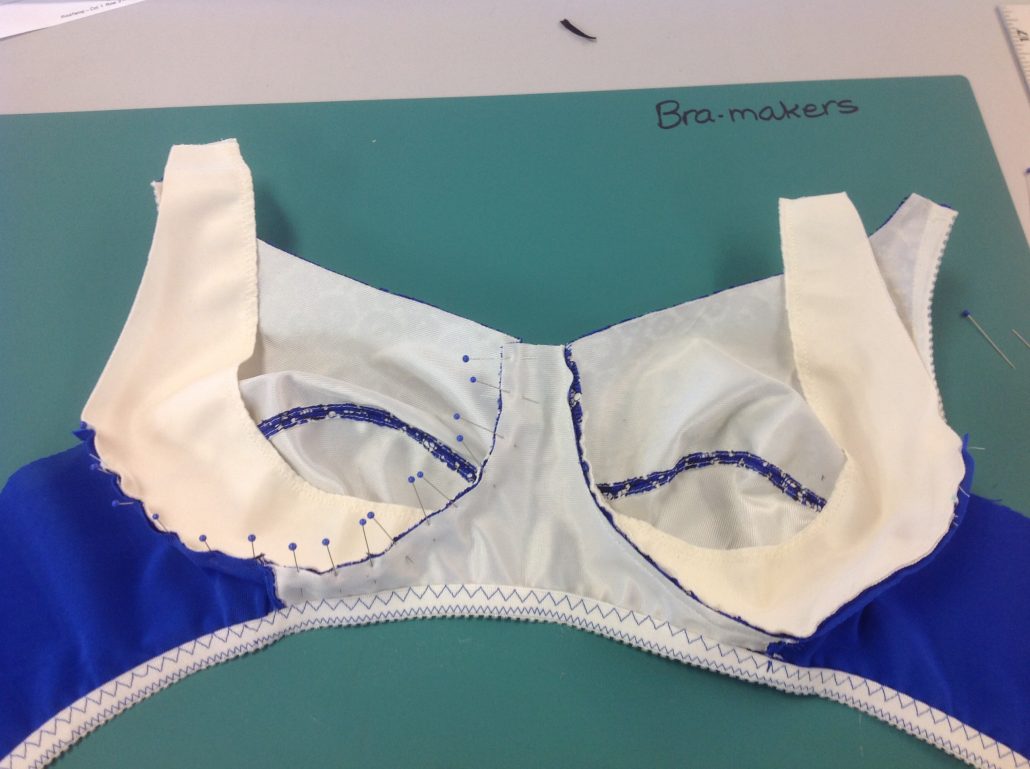
Sewing is easy once it is pinned! The we sew the channeling to the seam allowance around the cup.
We sew on the fold over binding to the neckline edge as well as on the sling and top edge of the bra. You an top stitch the channeling now too. Our bra is almost finished!
Add the Clips
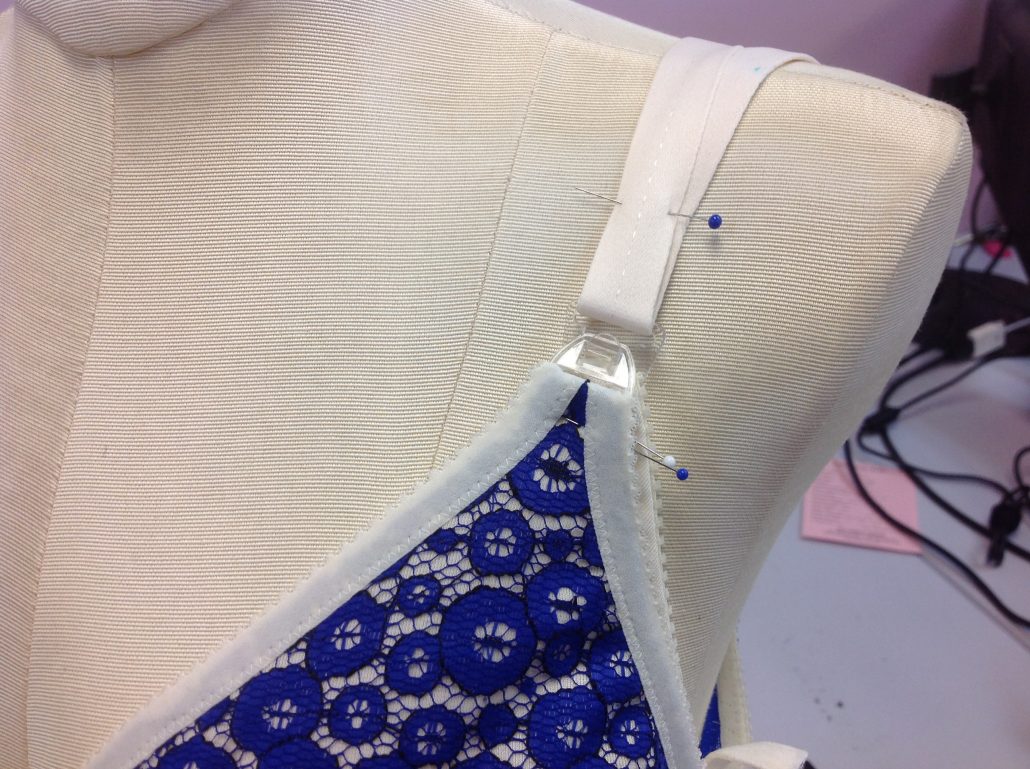
Now that our cups are in, we have two parts to the cup itself – the outer cover which can be lowered when feeding and the inner sling that keeps the breast and the strap attached when the outer cup is lowered. We need to sew the clips to the tops of the sling and the outer cover. First you want to make sure the strap tab of both the outer cover and the sling are the right width to fit into the one-handed nursing clip. Don’t sew it yet, though. You’ll want to test the exact position on the body before you sew.
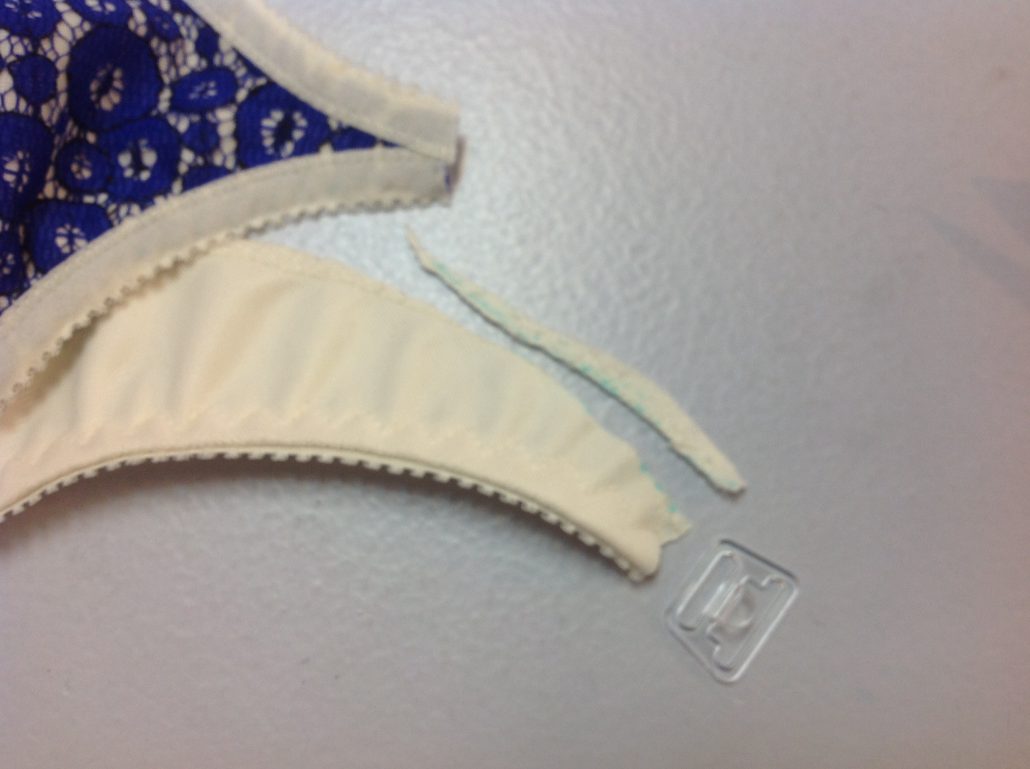
Here’s the outer cover which needs the “front” piece of the clip. I noticed the strap tab was a little too wide for the One-handed Nursing Clip. We trimmed the tab on the left to fit into the clip. The outer cover
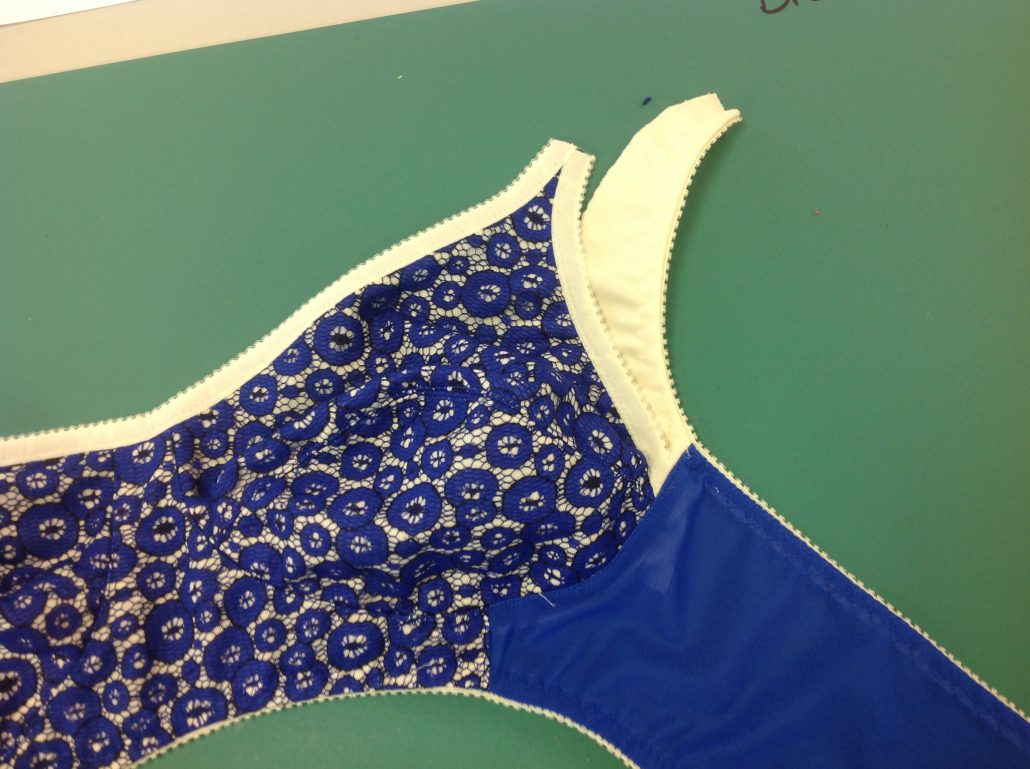
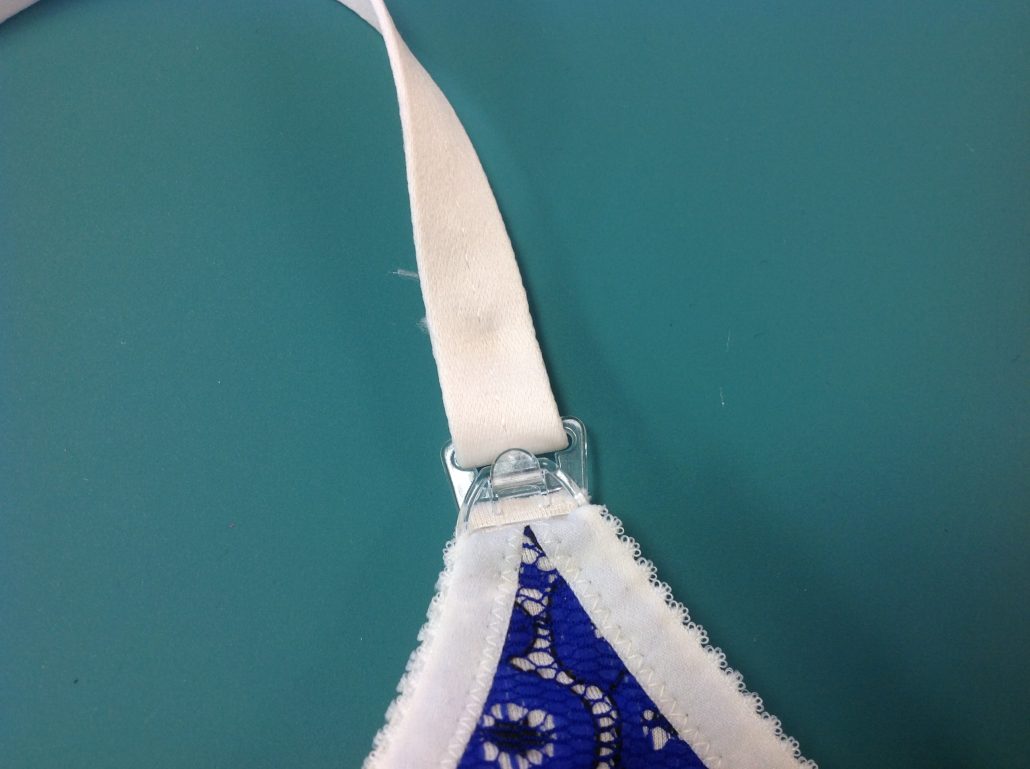
Then, according to the instructions on how to sew the Ezi-sew Nursing Bra, we need the other part of the clip on the sling. It also attaches to the strap. Here we used strap tape, but you could use a tube of fabric, or even strap elastics if you want (not too stretchy!) You’ll notice we also added the fold-over binding to the neckline edge.
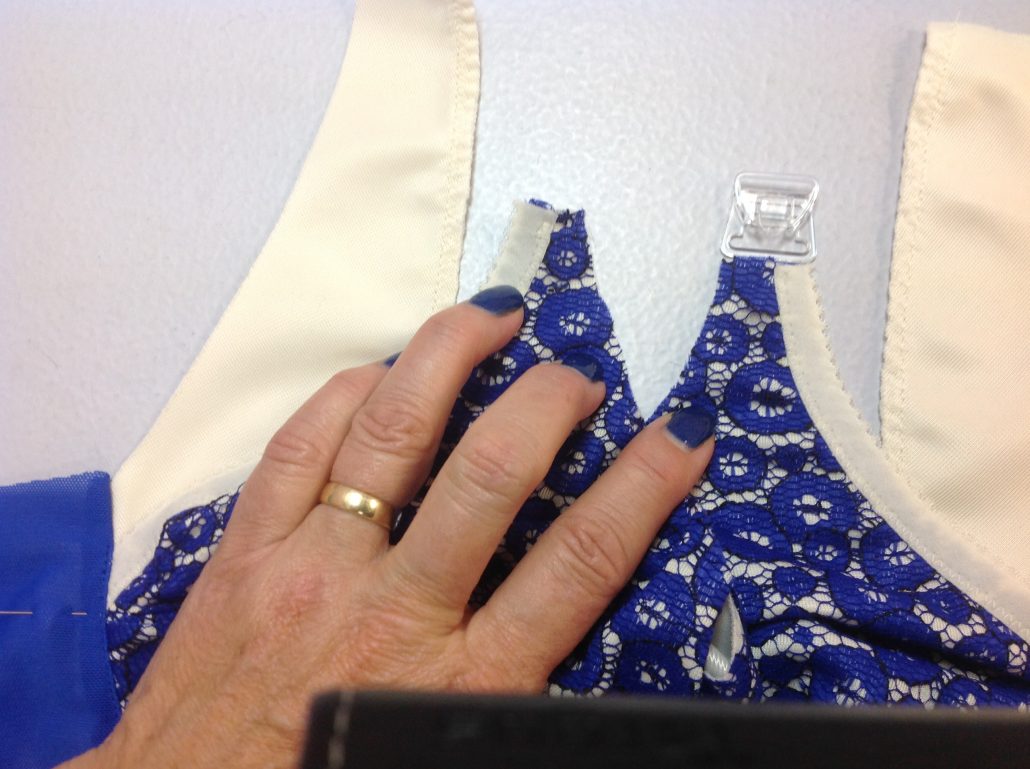
Just to clarify, this is how the one handed nursing clips go on. The back piece holds the straps in the top rung and the sling on the bottom rung. The front piece of the clip holds the outer cup.
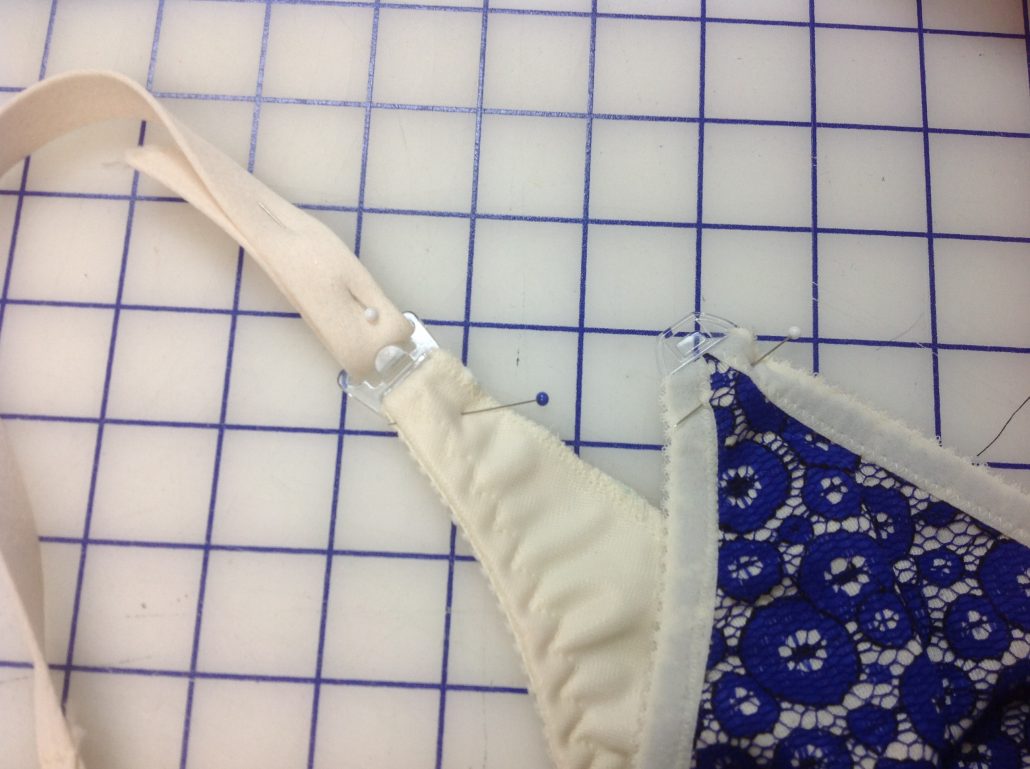
The back straps and the hook and eye are last to go on
Finally, we try on the bra and make sure both clips are at the right height. That’s easy to do it you pinned the clips first.
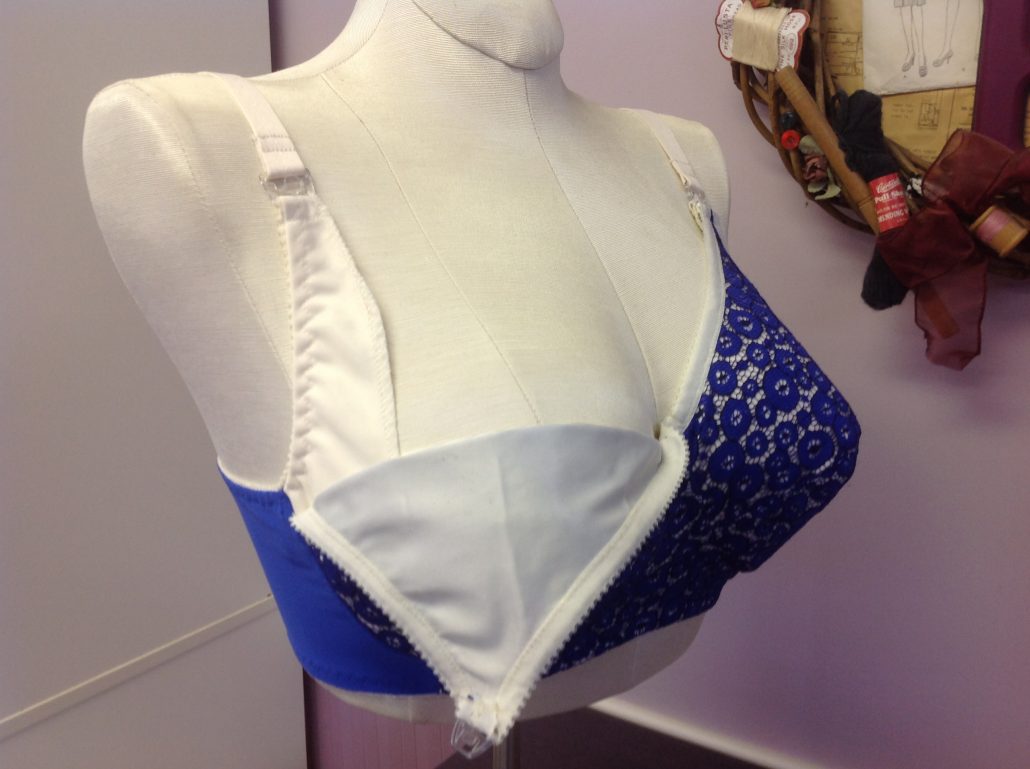
Are you ready to see the final Ezi-sew Nursing bra? Here it is in the open position.
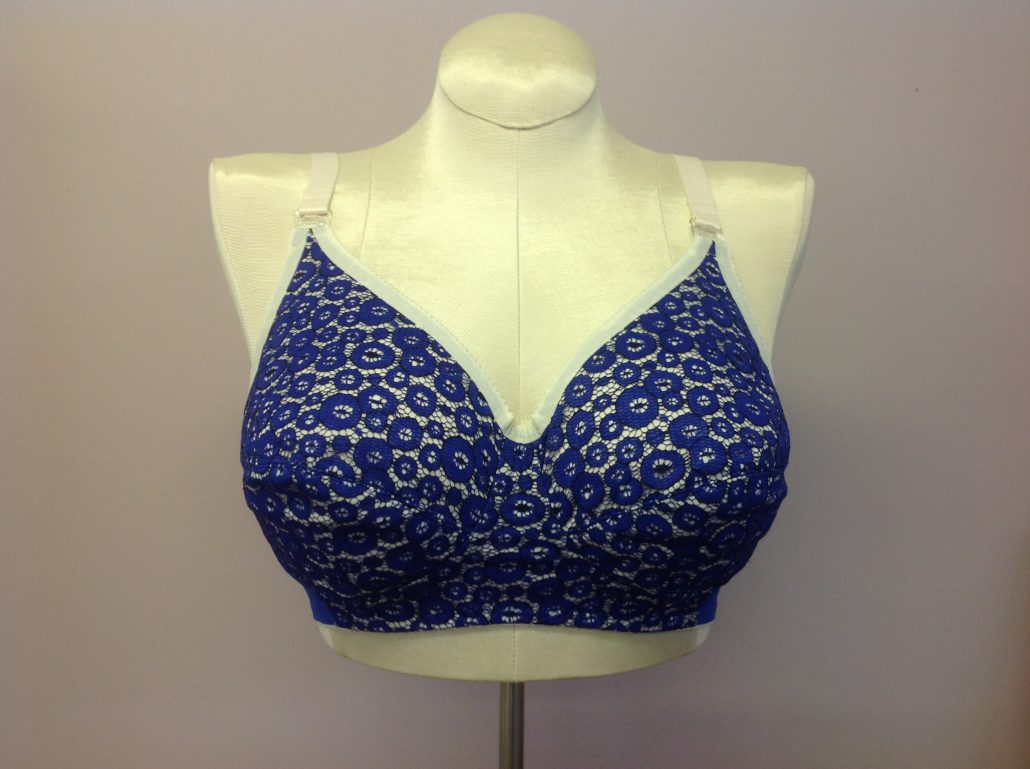
And here is the finished Ezi-sew Nursing bra!


Hi. I really want to get this nursing bra pattern but it is sold out. I have been searching the internet and have not been able to find any other pattern for a nursing bra with clips. Please tell me how to get this pattern.
This pattern has been discontinued. However I did a blog post on how to convert a Classic bra pattern to this bra style.
Thank you sooo much for putting together this helpful tutorial! I had ordered some well-made nursing bras from an international company a few weeks ago, and they seem to have gotten lost in the mail. I don’t usually even bother buying ready made anymore, (not worth it; the quality is terrible where I live) since I found your patterns, but I had to wear one temporarily due to my changing size, thinking what I ordered would arrive shortly…well, after a few weeks of an increasingly achey back, starting to feel practically immobile, I decided I’d had it and pulled out this pattern, and was super excited to see that you’d made a tutorial about it. And what do you know, my back feels like new again. 🙂 So thank you for the tutorial, and for the amazing information in your manual. On short notice, I couldn’t find clips locally but your manual showed me very clearly how to improvise, after I’d been trying to figure it out all day. (I guess I’m one of those types who reads directions after the fact…) One note for anyone making this pattern: be sure to cut the elastic going under the arm maybe a few inches short, so it can stretch—wish I’d done that. Anyhow, thank you for saving my day!!
The sling seems to be very long. Is that because it was designed for a different style of nursing clips? I’m trying to figure out if I should leave it long or if it should be trimmed tone shorter length.
It is fairly long, but you can cut it down to whatever height works for your body shape and your clips.
For a first bra sewist, is this an ‘easy’ bra to start with? also to make it non nursable? Or can you recommend something for someone with a full bust?
The Classic is a great bra pattern that comes in 90 sizes, so yes, very good for the larger bust!
I would love to make this, but would like to adjust the front of the cups so it’s not so full coverage – is this doable and will it still be functional? Or should I use the bra patterns I already have from you Bev, and try to draft my own sling? I also have both your bra makers manuals – so going to search in there as well. But I was def thinking I will need to purchase this pattern.
We also tried a similar style using the Pin-up Girls Classic Bra pattern. It is in the blog series, The Vintage Nursing Bra. Very similar to this EZI-sew but using our patterns.
Hey Beverly,
I’m trying the EziSew bra for the first time. Some of the pattern pieces are marked “straight grain.” Do I assume that them would be the same as the DOGS for this pattern, or perpendicular to the DOGS?
Thx for any enlightenment!
Sally
An easy way to check the pattern is to look at the arrow on the back band. The arrow, if it indicates the DoGS, will be horizontal, as the band stretch needs to run around the body. If the arrow runs up and down, then the arrow is indicating the straight of grain. I am certain the Ezi-Sew arrows are indicating the DoGS even though it says “straight grain”Sometimes designers working with knits are still hung up on that “straight grain” thing. In reality, the direction of the stretch of the fabric is what counts.
Thank you! I’ve been putting off cutting out those pieces. I think I’ll compare grain direction with dogs direction with my classic bra. As niece’s baby is almost here, I don’t have much time to do multiple remakes. Always nice to have a fairy bramakers consultant!
Hey Bev,
I’m wondering if there is a way to search on your blog??! I’m looking for a tutorial on how to thin the band so I can refer to it in my nursing bra post. I’ve sewin the EZI Nursing bra and I’ve made a few posts on my blog. You may be interested in taking a look.
BTW, the new design of your website rocks!! 🙂
Please let me know if you have a tutorial on thinning the band up in your blog.
Best,
Mons
Yes, Montserrat, there is a search feature on the blog. But the title of the thin the band post is Thin is In from June of 2014. There is a small magnifying glass in the top right corner that you can use to search the blog or any other part of the new site!
Here is an image of the blog search that is located at the top right corner of blog post pages and the blog category pages.
Let me know if you have any more questions 🙂
Hello Beverly. Do you sell the Ezi-Sew nursing Bra pattern? My daughter thinks it looks great for sleeping in. I was planning on making the vintage one for daytime wear for her. I have tried finding it on line but they don’t deliver to my address
We certainly do. You can see it in the Full Band Bra pattern section of our website at http://www.bramakers.com