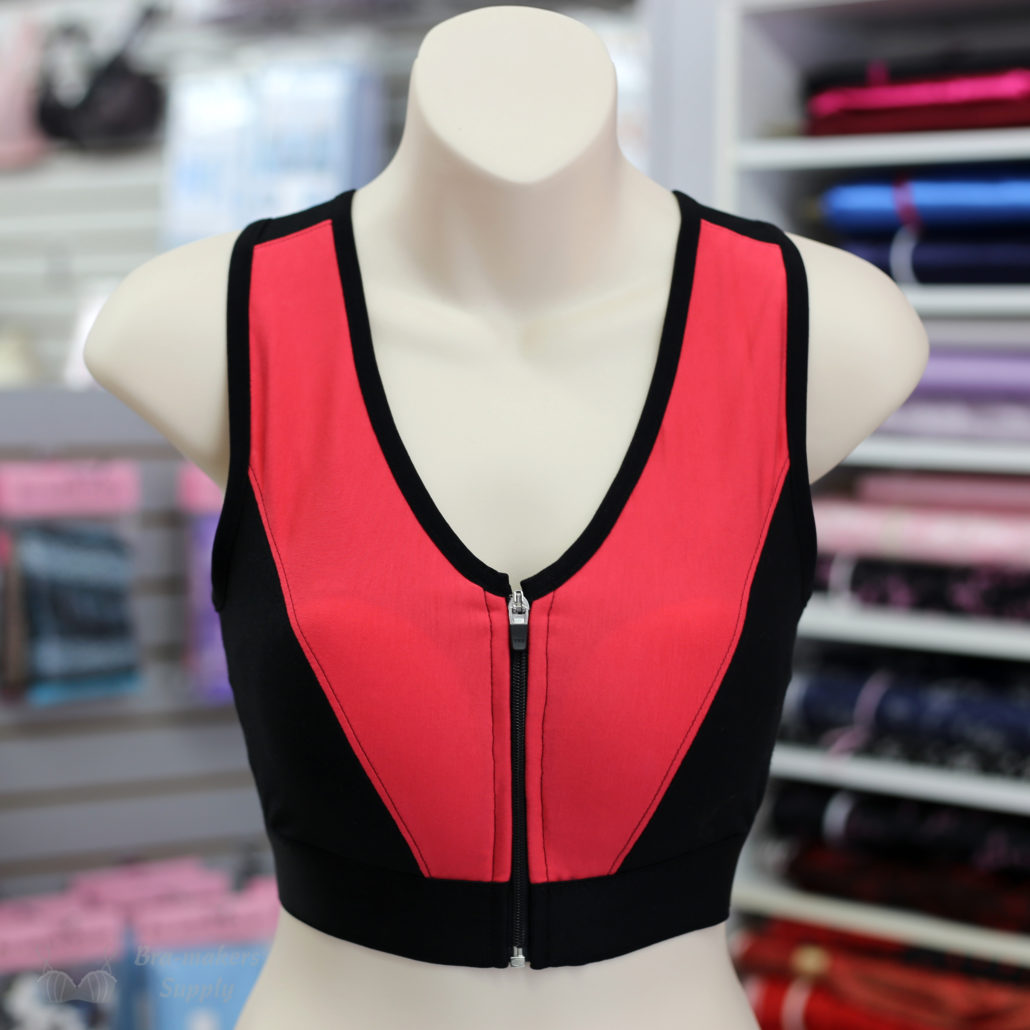
We have recently retired the Alison Sports Bra and re-released a more modern and user-friendly version we call the Allie Sports Bra. Think of the Allie as the new and improved Alison. An Alison 2.0 as it were. It has a number of features that really do make it a unique pattern. Here’s how to sew the Allie Sports bra (or the Alison if you have that one).
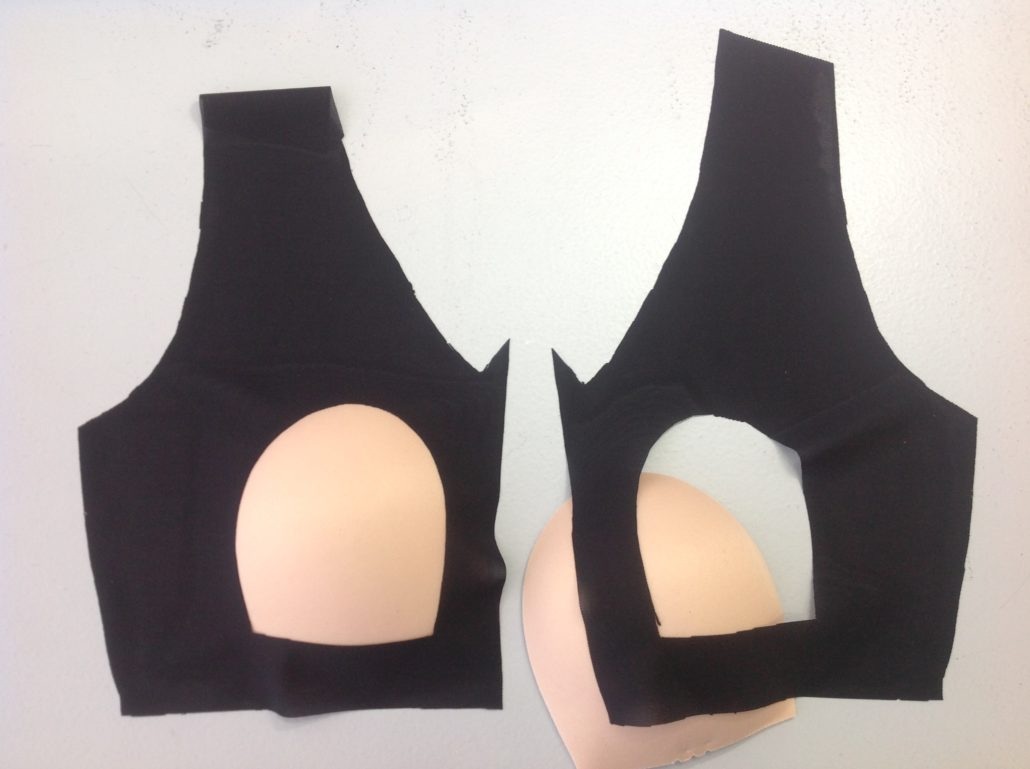
As with any sewing project, the pattern needs to be prepared first. In the case of Allie, you need to determine the size of the foam cup you need, then trace the cutting template for that size. This is the foam cup template we’ve included on the pattern.
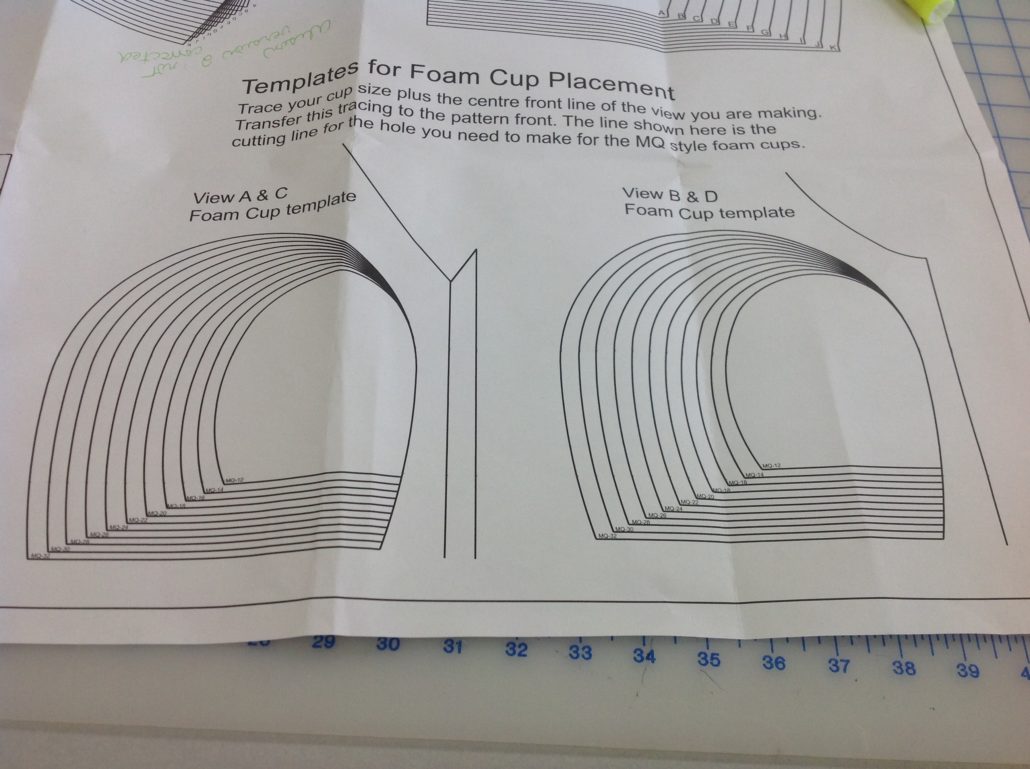
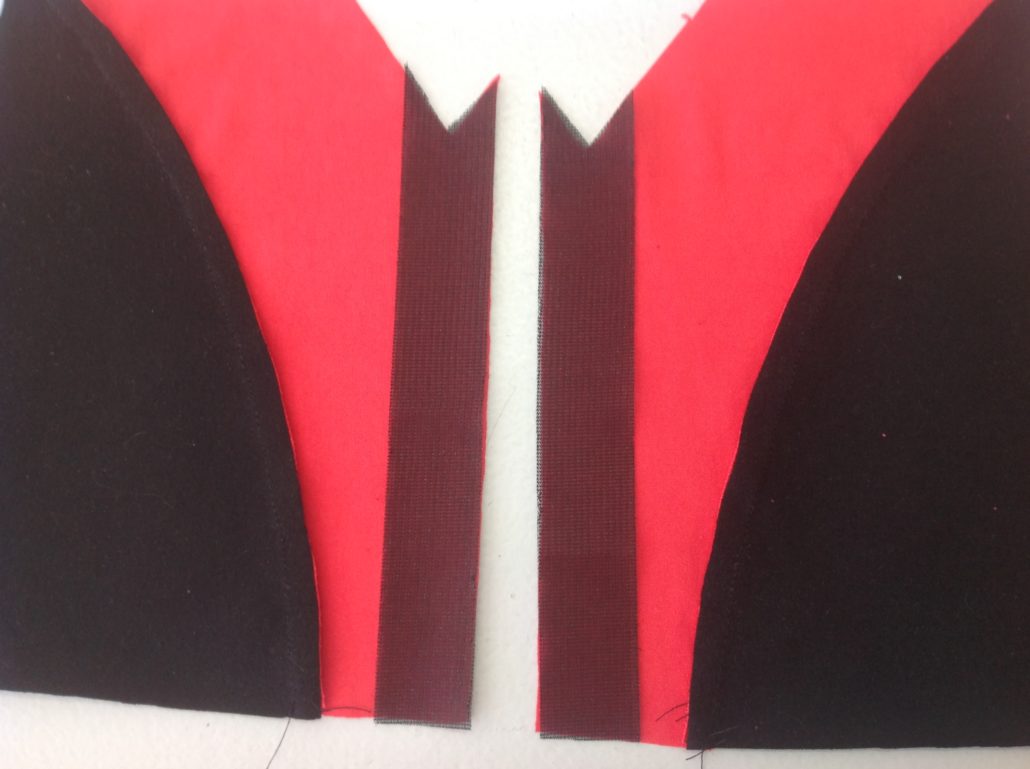
Then trace the pattern pieces, and align the centre front line of the cutting template (shown in pink below) with the centre front line of the pattern front you’ve traced.
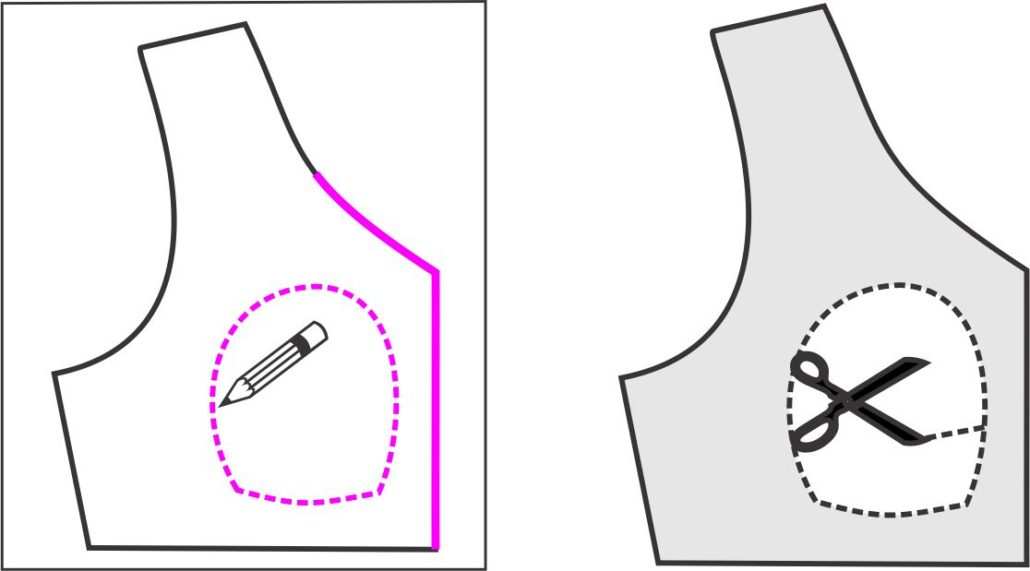
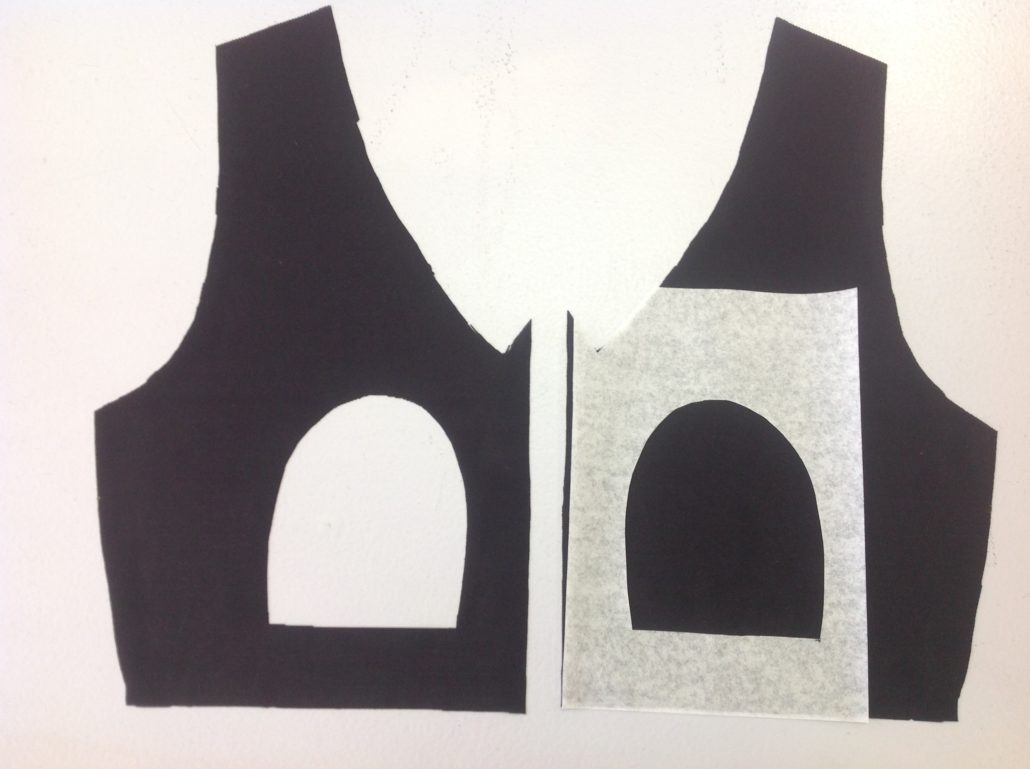
Once you have cut out the power net lining for the front you can cut out the “hole” for the foam cup. You now have the perfect sized hole that will fit perfectly over the horseshoe-shaped foam cups. Wasn’t that easy?
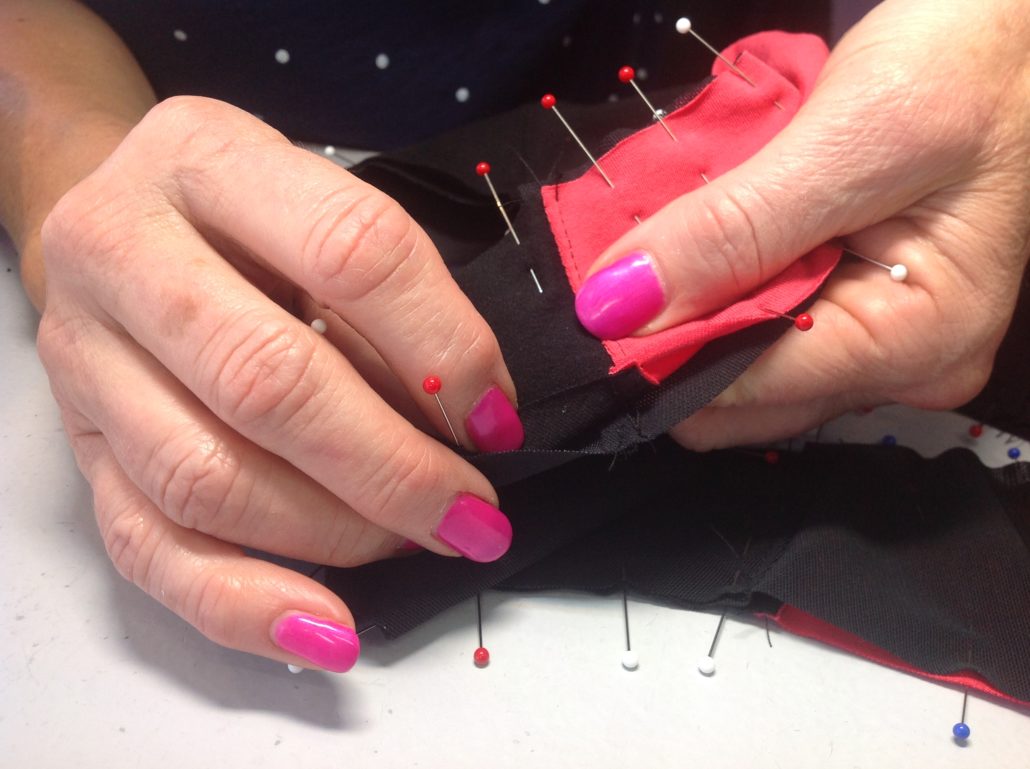
Now let’s sew the foam cups in place. Place the cups on the table with the “hump” side facing up. Lay the power net lining with the right side (the side you want next to your skin) over the cups. The power net should overlap the edges of the foam cup about 3/8″ (10 mm) all around.
Pin the fabric to the cups around the perimeter. Then turn the front over and re-pin from the other side as you see here on the left.
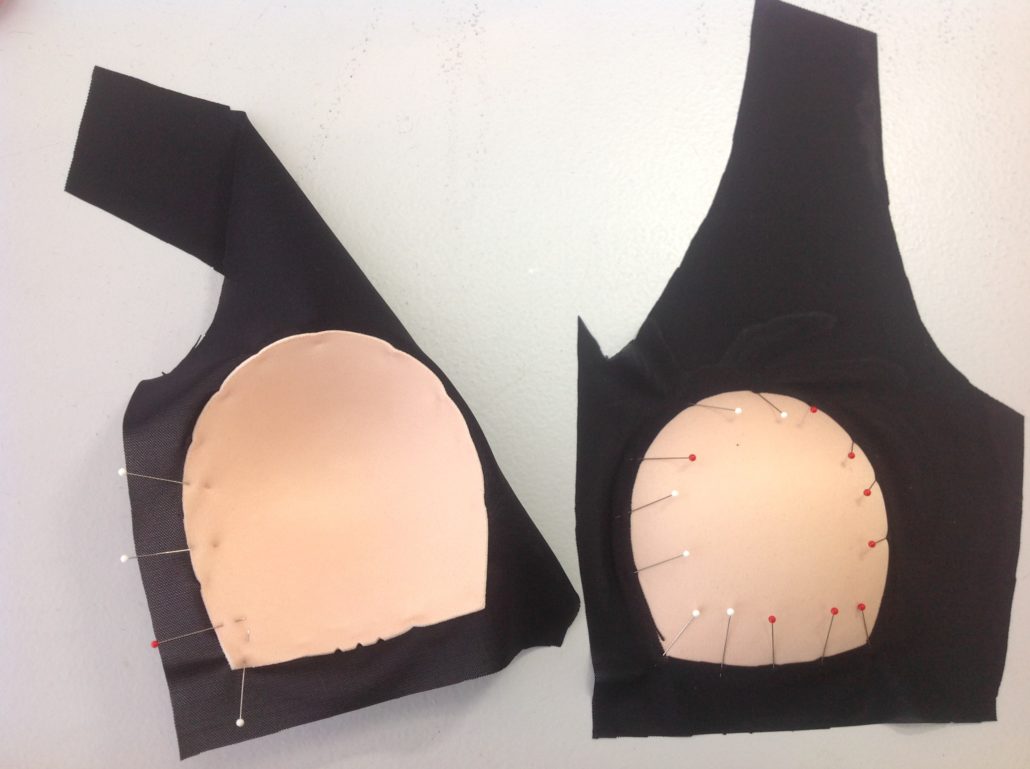
The reason we pin along the inside of the cup is that the foam cup is easier to zig-zag from the foam side. The power net tends to want to stretch if you sew from that side. Not so in the case of the foam. When the stitching is done, the cut edges of the power net “hole” do not show. If you want, you can cover the stitching with a narrow stretch trim.
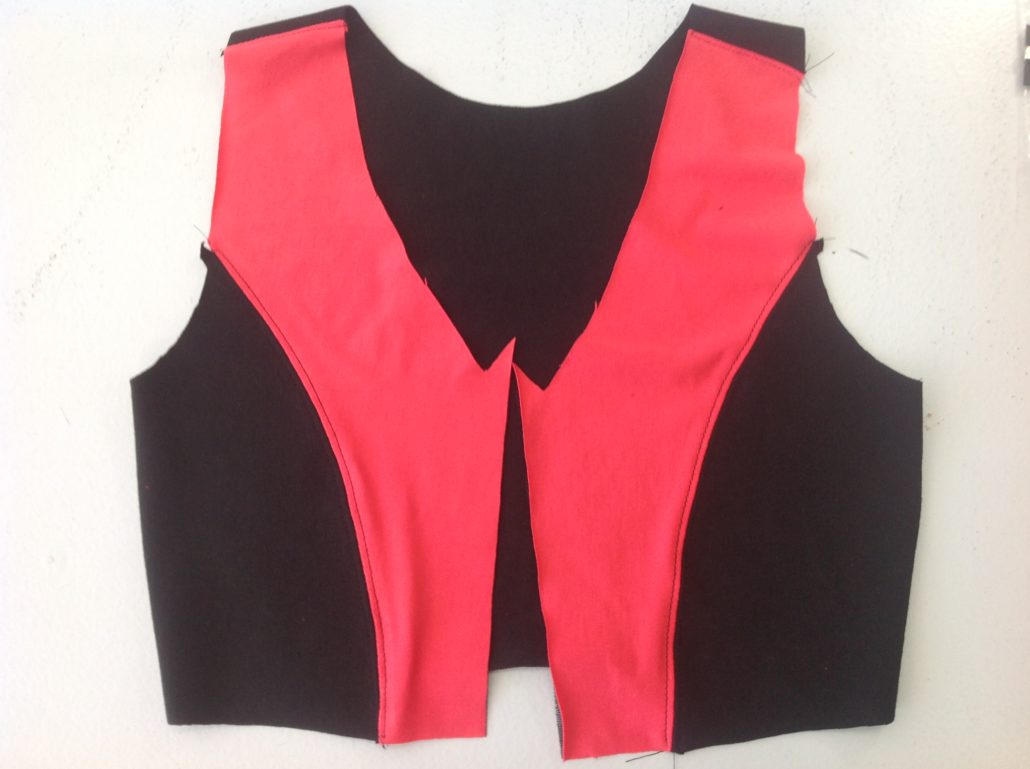
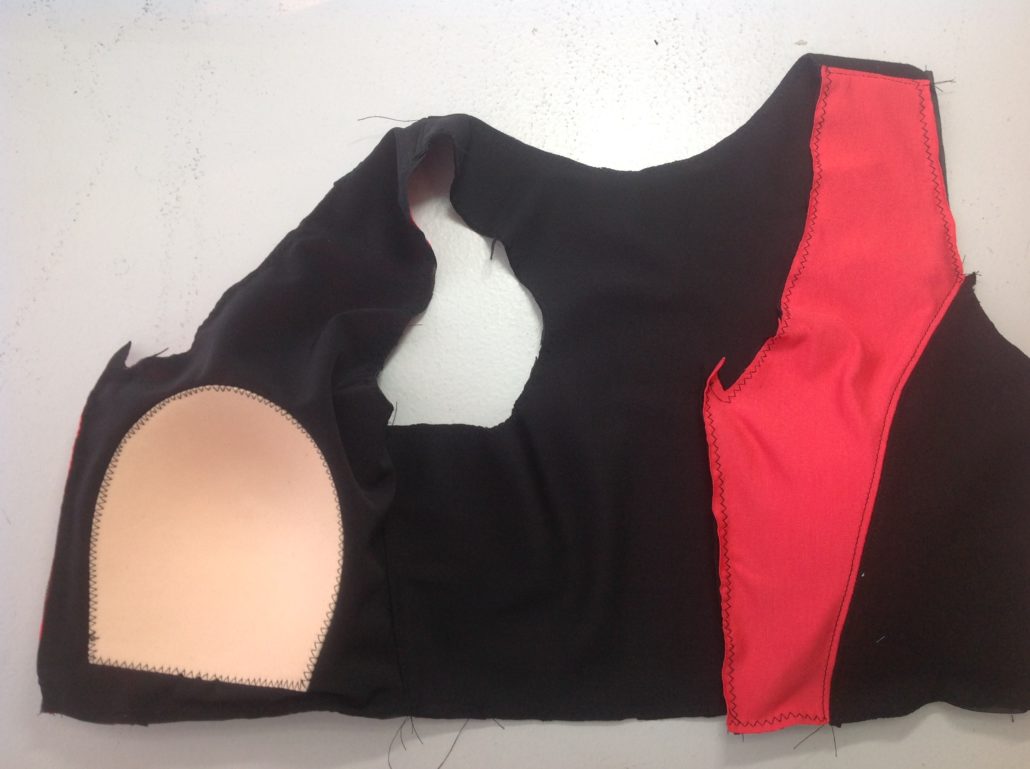
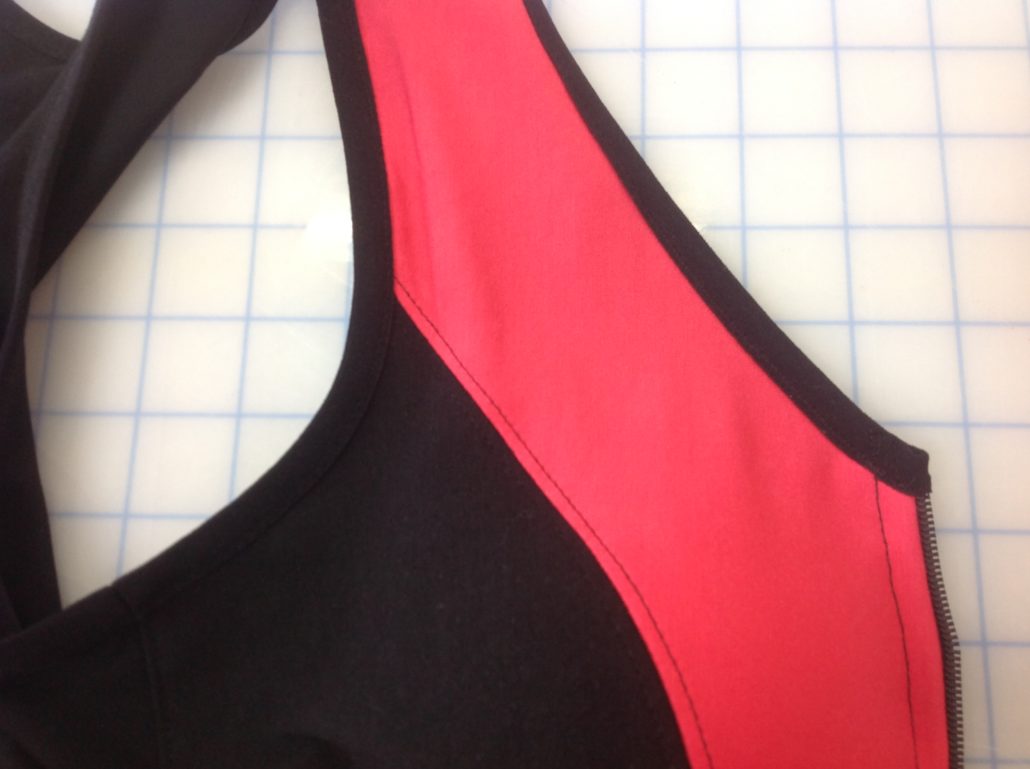
Now sew the cover panels together. If you are using colour blocking, this is your time to get creative. You can use whatever stretch fabric you want because the power net lining is doing the supporting. This is a good time to try the bra on to make sure the bra is snug enough around the rib cage. Topstitch the seams. Sew the lining together as well.
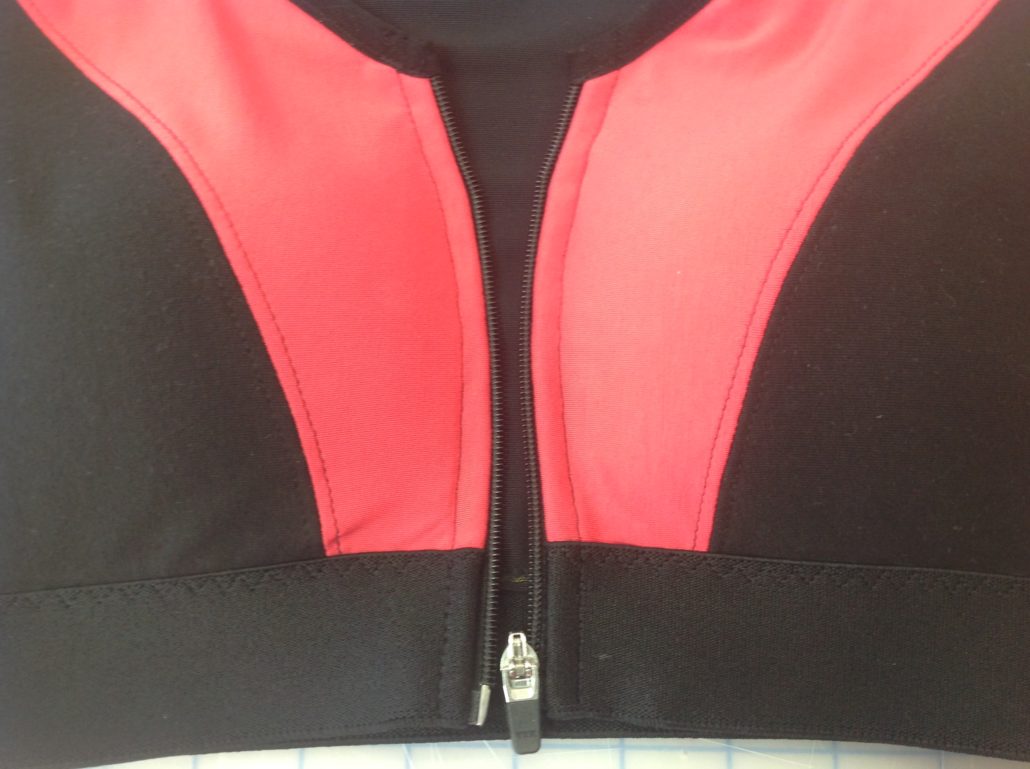
If you are adding a zipper to the front edge, interface the wrong side of the zipper edge with a strip of fusible interfacing.
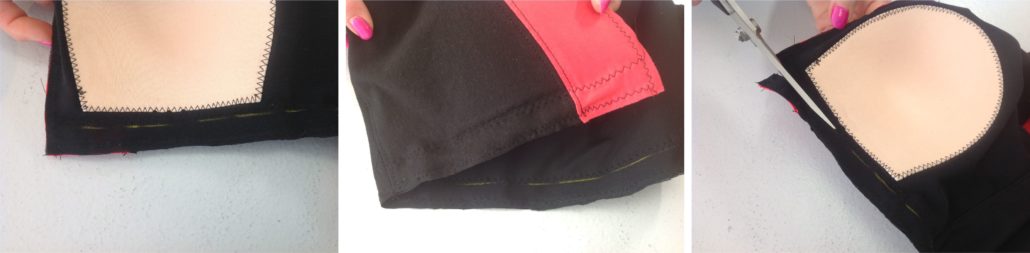
Pin the cover to the lining with wrong sides together, matching the seams. We have found if you press and topstitch the cover seams toward the front and the lining seams toward the back, the seams will nest together for a non-bulky intersection.
Once the layers are pinned together, you can baste the bra all around with a zig-zag stitch. Don’t use a straight stitch as you still need the edges to stretch. You can see the cups are facing outward (as they should) after the lining is sewn in.
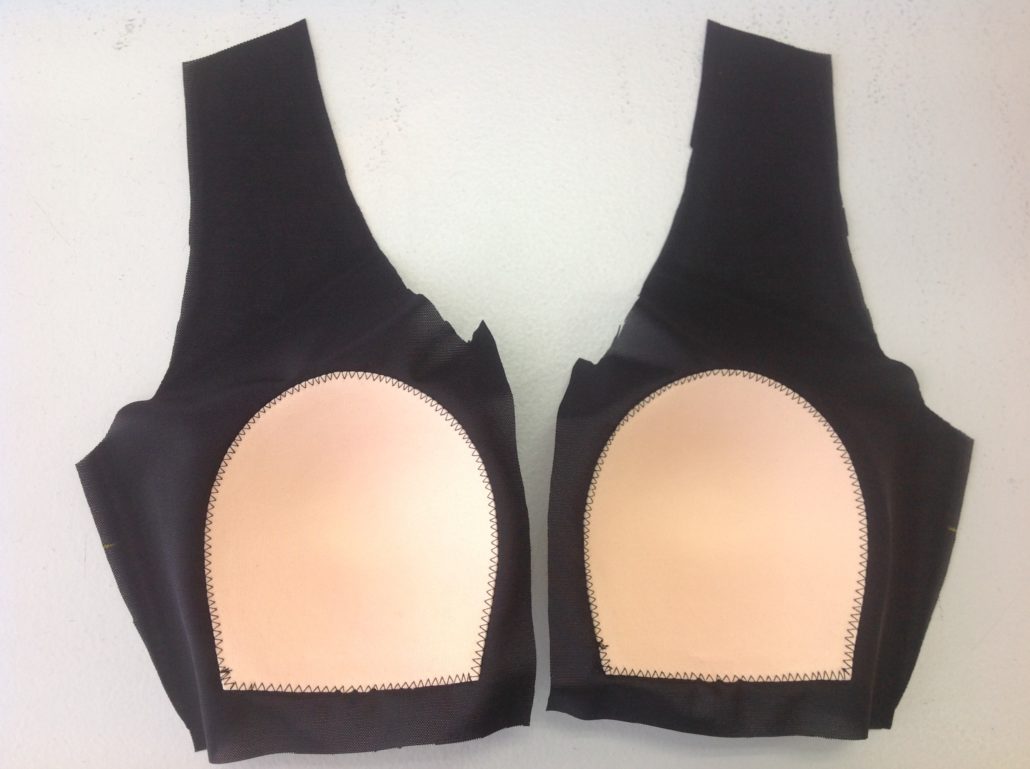
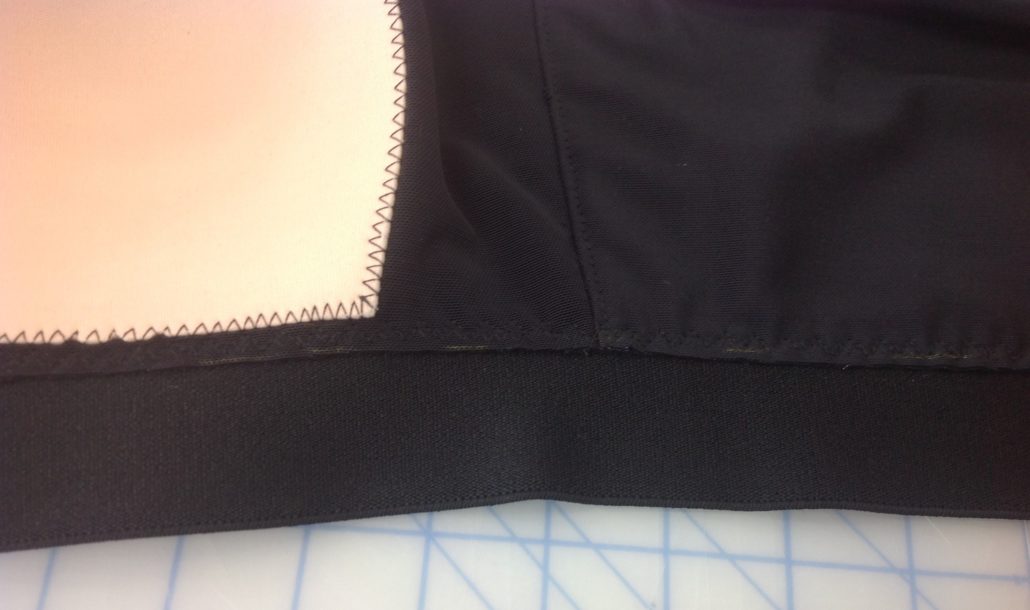
I’ve allowed length in the front for the largest foam cup size. However, if the edge of the fabric is more than 1/4″ (6 mm) below the bottom of the foam cups, you can trim off the extra. Mark where to cut, the zig-zagging above the marked line, then cutting off the extra.
Sew on the waistband elastic by overlapping the elastic 1/4″ (6 mm) over the bottom edge and use a three-step zig-zag (width 4 mm and length 1.5 mm), to stitch it on.
Apply the fold-over elastic on the neckline and armholes. We’ve got a great tutorial on that here.
Lastly, sew in the zipper, using our tutorial here. In the blog post we show and Ingrid, but the zipper application is exactly the same on the Allie.


I bought the pattern for the Allie Sports Bra, and I am trying to determine what size pattern I follow. I know it said to use my full bust size to find what pattern size to follow, but I am still confused. So, for example, my full bust size is 53”. My rib cage is 44”. My high bust size is 49.5” – so 50”,and my BCD is 5.5”, so for the Allie sports bra pattern would I follow pattern The pattern for 44E? Or does this pattern not accommodate my size?
Thank you very much!
Anne