Do you make up a pattern exactly as the pattern instructs? Or are you comfortable with changing…or in today’s terms “hacking” the pattern to create a new look? We took our favourite sports bra pattern, Kerri, and changed it to have the same great support and fit, but as a sports bra hack, it changed the look and its functionality completely.
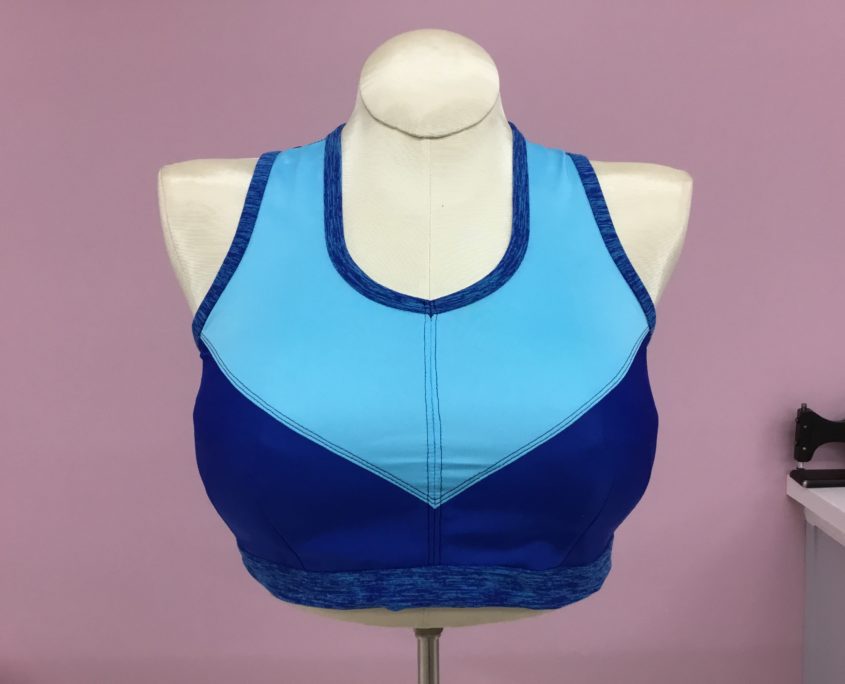
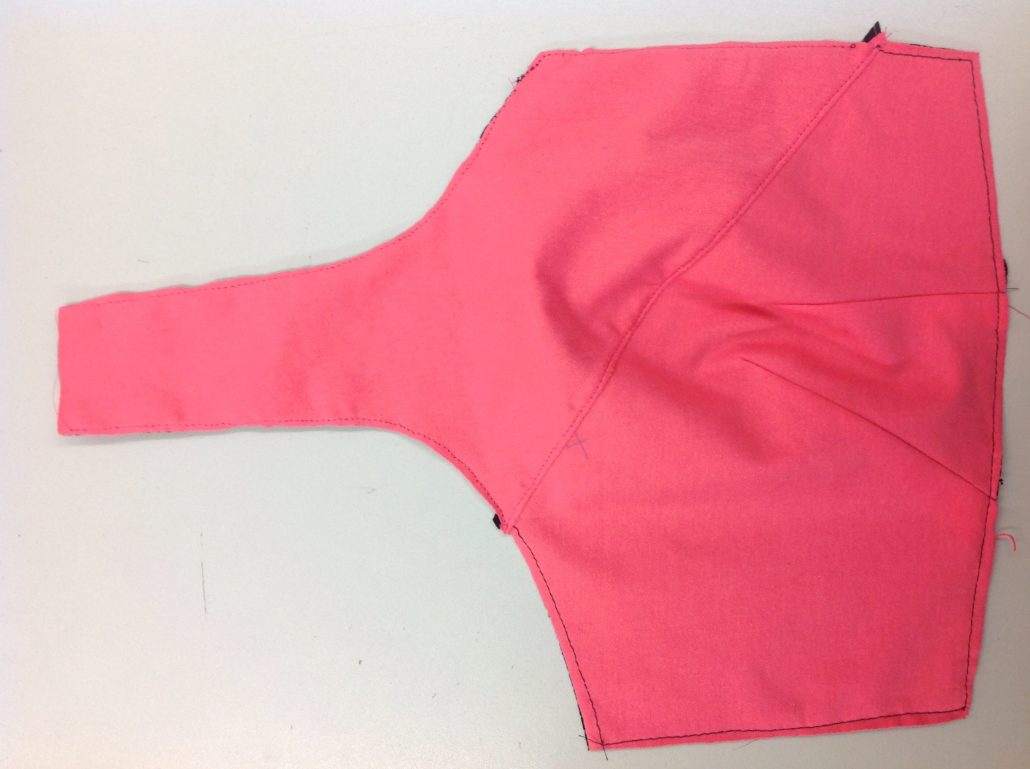
Here is our original Kerri sports bra. It uses Duoplex for the darted front and power net for the back. It is probably the simplest sports bra you can make that actually lives up to its “no-bounce” claim. In this right-out-of-the-box version, we used Maxine (a type of supplex) for the binding and bottom band. We thought that was a pretty awesome colour combination.
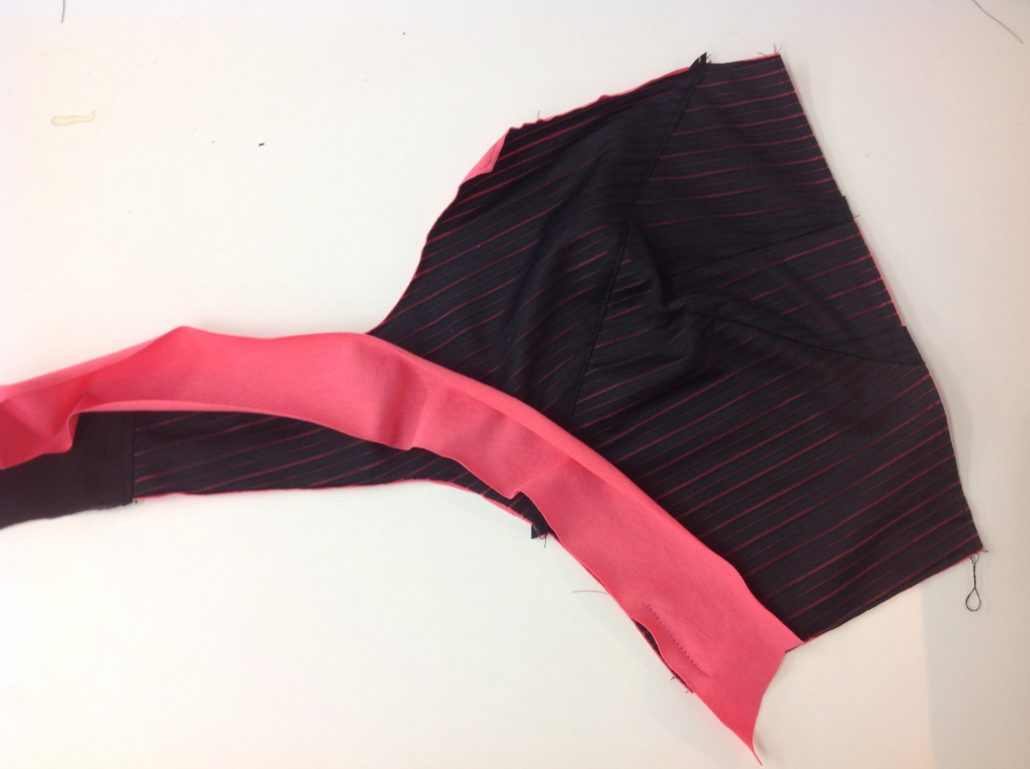
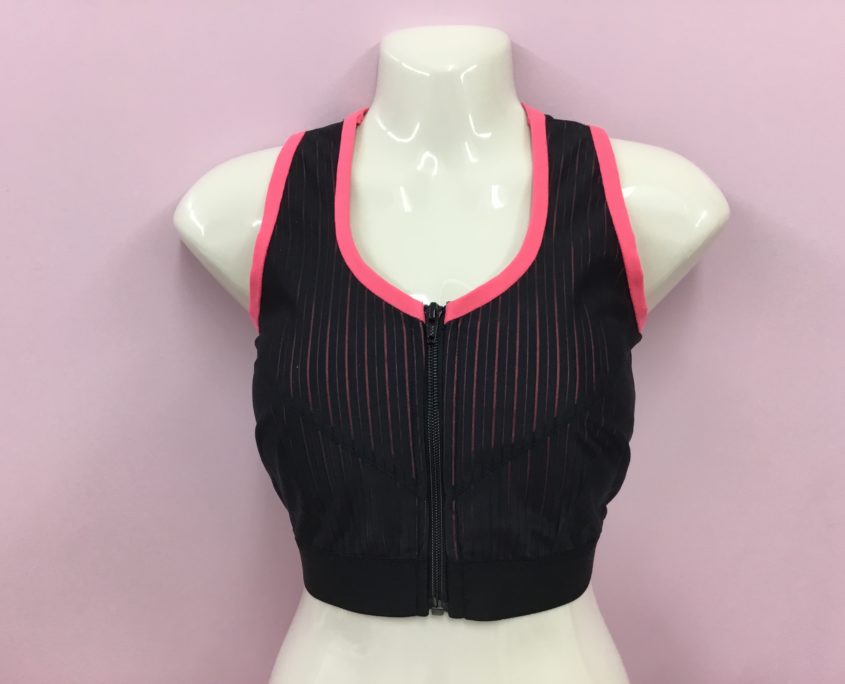
But we wanted something different. We wanted to add the moisture moving capability of Active Cotton to the Kerri. We also wanted to add more shapely V curves to the back. We also wondered if we could change the solid coloured duoplex to the Sheer stripe duoplex to make the whole sports bra hack a little more stylish. While we were at it, why not add a zipper to the front?
The Draft
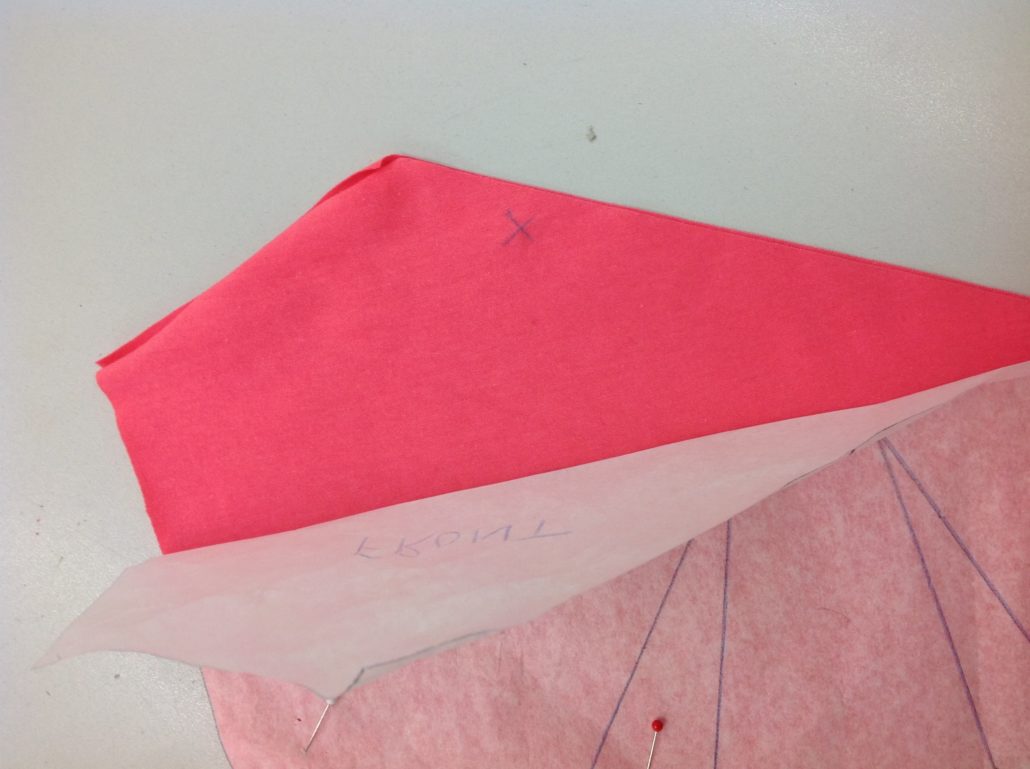
The first thing we did was to modify the pattern for the v-shaping of the front and also to accept the front zipper. The simple answer is to add 1/8″ to the centre front. If you want to know why… the width of the zipper coil is 1/4″ total, so adding a zipper adds 1/8″ width to each front. We have to take off 1/8″ from each side to keep the bra the same size. But we have to add extra seam allowance to sew on the zipper. Typically you need a total of 1/2″ for the width of the zipper tape. We already have 1/4″ seam allowance. So if we take off 1/8 and add 1/4″, our net change is to add 1/8″ to the centre front line. That will allow the zipper coil to be exposed and the zipper to be sewn on securely.
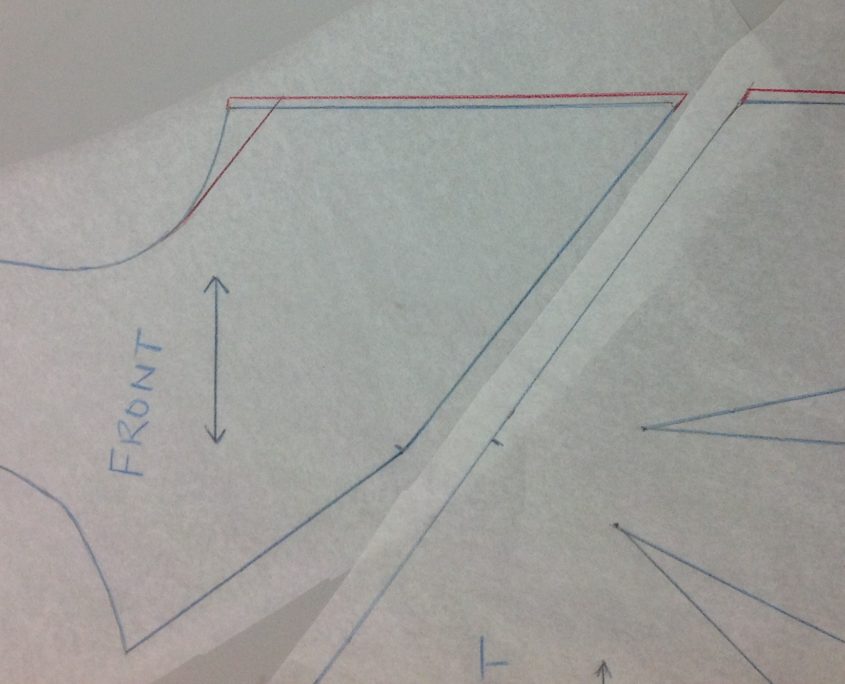
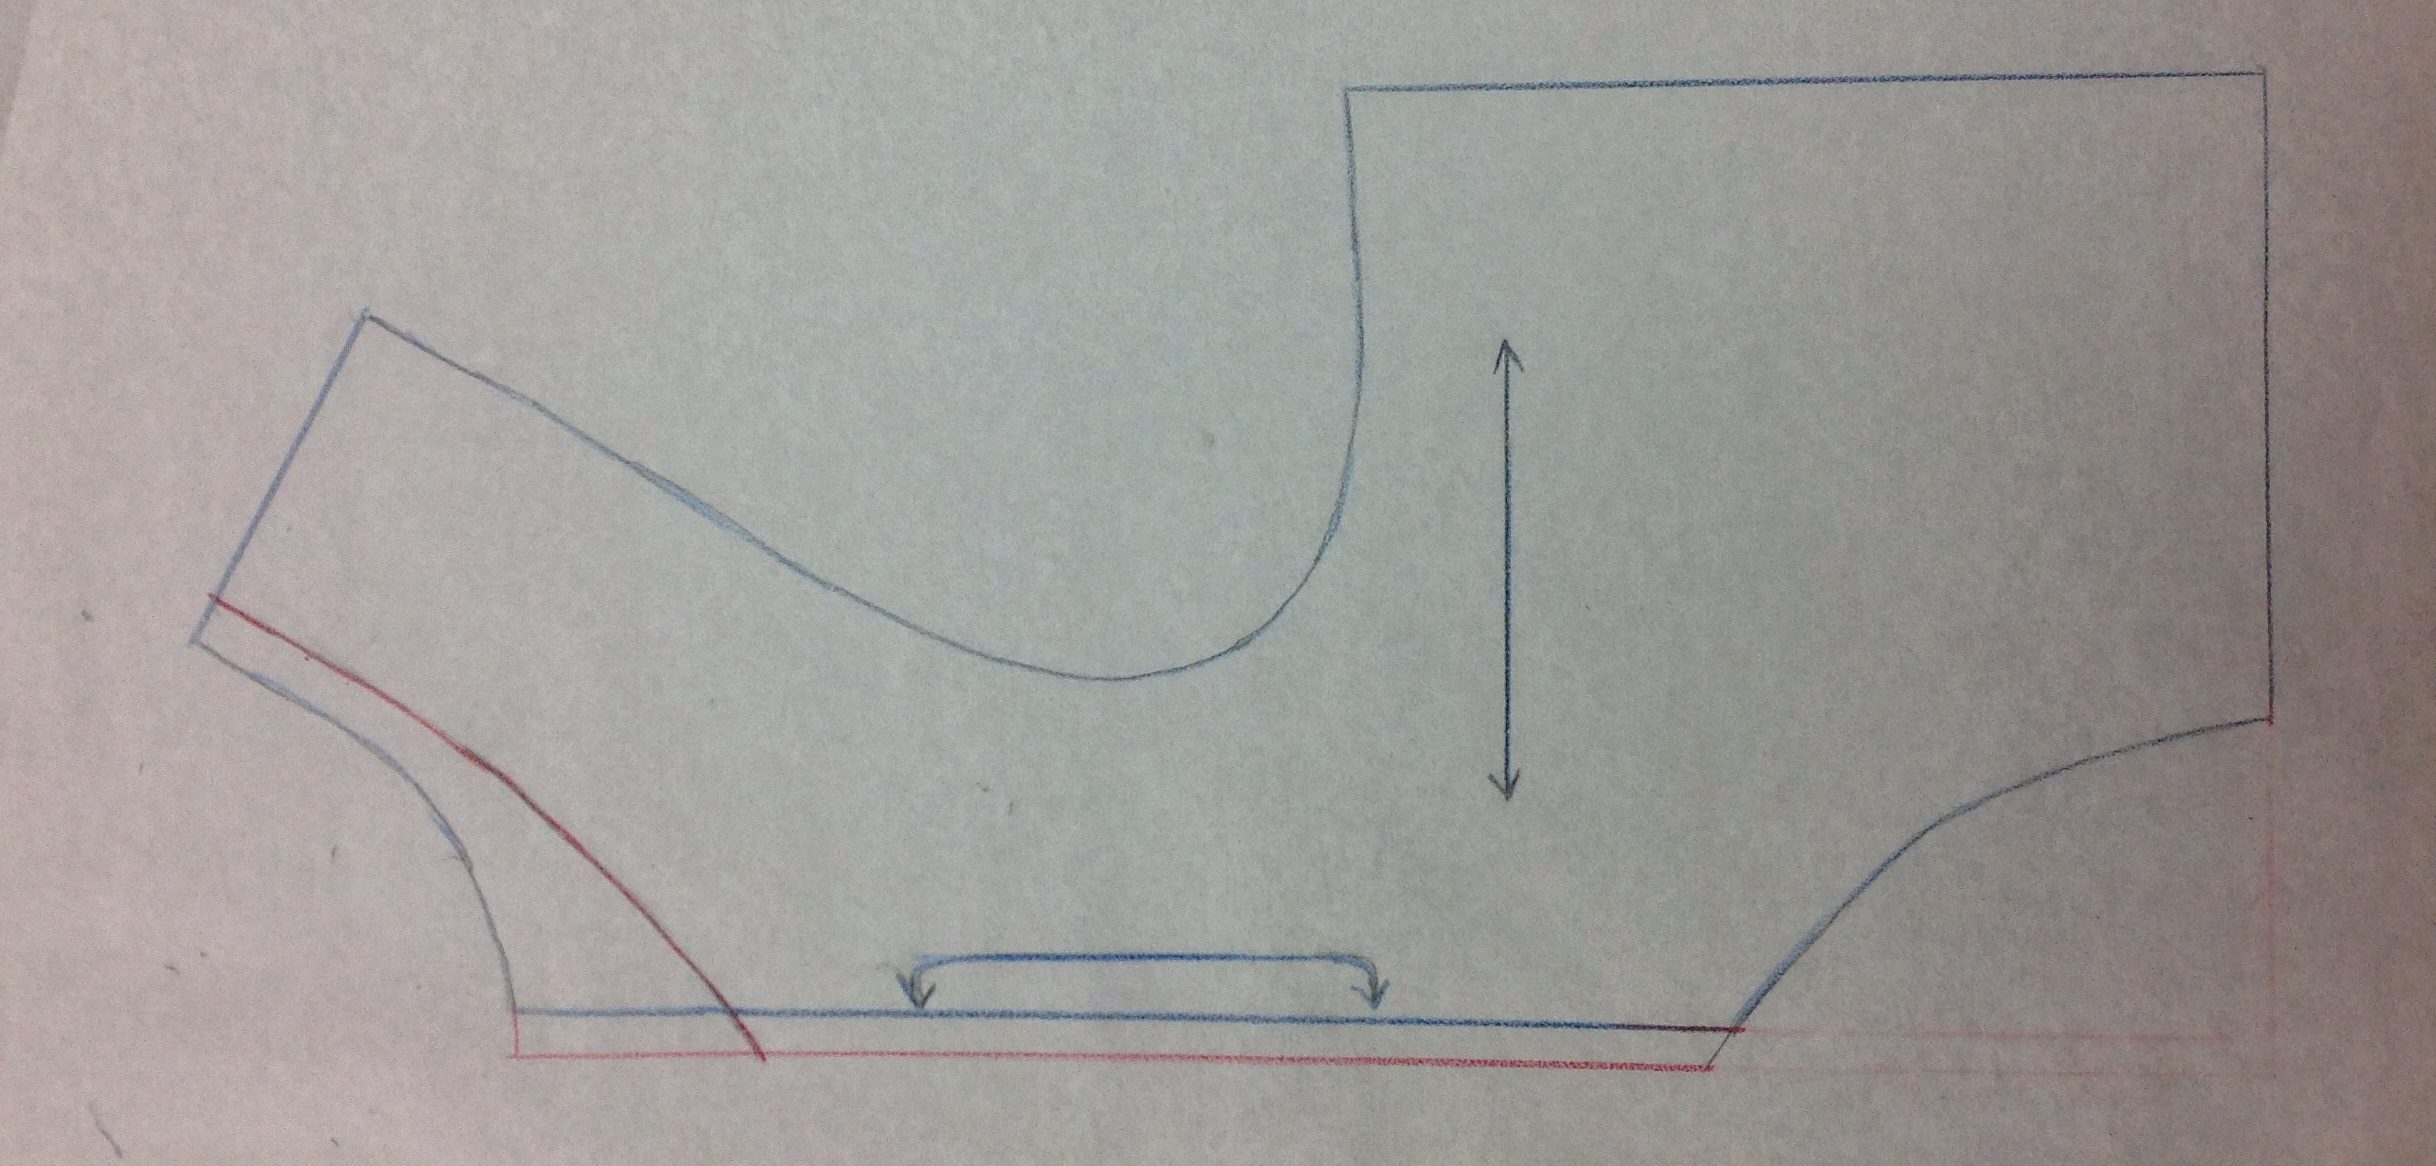
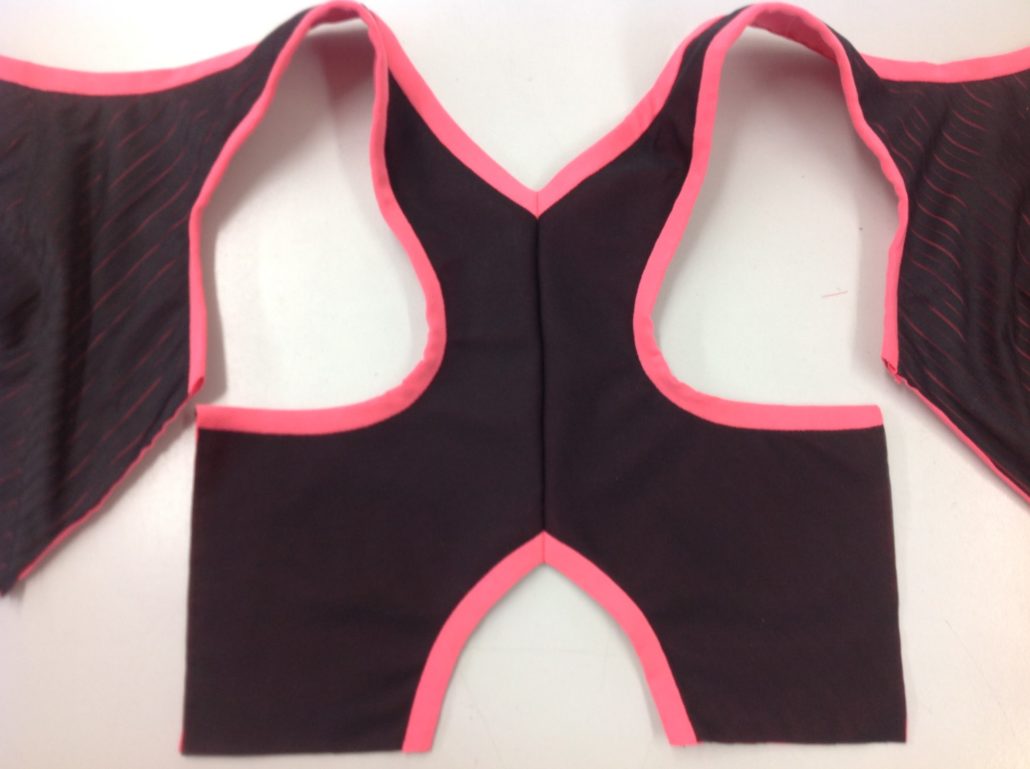
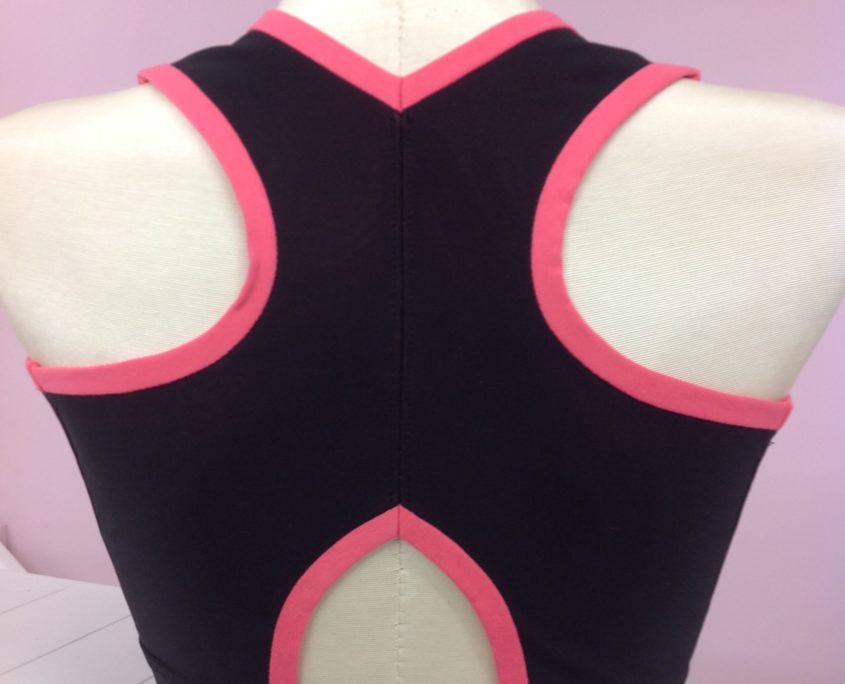
We also narrowed the shoulders a bit and made the top of the back into a V-shape rather than the round shape it is in the pattern. To add to it, we also made the bottom keyhole into an upward v-shape. Once we had our V-shapes, we added 1/4″ seam allowance to the centre back seam. We will cut two instead of putting the CB on the fold. Why? The seam allows us to obtain really sharp V-points. it also saves on power net.
The Lining
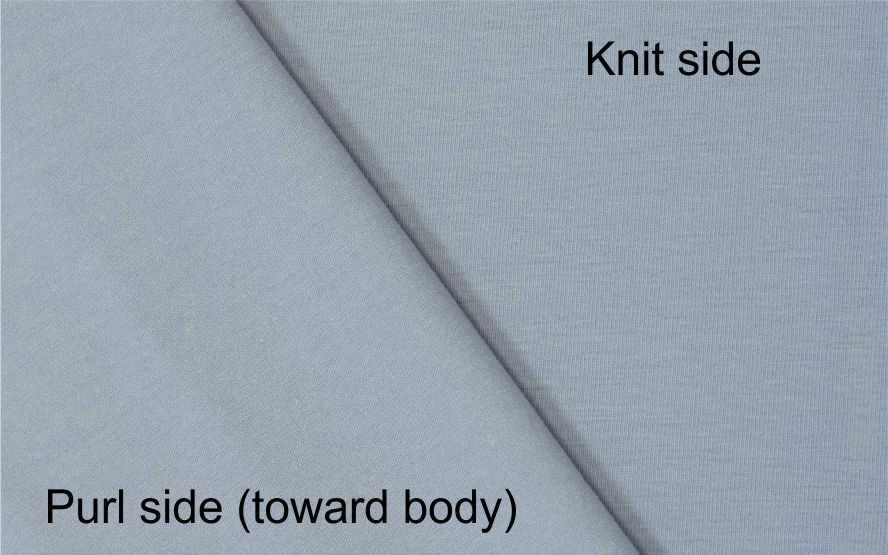
Before sewing, we lined the sheer stripe duoplex with Active Cotton. Active Cotton is 95% cotton and 5% spandex and has the remarkable ability to actually move moisture from its wrong side to its right side, making it a directional wicking fabric. Other wickable fabrics more correctly disperse the moisture, but Active Cotton actually moves it from the inside to the outside. That means you will stay dry, even with heavy perspiration. However, be aware that you must always have the “wrong side” of the fabric next to the skin, otherwise, the moisture won’t move.
That can pose a problem for sewists. We are used to lining a garment with the right side of the lining facing our skin so the garment is looking its best when we look at it from the inside. No so with Active Cotton. We must line the fabric so the wrong side of the fabric is facing out. In other words, the purl side of the Active Cotton must always touch the skin. What’s the purl side, you may ask? When you look at any single knit jersey such as Organic Cotton jersey or Active Cotton, there is one side that has a smooth appearance with tiny rows of knitting and one that looks a little rougher or not as smooth. That is the purl side and that’s the side that does the trick in moving the moisture.
I have to tell you…when we first started working with this fabric a couple of years ago, we got it wrong. And had to make the sports bra. All. Over. Again. Now we mark the side to be sure we don’t make that mistake again!
Some sewists would layer the fabrics and sew the dart as one layer. We didn’t do that; we made the darts separately in the lining and the front because we didn’t want the bulk We were able to nest the darts for the least amount of bulk. That means pressing the darts in one direction on the main fabric and in the opposite direction on the lining.
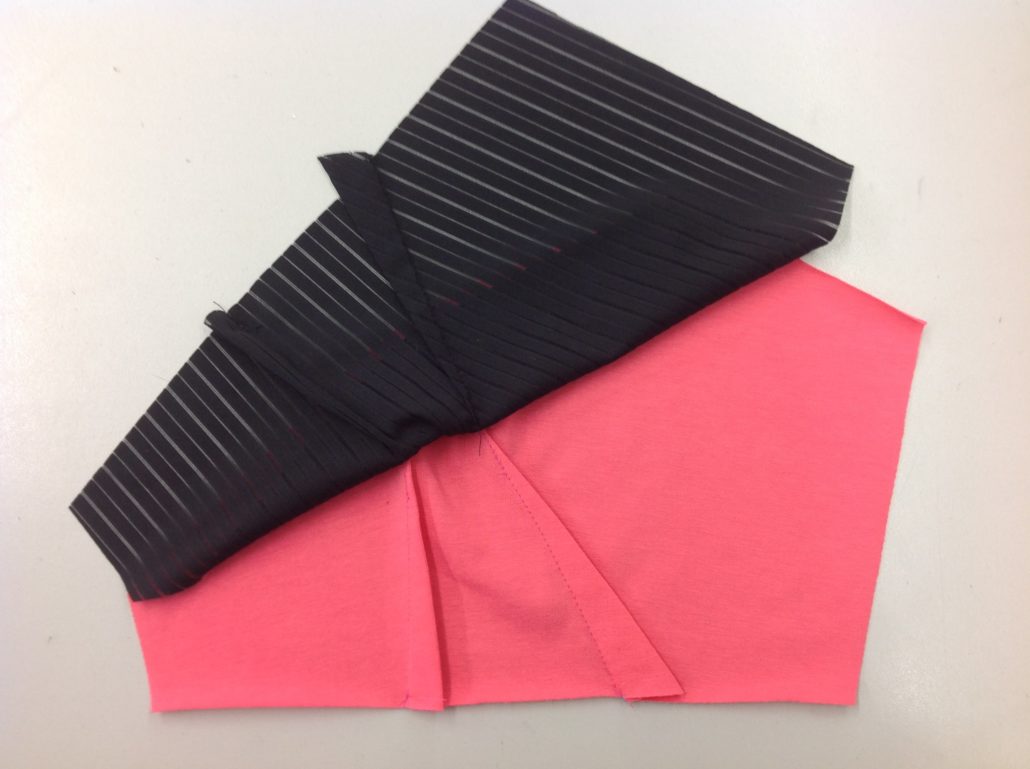
You can see the darts clearly nesting here. Once the darts are sewn, baste all around the perimeter of the piece
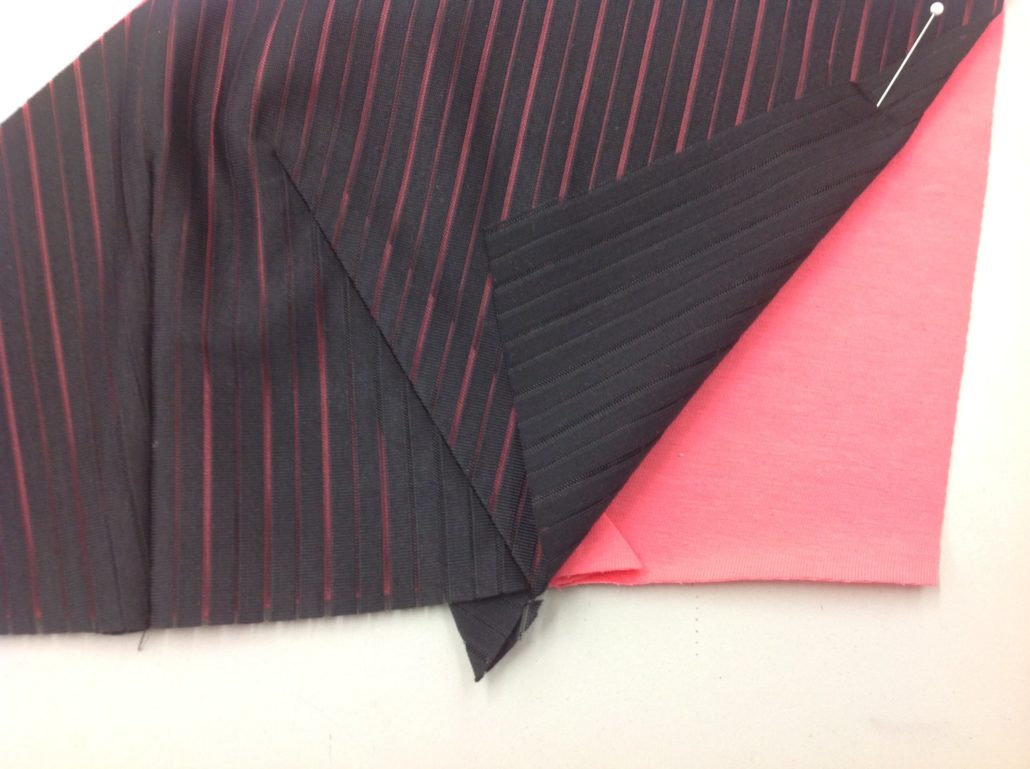
To add the upper part of the sports bra hack, we did a “stitch-and-flip” construction which completely hides the seam. if you have made panties, this is the same type of seam we use in lining the gusset. To do a stitch-and-flip seam pin the lining to the lining side, and the main fabric to the main, then stitch the four layers together.
A stitch-an-flip seam makes the inside as neat as the outside, with no chafing from raw seam edges.
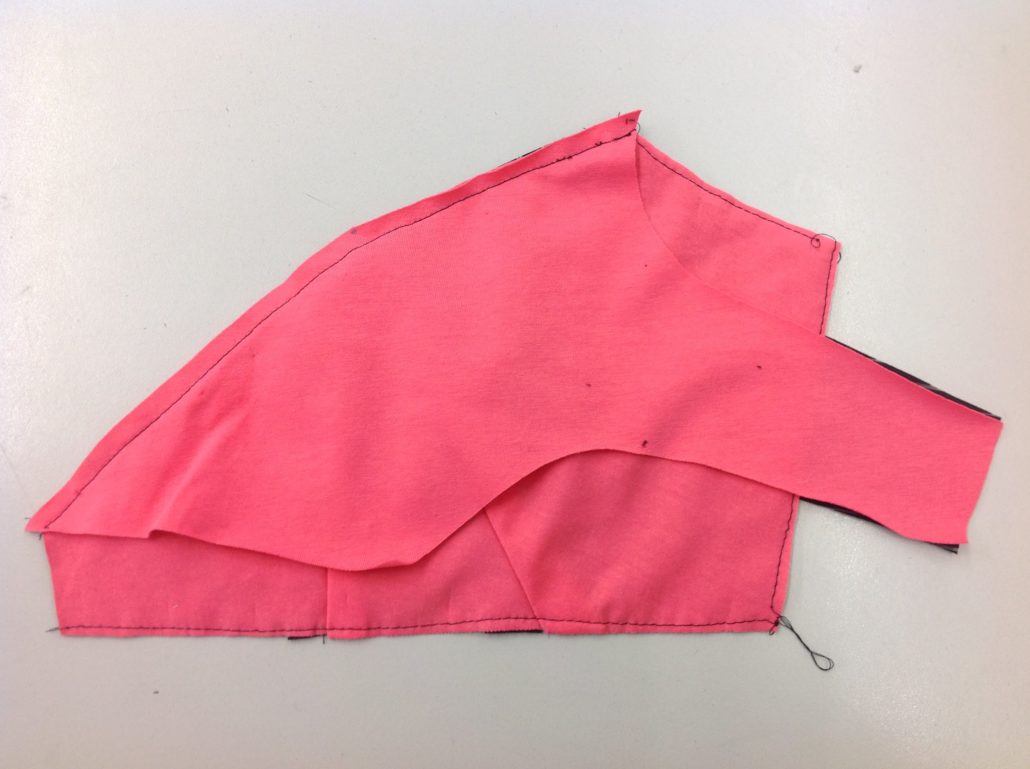
We added the Active Cotton to the power net back pieces and sewed the shoulders together. We now had the sports bra together but it was still in two pieces – the left and the right. Then we applied the binding
The Binding
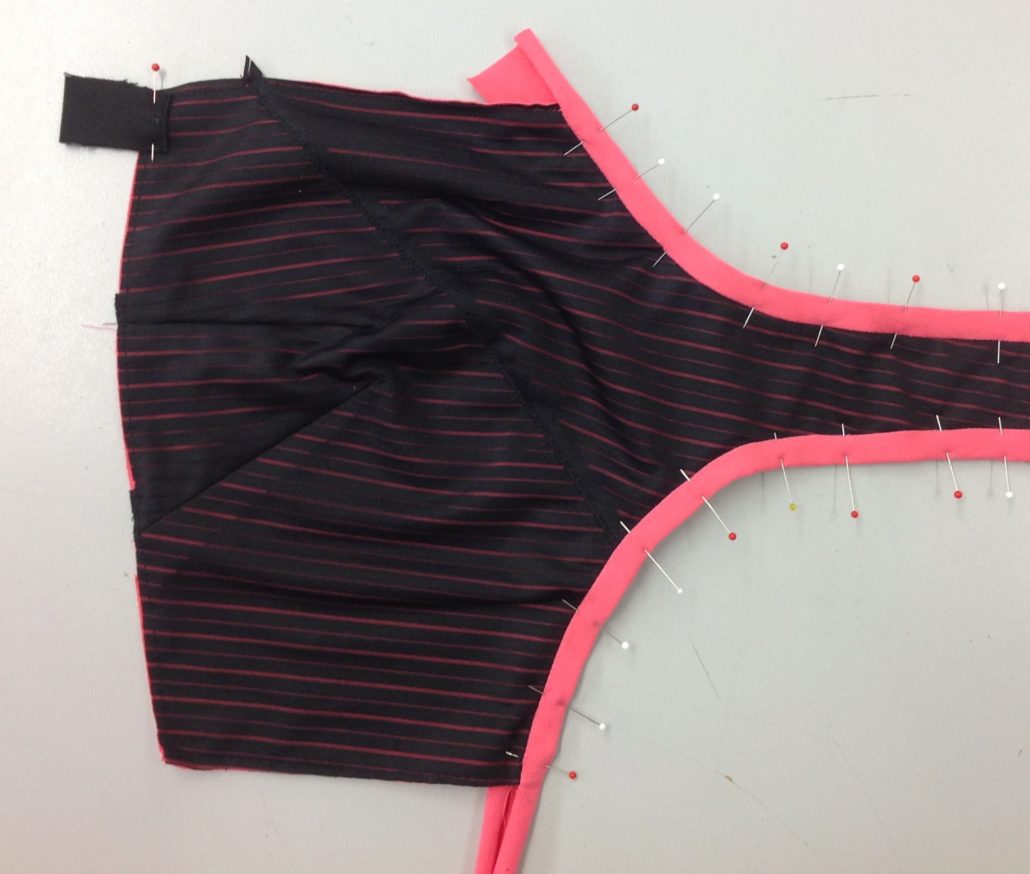
If you have a cover stitch machine, this is the perfect time to get it out and fire it up. However, we realize that most sewists don’t have the luxury of this fabulous little machine (yet) so we used the binding method called a turn-over binding. The purl side of the binding strip is sewn to the right side of the garment with a 3/8″ seam (or whatever width you want your binding to be).
Then the binding is turned over the raw edge, pinned and stitched-in-the-ditch. The purls side of the fabric should show on both sides of the binding.
It was only after we got all the binding on that we noticed our mistake. Can you tell what mistake we made?
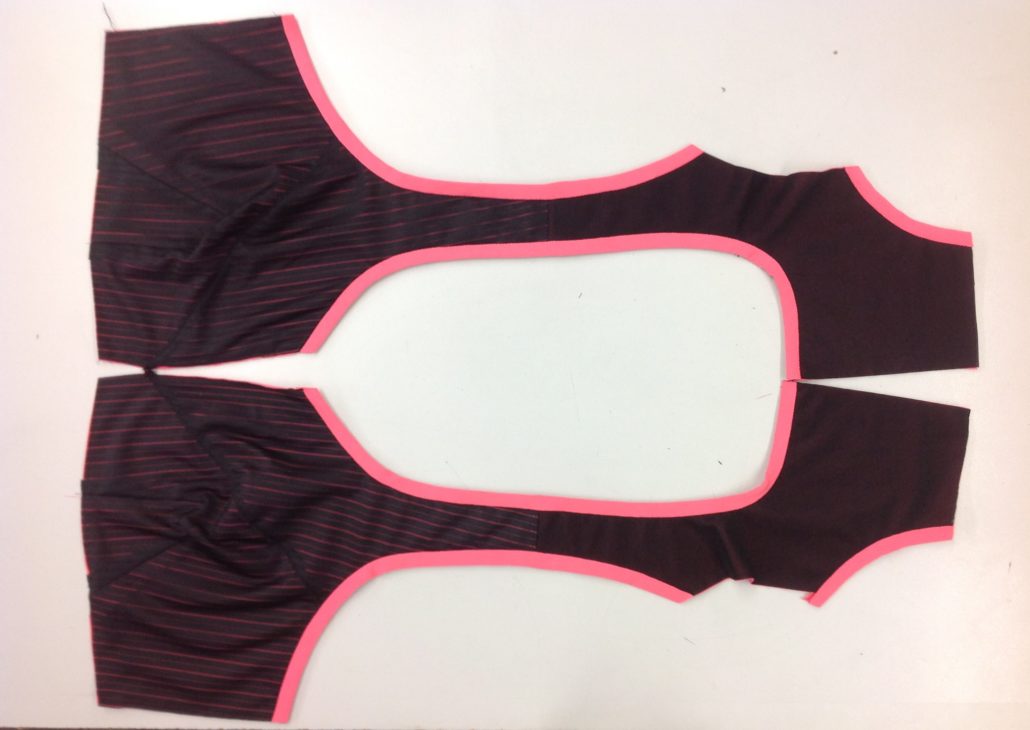
That’s right – the back pieces were sewn on left for right. The keyhole curve should have been in the centre, not on the sides! Once we took things apart, we were able to move on. We sewed the centre back seam, and I have to mention how perfectly Denise matched those two v-points!
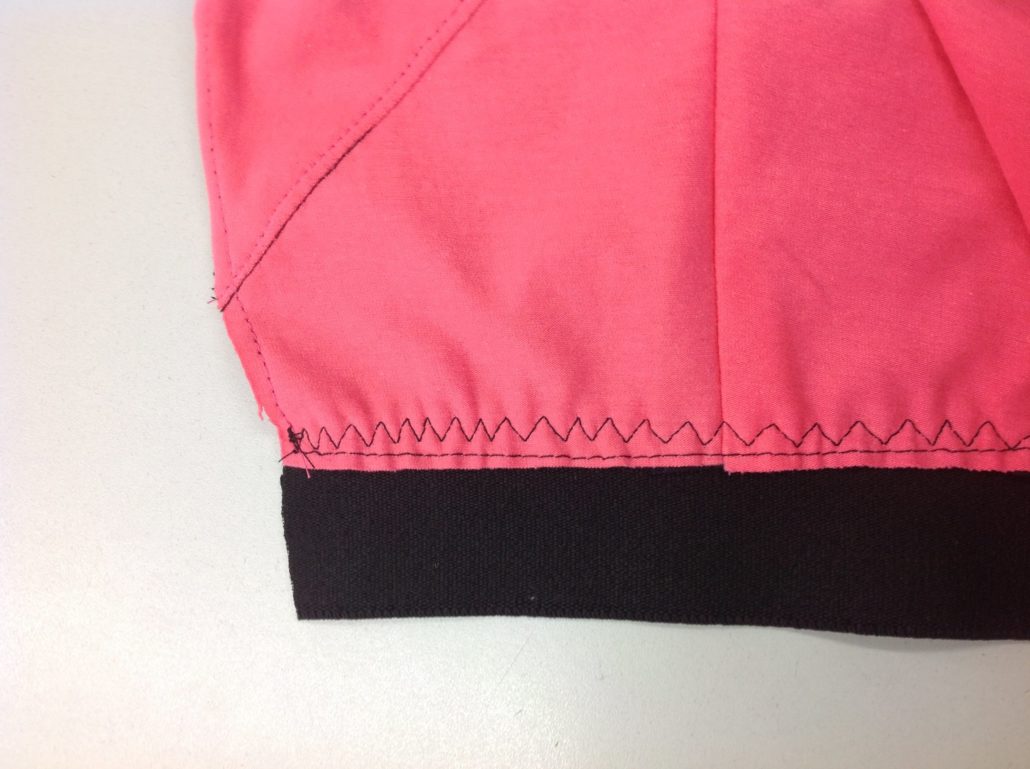
We decided to use the Men’s Underwear Elastic instead of the elastic in a tube the way the pattern instructs – after all since we are doing a sports bra hack, we might as well break all the rules! It is really easy to apply – just sew it along the 1/4″ seamline with a three-step zig-zag.
The Zipper
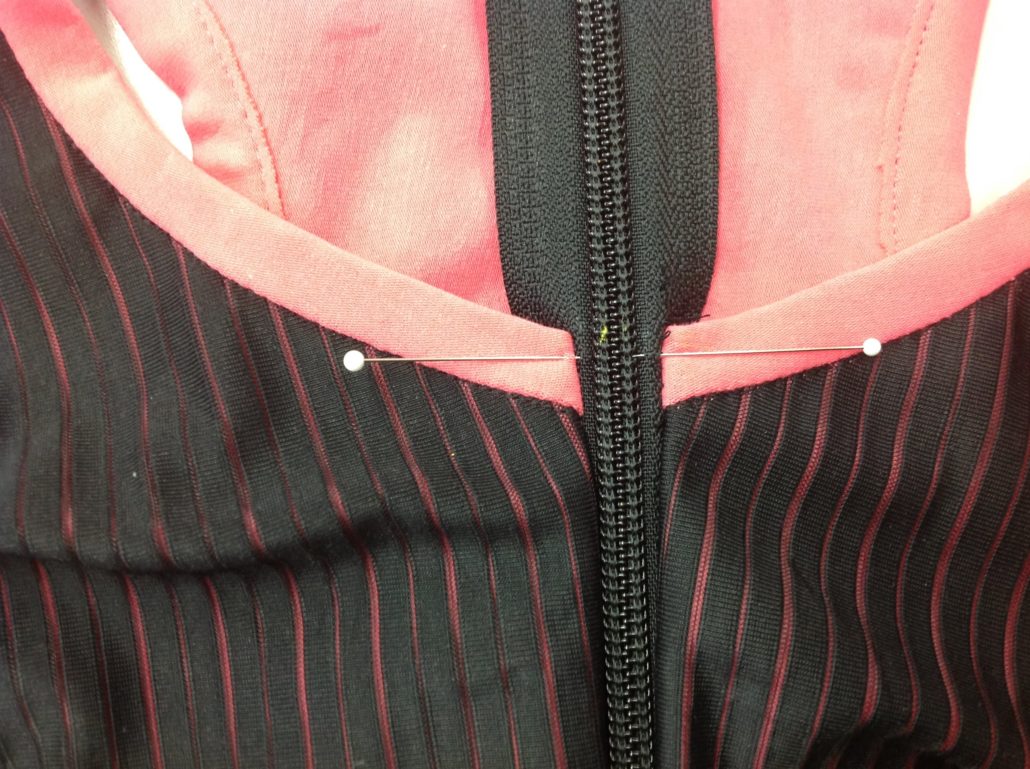
Pin the separating zipper to the front, aligning the raw edge of the fabric with the edge of the zipper tape, and the bottom of the zipper even with the bottom edge of the elastic. Stitch as close to the zipper coil as you can. You will find a zipper foot useful here.
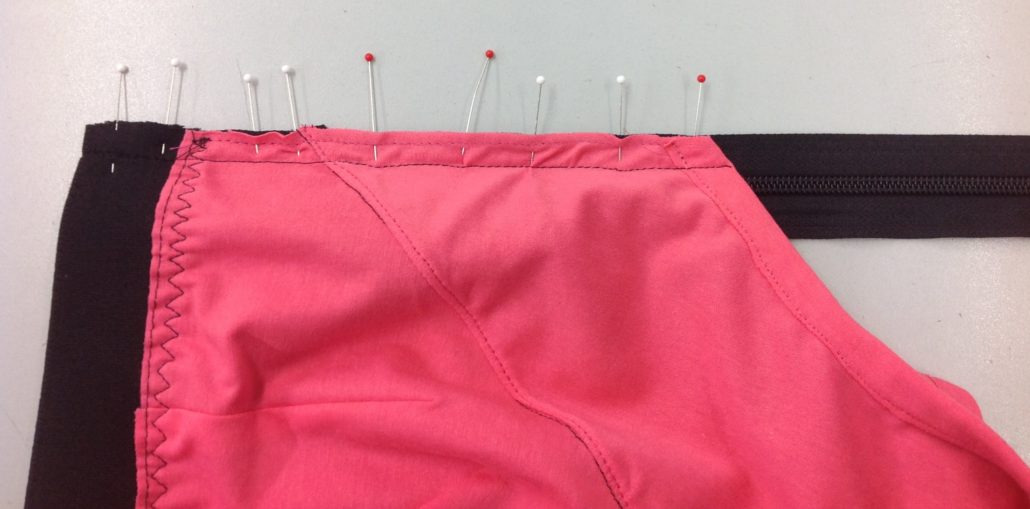
Then stitch the opposite side, being sure to keep the edges even.
We are always really careful to get the tops and bottoms even. We know you are looking!
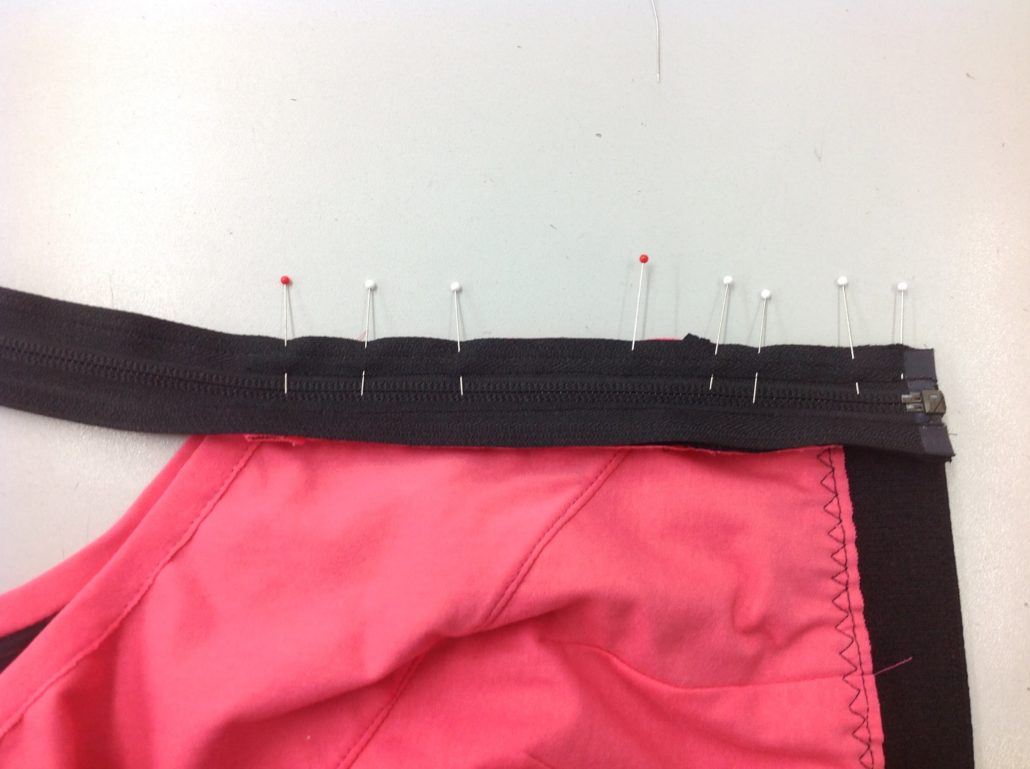
To finish the zipper (you can never buy a separating zipper the exact length you need!) Denise stitched by hand over the zipper coil then cut the coil just above the stitching, and cut the zipper tape like this so she can fold it over.
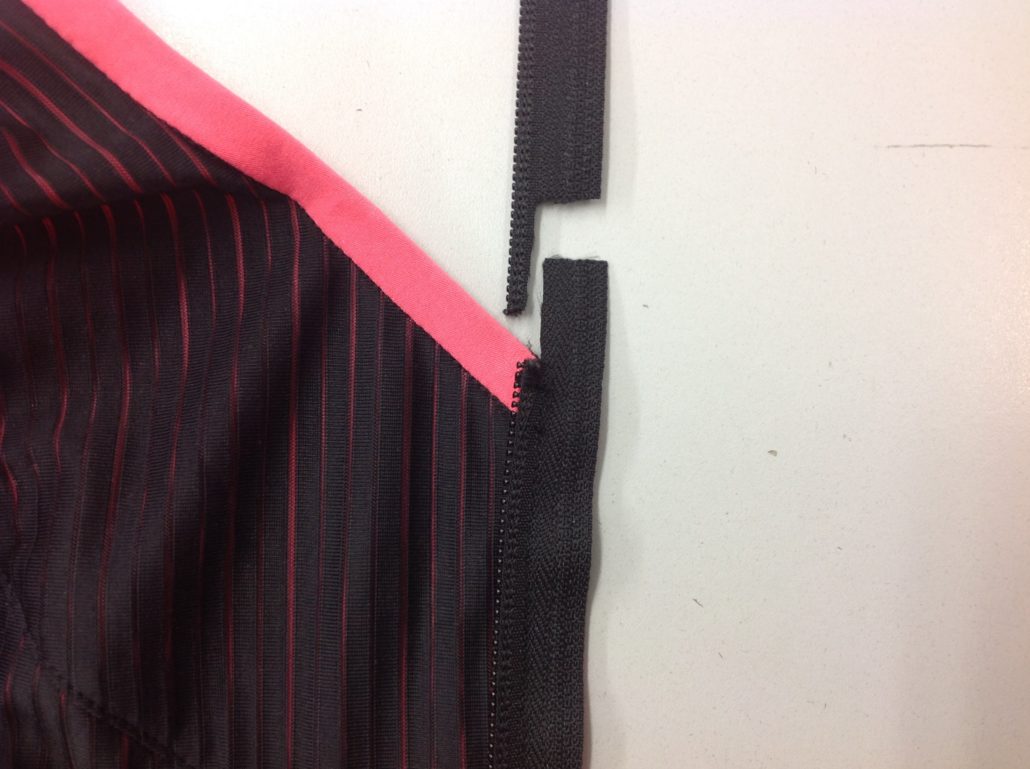
Fold the tape to the back

There! Now it is nice and neat and the zipper goes all the way to the top. Yes, it would be better if we had metal zipper stops, but we didn’t… so hand stitching worked!
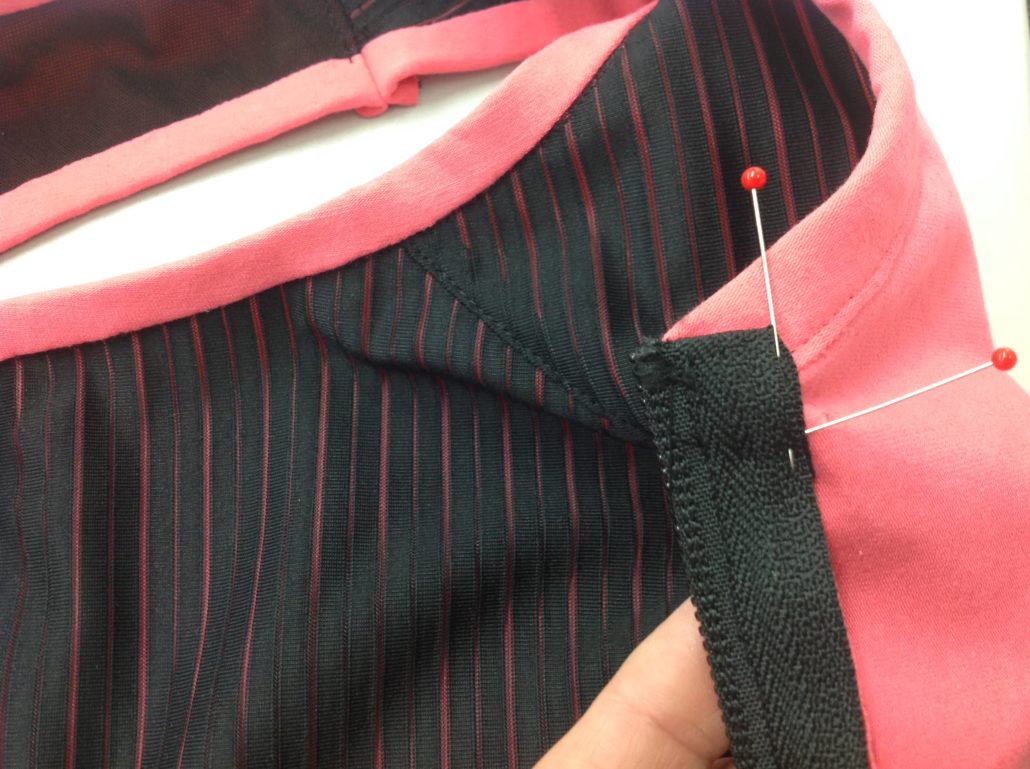
The zipper is then topstitched to hold down the zipper tape to the fabric. We hand-stitched the section of the zipper that runs across the coral binding as we did not like the black stitching on the coral. Finally the side seams are sewn. Our sports bra hack is finished!
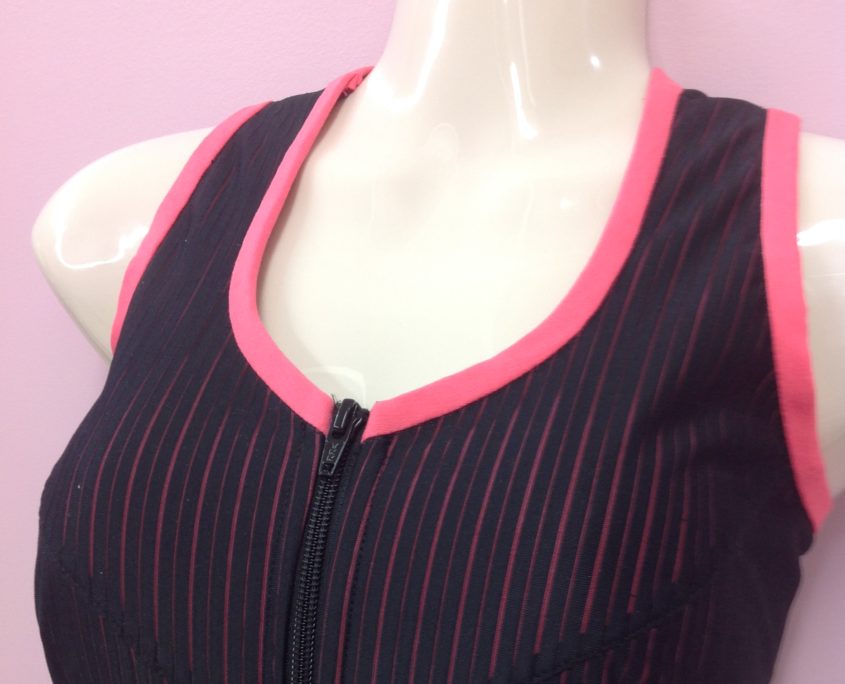
Here’s our finished Kerri hack! Presenting the back…
and the front…
We hope you have enjoyed this sports bra hack! As always, we welcome your comments!
Your Fairy Bra Mother,


I have the Kerri pattern and took a chance on a search to see how to add a front zipper…and voila! Thank you so much for such a detailed, yet simple demonstration. I have a serger/coverstitch combo machine and don’t often use the CS function. How would I use it in this pattern? Would I need a special foot? Two or three step? Narrow or wide? How fun to be able to use my machine to put the finishing touches on my new bra!
Thank you so much for all your, ahem, “support.”
You sewed each back piece on the opposite front. The central seam was left for the sides. Often happens. 🙂
Thanks Beverly for this hack! I’ve made several of the Kerri bras and I love them, but I’m having problems with hooking them up in the back due to arthritis in my hands. So I’ve been meaning to add a zipper to the front. I am definitely going to use these hacks on my next one and post pics.
Lovely!
Thanks for the post! I have one question about attaching the binding. I was planning on using supplex. Do you stretch the binding like one normally does with knits or is it a 1 to 1 ratio with the bra?
I pull stretch fabrics only enough to “show them who’s boss” Not too much or you will make gathers happen!
What a timely post! I have been so pleased with the wickaway cotton as sports bra lining. Coverstitch machine is getting tuned up for the new year. Will be sure to use this as inspiration for my next sports bra.
Thank you so much for posting the details on the Kerri sports bra hack! I love how it looks, especially the zipper, which is a feature that is a “must” for me. This is a wonderful holiday gift – thank you!
There are lots of ways to use an existing pattern to improve its functionality. A zipper is just one way!