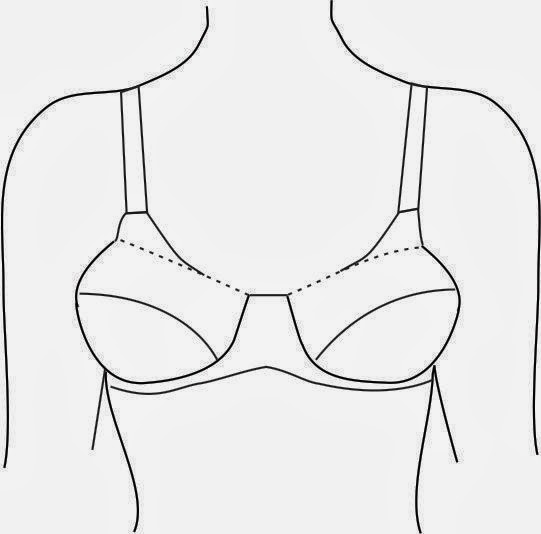
To use lace edging on the upper cup on the Classic or the Linda Bra patterns, there’s a bit of modification you need to do. The Classic and the Linda both have a strap tab extension area on the shoulder side (which is where you attach the strap) and the top edge is slightly curved. Here’s a drawing of what a strap tab extension looks like.
You will need to straighten out the top edge of the bra in order to accept the lace. Here’s how to do it. Trace off the upper cup pattern piece. It doesn’t matter which one you use. Either of the partial band or the full band cups will work with lace edging. Mark the seam allowance along the neckline edge. It will be 3/8” (10 mm) down from the top edge as shown.
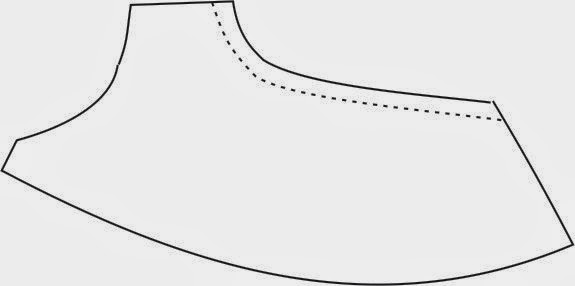
Draw a straight line starting at the centre front seamline and extending to the underarm edge. It can be drawn roughly parallel to the existing neckline edge but if it is a little higher or lower than the neckline, don’t worry about it. What you are looking for is a straight line on which to position the lace.
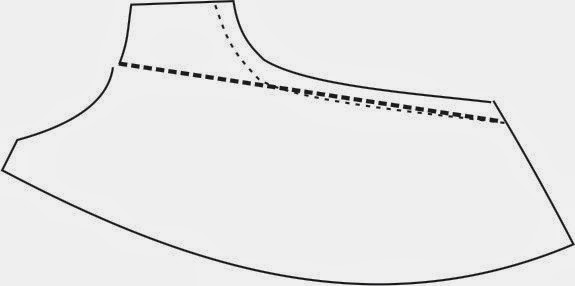
This drawing shows the position of the lace edging on the upper cup pattern piece. I like to start a lace repeat (the deepest section of the fancy edge) in 1/4” (6 mm) from the edge of the cup at the front. Sometimes if I am lucky, I can make the lace dip at the seamline of the underarm edge as well. If your cups are small, you are ready to cut out and sew the bra.

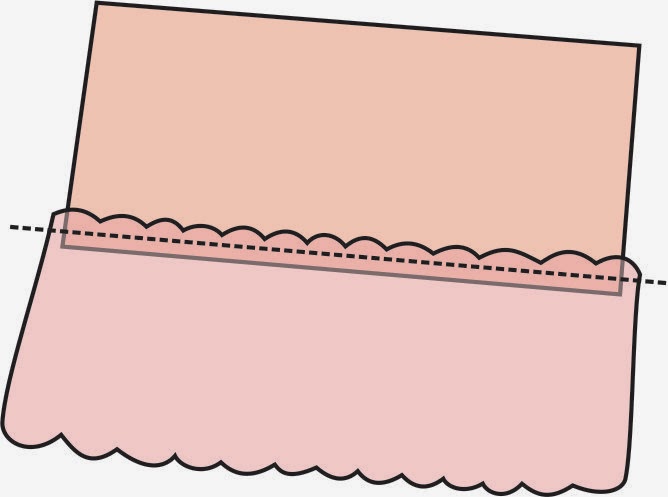
However, if your cups are larger (or if the lace is a bit itchy-feeling), line the upper cup with 15 denier sheer fabric or sheer cup lining. This will help stabilize the lace so the tension from the straps won’t destroy the lace. Lay the lining face up with the lace edge also face up, overlapping the lining by 1/2” (12 mm) as shown. Stitch with a straight stitch through both layers. Turn the sheer lining to the wrong side of the lace and press. The raw edge is now hidden and the neckline edge is stabilized.
Lay the upper cup pattern piece on the sewn fabric and cut out. Once the cups are cut, you can baste the edges of the lining to the cup all around, using a longer length straight stitch.


Yes. Thanks. I think I understand. Though I may need another set of rings.
The elastic is always sewn with two passes of the machine. Once you are finished the first zig-zag on the top edge (underarm edge) leave a tail of elastic about 2" long. Then thread it through a ring. Fold the elastic back on itself and snug the ring up to the lace edge so you really can't see much of the elastic. Then sew the second pass of a zig-zag or three step zig-zag. This will catch the elastic tail and secure it. The ring can then be used to attach a tube strap or an elastic strap to it. The denier lining helps prevent the tension on the strap from damaging the lace.
Hope this helps!
Hi Beverly. Thanks for the tip for a lace upper cup. Without the strap tab how do you attach the strap to the upper cup? Do you put the elastic on the neckline edge of the strap before attaching it to the cup?