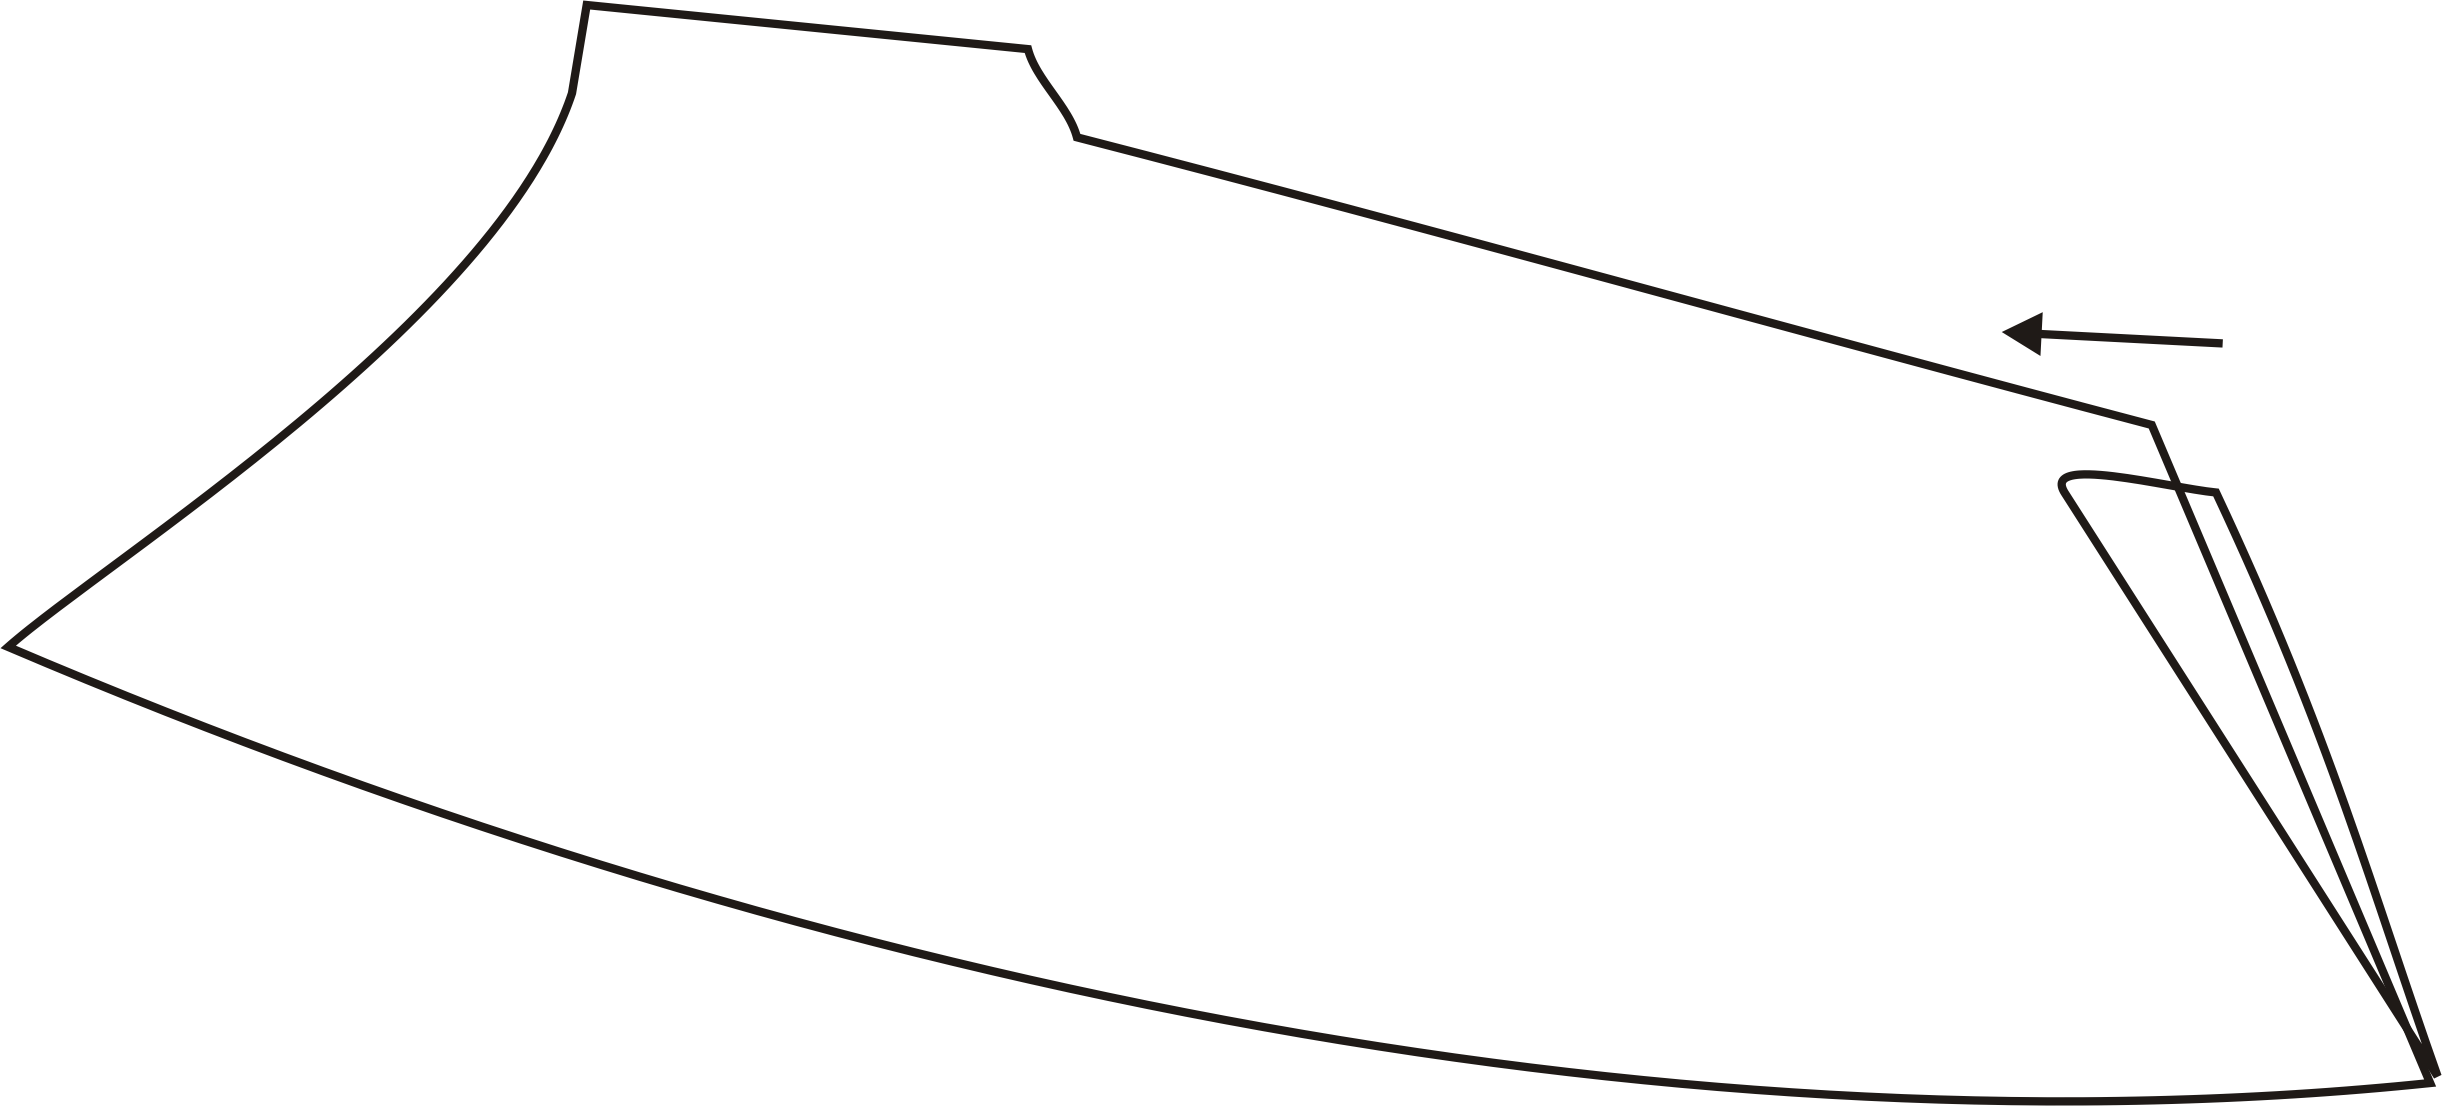
I like to make up words for my students so they remember the technique associated with them more easily. (Do you remember what DoGS means?) So when it comes to fitting bras, it’s no different. So lets’ talk about Almonds and Bulges…
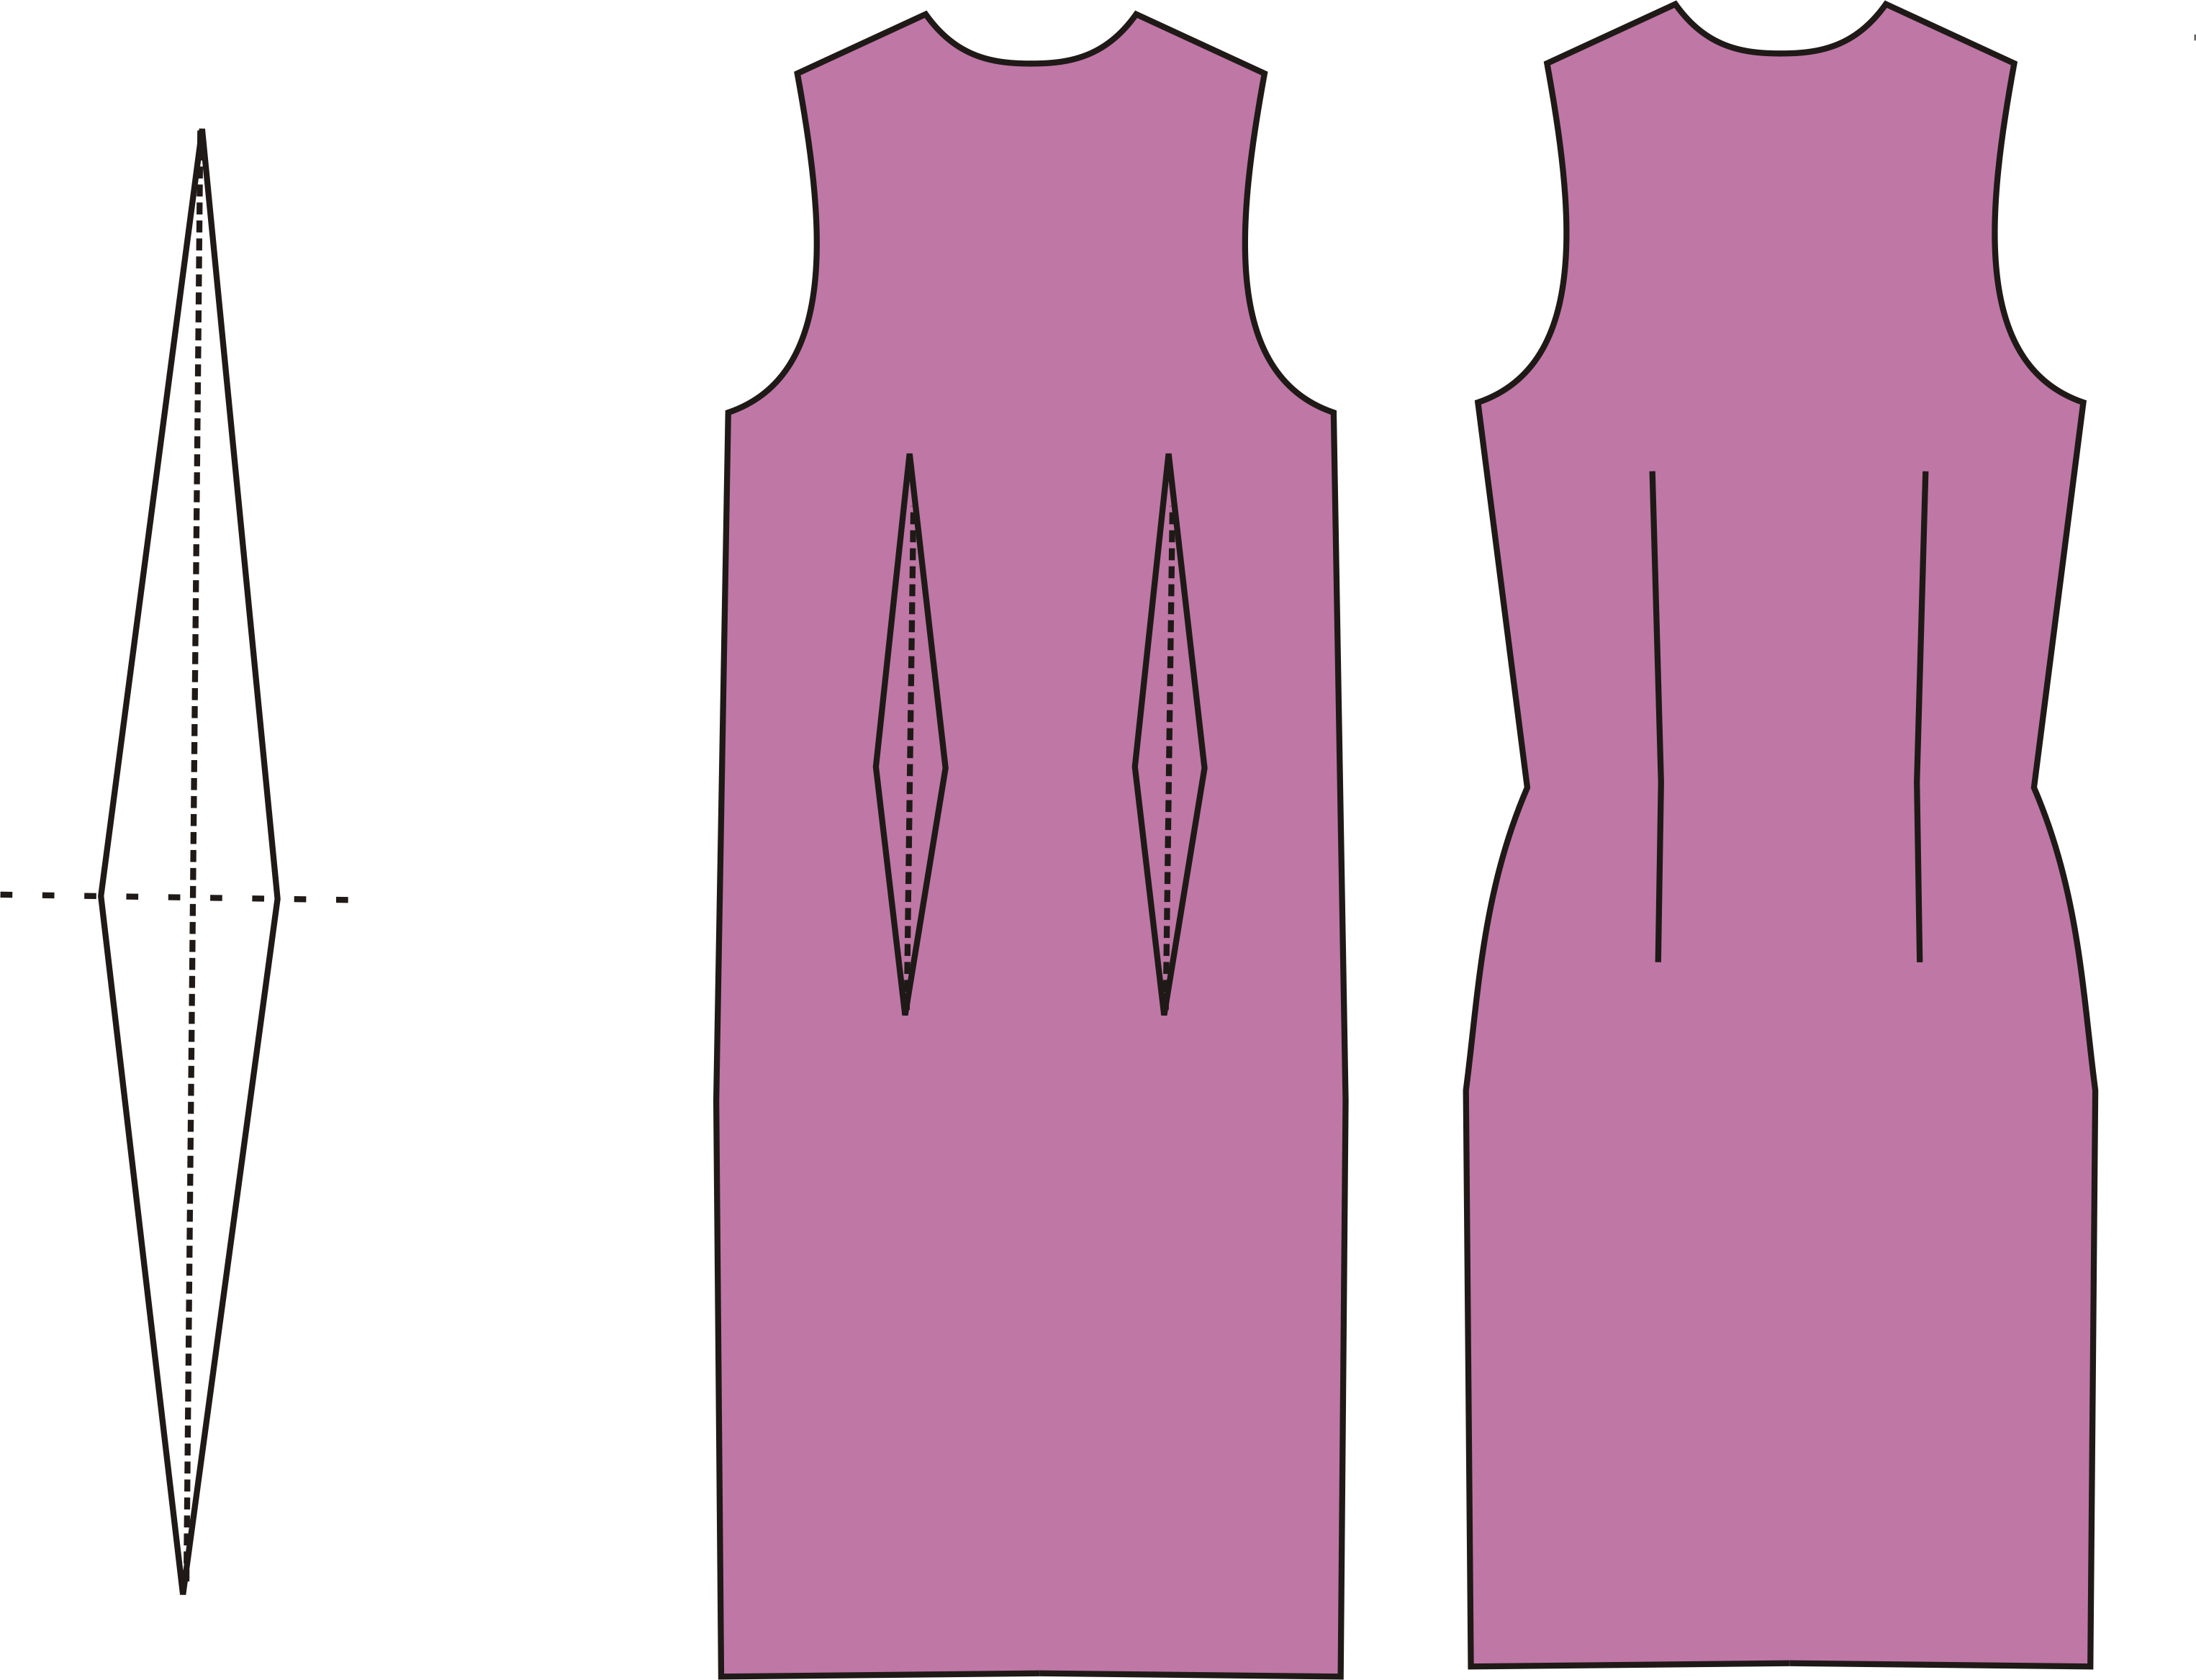
In dressmaking, when we need to remove fullness, it is called a Dart. You seen and sewn a LOT of these, I expect. There are darts to shape the fabric around the bust, and the hips and on the back shoulder seam and sometimes in the sleeve at the elbow.
You may have even used a double ended dart on garments that cross the waistline, such as a sheath dress or a long blouse. Those darts are there to remove fullness at the waistline. Without the double ended dart, the dress would hang straight up and down. The double ended dart shapes the dress at the waist but returns the width to the original at the hip and bust area.
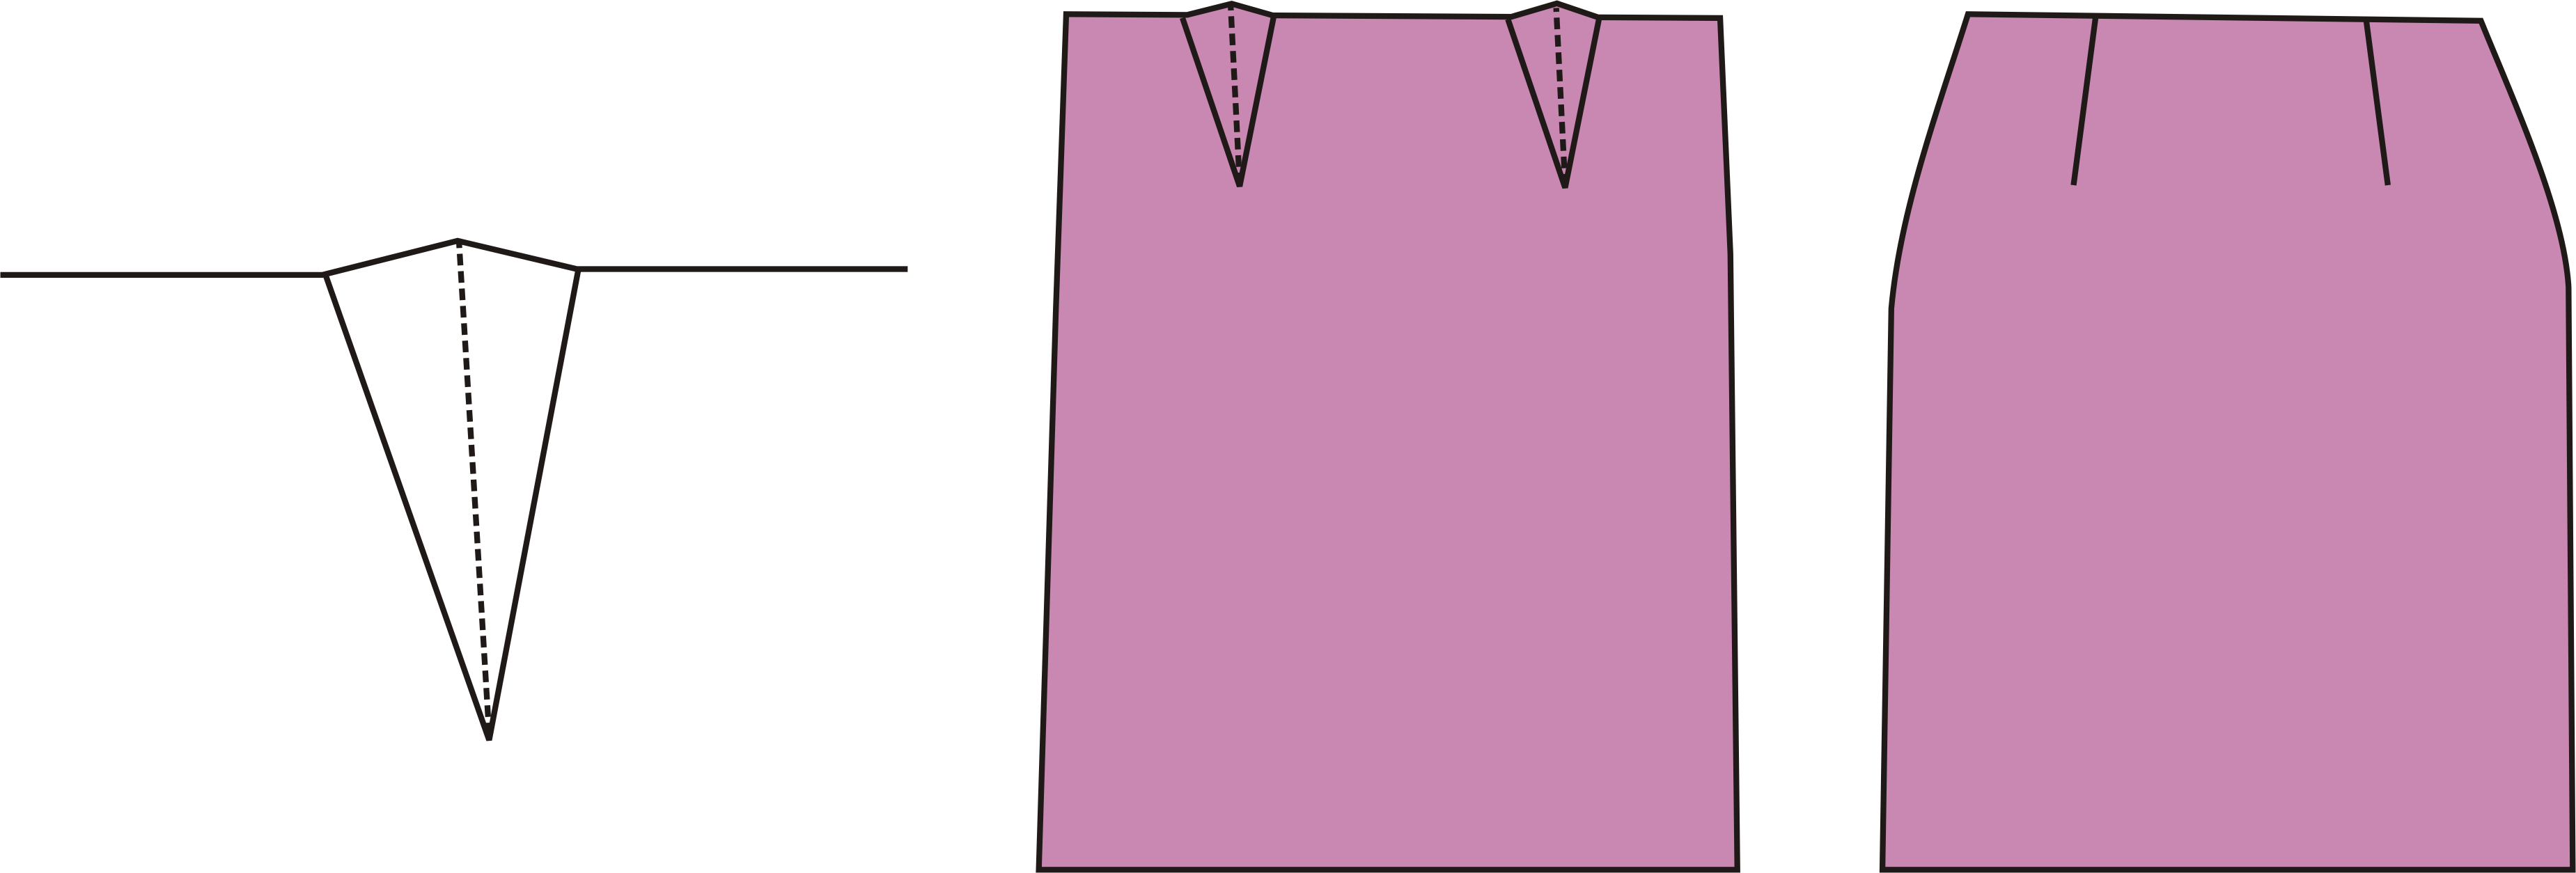
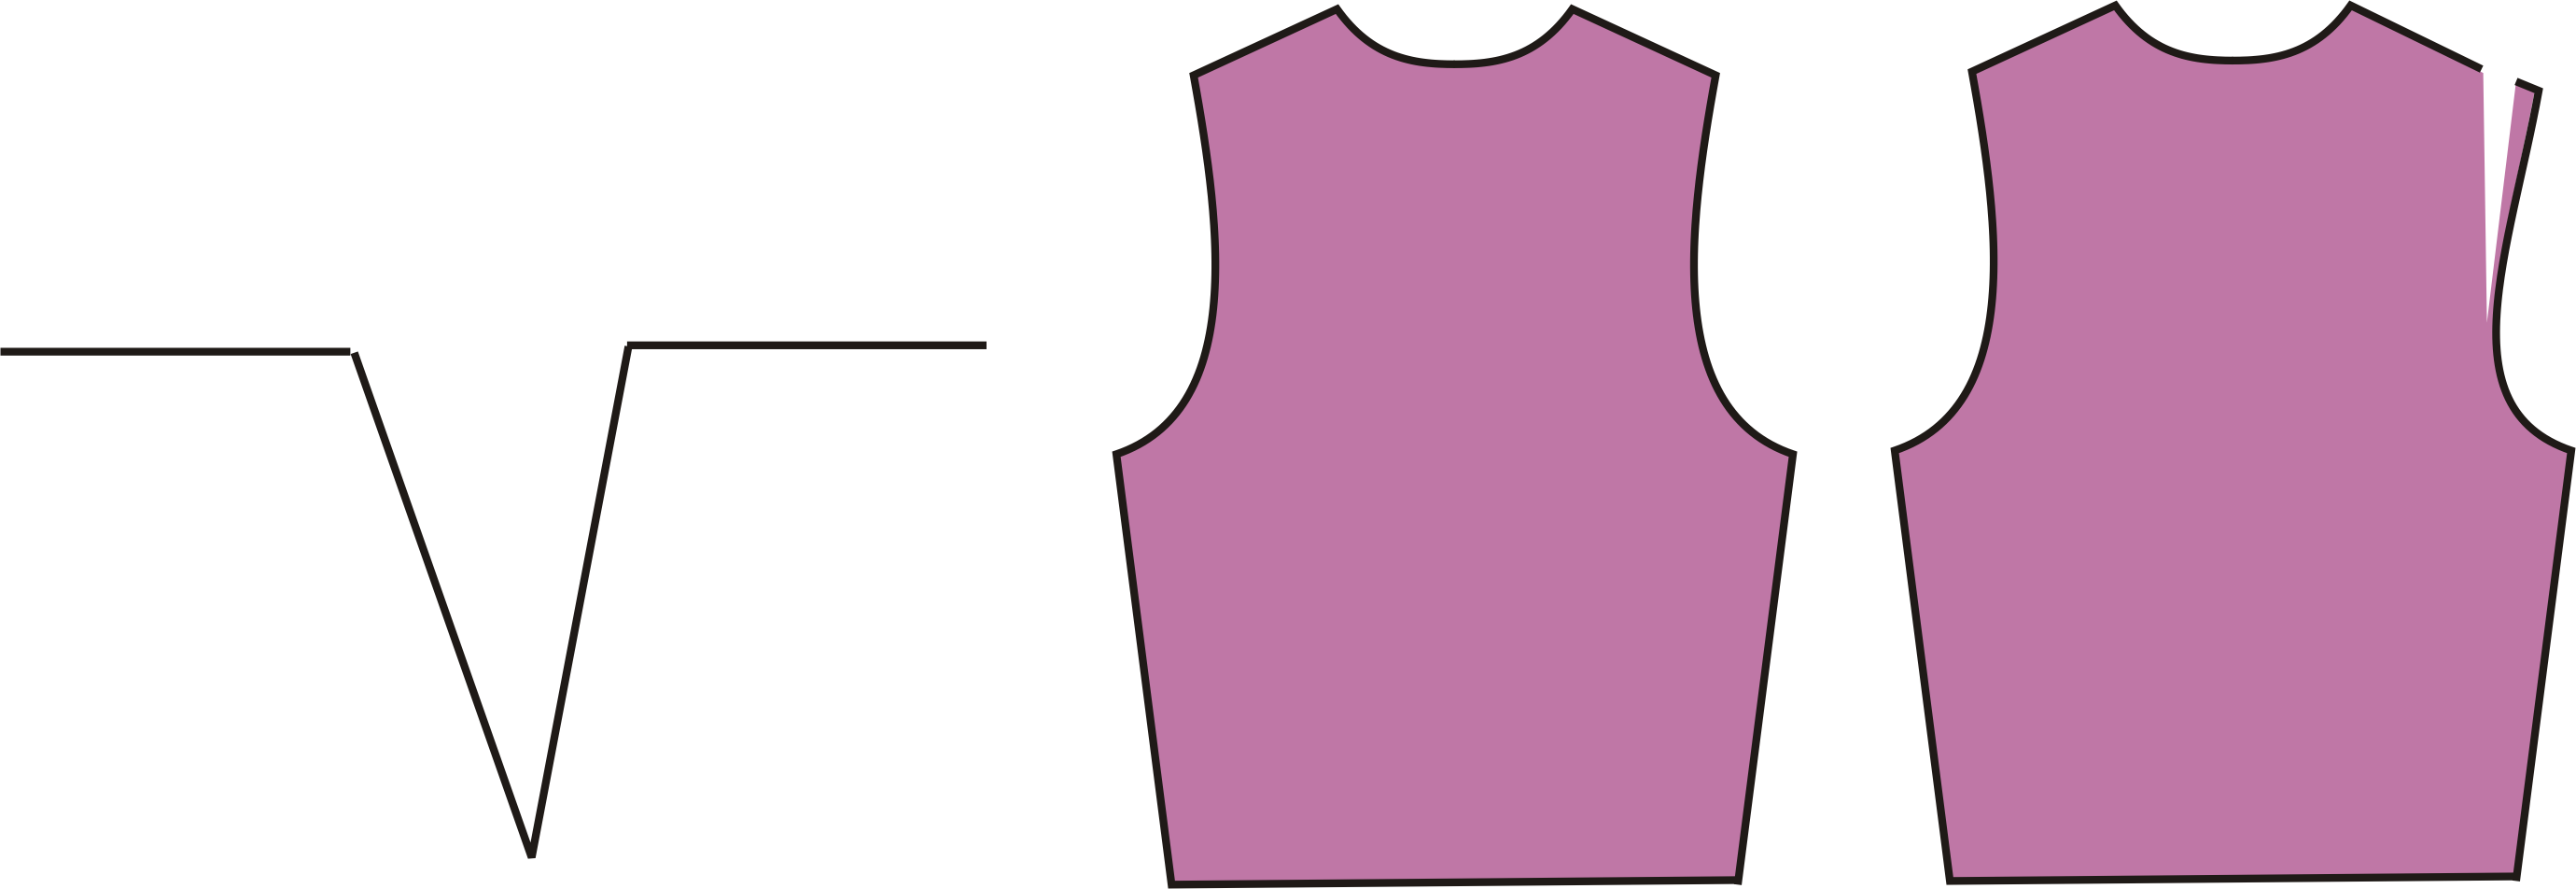
The opposite to a dart is a Wedge. A wedge adds fullness to an area. You may not recognize them as such, but they are there. We normally don’t call them wedges in garment making. Whenever we have to add width, for example to make the shoulders wider we are really adding a Wedge. We split the pattern, and move part of it away from the rest of the pattern to add width.
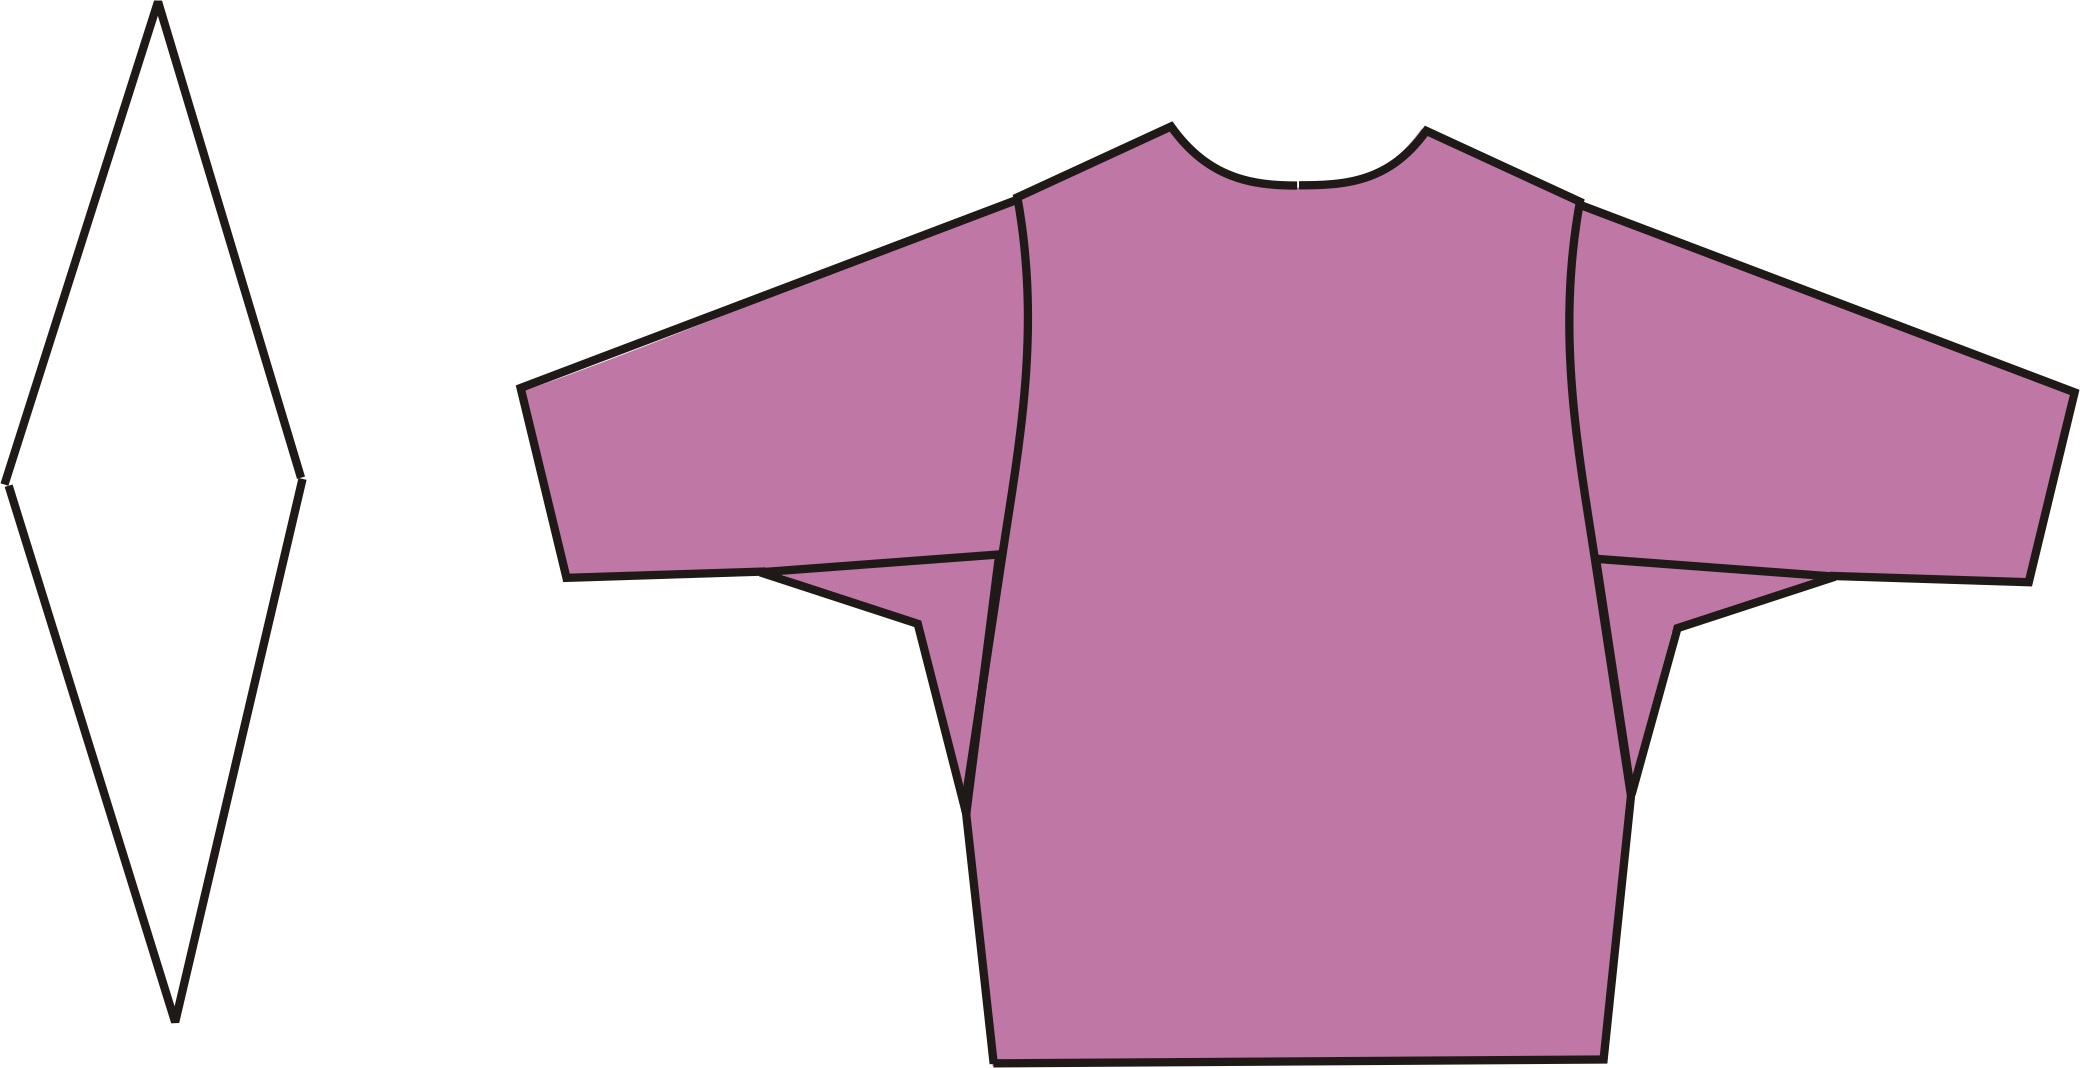
Is there a double ended wedge? Yes, there is, and you may have sewn one. it’s called a godet gusset. A gusset is likely to be used in the underarm area of a top with tighter sleeves, in order to give room without being too obvious. A gusset is the opposite to a double ended dart- it adds fullness to the interior of the garment rather than take it away. That extra fabric piece has to be sewn in.
Soooo…what does all this have to do with Bra-making?
We use Darts, Wedges and Gussets in our work too, except I call the Gusset a Bulge, since it more accurately depicts what its function is. Darts, Wedges and Bulges. Those three words tell you all you need to know about fitting bras. (well, there may be a little bit more…lol)
Lets go back to Darts and Wedges for a moment….
Darts
We can use darts to decrease along the neckline edge, the back band, the frame, or to remove extra length along the cross cup seam. You can remember that Darts Decrease (Darts = Decrease)
How can you tell how much you might need? In the case of a dart, it is fairly easy. Use your fingers or a Wonder Clip to pinch out the amount until the cup lays smoothly and the area fits where it is supposed to. You will need a dart that is twice as wide as the pinched amount. Why? Because when you pinch, there is fabric from the fold to your fingertips on each side. If you pinch out 1/4” (6 mm) from the fold of the fabric to your fingertips, then you will need a total of a 1/2” (12 mm) dart.
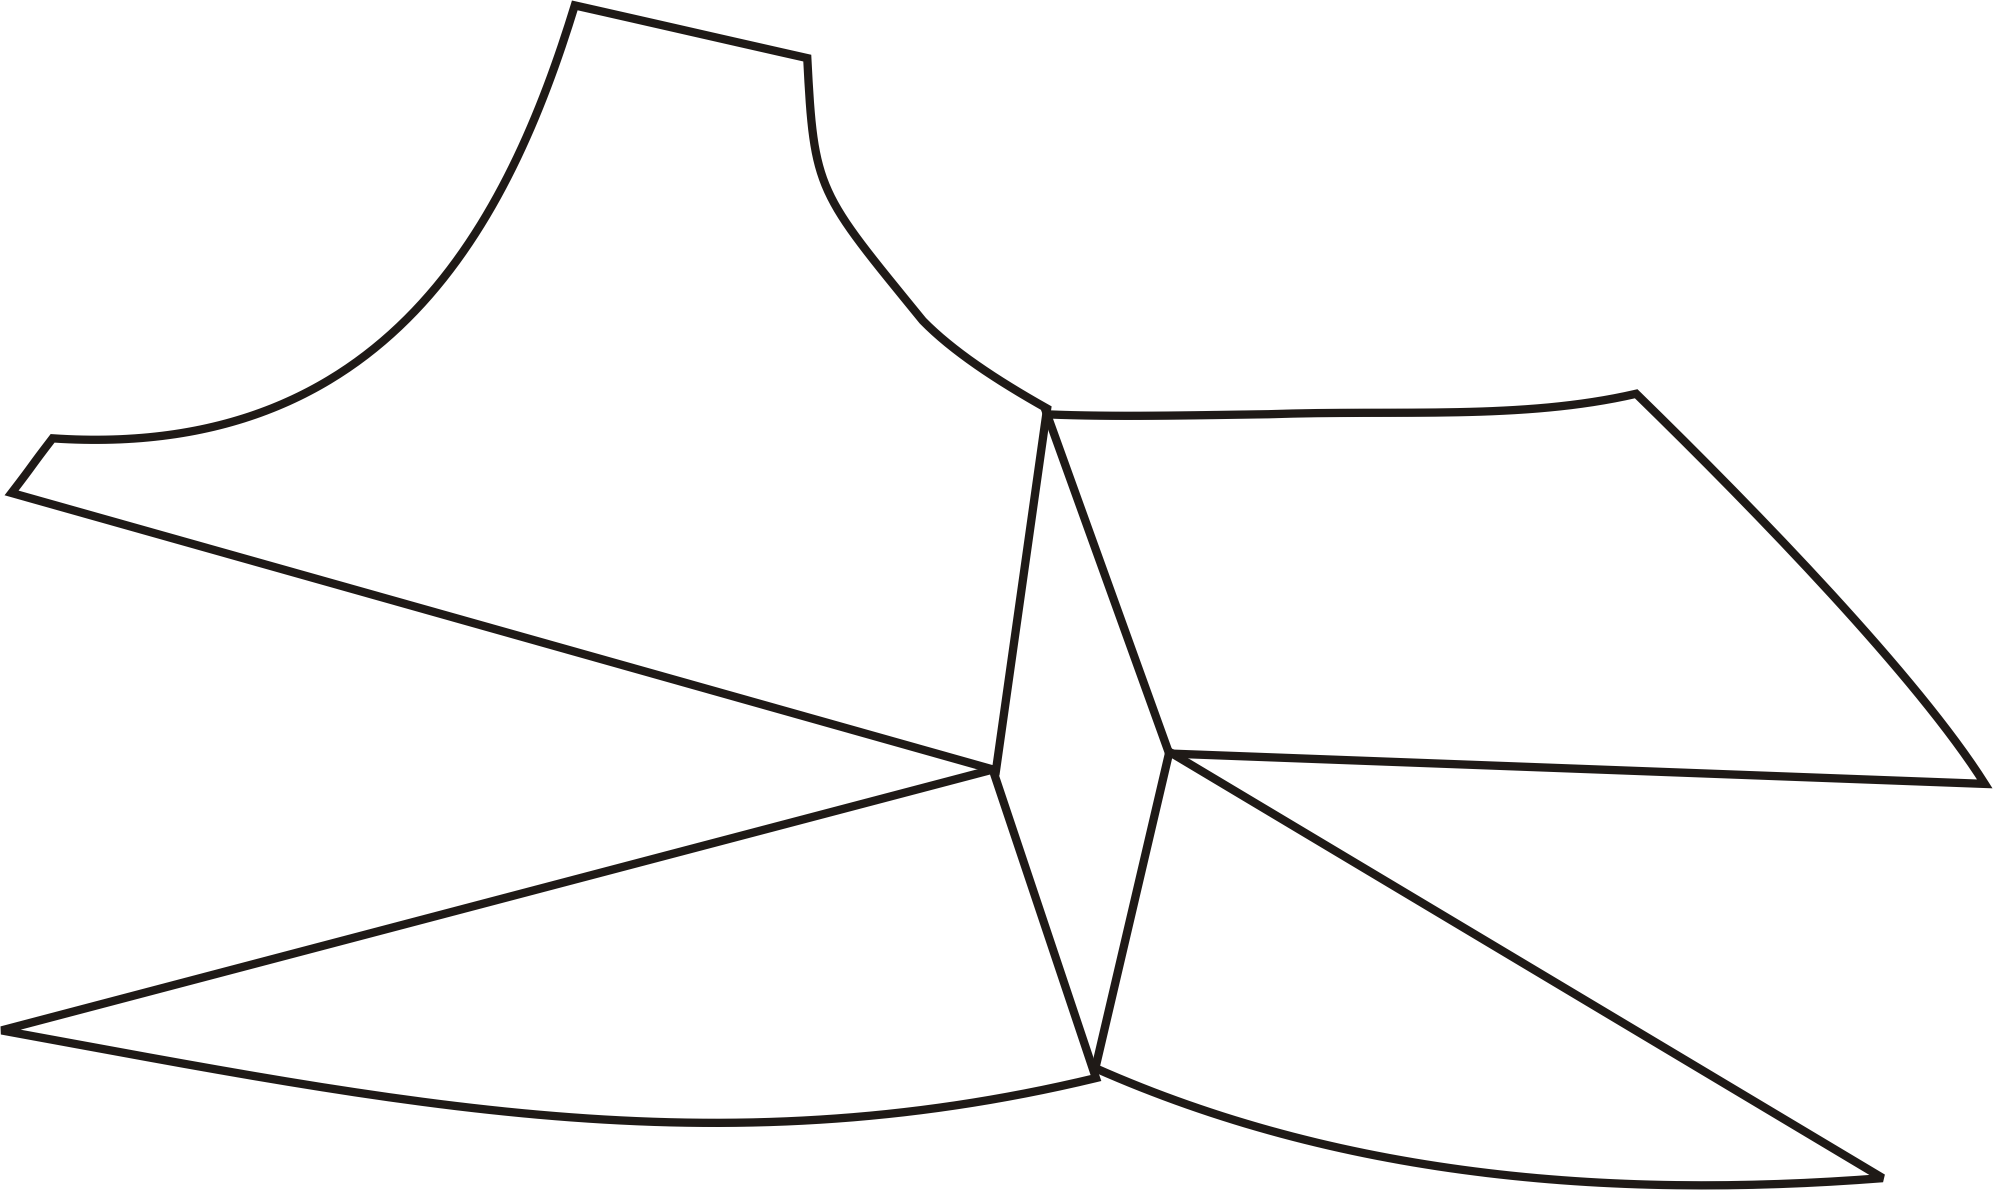
Draw a line from the top of the neckline fairly close to the centre front. Draw to but not through the bottom corner near the cross cup seam

Hinge this small piece over the larger piece of the cup the distance you need and tape it down.
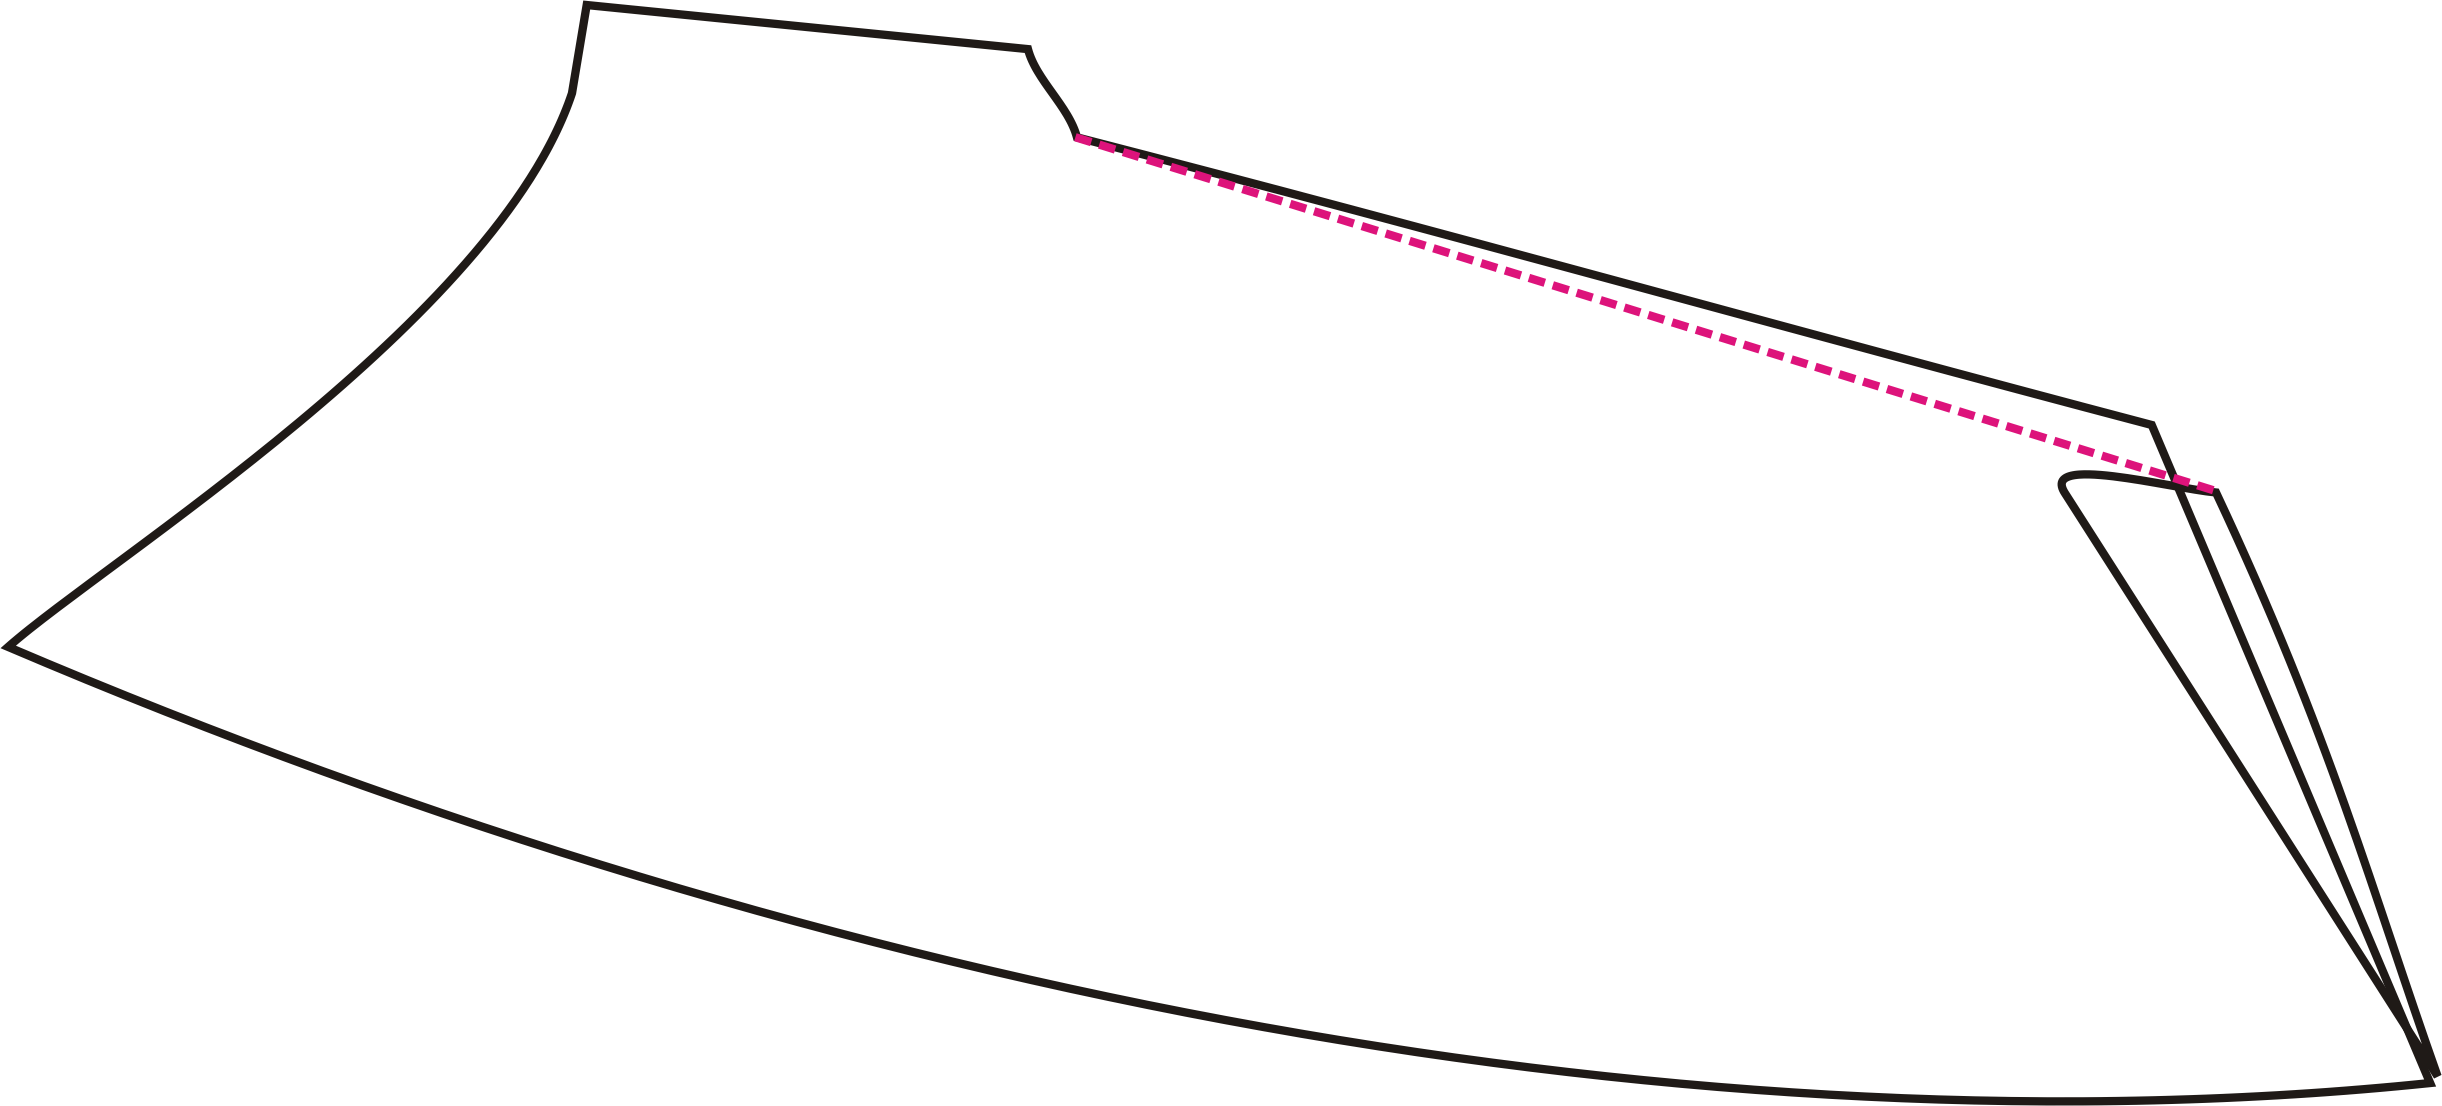
Next draw a line form the known point to the known point. In this case, one known point (one you didn’t touch) is at the CF area. The second known point is at the strap attachment.
Wedges
Use wedges to add length along the neckline edge, to enlarge the cup to accept a wider wire, or to create a downward hike at the back of the bra. Just remember that Wedges Widen (Wedges = Widen)
Unfortunately, there is no real way to accurately measure for the wedge, you have to take an educated guess. So here’s my advice – if the flesh is a little bit puffy over the neckline (in other words, you can push it into the cup easily but when you move it puffs out again), then add 1/4” (6 mm). If it is causing visible creasing across the breast, then you will need 1/2” (12 mm) or more.
Draw a line from the top of the neckline fairly close to the centre front. Draw to but not through the bottom corner near the cross cup seam
Hinge this small piece out from the larger piece of the cup the distance you need and tape it down.
Next draw a line from the known point to the known point. In this case, one known point (one you didn’t touch) is at the point marked A. The second known point is at the strap attachment are marked B.
And now, the Bulges…
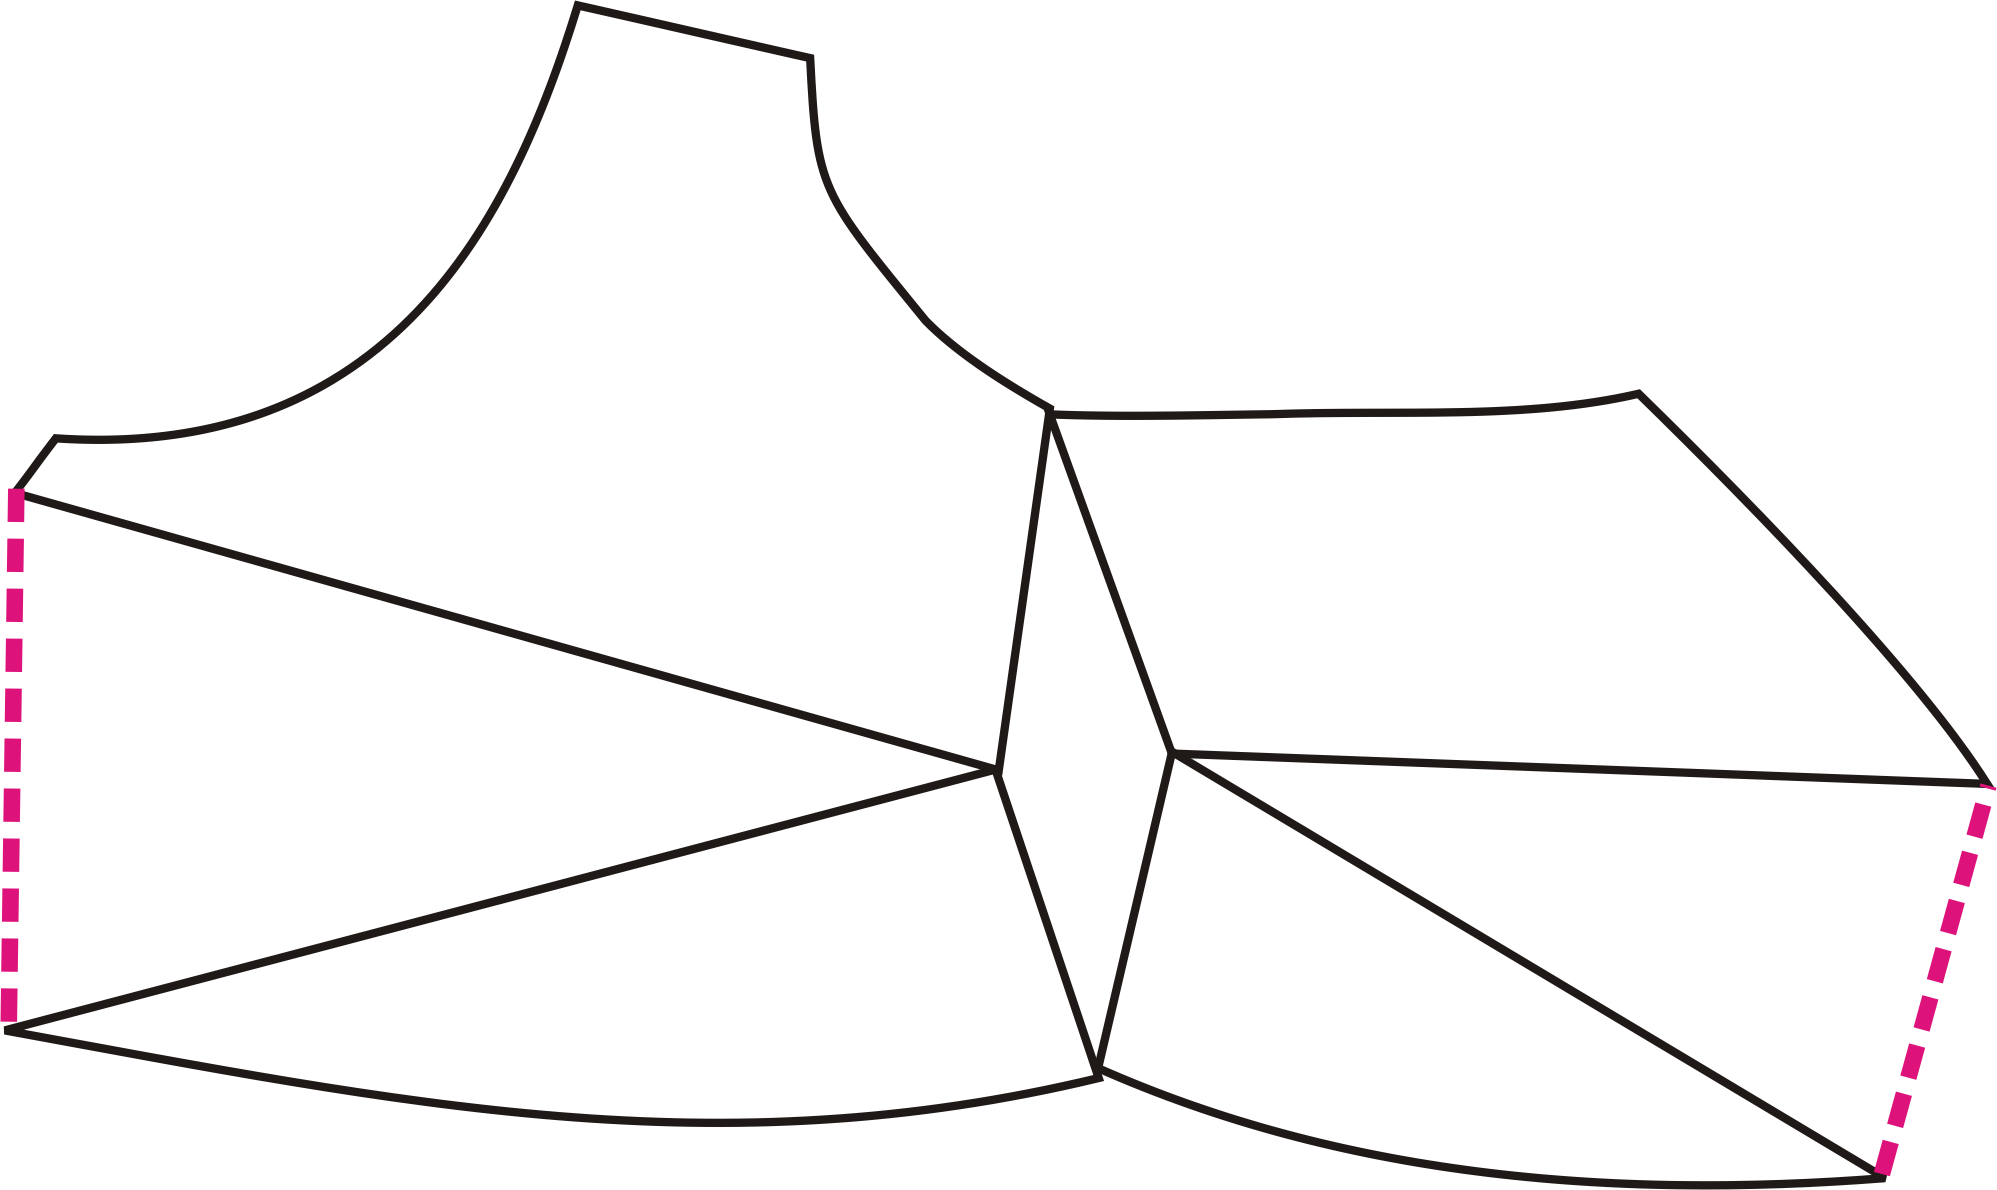
In bra-making, it would be highly unusual (never say never!) to use a double ended dart, but we DO use a bulge, aka a double ended wedge (or gusset) Where do we use a bulge? Anywhere you need to add width in the interior of a bra cup. The most common use for a Bulge is in the lower cup when you get the Dreaded Flat Spot right above the wire line. The flat spot could be due to many things including a wire too large, but the most common cause is not enough width in the lower cup in that area. It’s an easy fix.
Assume you wish you could add a bulge in the coloured area.
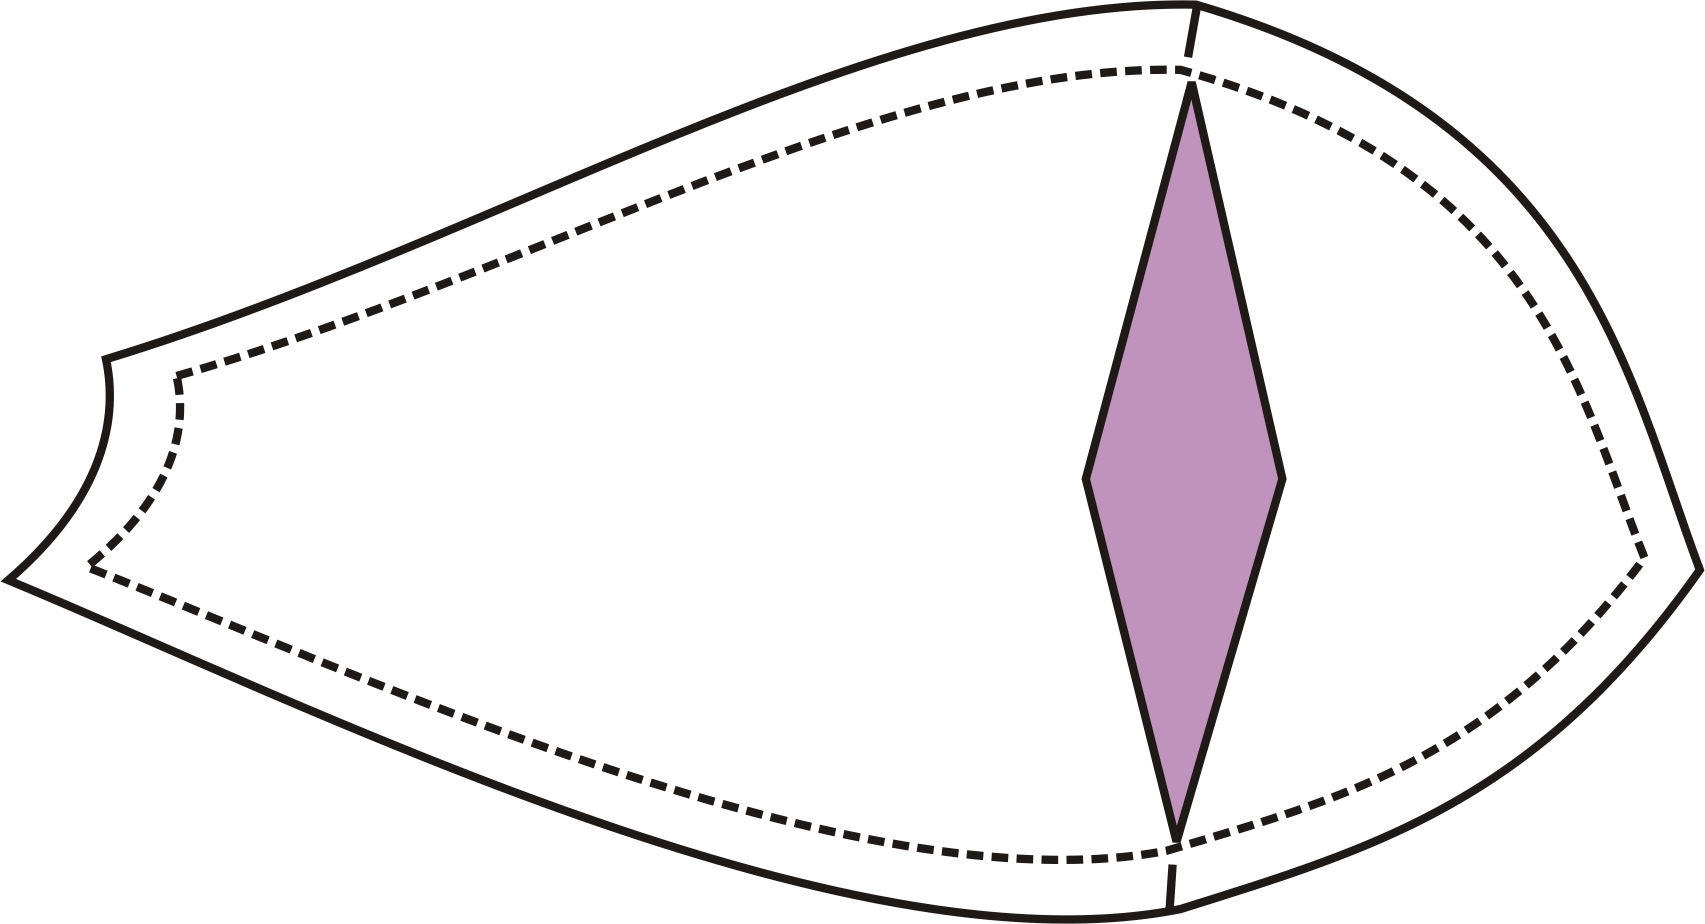
Draw a line from the notch at the apex to the notch at the bottom. It should be more or less parallel to the DoGS
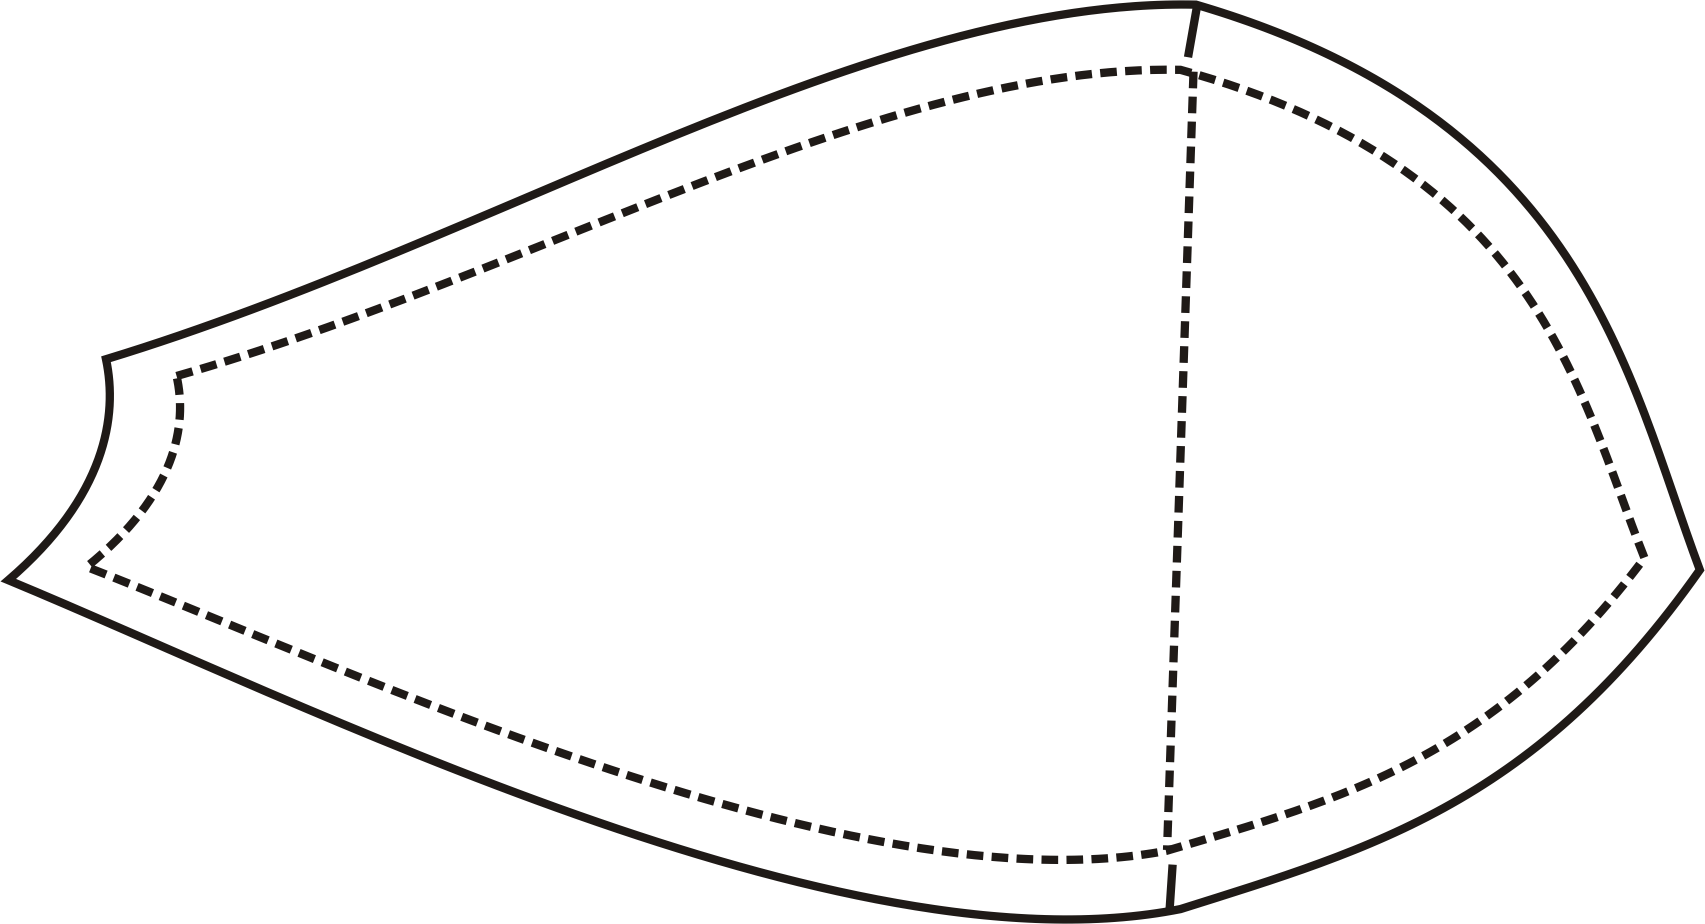
Now separate the two pieces along that line
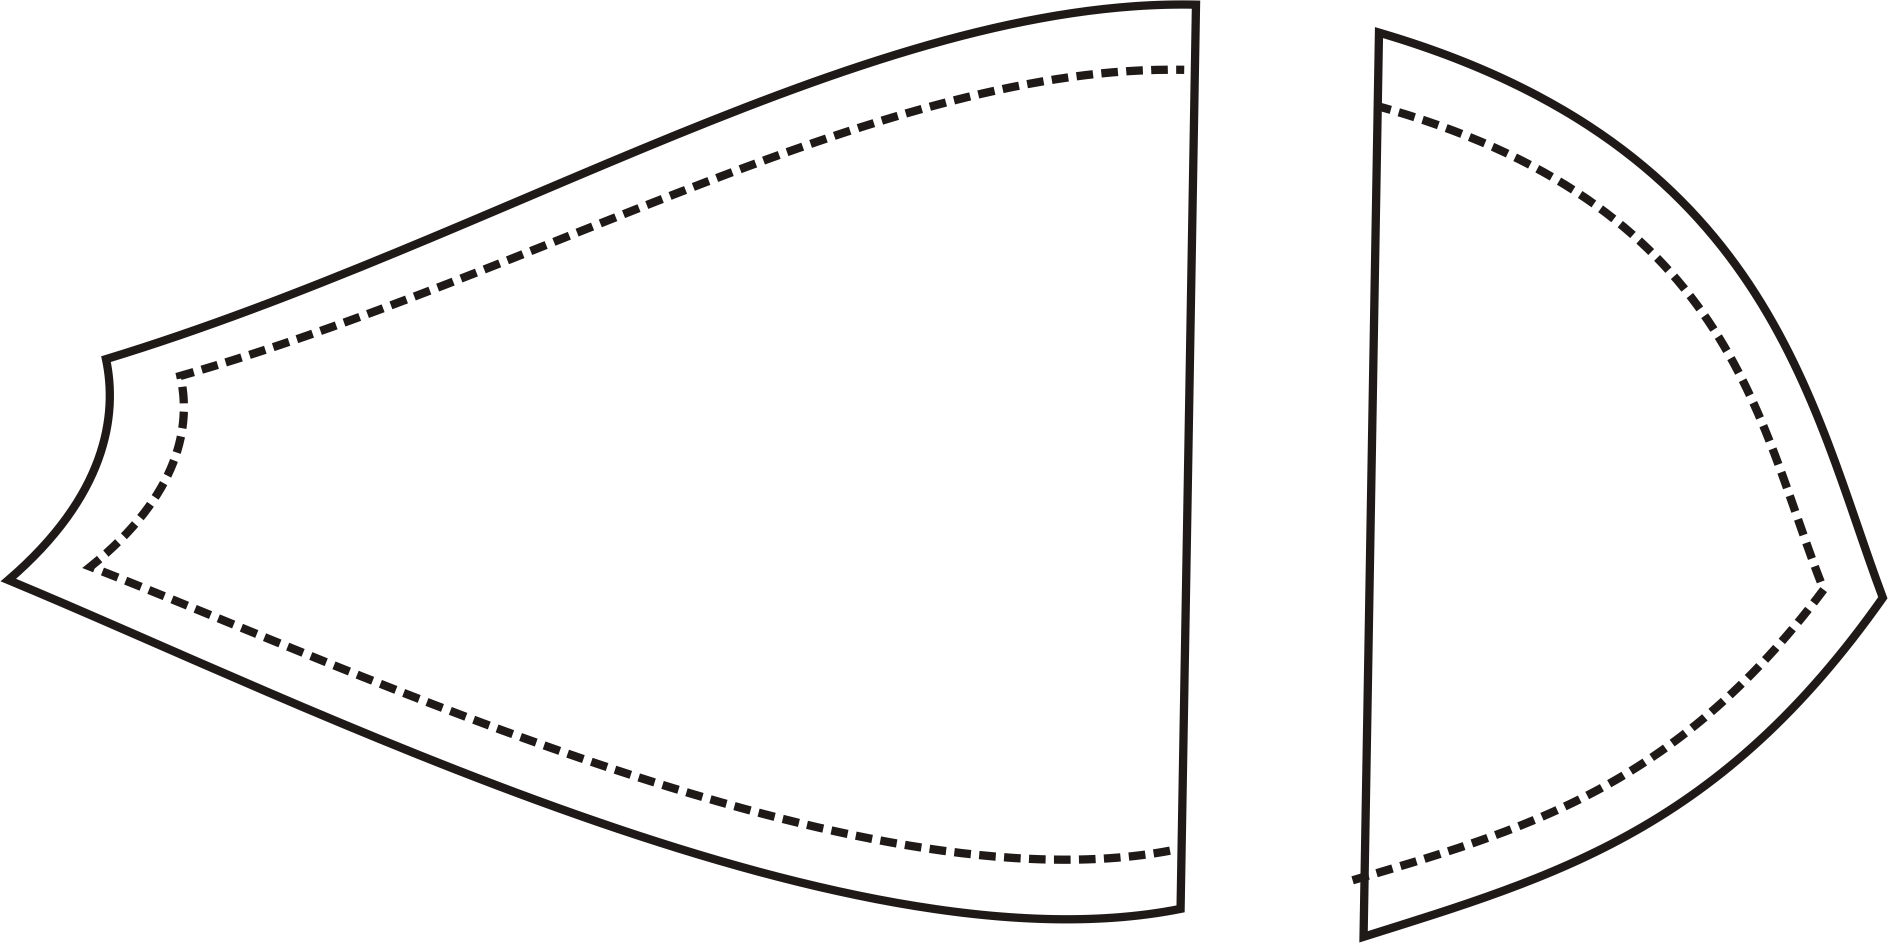
Next we add half of the bulge shown in the drawing above to each side of the split cup.
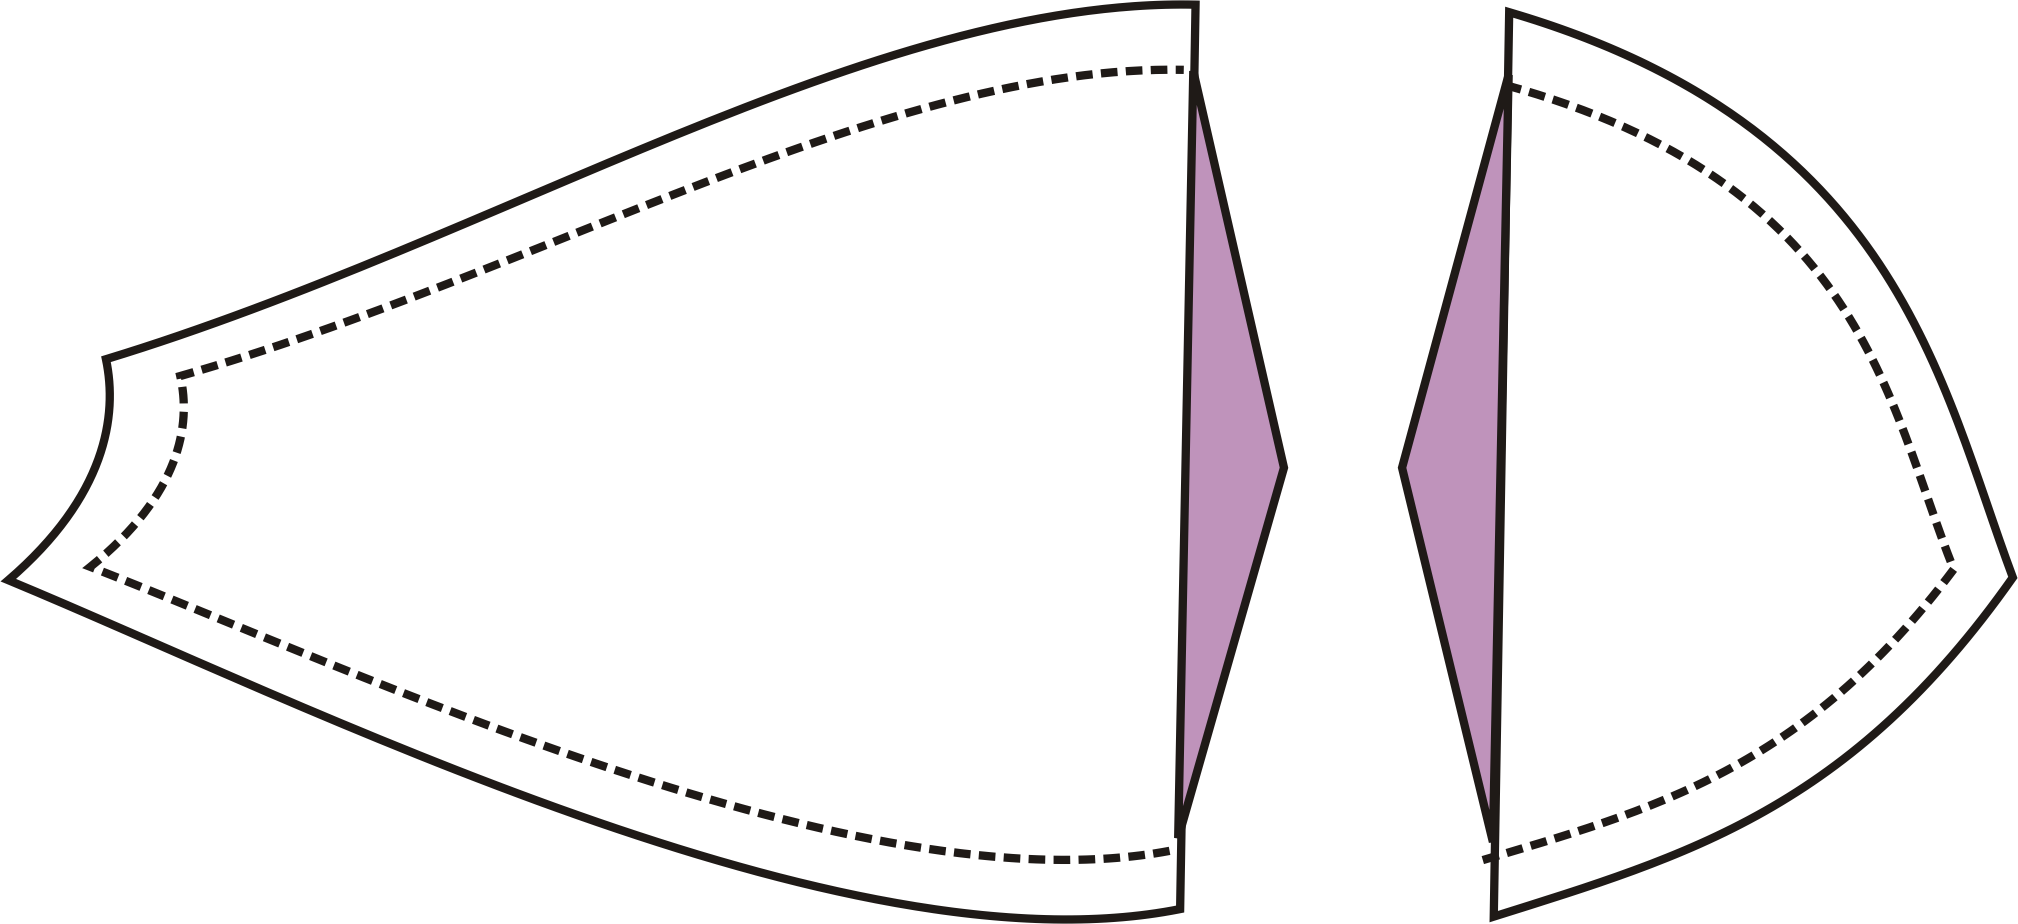
Is it starting to make sense now? But we don’t want angles in the cup. Let’s smooth them out, trying to keep them symmetrical as possible
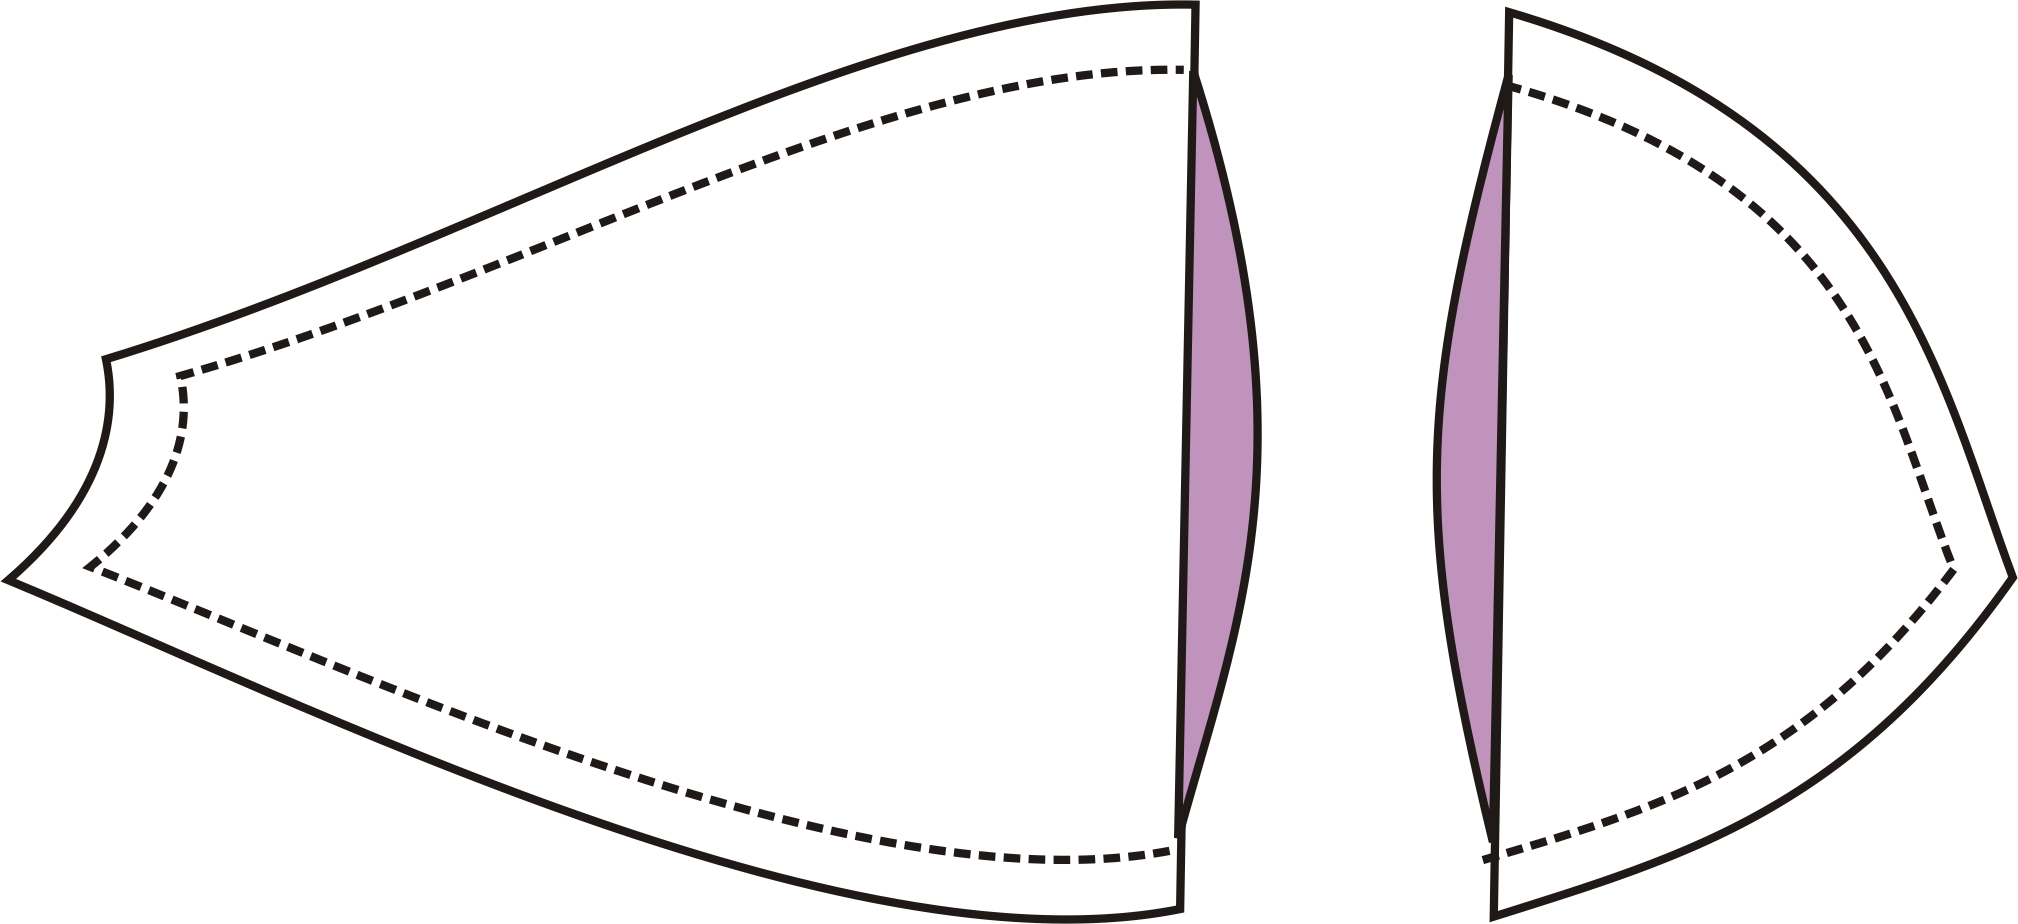
Now we add seam allowances
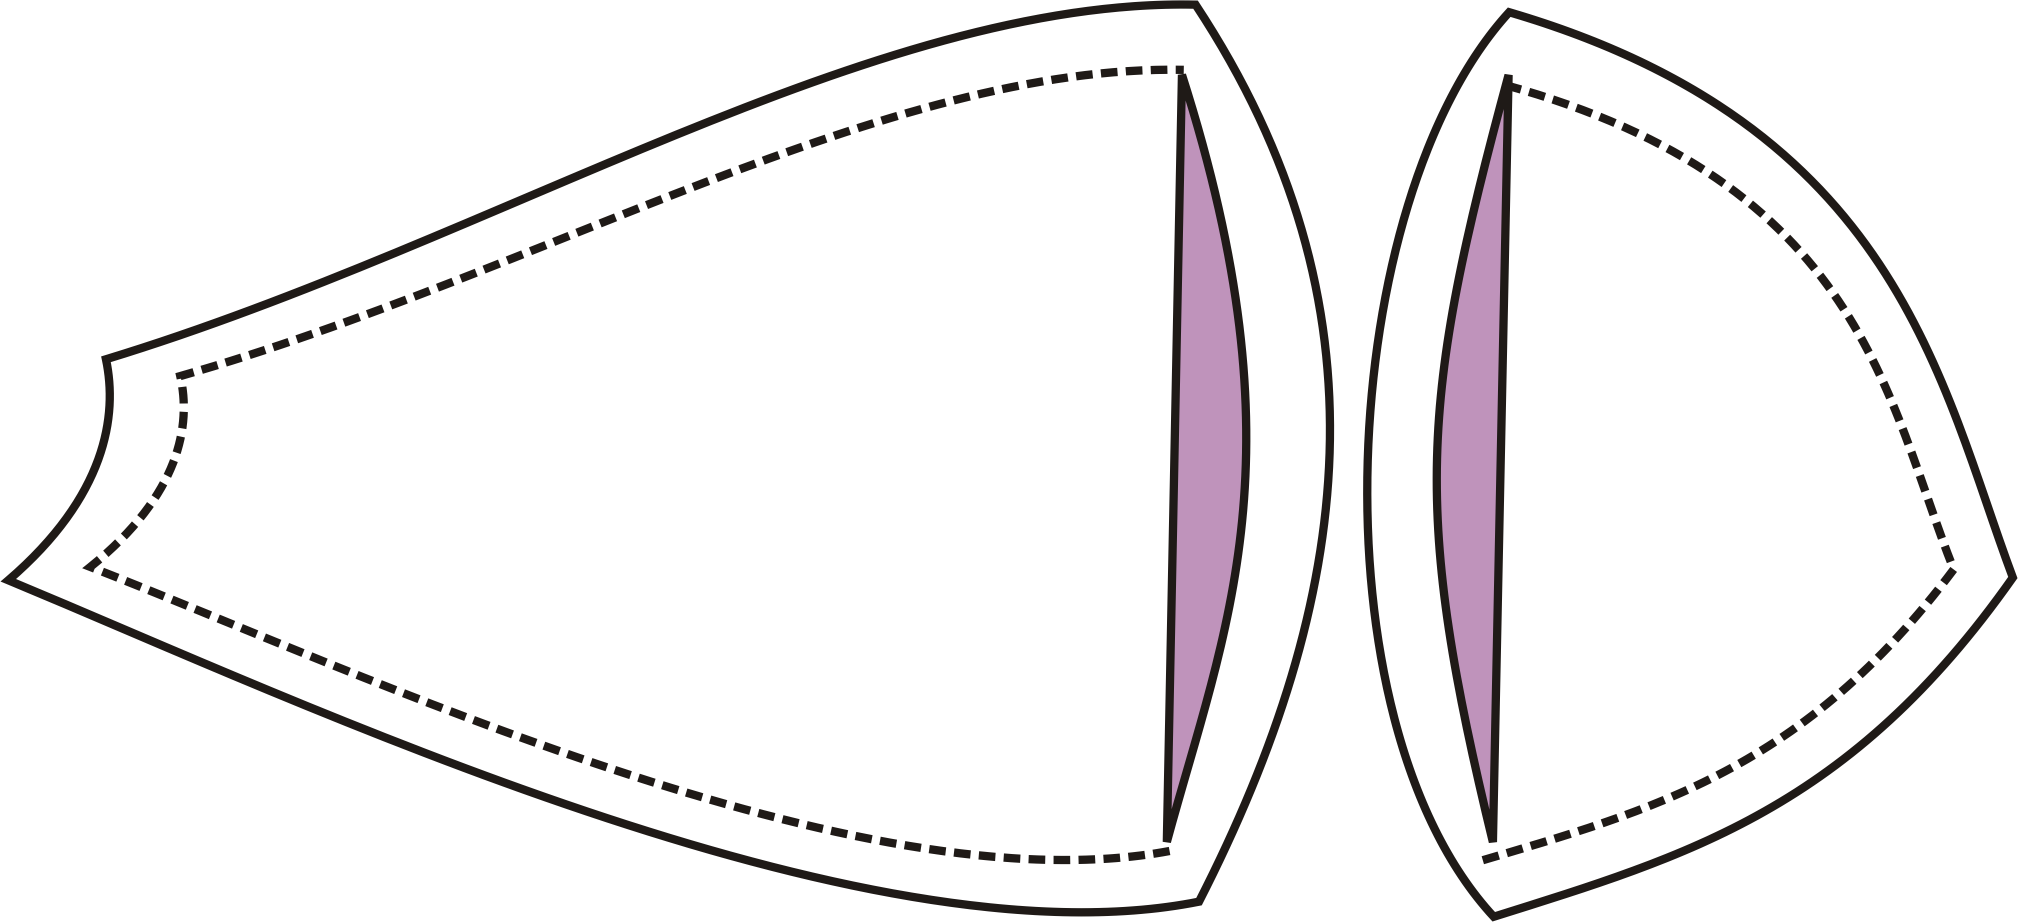
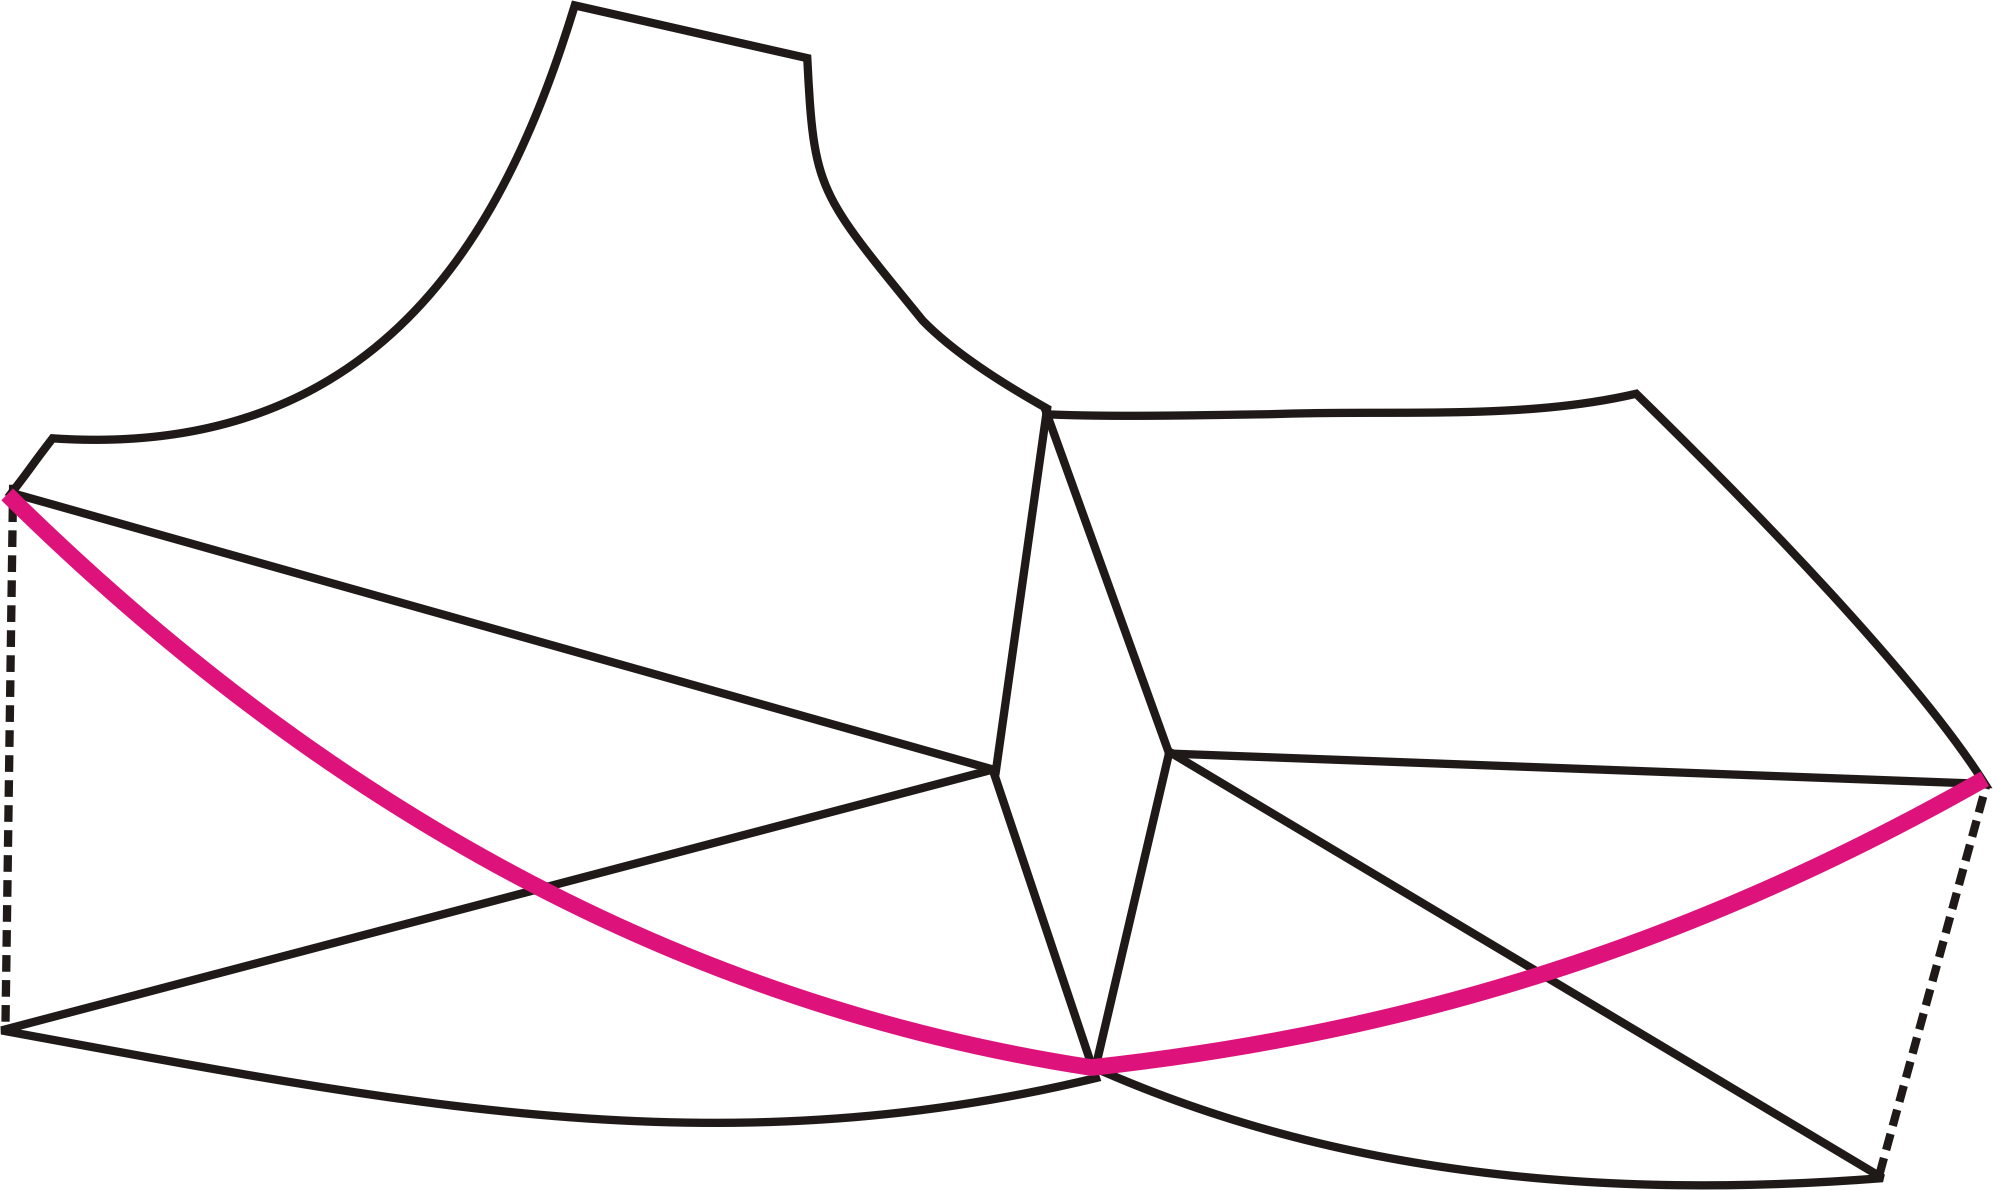
Almonds and Bulges in the Upper Cup
Finally let’s add the DoGS. You want the DoGS in the new pieces to angle toward the apex for the best lift! Now, wasn’t that easy? But what if you want the bulge in the upper cup? Recently in my Craftsy class Sewing Bras: Construction & Fit, I was asked that very question.
“ The frame fits great, but the cups need some work. The upper cup was flattening my breast and squishing it out over the neckline edge. I fixed the problem in the bra itself by Frankenstein-ing the bra by inserting an almond shaped piece of fabric as shown to the upper cup. But I cannot figure out how to transfer that almond shaped piece I sewed in the cup to the flat pattern. It is difficult to know exactly where to put it as it doesn’t seem to fit nicely anywhere. Do you know how I can do that?”
First of all, a hearty handshake to her for going about her fitting challenge in a logical way. By Frankenstein-ing the bra…that’s my term for adding odd pieces or cutting bits out of the cup or band in order to get the fit right, she was able to get the fit of the cup right without having to re-make the bra over and over. And really…once you get the fit of the cup, no matter how odd the bra looks afterward, you are almost to the finish line!
In this case, we need to add extra fullness, so we are going to add an double ended wedge to the upper cup. Here’s how to do it:
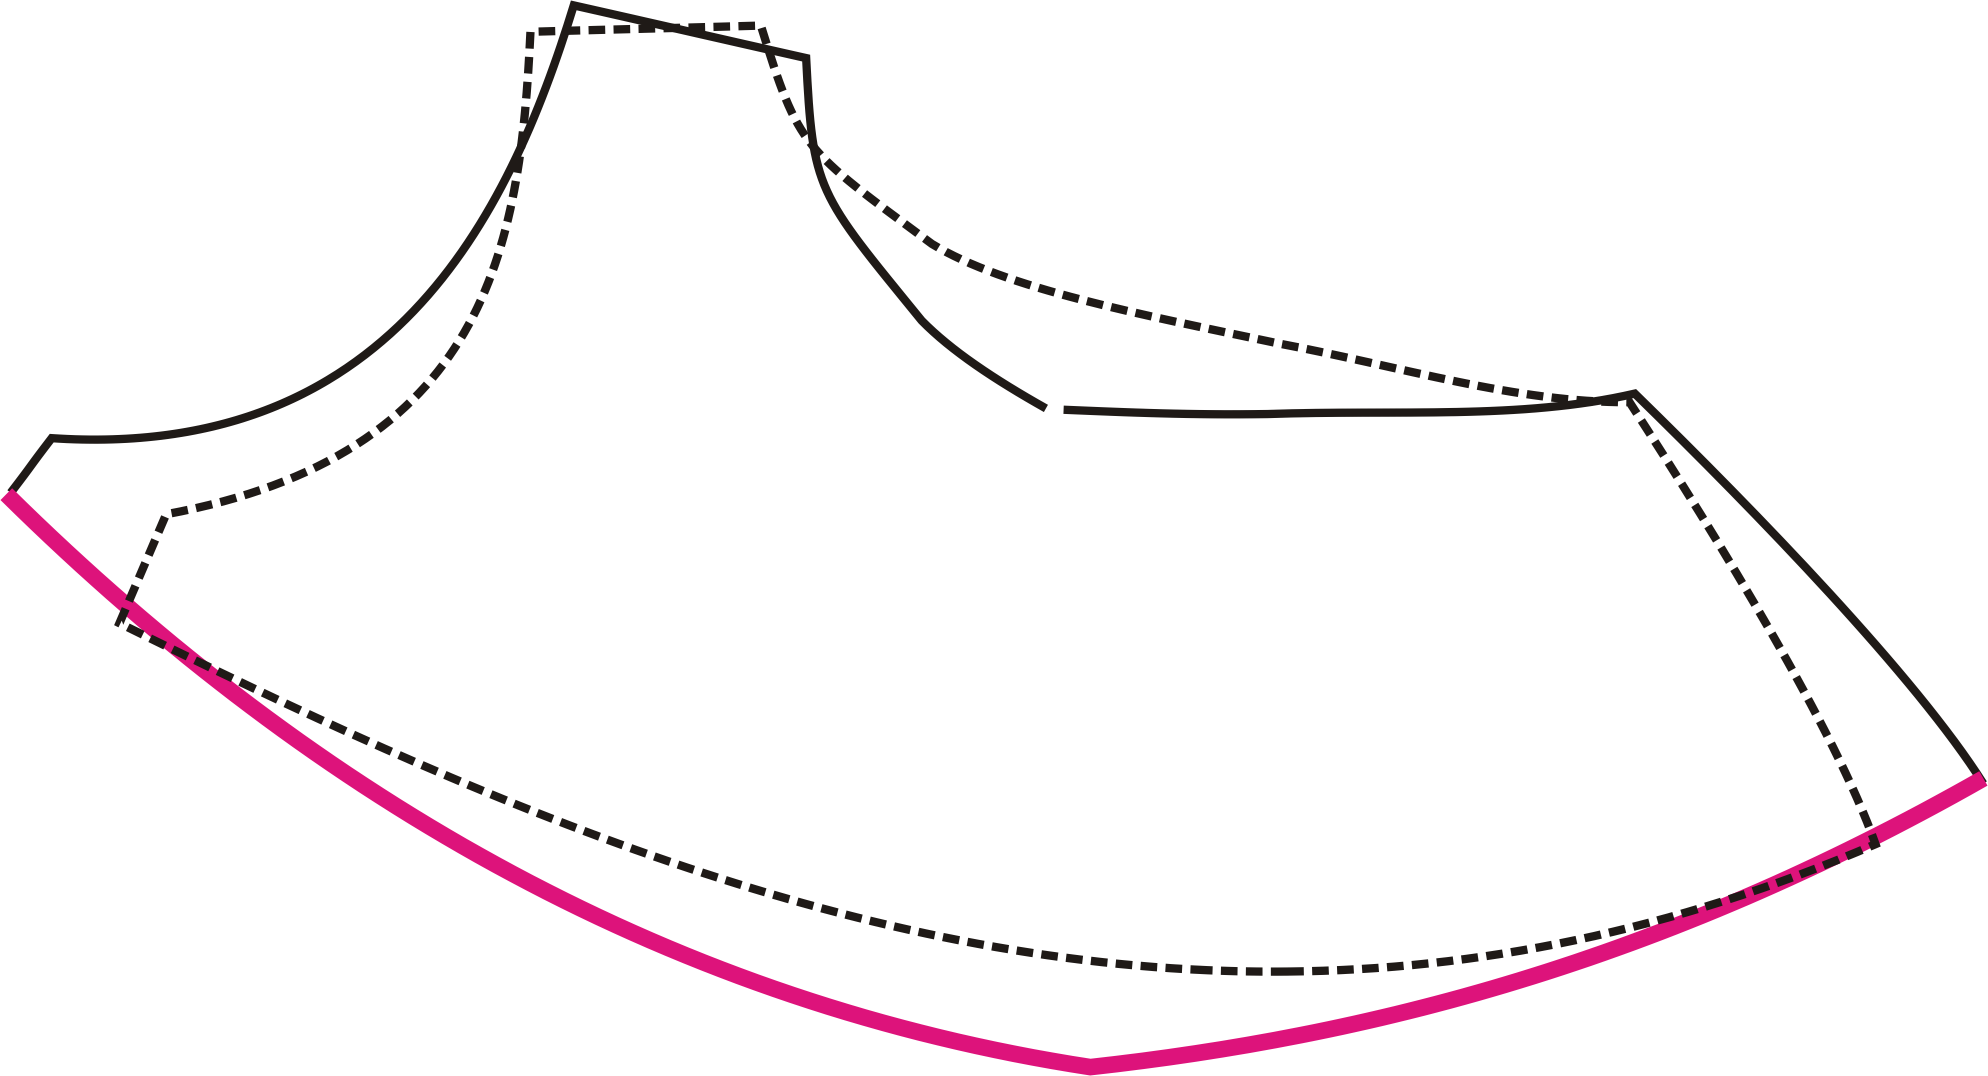
Draw lines through the apex to the neckline edge and also to the bottom points where the cross cup seam meets the wire line at both ends.
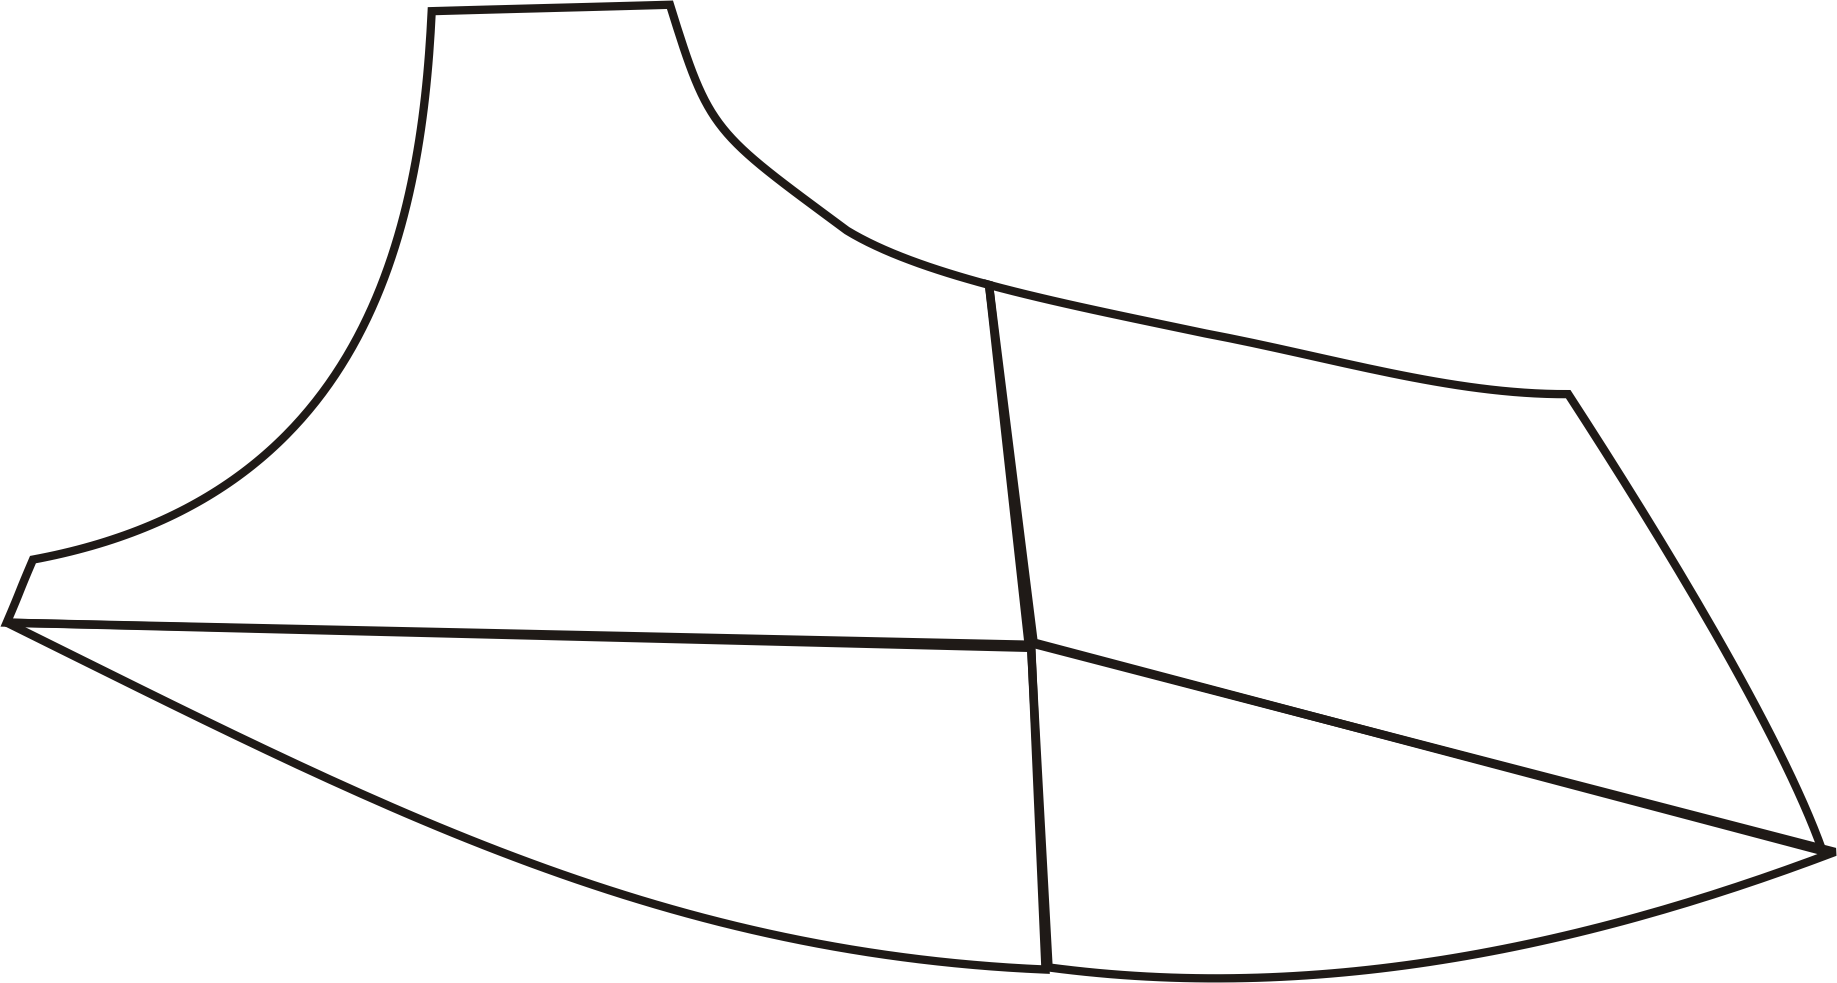
Use the neckline and cross cup points as a hinge to widen the area in the centre of the upper cup. When you do that the sides will open up and make a huge opening on the wire line at the front and the side. There is no way of getting around this – it will happen. Don’t worry about it.
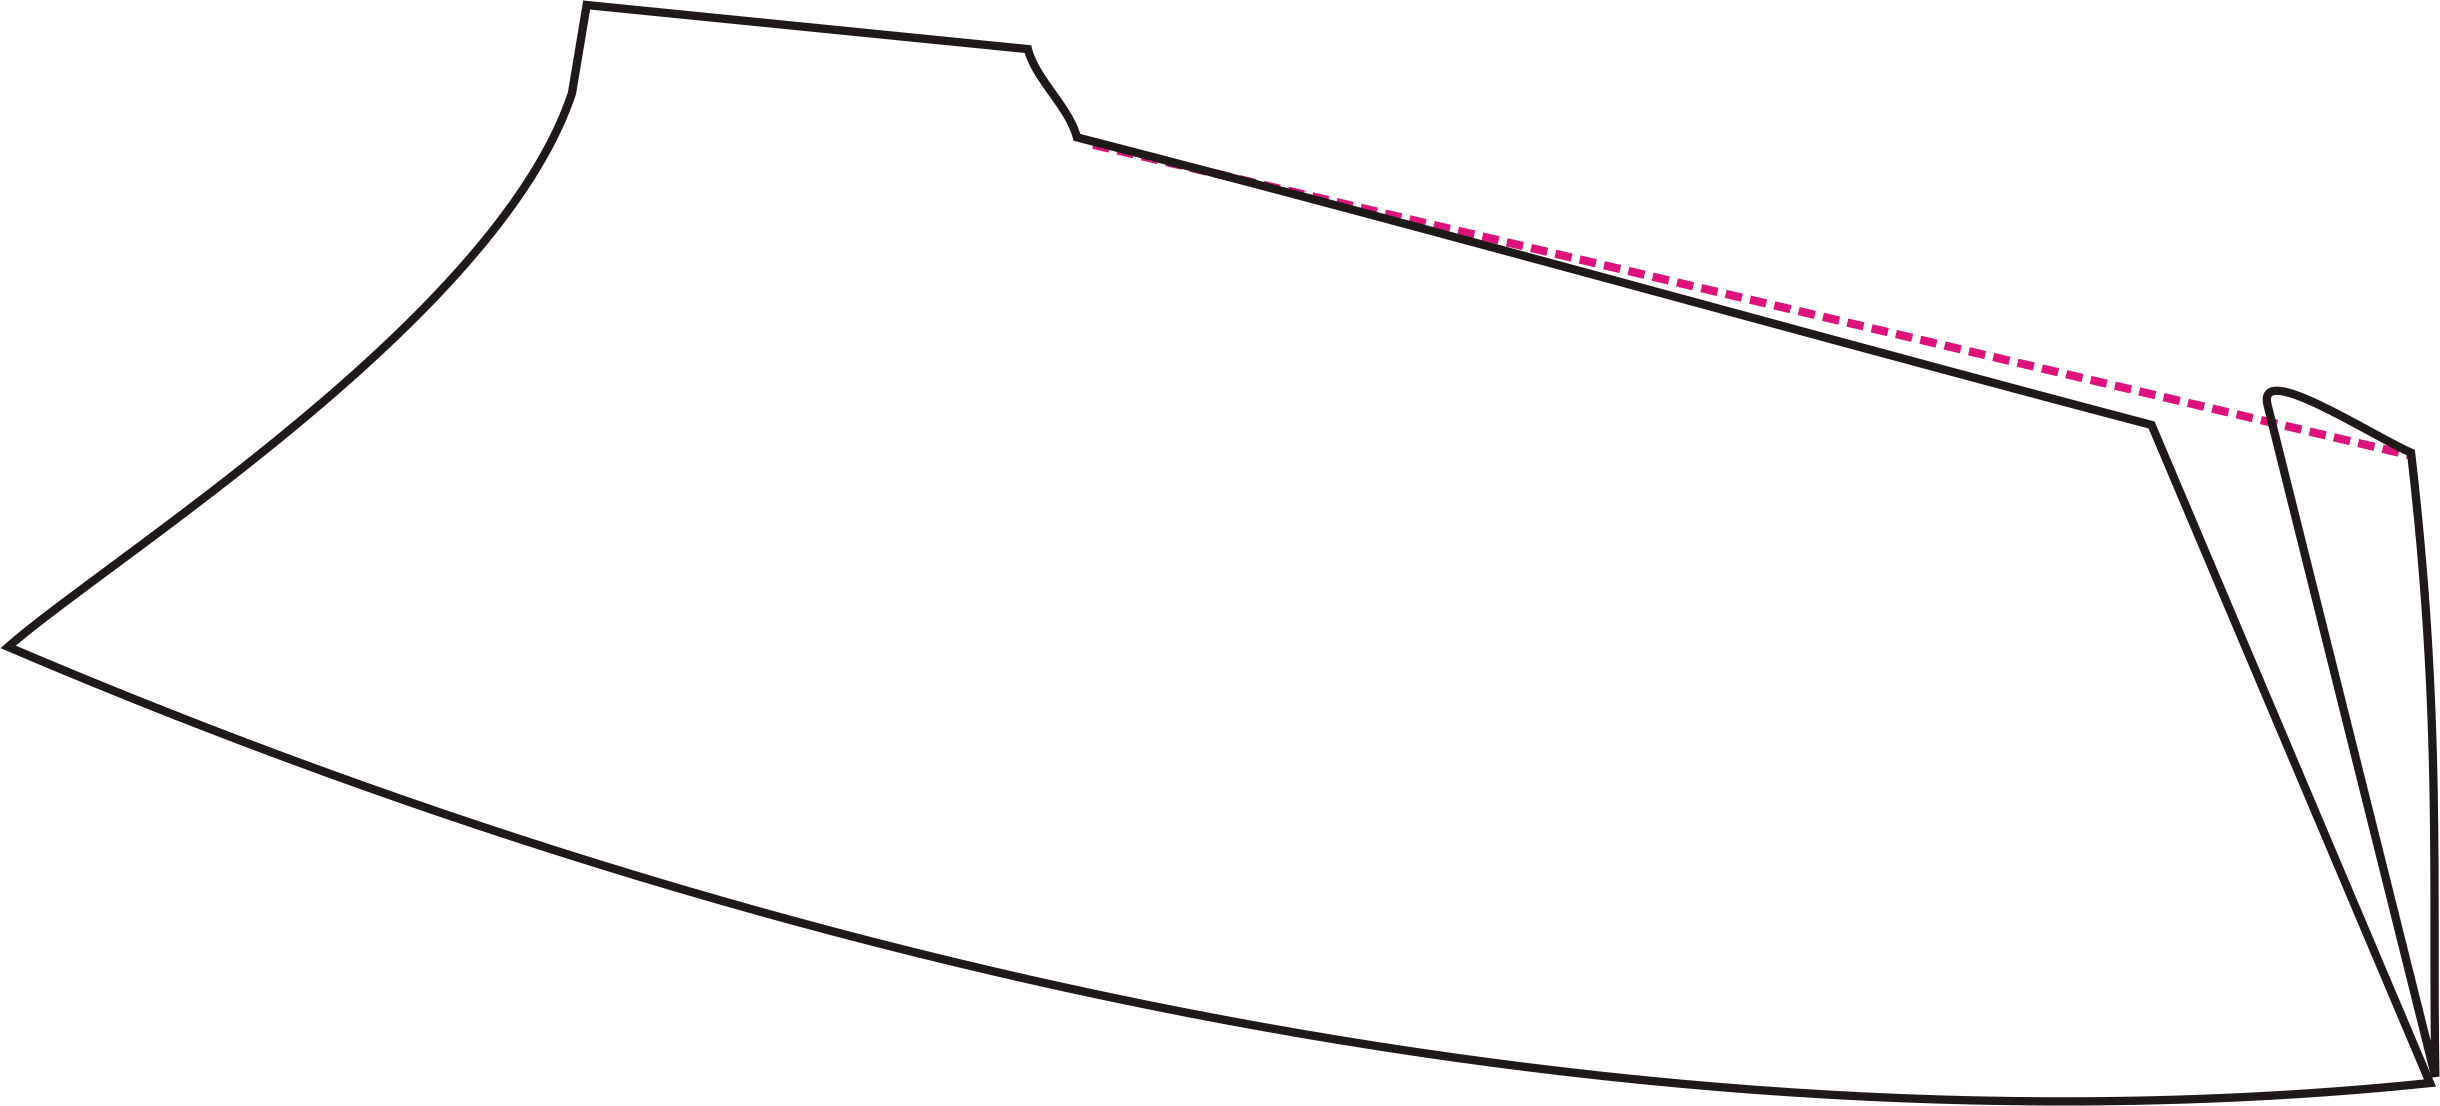
You can probably see that the seam line at the centre front and the seamline at the underarm are too long by the amount of the dotted line. However, the more astute among you will realize that the overall height of the cup from neckline to cross cup seam has not changed.
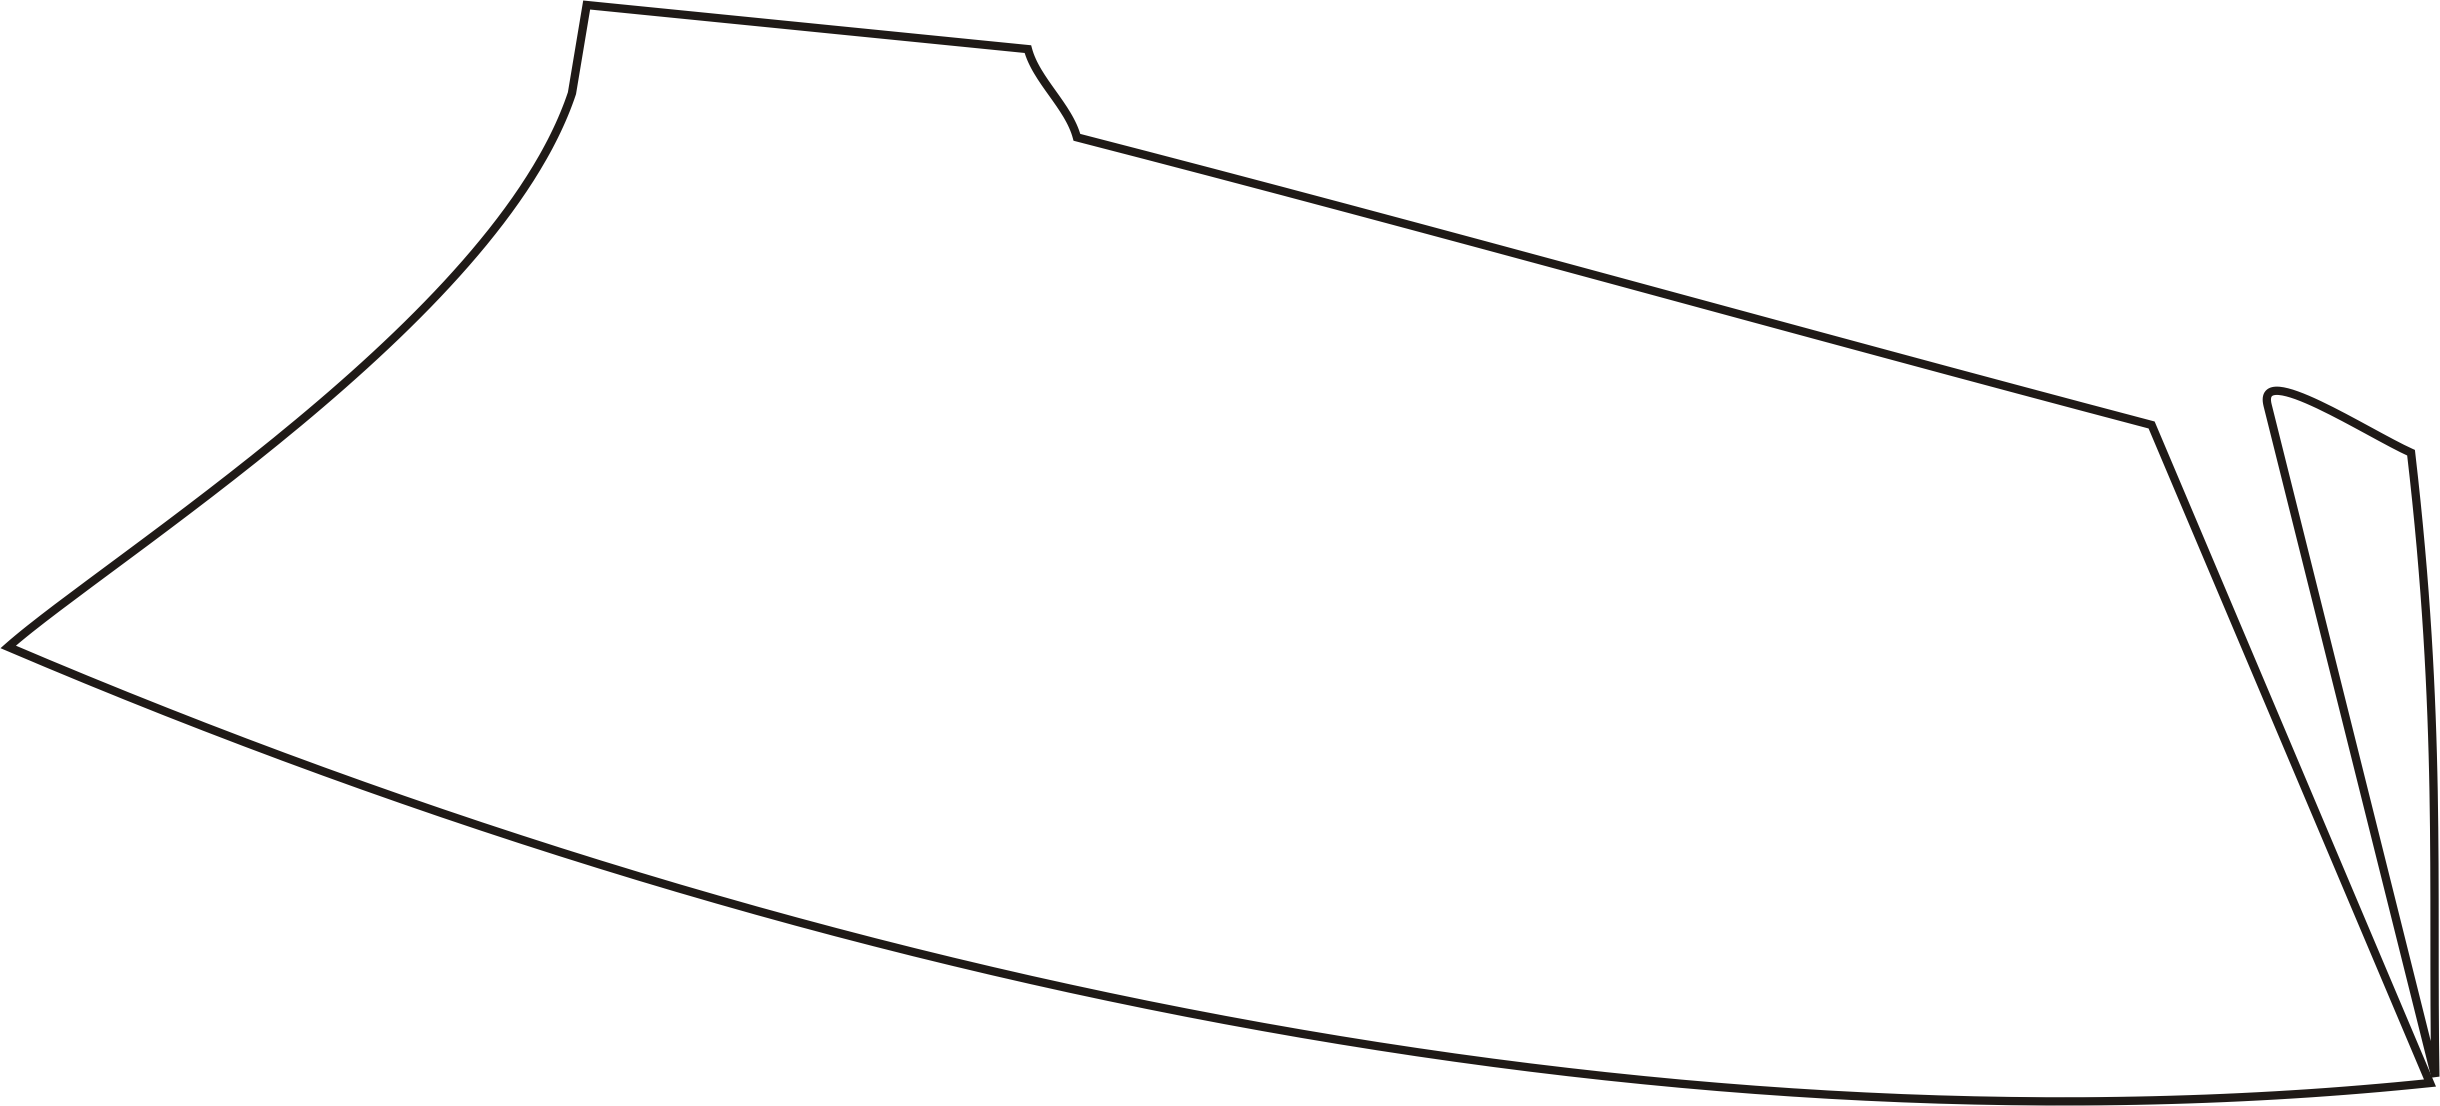
Re-draw the curve from the apex to the front seem line, excluding the piece that was added. Now the seam line is the same length as it was before the hinge. Do the same with the curve from the apex to the underarm. Keep the curve as smooth as possible, with no weird jinks at the apex.
If you compare the original cup (dotted line) to the new cup, you will see how much width has been added. We have added volume to the interior of the upper cup without messing up the wire line.
So now you have some new terms and some new fitting techniques for your bra-making!


Hello Beverly! I’m working on fitting the Ruby bra and need more horizontal distance across the apex while maintaining the BCD and wire line. The description mentions an offset seam, which is giving me pause. I’m not sure if I should add a wedge to the upper and lower sections or if I need to add a gusset to the lower section(s) only. Is the apex of the Ruby at the seam line or lower? Maybe at the notches in the lower cup pieces?
The wedge was just what I needed in the top cup as I was being flattened down with the pattern as originally drafted (size 34D, much more flesh on top than bottom) but the bottom cup fit very well. I slit the top cup near the center front seamline as described above, put the bra back on, and by pulling the fabric edges together saw I needed to add just under 1 inch in length. I sewed in a wedge of fabric, tried the bra back on and saw that while the length now seemed correct, the flesh was being pushed to the center front right where the new wedge was – not attractive. But since the girls come in pairs, I had a spare to practice on. I then slashed the remaining top cup front the middle of the top to the apex and sewed in the wedge there with much better results. This also resulted in curving the line of the top cup, which looks nicer on me. Now there is only slight wrinkling on the side of the top cup which I can eliminate with a vertical dart. I have been sewing clothes for myself for over 30 years and know how to fit “regular” garments to my body, but bra making is new to me. This site and the Craftsy classes are such wonderful resources for bra making.
I learned the double ended wedge/ triangle shape for adding width in underarms is a gusset, a godet is usually open on 1 end.
Yes, that is correct. My mistake!
Beverly, this is the alteration I think I need to try, since my upper cups seem to be flattening me out. One thing is bothering me about it though, do I have to lengthen the seam on the lower cup also? Would I add to the bottom cup at the side to accommodate the longer top cup seam?
No you would make sure the upper cup seam matches the lower cup in length, by measuring from the apex outward along the cross cup seam. If the lower cup fits already we want to add more volume to the upper cup, not necessarily more length to the cross cup. Sounds counter-intuitive but try it on paper first!
My upper cup seamline ends up 1/2 inch longer at least, on each end, than the lower cup crosscup seam. My crosscup seam line on the upper cup is definitely longer. There is something I’m not understanding. Should I be drawing the curve flatter so that the line is shorter? If I do that I’ll end up with a point at the apex which I know for sure I don’t want. LOL Oh dear. I have a bra obsession. Can’t rest until I figure this out.
Thanks, Beverly. When I was in your shop last summer, the lady who looked after me, sorry, I’ve forgotten her name but she was super and patient, had a look at my turquoise bra which I had on. It was made from new pattern pieces where you had removed some fabric from the power bar at the SSC but my new bra felt like there was not enough room in the upper cups. She described and drew for me exactly what you show here to insert a small wedge in the upper cup. To my chagrin, I haven’t made any new bras since then, but I expect I will get back at sewing for myself once the golfing and gardening season is done.
You DO need to get back at sewing. That golf stuff will just give you wrinkles anyway! The blog post is going to be at thew site from now on so you know where to find it if you need it!
This is so very informative. Thank you, Beverly, for such wonderful and useful information!
Thanks Michelle. It’s always a good thing to make a post with drawings to answer student questions. It is much clearer than “just” text, isn’t it?