Every woman needs a little sparkle now and then. We recently started a project that (quite frankly) needed some help. It started as a plain ivory corset with a hand-sewn lace overlay. It was ok and some people thought it was stunning actually, but to me, honestly, it was ho-hum. Bland, even. That’s when I decided to bedazzle it. What? You’ve never tried bedazzling? Seriously – it’s the easiest thing in the world. You don’t even need to know how to sew in order to add some sparkle to your garments, shoes, or accessories.
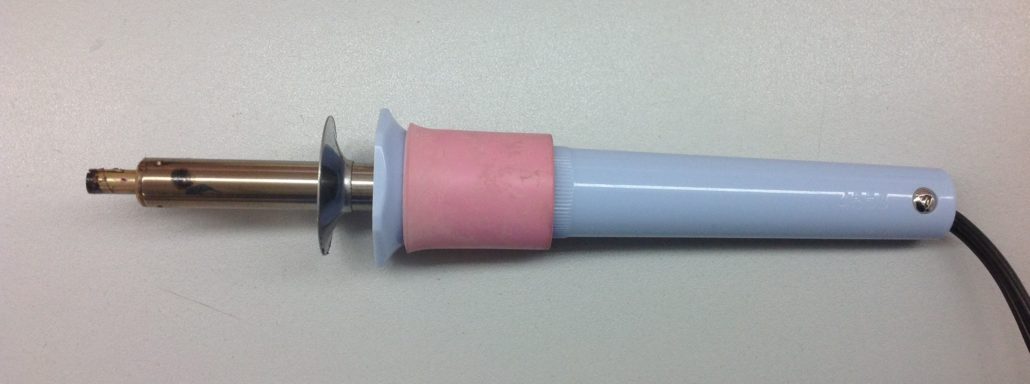
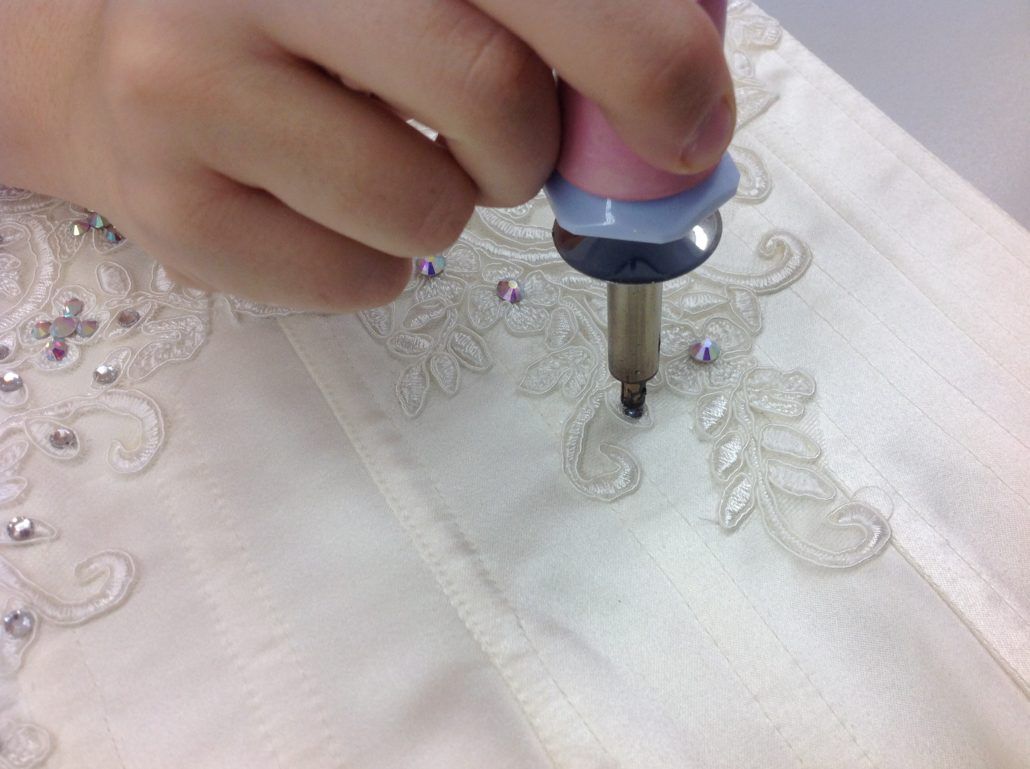
It all starts with the right equipment. The bedazzler tool looks like a curling iron but the tip heats up to activate the glue on the back of the crystals.
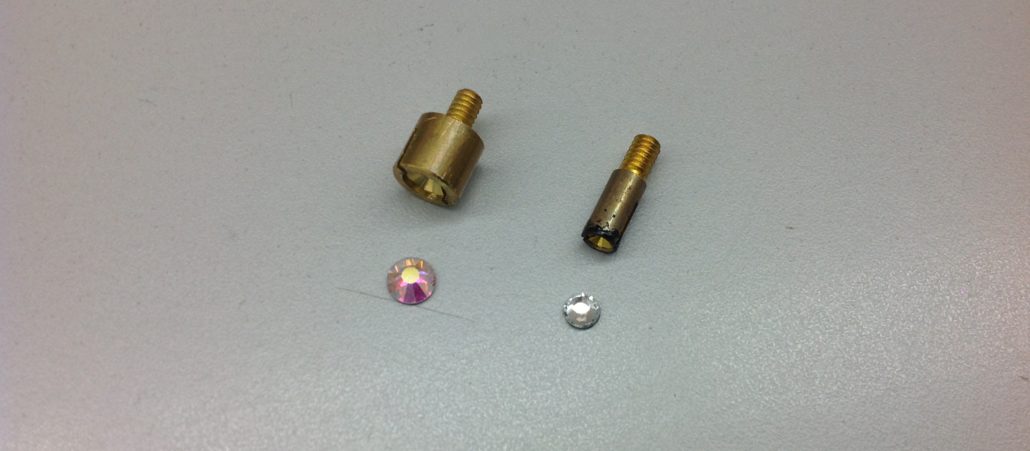
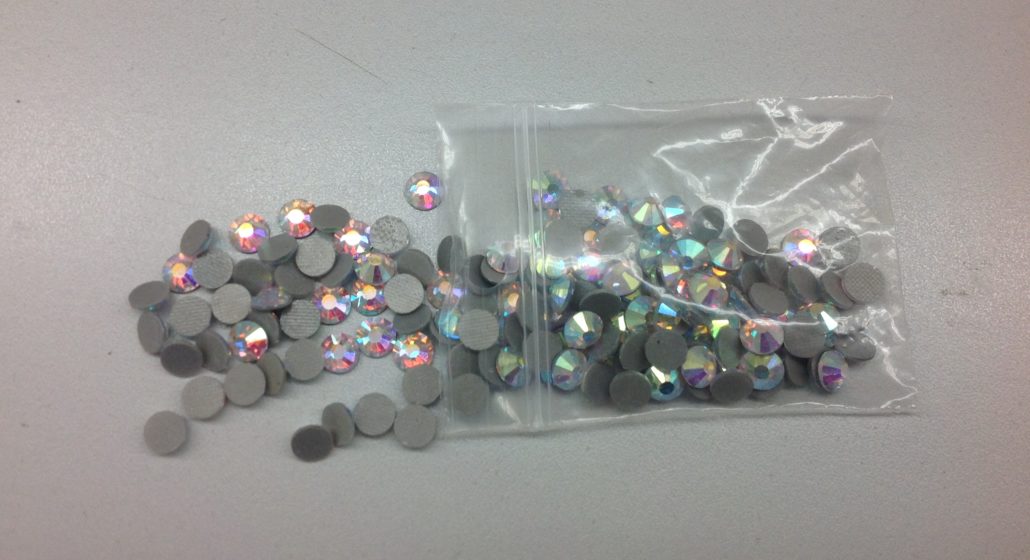
The tips come with the tool and need to be sized to the crystals you are using. The crystals, preferable Austrian or Czech cut are the best. I buy them in size 20 and size 30. The size 30 is almost 1/4″ across. I am going to use both sizes today.
The crystals themselves some in a myriad of colours. I am using the AB colour (Aurora Borealis) in both size #20 and size #30. I am also using a size #20 in the plain crystal. I bought 2 gross of each of the AB crystals and I had 3 gross of the plain. Now you might think I had my crystals brought in by the truckload. Not so – a gross is simply a dozen dozens or 144 in all. A gross of crystals will fit in a small bag. Here’s a gross of AB size #30. That bag is only 2″ x 3″ (5 cm x 7.5 cm) in size.
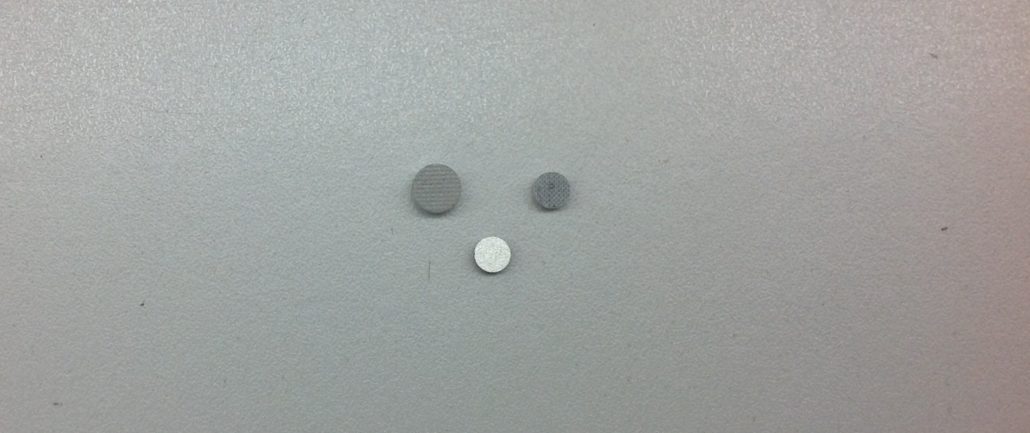
There are two types of crystal backs – the light silver coloured backing is foil, and it is NOT heat-activated. You need to glue crystals with a foil backing to the fabric. This is the preferred method for adding crystals to any kind of stretch fabric as often the hot fix crystals will pop off when the fabric is stretched. There are several types of flexible glues for the foil backed crystals. But I want to show you the hotfix variety. That backing is a darker grey colour. The glue on the hotfix crystals is heat activated…and yes, it really sticks!
Put the tip on the tool that is closest in size to the crystal you are using. If you don’t have the exact size (maybe you lost it or something) use a smaller tip rather than a larger. The larger tip can actually touch the fabric and can melt it. Pre-heat the tool with the tip in place for at least 5 minutes.
How to Bedazzle it!
The only tricky part is to use tweezers (the kind that comes with your serger, for example) to pick up and place the crystal where you want them. The easy part is actually heating the crystal. Push the tip of the tool over the crystal (don’t worry – it won’t slide off) and push lightly. With practice, you can actually feel the moment the glue melts and the job is done. It’s about 5-8 seconds.
That’s all there is to bedazzle it. Whatever “it” is. You can add a little touch of bling to whatever, but when you think you have enough…do more! When it comes to crystals…less is not more. More is more!
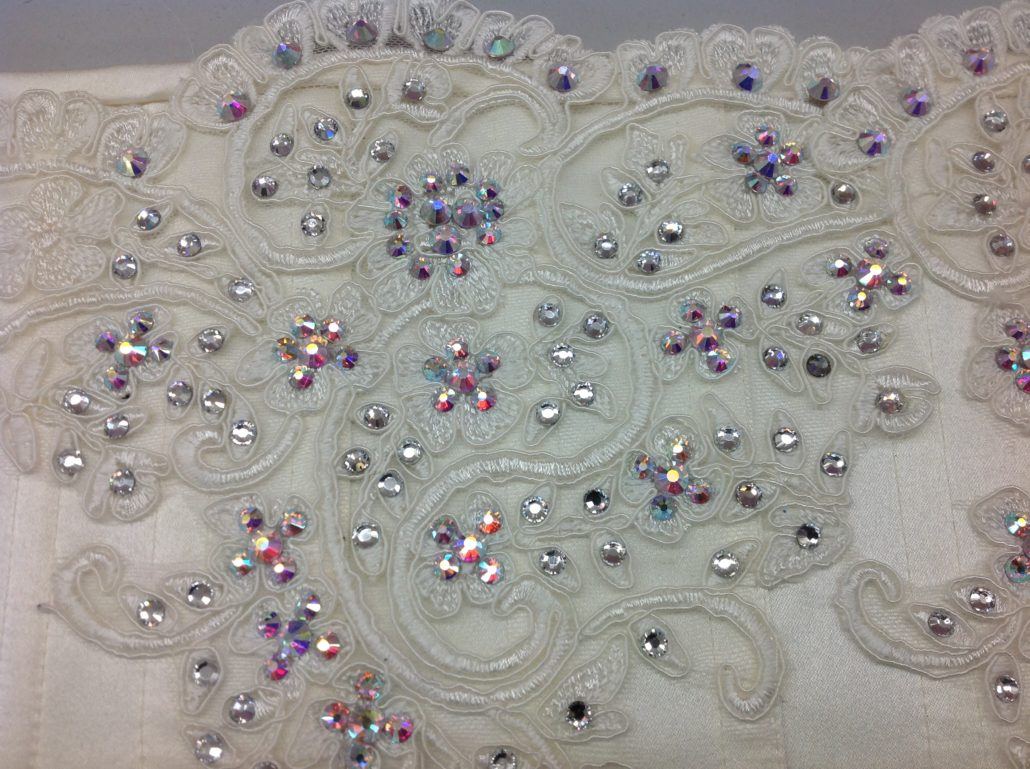
You can mix the colours and the sizes as I did. I used the AB crystals for the flowers and the plain white for the leaves. I “could” have added more but I ran out of crystals. I used 2 gross of AB size #20 (and needed a few more), a full gross of AB size #30 and 2 gross of plain size #20. I buy them from Ann’s Fabrics here in Hamilton. They have all the colours and all the sizes.

We’re actually using this corset in a display that is in our shop window. I am going to share that process with you (today) as well. Stay tuned!
Your Fairy Bra Mother
Beverly


The effect is truly lovely. I should think about what I might make to use this technique. If I were to try bedazzling something, can that something be washed in a machine or is it hand wash only?
Oh yes, hand wash only. It would be disastrous to throw those crystals in the washer. You would be calling the Maytag man for sure!