We needed something special for the display window in our new store. The shop features a window that is easily accessible from inside the store, with an opening large enough to accommodate a display that is almost one metre in diameter.We decided to make a Christmas Mannequin tree. I’ve seen them on Pinterest, and we did one last year, but I did not write a blog post about it. In fact, I didn’t think of taking pictures of it until it was all finished and inside the window. This year, I thought I would share the process of building the Christmas Mannequin Tree with you.
Here’s what you need:
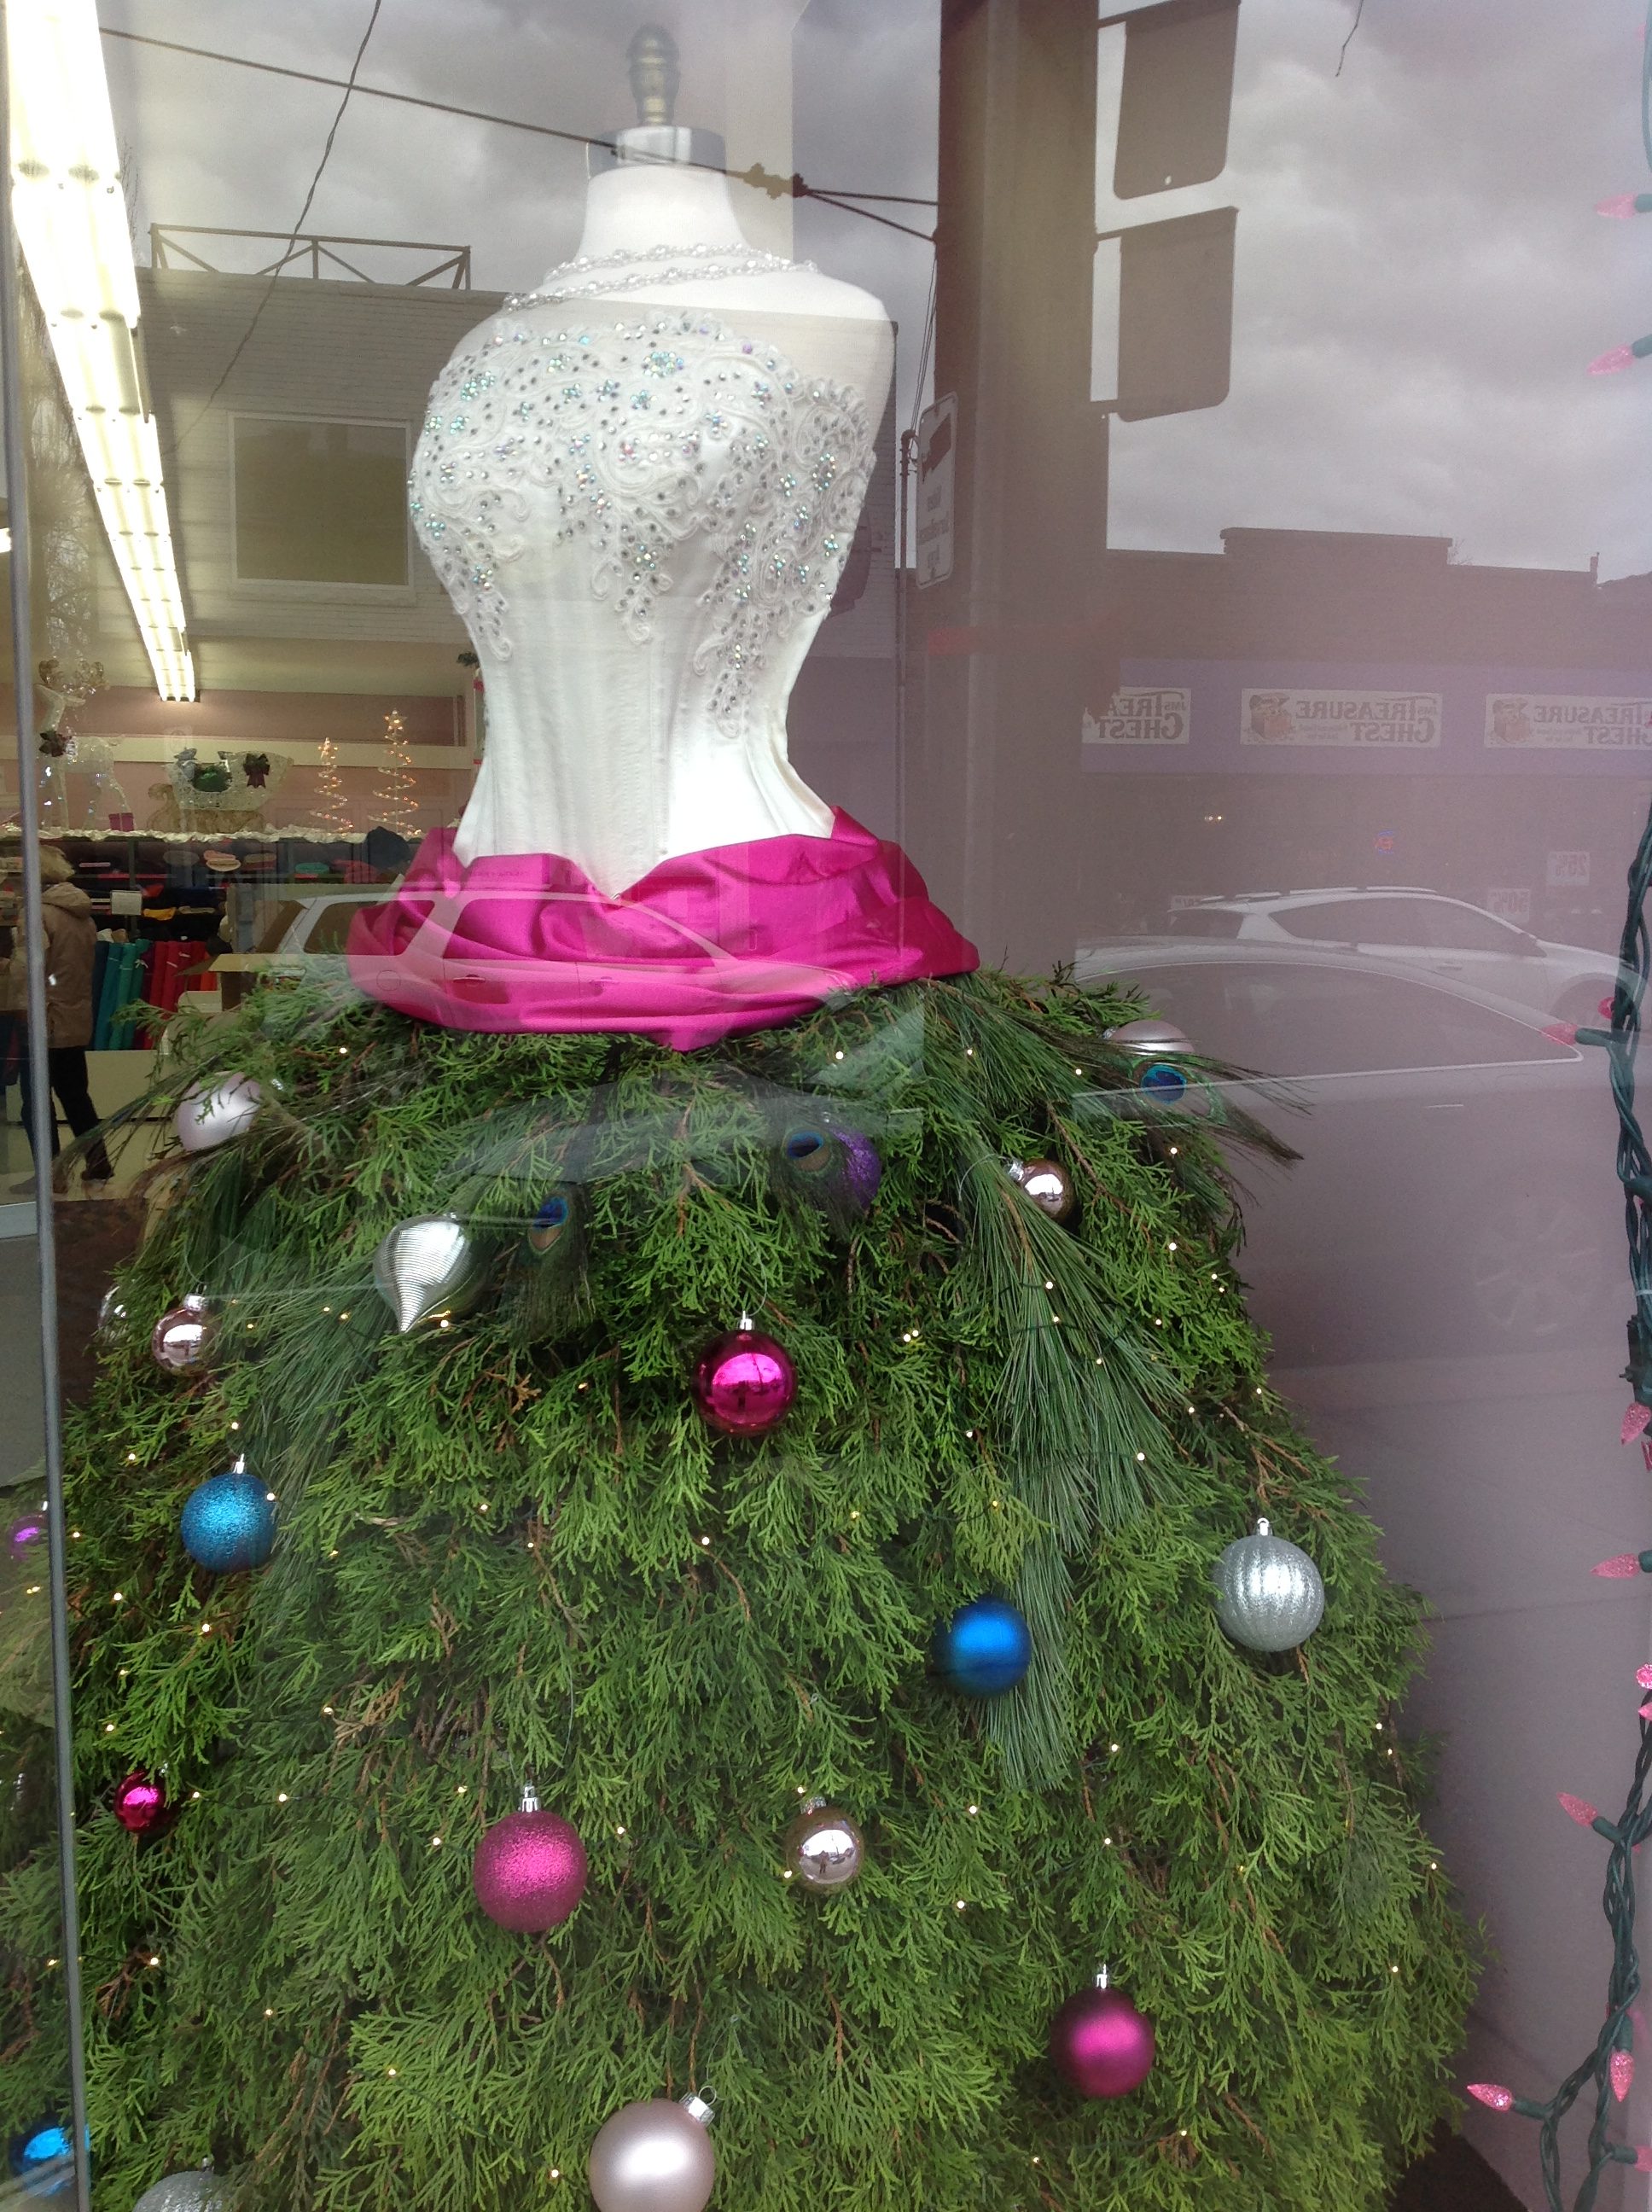
- A mannequin to use for the top of the tree. We used a corset mannequin
- Fabric to drape on the bodice of the mannequin or something to cover her chest. Last year, I wrapped fabric to simulate a strapless dress. This year, I used the corset I bedazzled.
- You’ll need a whole bunch of tree boughs. Denise cut down a wayward cedar tree in her yard so we had lots of boughs to work with. It takes a LOT of boughs and some sturdy pruning shears to cut them into manageable size pieces
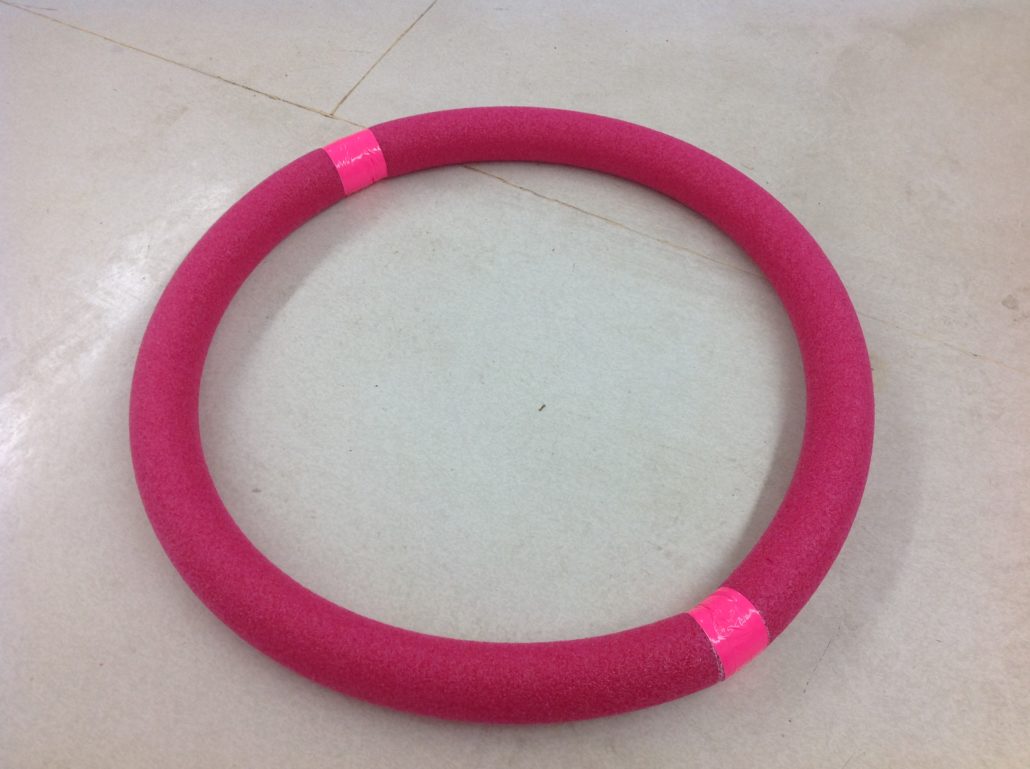
- 2 pool noodles and duct tape to form them into a circle. This makes the base of the tree
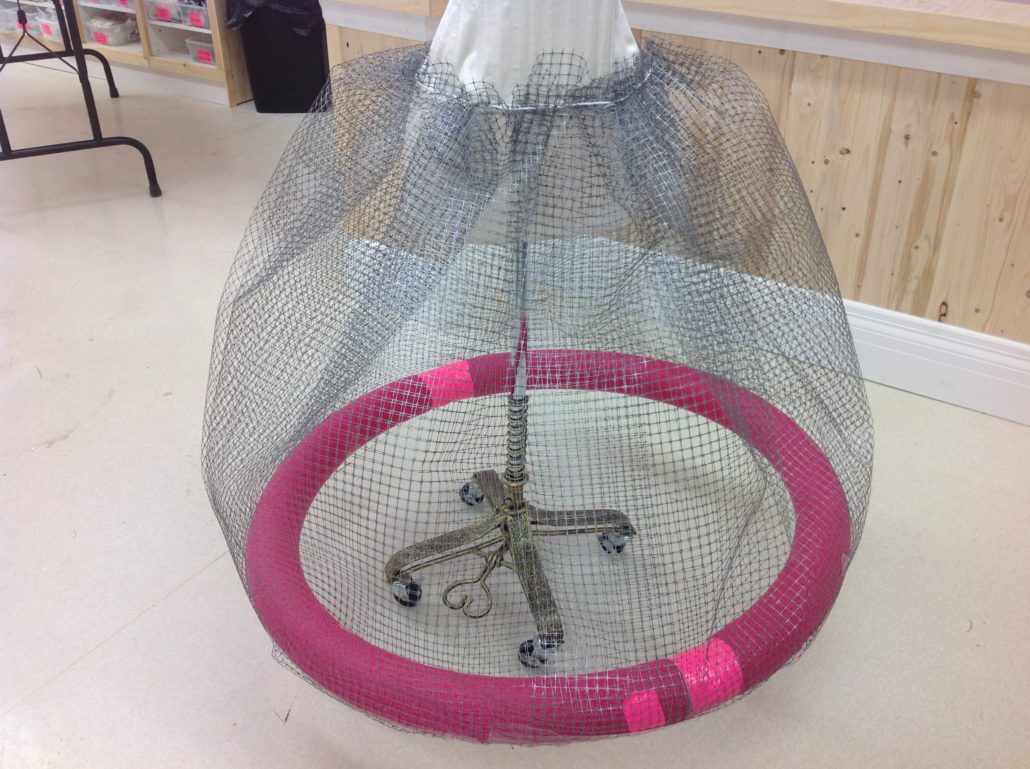
- Chicken wire. This year, we chose fibreglass chicken wire with 1/2″ holes. It is cheap and easy to cut with household scissors (not the good Kair shears!) The only downside to the fibreglass wire is that it does not stand up on its own. It’s only 1 metre tall so you are limited to how tall your tree can be. Last year, we used real metal chicken wire and it was not easy to cut and work with. On the plus side, it could stand up on its own.
- T-pins to pin the skirt to the mannequin
- Duct tape…because. Duct Tape
- String or cord to cinch in the waist
- About 1/3 yard or .3 metres of fabric for a sash
- Christmas lights. Last year, we used small tree lights, but this year, I managed to find the Microdot lights at Home Hardware! This was my most exciting find this year!
- Ornaments and trimmings – whatever you want
Let’s Start!
Start by forming the pool noodles into a circle and fastening them with the duct tape. Yes, I wanted green noodles, not pink. I considered myself lucky to find pool noodles at all in November! I suppose I could have used a hula hoop.
We used two rounds of fibreglass chicken wire to form the base for the boughs. Like I said, the non-metal chicken wire does not stand up on its own. That’s why the 2 layers. We used strong clear packing tape to tape the wire to the pool needles (pink duct tape was getting expensive!) Dress the top of the mannequin, then put on the chicken wire base. Tighten it around her hips by threading some lacing cord and drawing it tight. The chicken wire is not very tall, so the skirt sits at the hips and not the waist. More than a few T-pins helped to hold the skirt to the mannequin.
Then we attached the cedar boughs to the skirt. Start at the bottom and work up. It is easy to feed the small branches into the fibreglass chicken wire. We allowed the branches to hang lower than the pool noodles so they would be hidden. No one will see the pink pool noodles once the Christmas Mannequin tree is finished!

We ran out of boughs when we were almost finished! We will tuck the boughs into the bare spots tomorrow. But in the meantime, we added the microdot lights (there are 300 of them) and pinned on the hip sash. We also wheeled her closer to the front of the store. We didn’t dare go onto that floor until Rebecca’s fresh wax had dried!
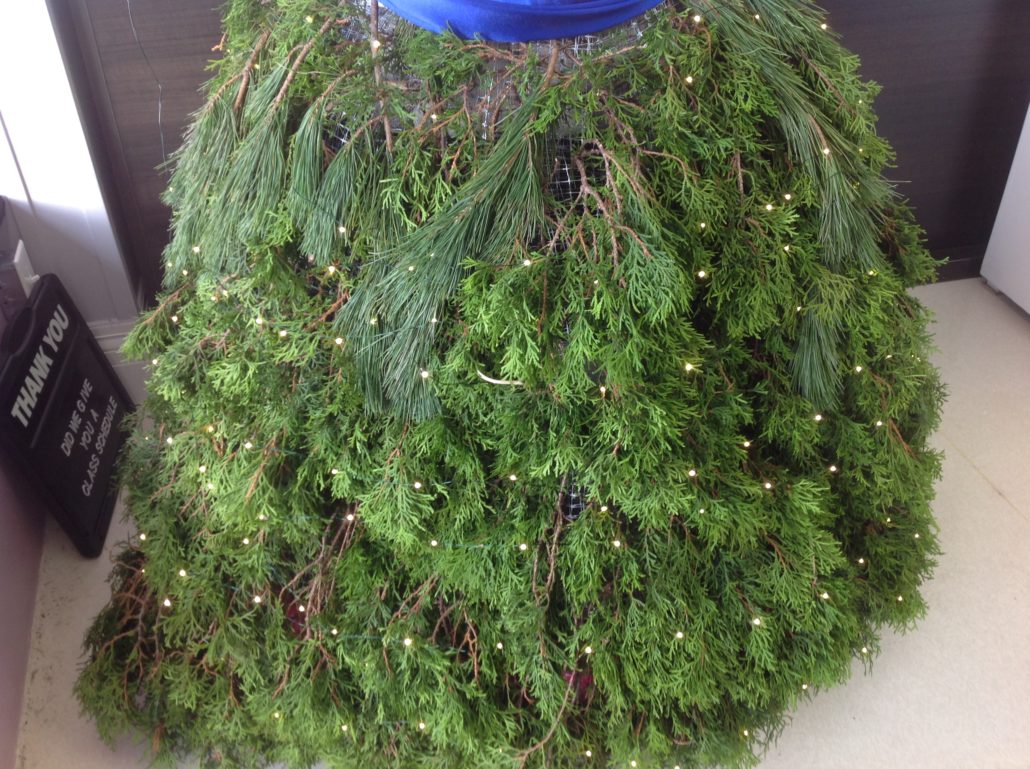
So far, so good. I made the hip sash out of some royal blue satin that was the end of a roll. I serged the long side to make a tube, then arranged it on and pinned it to the form. I am not showing you the corset part of the Christmas mannequin tree until it is all done!

The next day, Denise came with the rest of the boughs and we finished the skirt. We also decided that fuchsia was a better colour for the sash than the royal blue. Sorry Rebecca! Now for the decorations!
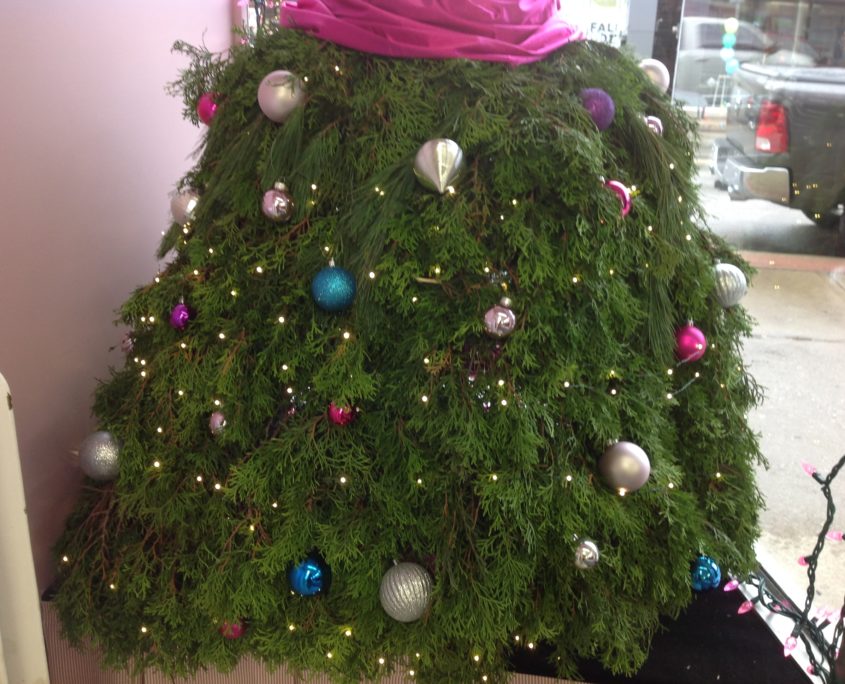
Here she is finished!
Into the window, she goes! All done in lots of time for our Open House, December 9! We hope you will make a trip to come see our new store and the Christmas Mannequin Tree. And us, of course. We want you to come to see us, too!

Your Fairy Bra Mother
Beverly


Love the tree!!
Thanks Pat…we had fun making it!
Now I’m eyeballing my mannequin and flocked fake tree limbs so if maybe I could squeeze one in my sewing room…
I think you need one!
I think this absolutely stunning. Such a perfectly appropriate window decoration. Enjoy your new home!
We had so much fun creating her! And she was a team effort – collecting the boughs, making the skirt, beading the corset…getting her into the window…lol!
Adorable! I love how the corset is subtle from afar but I bet up close it is sensational
Adorable! I love how the corset is subtle from afar but I bet help close it is sensational