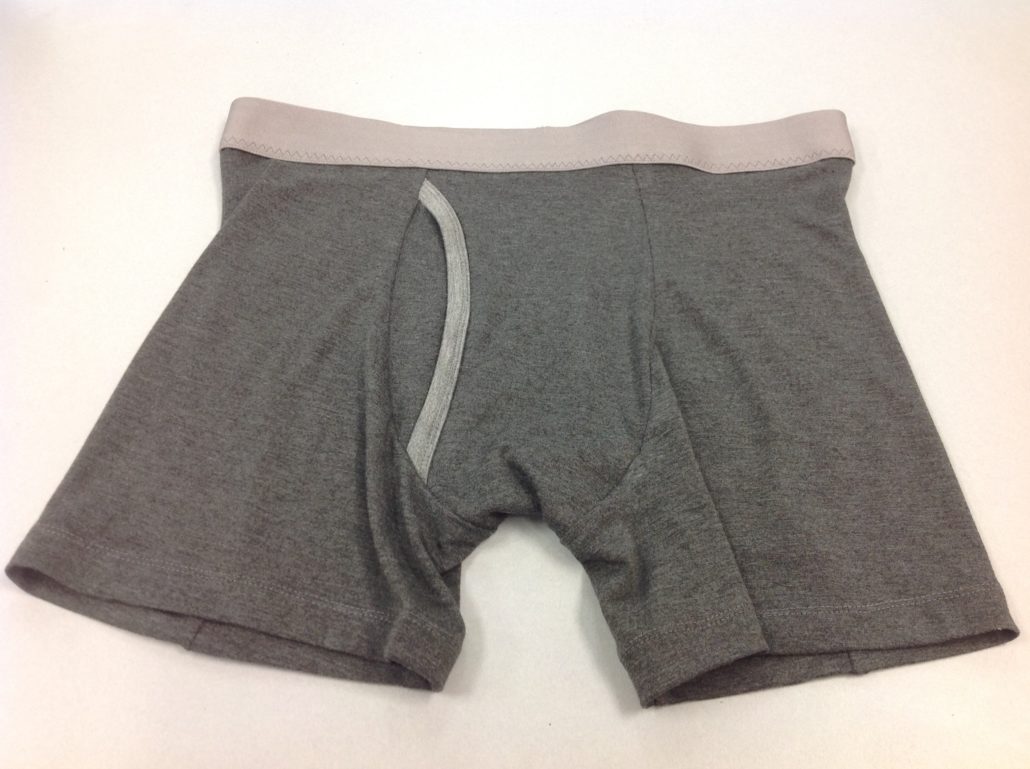
Our Men’s Underwear pattern has been getting rave reviews. It has an inner support sling and two stylish views, both with over-the-top access. That’s a growing trend in men’s underwear, in a manner of speaking. However, if your guy prefers front access, there is an easy modification to the pattern you can do. Here’s how to convert over-the-top to front access. You can do this with any men’s underwear pattern, by the way.

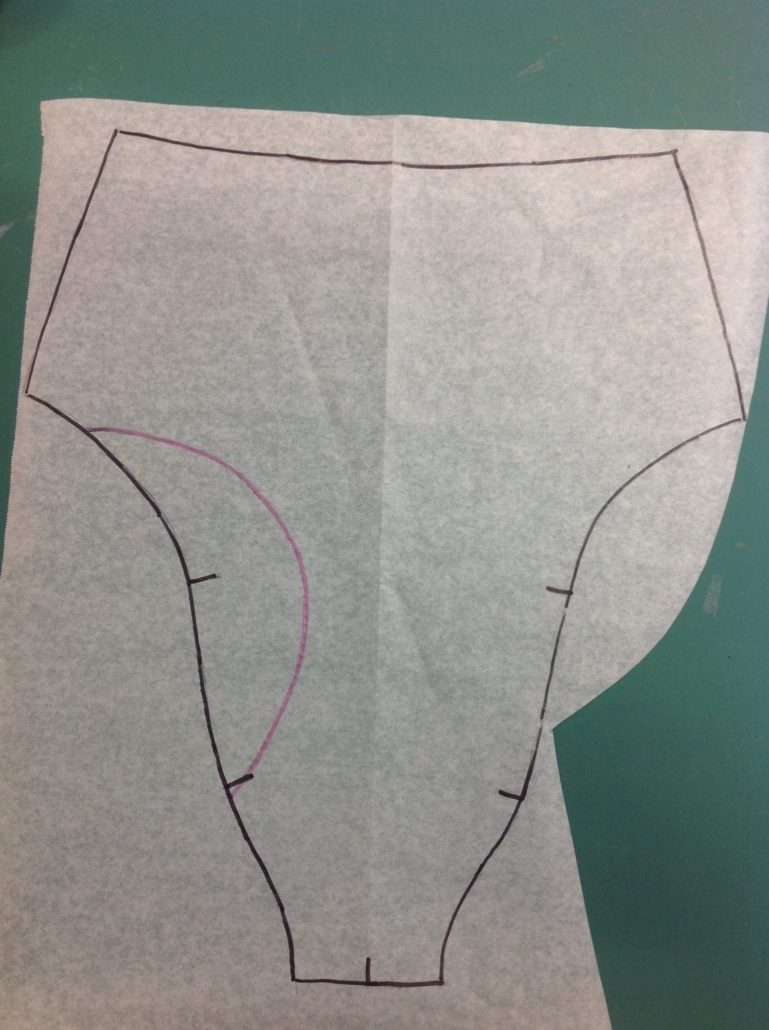
We’ll start with the front of the Michael version of our Men’s Underwear pattern. The front panel of the pattern joins to the main front piece by means of two curved seams. These seams are the usual place for front access on regular ready-to-wear underwear. This is where we’ll add our access. The alteration affects only the front panel area, not the main body of the underwear. Draw a curve starting about…” up from the bottom edge. Make the curve about 4-5″ (10-12.5 cm) long. The depth of the curve should be approximately 1″ – 1.25″ (25-32 mm) deep. I took an average of these measurements from several ready-to-wear underwear brands. I don’t mind telling you, I looked a bit odd in the store standing at the men’s underwear rack with my tape measure!
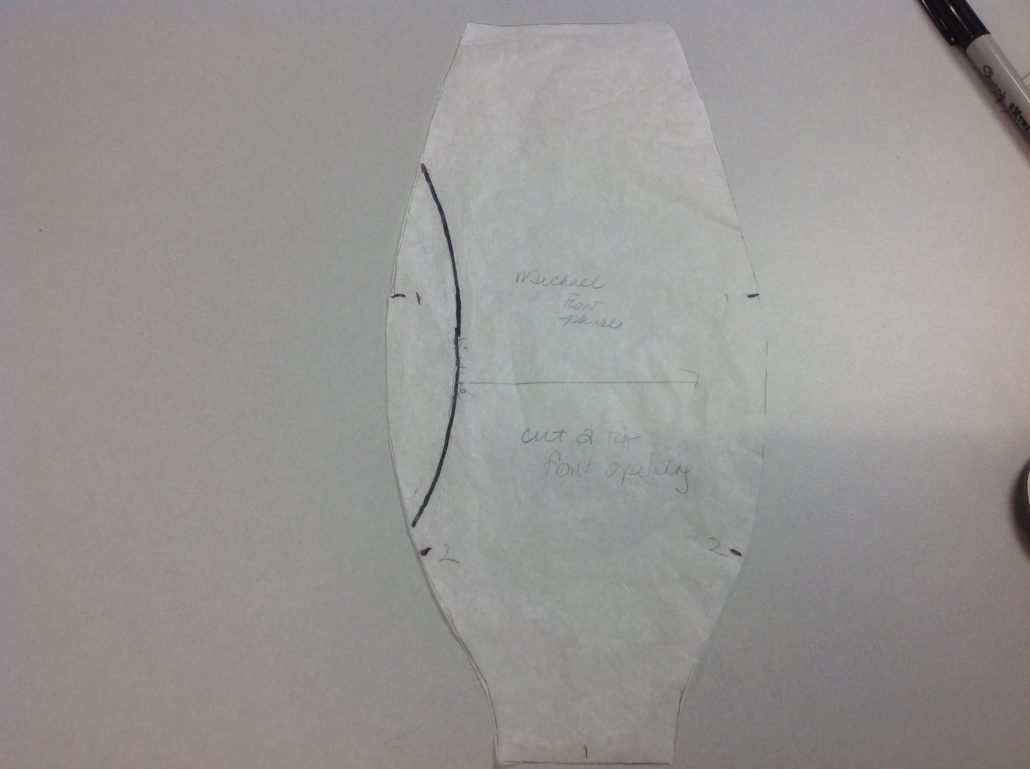
Once you have the curve drawn, that’s it – the draft is done. You will cut two of this front panel, but none of the sling pieces. Be aware that the sling and the front access elements do not work well together. Apparently the parts get all tangled up when the front access is in use (someone told me – I have no personal knowledge). So your guy can have the sling or the front access but not both. (If someone has a way to add both, please let me know!)
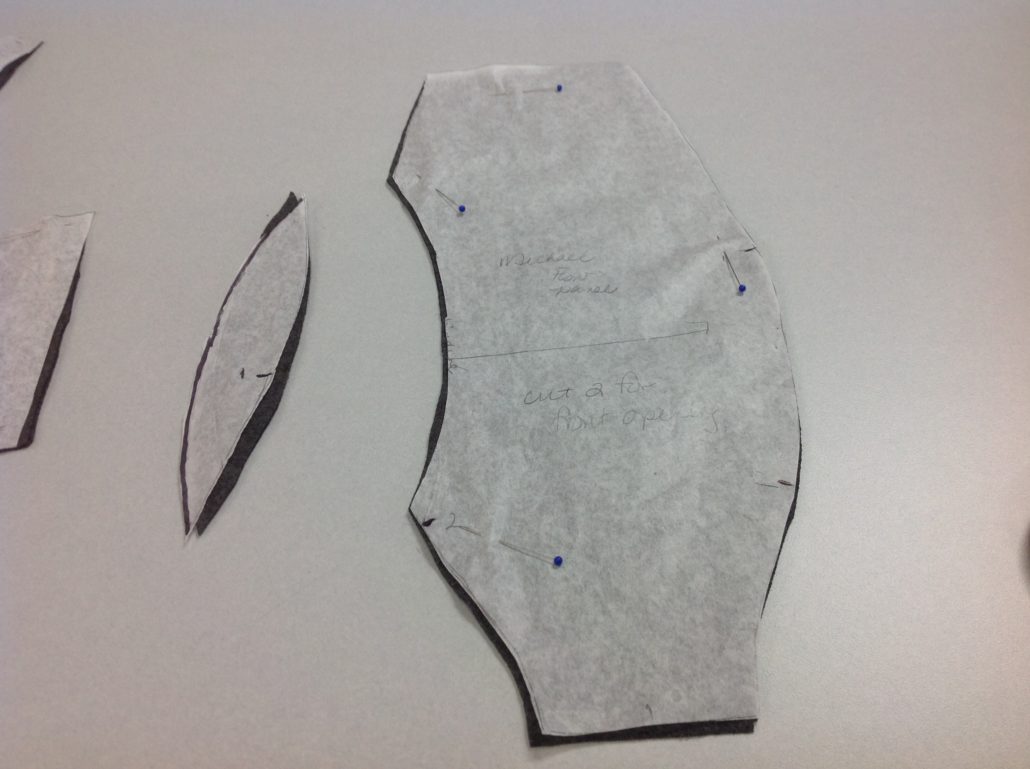
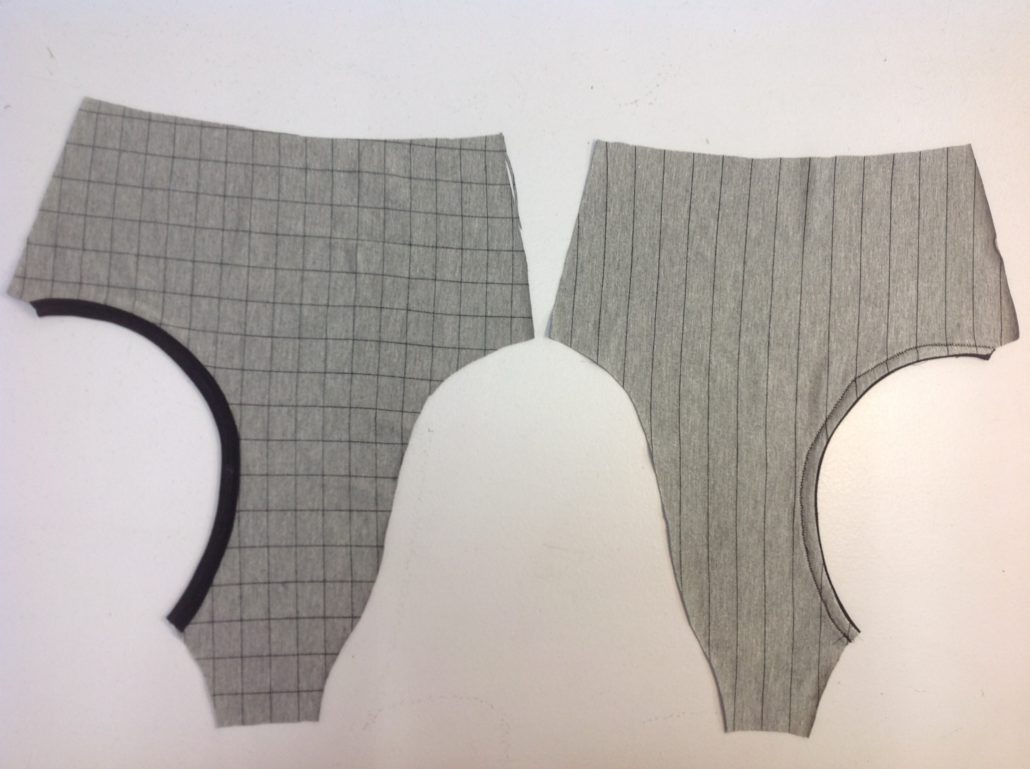
You can add binding to the curved area (both layers) with the easy binding technique I showed up in my last post. Remember to add binding to the right hand side on the outer panel layer and on the left hand side on the inside panel layer. You need an opening on both sides – but not on the same panel!
Then put the layers of the front panel together with the openings on opposite sides. Machine baste the two panels together.

Construct the underwear as directed in the pattern, leaving out the sling parts altogether. This is the inside view.
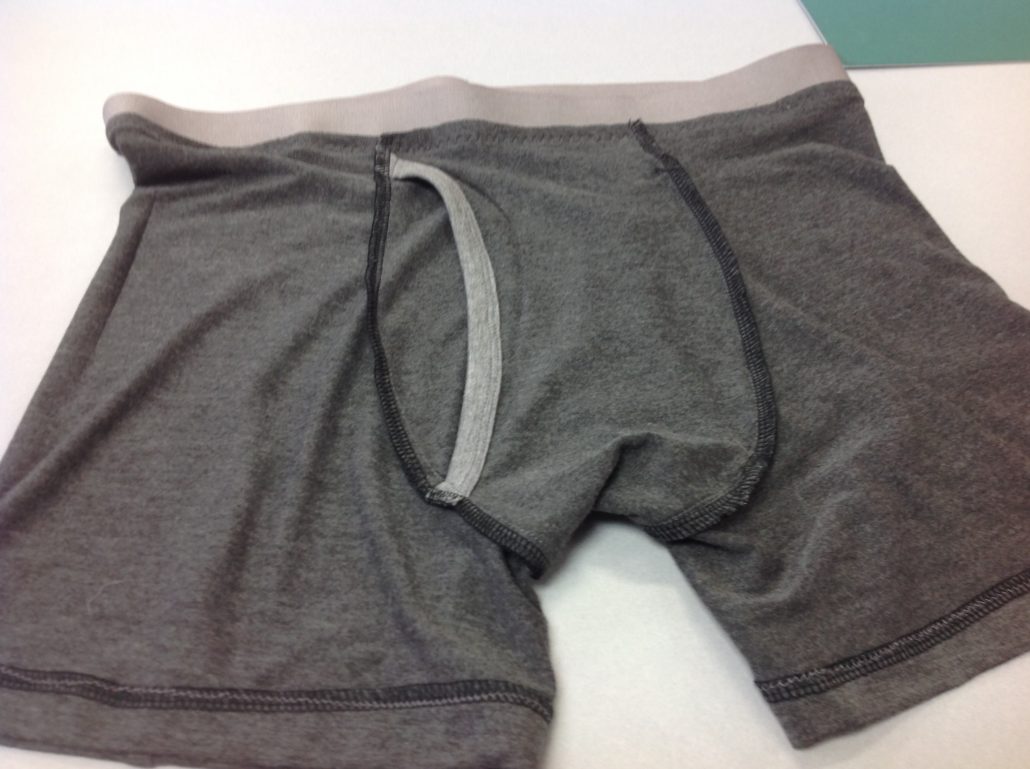
As you can see, it was relatively easy to convert over-the-top to front access.
The Lillebror version of the underwear can be modified in exactly the same way. The front cut-away can be positioned from the notch at the bottom up the curve almost to the top and about 1.25″ (32 mm) deep.
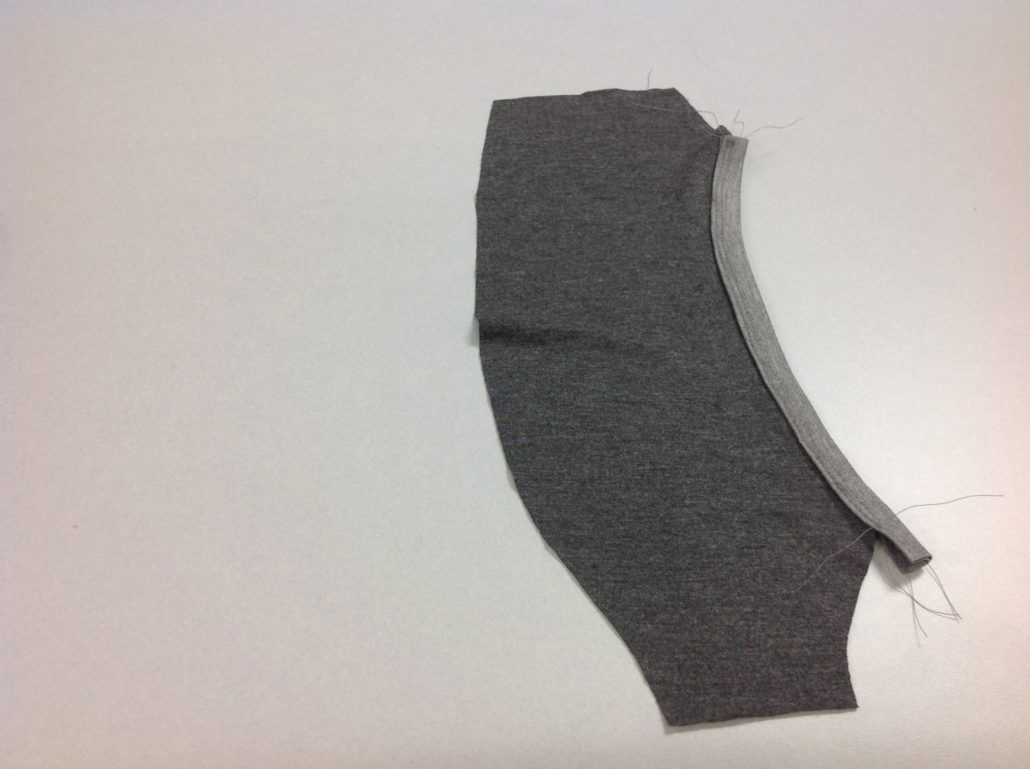
Cut out two of the panels (no slings) and add the bindings as we explain above. You can see that the inside panel (shown on the right side below) needs to have the binding sewn so that the finished side faces the man’s body when it is put together.
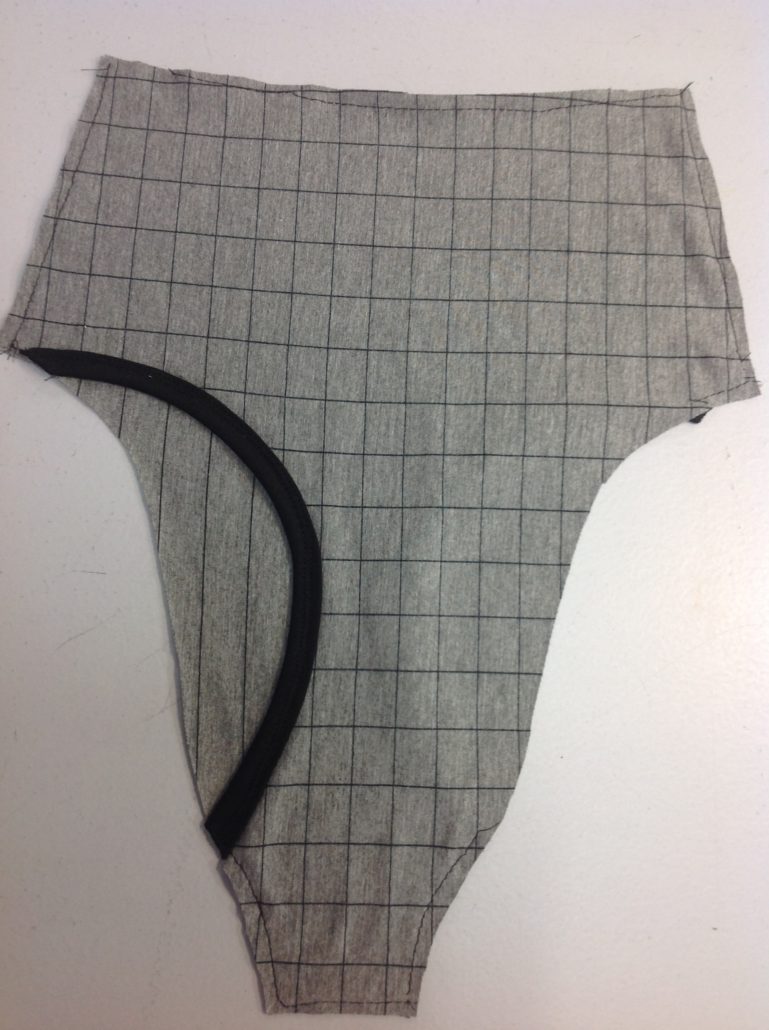
Here is the finished bound panel.
I do hope you’ll give these a try!


Trackbacks & Pingbacks
[…] two pieces.I altered the front pattern to be a front-opening panel. You can read how to do that here on BMS’s blog. And I cut two front panels. Then one piece is flipped so it becomes a mirror […]
Leave a Reply
Want to join the discussion?Feel free to contribute!