The Ivory and Green Demi Bra
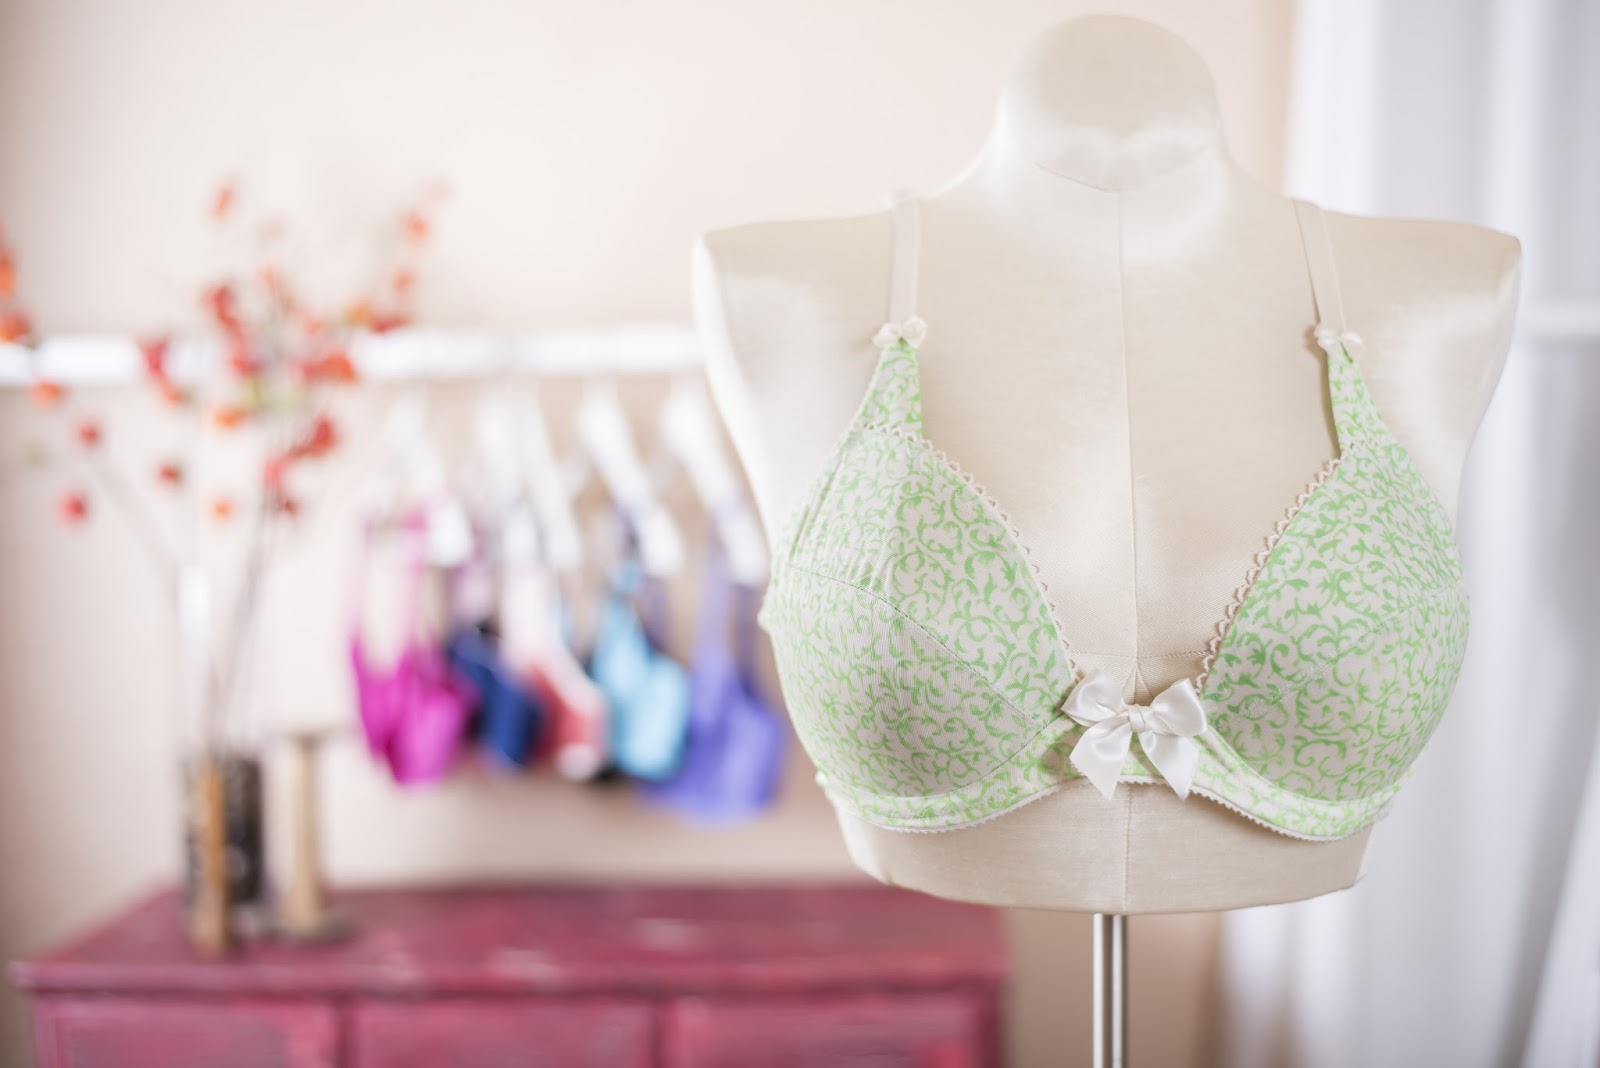
The Ivory and Green Demi Bra bra features:
- demi cup construction
- short strap tab extensions
- a full band with raised arch
- printed fabric!
The first thing is the demi cup construction. We will change the Classic full coverage pattern to be lower in the front. This Classic bra uses a WL-40 or #40 LONG wire. I measured the difference between the LONG and the SHORT wires. That difference is the amount to shorten the upper cup and the bridge.

Shorten the bridge first by the amount you measured, then shorten the upper cup by the same amount. You can draw a straight line back to the point or… if you are afraid the girls might try to hop out… you can draw a curve so only the front of the bra is dropped but not the coverage over the mound.

Why is the Bridge so wide?
Why does the bridge look so wide? Because when we shorten the bridge by the amount to make the demi cup, the bridge automatically gets wider.

You can actually see on this close up of Ashley that as we lower the bridge, that space between the breasts gets wider.

The we add the short strap tabs. To add a strap tab extension we need to straighten out the upper cup and remove the strap tab bit that is there already.

Then we make a short strap 3″ (50-75 mm) long with a longer edge that will go toward the centre front. The longer angled edge will be placed on the fold so the pattern looks like the one on the right. Cut two of fabric.

Sew the neckline trim to the straight top upper cup. Finally fold the strap tab extension in half and sew to the upper cup ( the folded edge of the fabric goes to the centre front.) I show the stitching here as a straight stitch but you can use a zig-zag stitch here too, depending on your fabric and if the neckline is stabilized.

When you finish stitching the elastic, the neckline and strap extension will look like this with the trim in front of the short strap tab exetnsion.

Raising the arch on the front frame is also easy.

Don’t take the top of the arch too far up! Those pink lines indicate the Point of Most Strain and if you take the arch above these lines, the cups will swing like a pendulum! Not a good look!
The little arrows are a reminder to try to keep the wire line and the bottom edge lines as parallel as possible at least as long as you can along the bottom of the bowl. In my opinion, the parallel lines when sewn well with the finishing elastic, really make the bra professional looking.

The fabric?
But what about that fabric for the Ivory and Green Demi Bra? Where did I get that? Well, I made it! I used fabric markers to trace a drawing of this vine type design I found on Google Images. I think I searched for “line drawings vine designs” or something like that. There are lots of designs and it was fun to do!
Since the fabric I used was ivory, I was able to see through it enough to trace the pattern quite easily. I used a lime green fabric marker I bought at Michael’s (but I have seen them at Wal-mart and our art store here, and I bought some from Amazon too) Just be sure they are fabric markers. They usually need to be pressed with an iron to make them permanent. I did a blog post on that technique here.
Have you tried using any of the techniques from the Craftsy classes – or have you printed your own fabric? Have you made your own version of the Ivory and Green Demi Bra? If so, let me know – I would love to hear about how they turned out! Especially the ladies who did fabric printing on our cruise – how about posting photos of your fabrics (or the bras you made from it) on our Facebook page?


Beverly, I'm always so impressed by your knowledge and skill. This time I'm simply amazed. I get to the end of your post and see you made your own fabric print. Wow. It's gorgeous!
Michelle
Sue – it was so easy! I thoroughly enjoyed making the printed designs and hope to feature more of them in my designs!
WOW! I love your fabric! I've used stencils on garments, but never thought to get creative with bra fabrics.