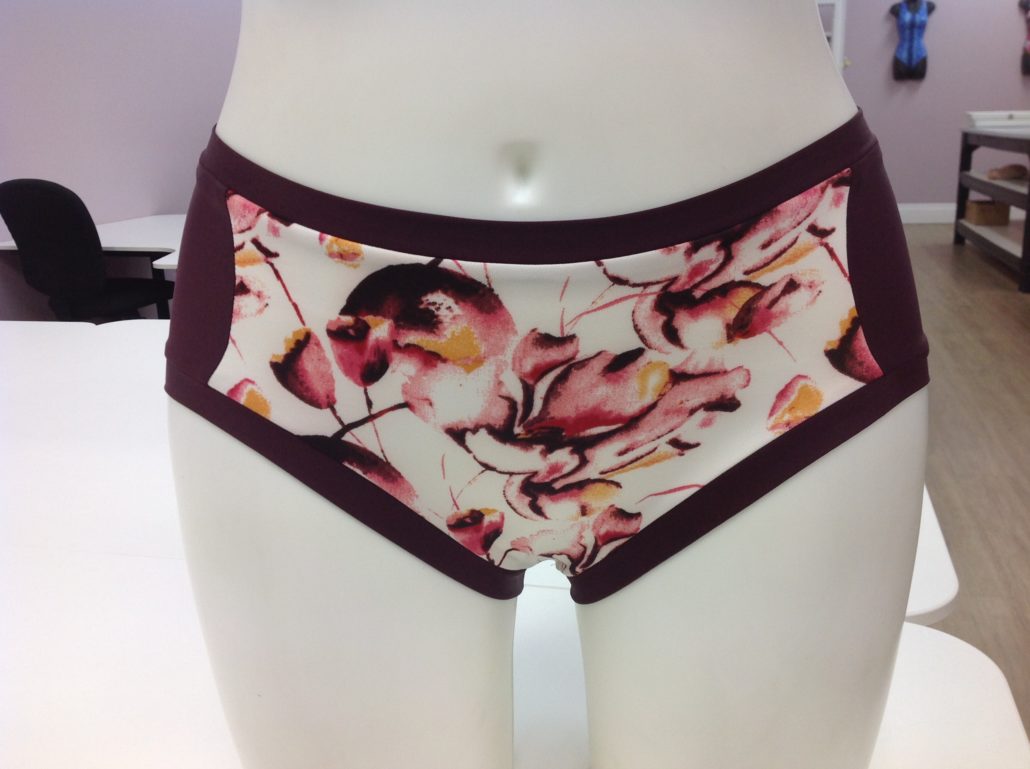
How about we buck tradition and NOT use elastic when making panties? It is possible, you know, as long as you substitute bands made from elastic fabric for the usual elastic around the legs and waist. Let’s make banded panties – it’s easy once you try.
You might want to try banded panties for a number of reasons: perhaps you have an allergy to elastic, or perhaps it is late and there is no elastic to be found in your sewing room. Perhaps you want to flex your creative sewing muscles and try a new technique. Whatever the reason, this pattern is sure to become a staple in your pattern library.
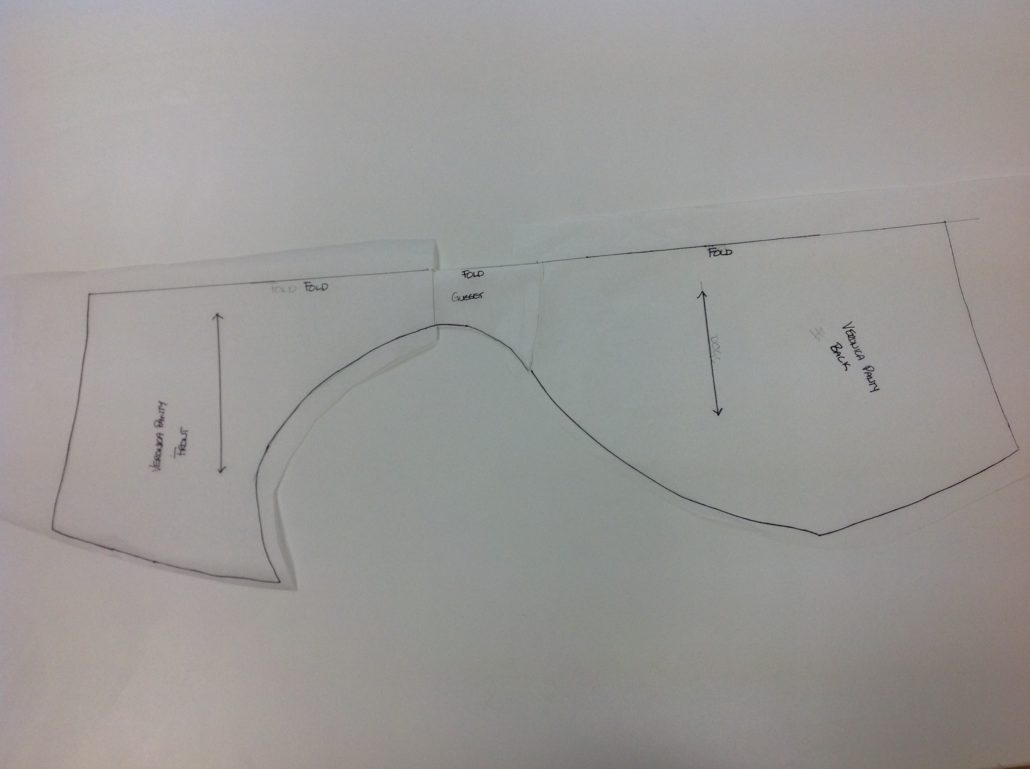
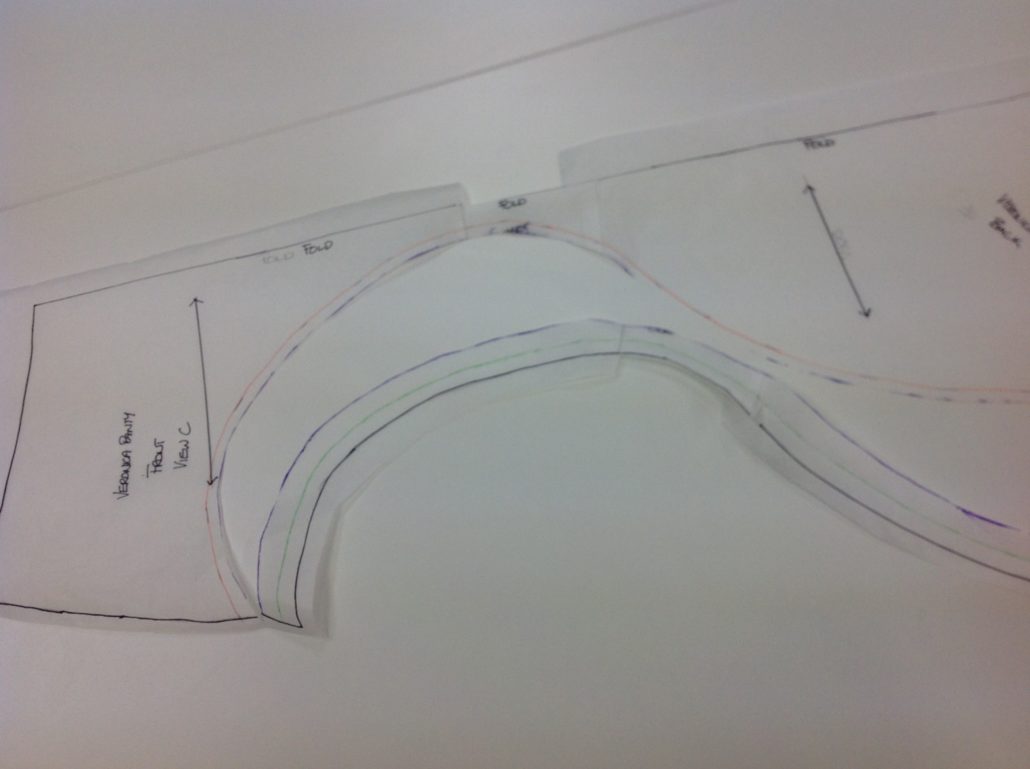
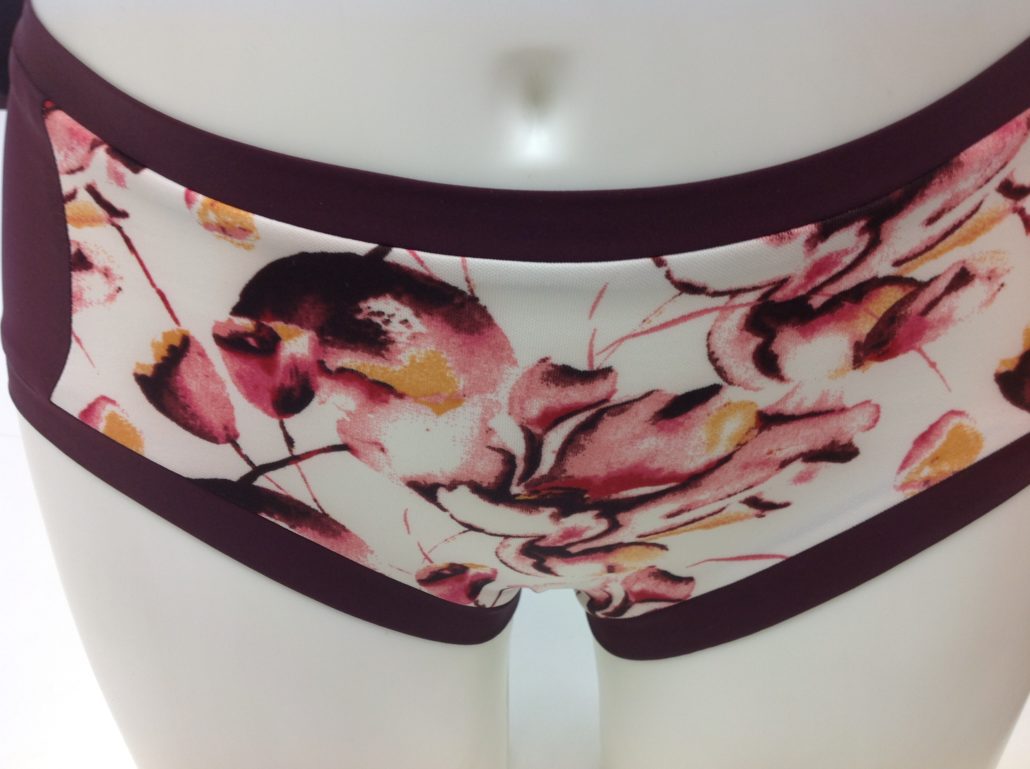
It all starts with a modification to a panty pattern. In this post, we’ve used the Veronica pattern but it could have easily been the Cheryl back-seam panty.
Tape the panties together as if they were sewn by overlapping the gusset piece to both front and back pieces by 1/2″ (two 1/4″ seam allowances) here the panties are shown with the front panty on the left and the back on the right, rather than up and down. (It fit in the frame better!)
There is already a 3/8″ (9 mm) elastic allowance on the legs of the pattern. We will remove that shown as the green line below. Remove the 3/8″ seam allowance from the waist as well (not shown).
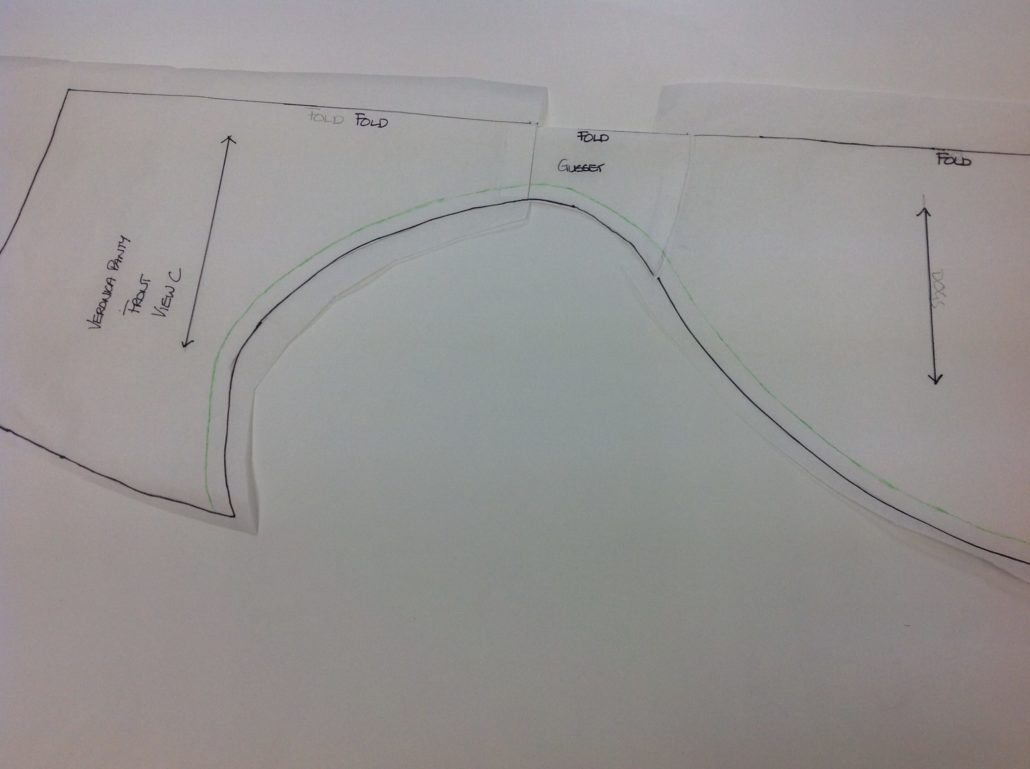
Then we need to also remove the finished width of the band we want to use. A good width is 3/4″ (18 mm). Let’s get rid of that too shown as the red line. Repeat this step for the waist.
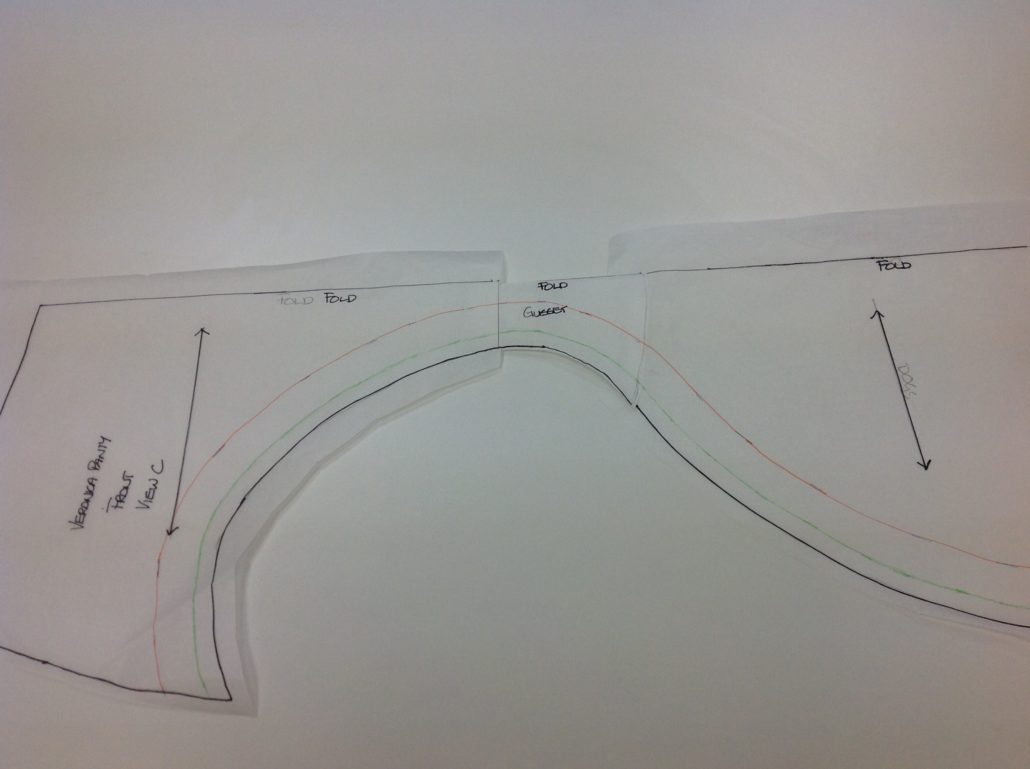
Now we have to add back a seam allowance of 1/4″ (6 mm) in order to sew the band to the leg. Here the purple line is the new cutting line.
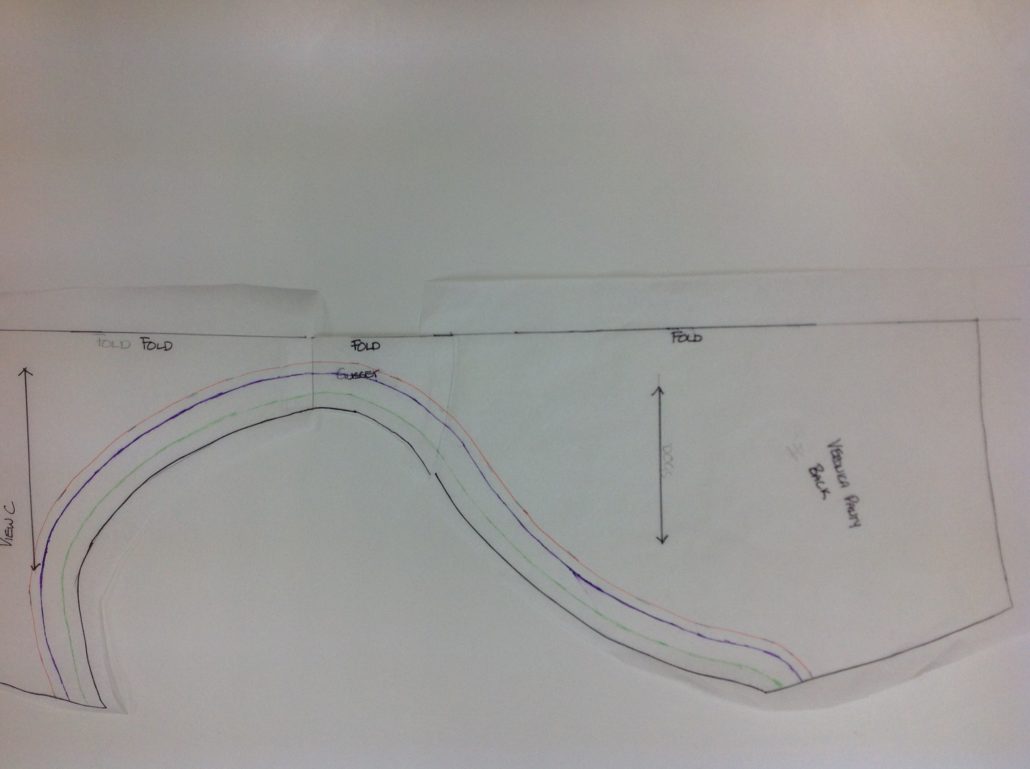
In essence, If you don’t want to go through all the drafting steps – we have removed a total of 7/8″ (23 mm) from the legs and the waist. (-3/8-3/4+1/4 or -9-28+6 mm). Here is the pattern with the extra moved out of the way. Yes, the gusset area will be “that” narrow!
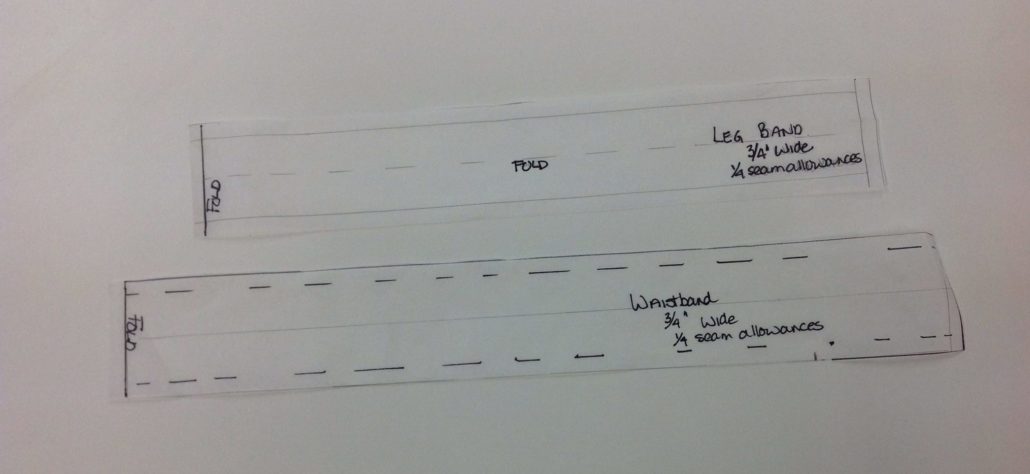
The band pattern will be two times the width of the finished band plus two 1/4″ (6 mm) seam allowances. In our case, that is a total of 2″ (5 cm). In addition, the waist pattern will be shorter than the paper pattern waist by 4″ (10 cm) and the legs will be shorter than the leg of the paper pattern by 2″ (5 cm). Make a band pattern for the waist and the legs.
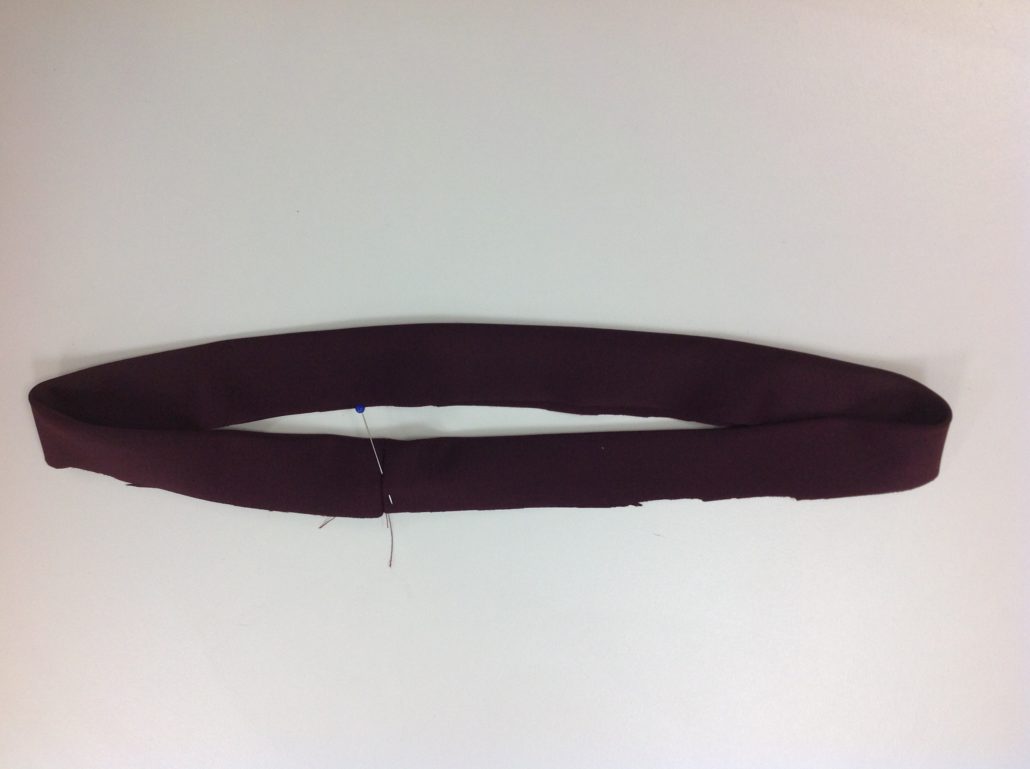
Cut out the main panty from stretch fabric. Cut two leg bands and 1 waistband piece. Sew the ends of each band together. Fold the band in half so you have a folded edge on one long side.
Sew the gusset to the front and back as you normally would. Then sew the side seams. This is a bit different than our usual routine, however, sewing the sides together makes for a nice smooth finish.
When you pin the band to the waist, the band will be shorter by 1″ in each quarter of the panty. Pin at each quarter (centre front, side seam left, centre back and side seam right).
Sew the band to the waist using a 1/4″ (6 mm) seam, pulling on the fabric enough to make the fabric band the same size as the panty and keeping the edges even.
The leg band is shorter by 2″ overall, but the 2″ (5 cm) reduction is all for the back of the leg, between the side seam and the gusset seam. That means you will stretch the band in this area so the band will hug the cheeks better and not ride up.
You can zig-zag or serge the sewn seam. Press the seam toward the panty.


")


Excellent tutorial, easy to understand and follow. I’m going to give it a try.