Someone told me recently that some women didn’t make their own underwear, because they felt the leg elastics would show as a panty line under clothes. This shocked me for two reasons 1. Who wouldn’t want to make their own underwear? and 2. the panty line is SO easy to eliminate. Here then, is how to make hemless Boyshorts. I did this construction in a pair of shorts I designed for a ready-to-wear company some years ago. Once you wrap your head around the concept, it is actually pretty easy.
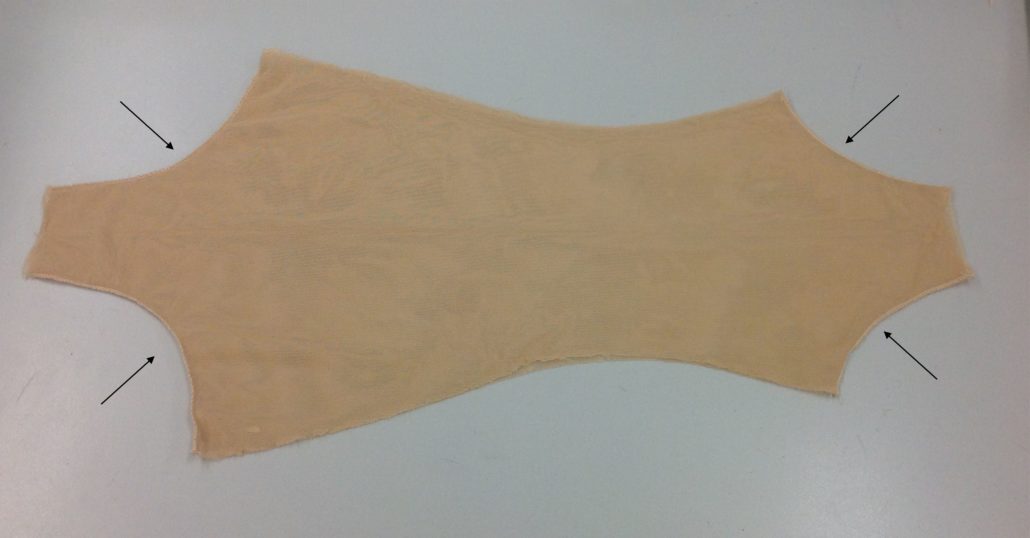
You need a boyshorts pattern. Use my Boyshorts pattern, or draft your own from instructions in my book, Make & Fit Panties, or on my Craftsy class. Perhaps you have a favourite pair you’ve cloned. Whichever route you take, the pattern should have the following elements:
- a seam in the front
- a seam in the back
- no side seam
- a straight leg hemline
Here I show the pattern I’m using. Yours may look a little different. I’ve indicated the actual seamlines and the hemline on the pattern. Be sure you have enough paper under the hemline to make this pattern double.
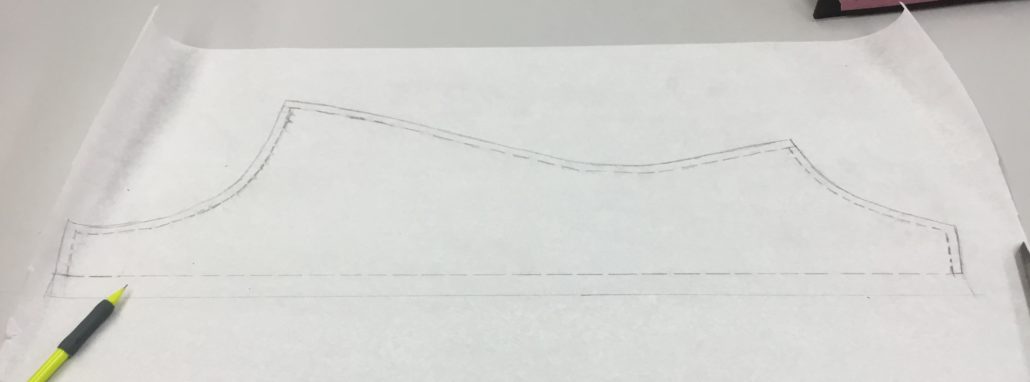
Now remove the hem turn-under allowance
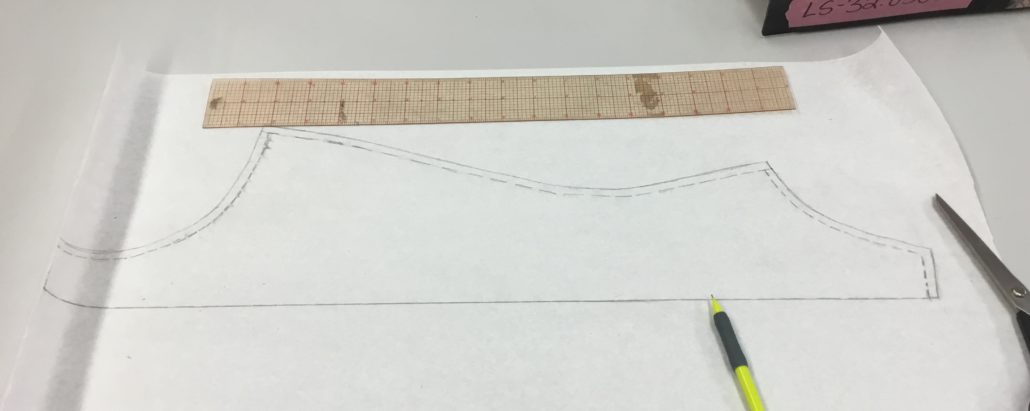
Next, fold the pattern along the hemline and cut along the cutting line of the pattern (but not the hemline).
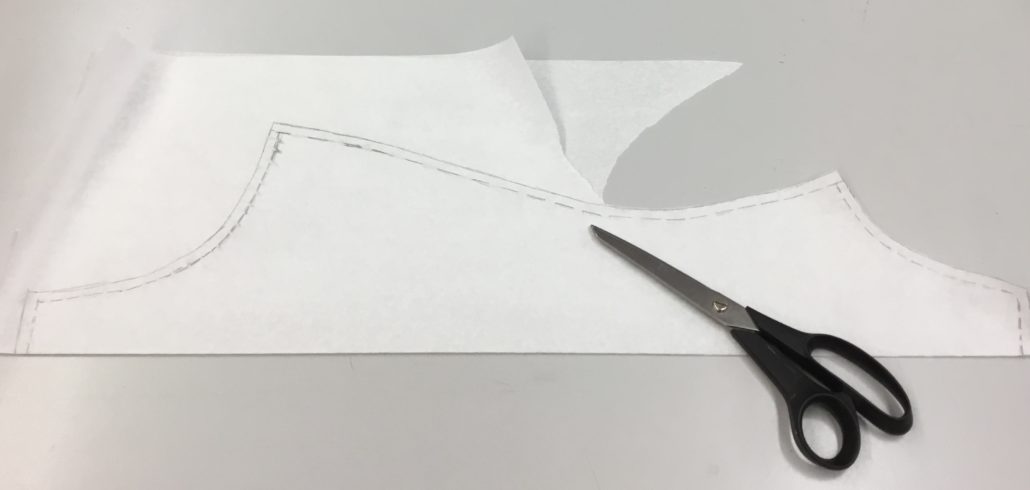
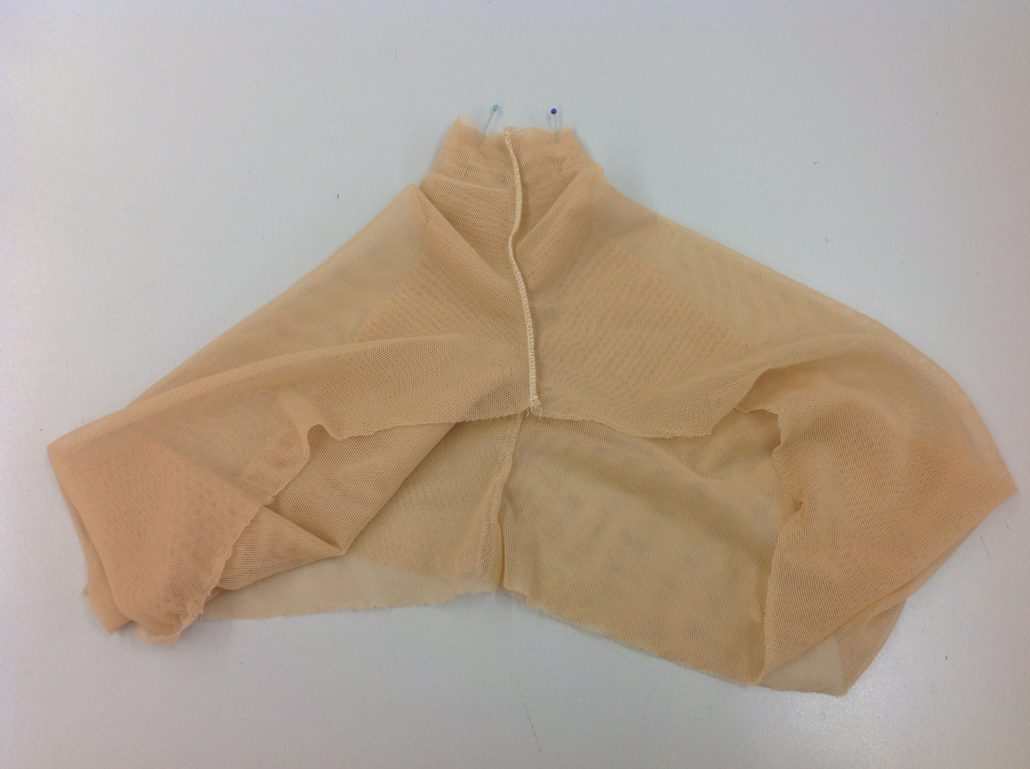
This makes a double sized pattern. Cut two of these out of lightweight stretch fabric. We are using sheer stretch mesh, but you could use Bamboo, Modal matte glisonette, or ultra fine stretch mesh. Anything super light and stretchy.
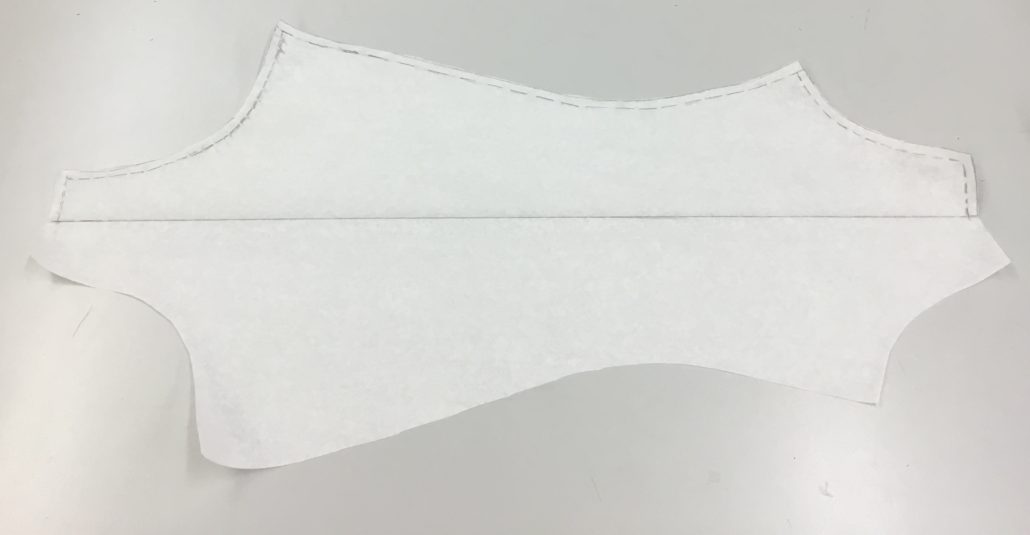
I like to press the fabric in half along the hemline at this point so it will be easier later. Next, sew the two layers together at the four seams along the centre front and centre back. I used a narrow serged seam. Right now this looks like an animal hide, but I promise, it will get better. Leave the seams on the outside for the moment.
Here’s the tricky part
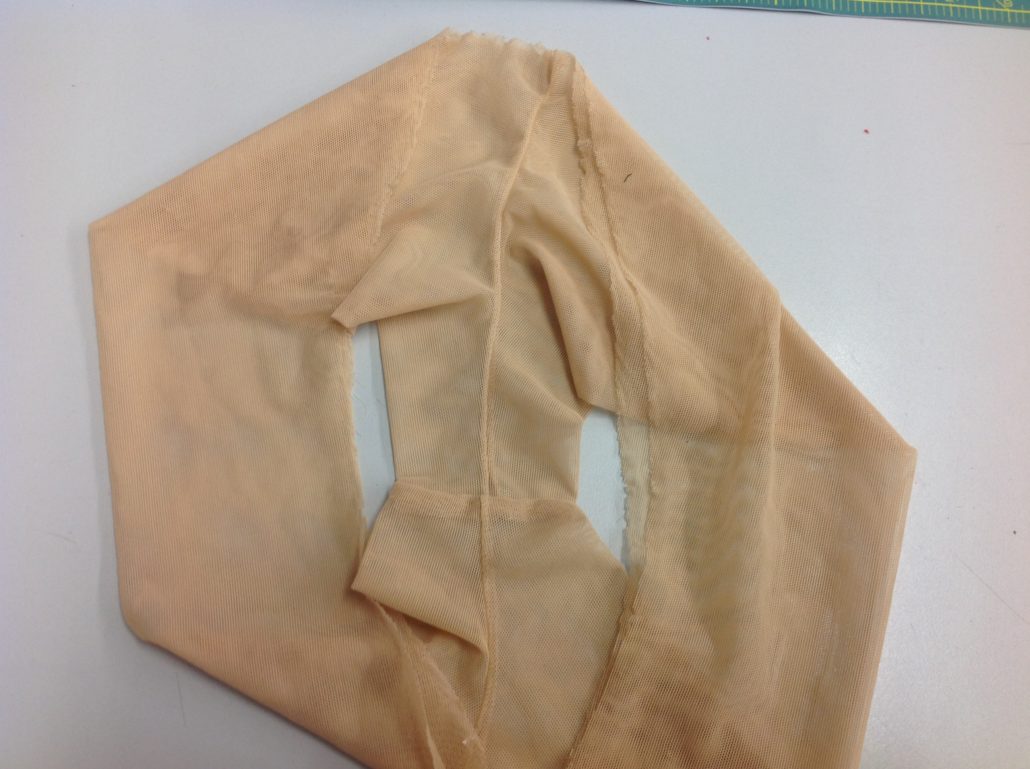
To make hemless boyshorts, you will be making the inseam a stitch-and-flip seam so the inside will be raw edge free, just like the outside. Push the back gusset section up into the front section so that the right sides are together. You can see the shadow of the back through the front. Make sure the seams all line up and they are centred along the space.
Here’s a close up
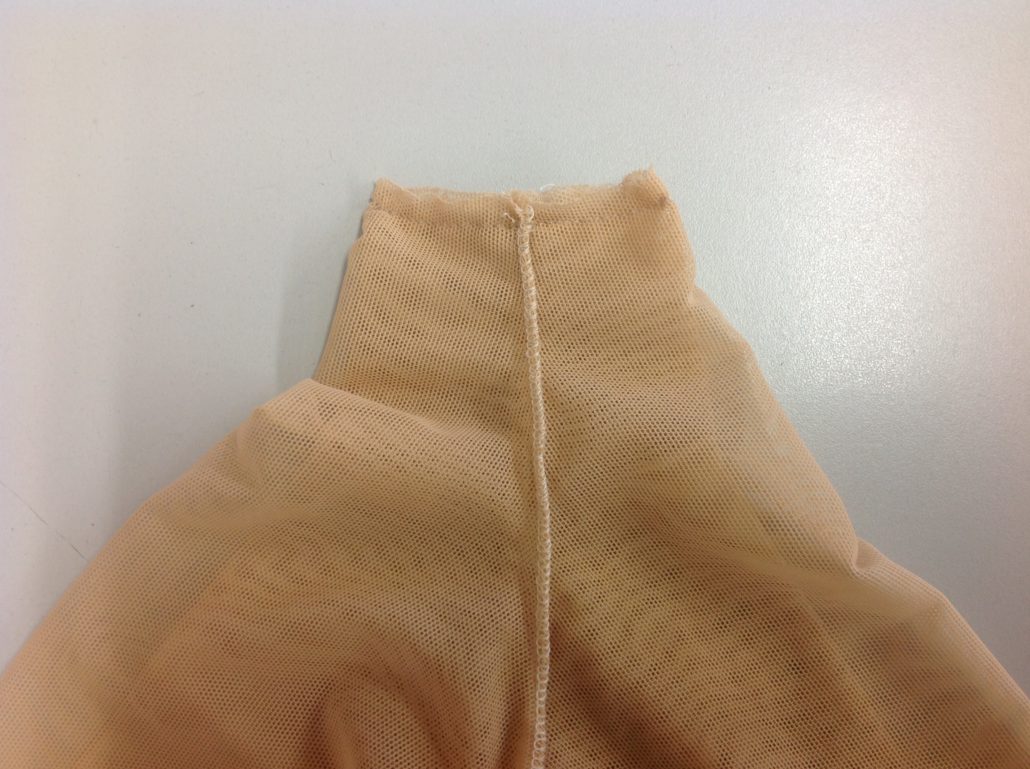
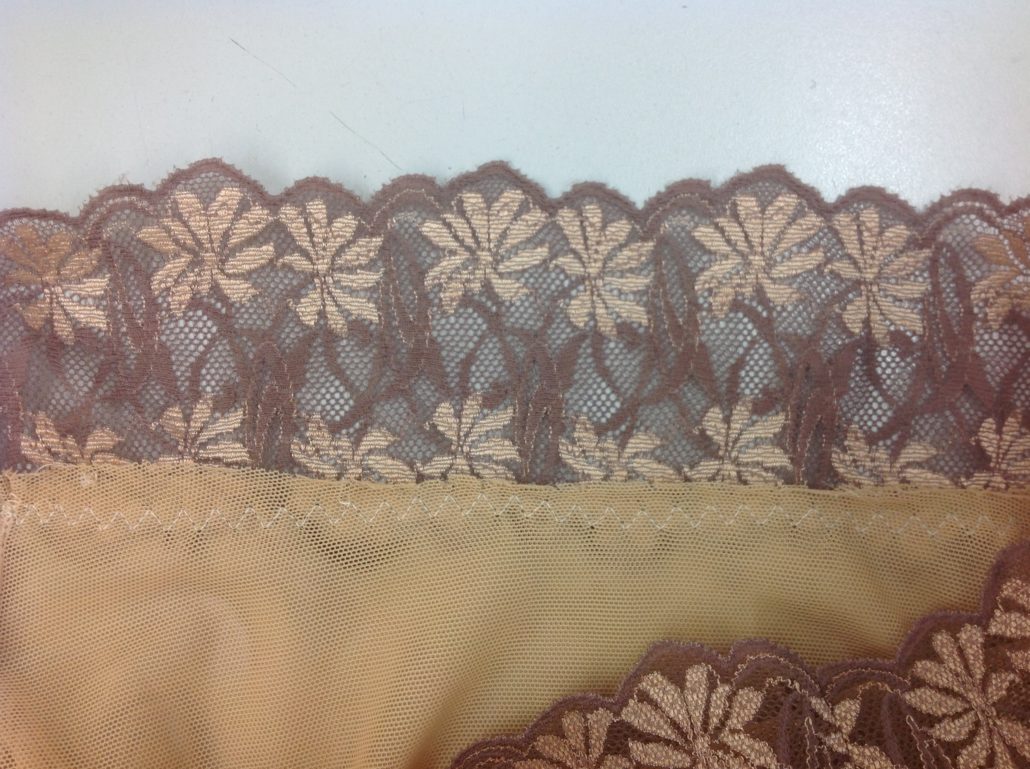
You can serge the seam or not (I didn’t here) but now you can flip the shorts to the right side. Sometimes you just have to shake it and it will magically be right way round. The seams are enclosed on the outside of the shorts…
…and on the inside as well. At this point you can sew a rectangle of cotton for the gusset lining over the intersection.
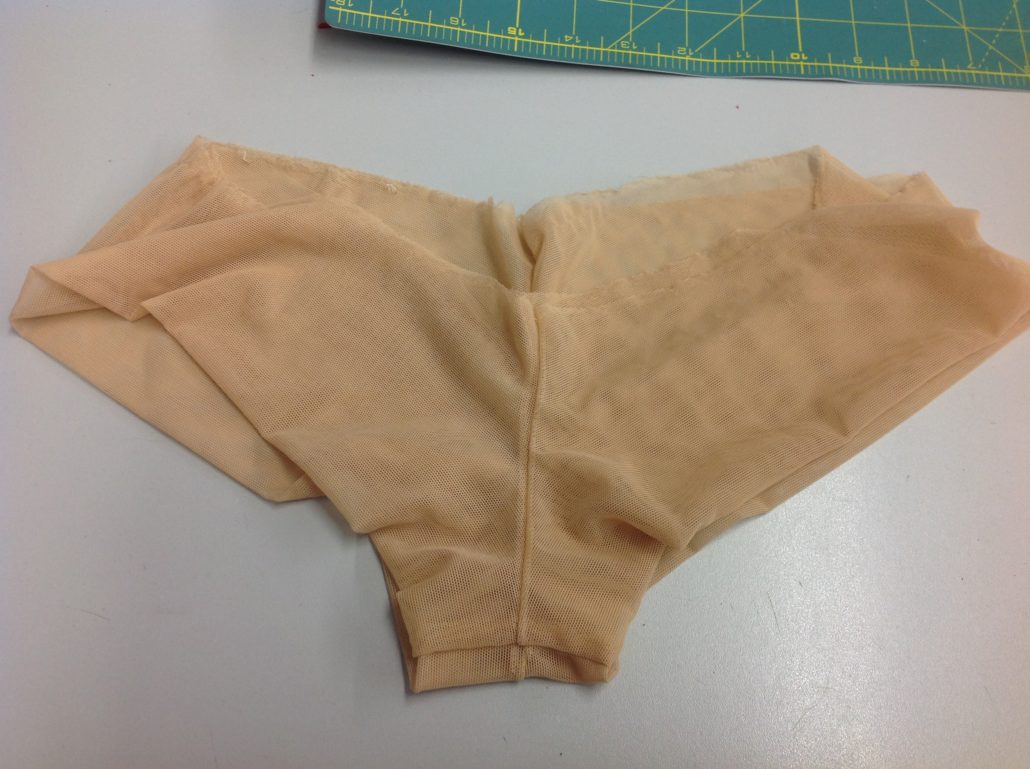
To finish the top raw edge, you can sew elastic on, but here I sewed on a piece of 3″ wide lace. The shorts won’t sit so low (that’s old-fashioned, I know, but I don’t like them too low on my short body). Overlap the top edge by 3/8″ (9 mm) and use a three-step zig-zag to sew on the lace.
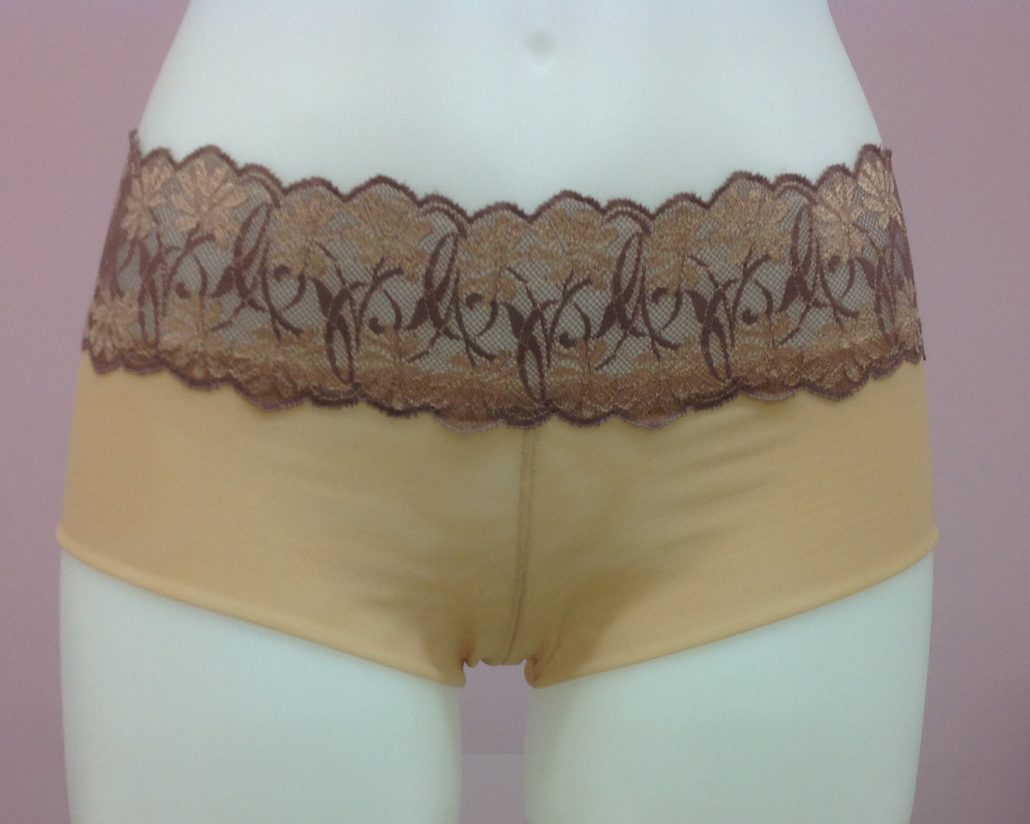
The finished hemless boyshorts!


Beverley I have a question – I drafted a pair of boyshorts following your crafty class and I notice two things:
Ons is that the back waist pulls down, terribly. Your back waist above seems to be much higher proportionally.
The other is that back bum length needs to be longer based on that pattern drafting. With the draft above, do you think the straight legs, if longer, would fix that. I definitely love the look here with the no-hem legs.
Hi
I am totally confused but desperate to make these. I take it that the four seams which are sewn are the curved seam either side of the gusset on both ends? What is the hemline!
Many thanks
The hemline is actually the foldline – half-way between the waistband at the top and bottom of the piece. You can see it in the photo. I folded the paper along the hemline to make the other half of the pattern
Hi Beverly!!! It’s a sunny, lazy Sunday morning and I cut and sewed two pairs, thank you! The lace waistband is so pretty. I lengthened my hipster boyshort pattern 6″ and added 2″ in height to the top so they look like slimmer shorts. These are perfect for bike commuting in a skirt, and will be just the thing to extend the wearing season of my skirts as the weather cools off. Merci beaucoup !
You are most welcome. I am glad you enjoyed the tutorial!
Depending on the amount of stretch in the fabric, couldn’t you treat the waistline edge as a stitch-and-flip as well? I think I’d add a strip of power mesh about 1inch/2.5cm wide at the waistline between the layers, triple zigzag stitch stitching along both long sides, on the layer you plan on being next to the skin.
You can make the hemline on the fold or the waistline on the fold but not both. You could make the waistline stitch and flip but you would have no way to turn the shorts the right way around. Unless there is a way that i haven’t found yet! Might be something to play around with!
Thanks Beverly, looking forward to trying this technique.
These look great! Thanks for sharing with us, Beverly.
Looks great – thank you!