Ingrid is a non-wired support bra from the design team at Pin-up Girls. Together we’ve created a bra pattern with the largest size range on the planet. Ingrid has a lot of pieces, and they all contribute to the engineering of this remarkable bra. Here, then is how to sew Ingrid, so that your sewing will be smooth and trouble-free.
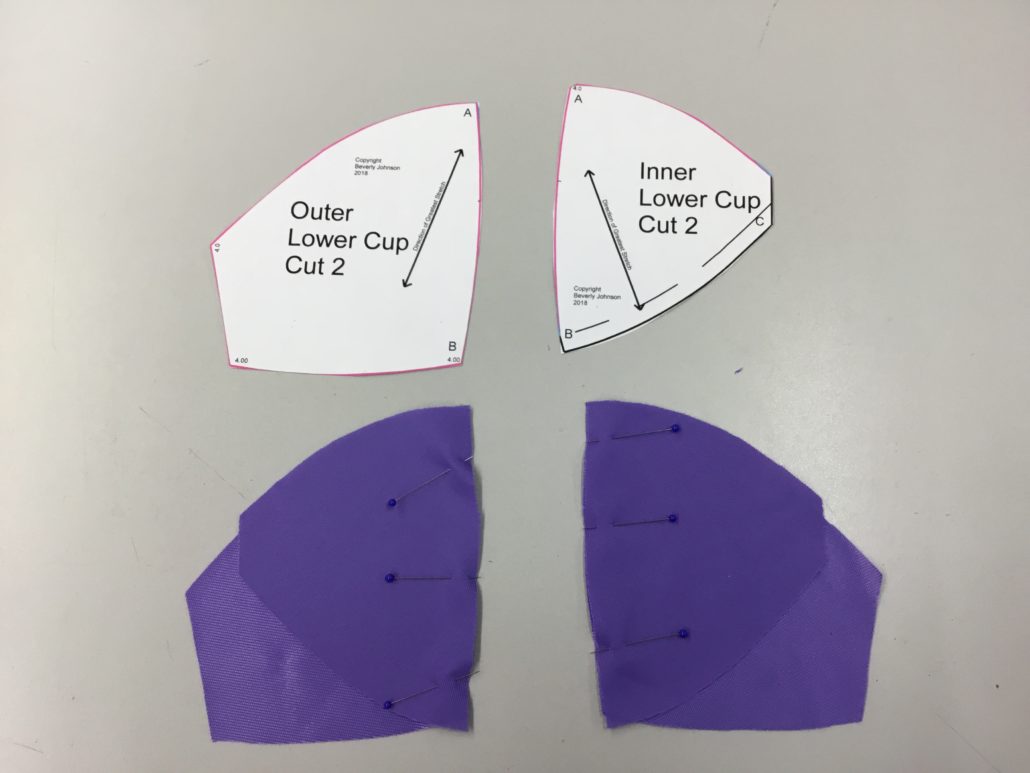
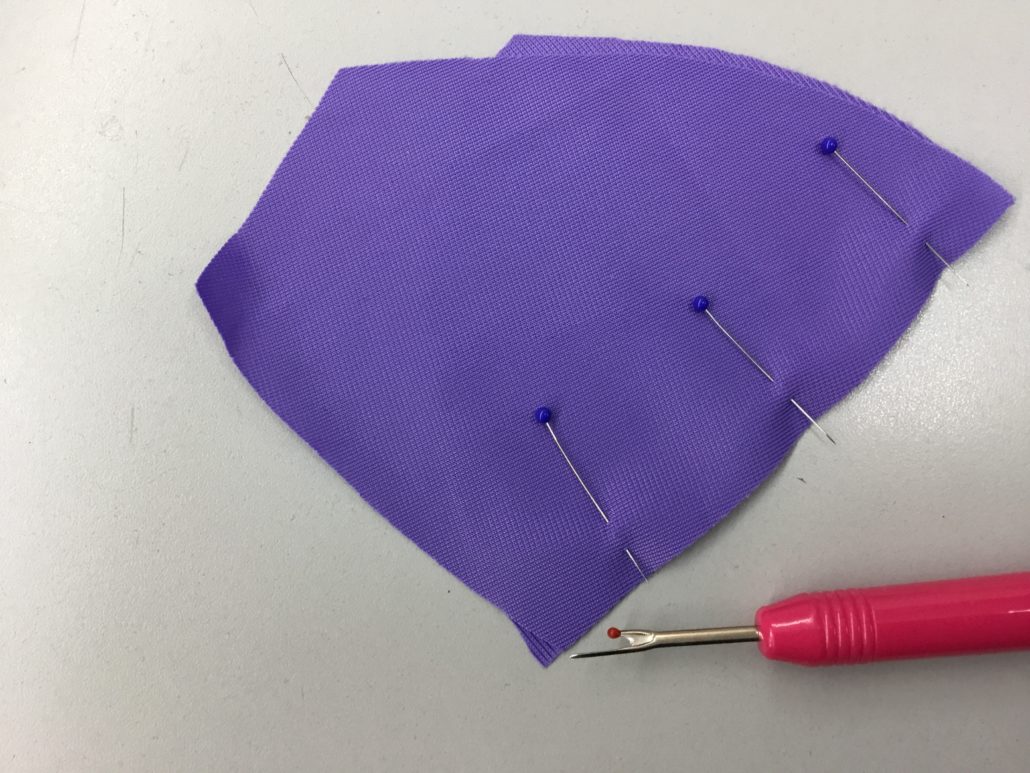
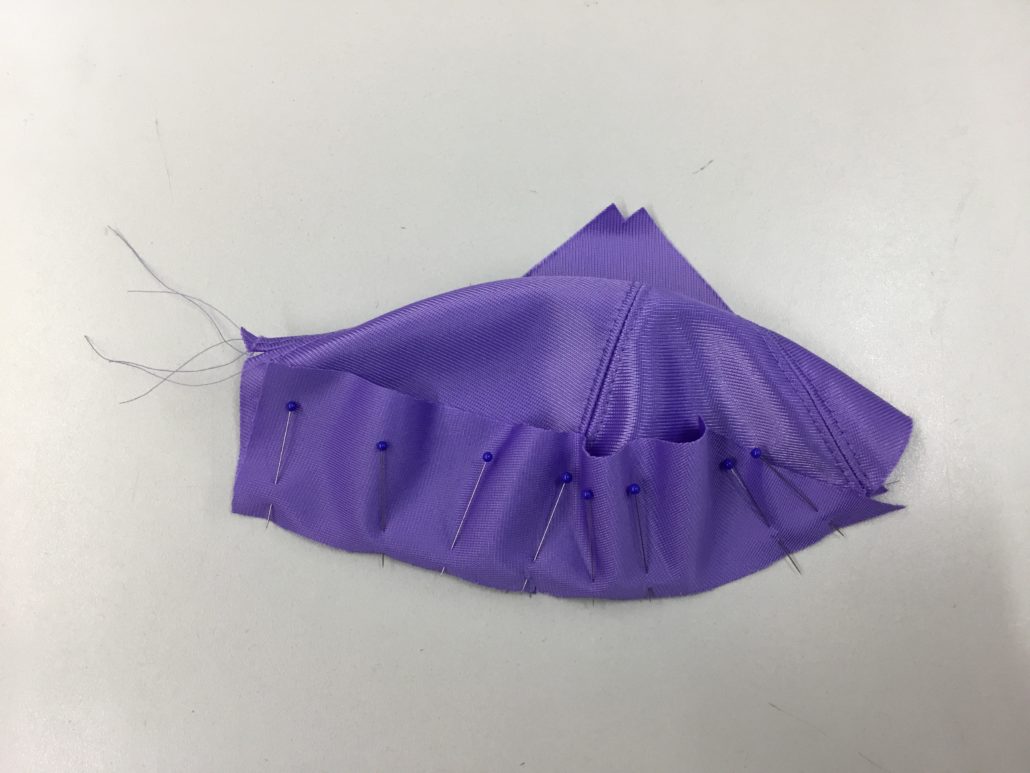
After cutting out the pieces according to the cutting diagram in the instructions, we pin the lower cups together. The lower cup is in two parts (except for the smallest sizes). The top and bottom of the seams are not perfectly square, which can present a problem if you are not familiar with sewing angled edges. You can see clearly here how the piece underneath forms a “dog-ear”. The tip of the “ear” needs to be exactly 1/4″
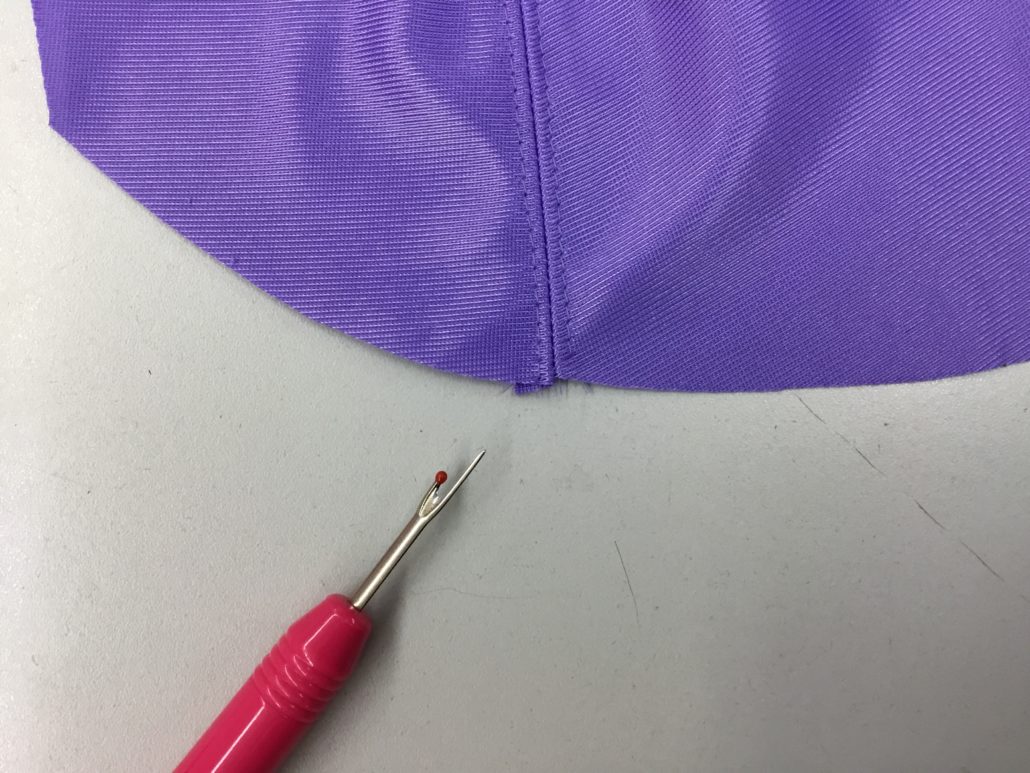
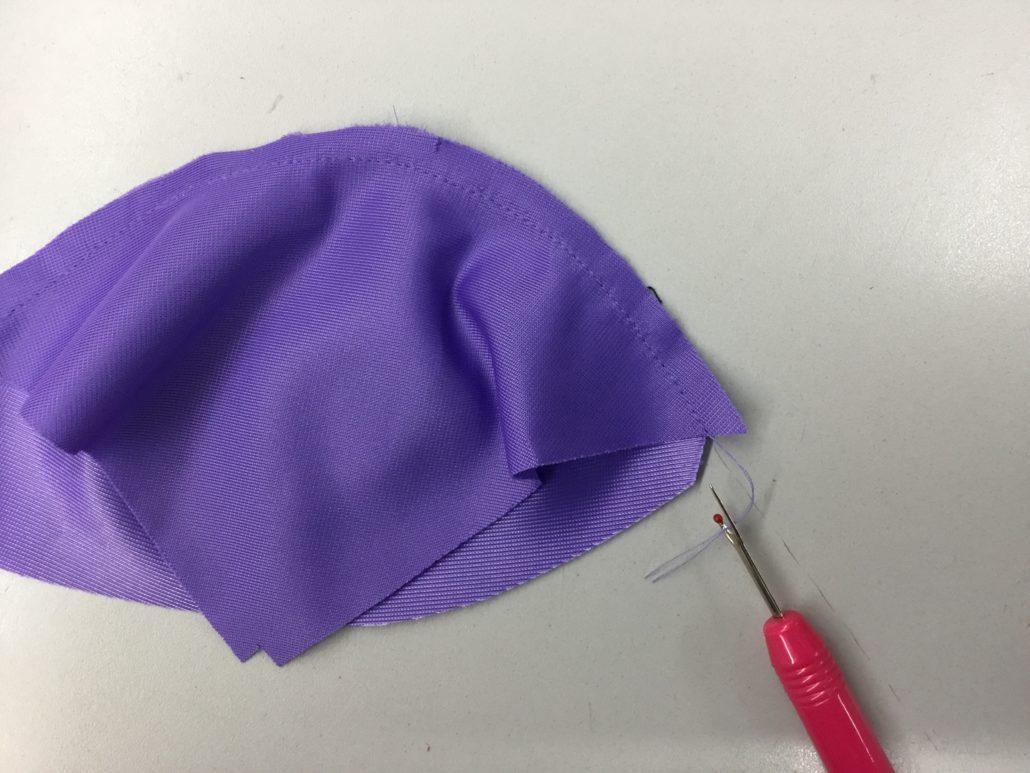
You can see how the edge lines up correctly when you do this. Press the seam open and topstitch
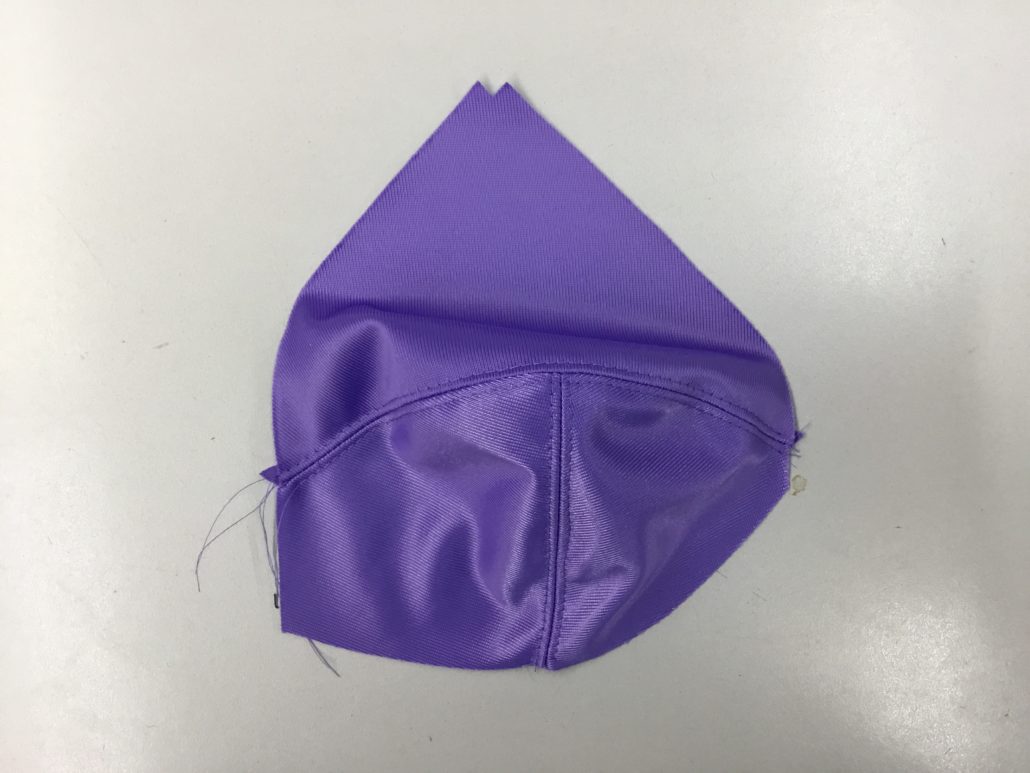
Sewing the upper cup to the lower cup can be a bit tricky. But match the 1/4″ seamline to the small square section of the inner lower cup. It will look like this.
Here’s what the piece looks like after topstitching. You can see the small squared off section of the front below the cross cup seam (this is the right hand cup shown).
The underbust piece is the piece with a sharp up-turn. This is the centre front.
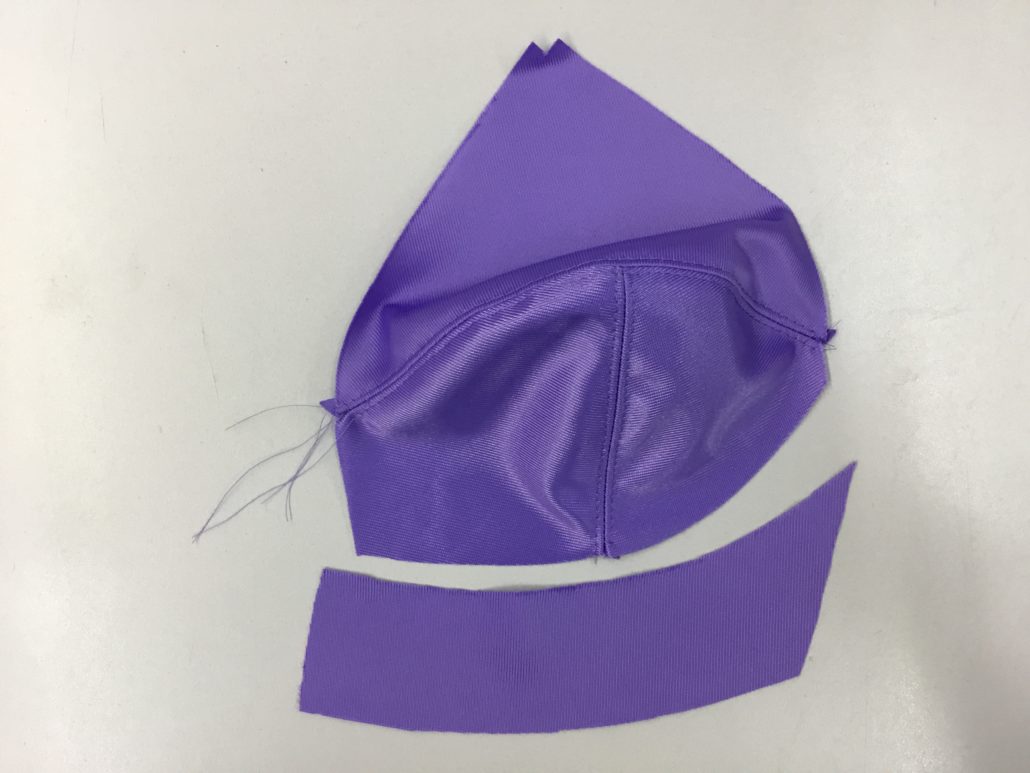
With ride sides together, sew the underbust to the bottom of the lower cup.
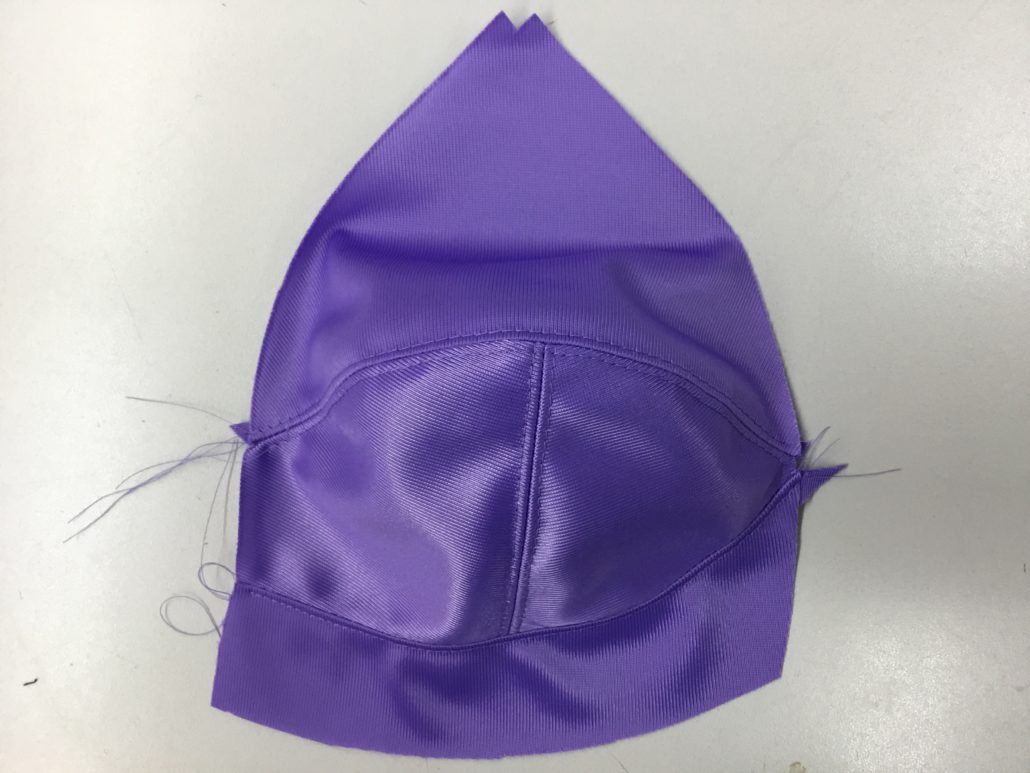
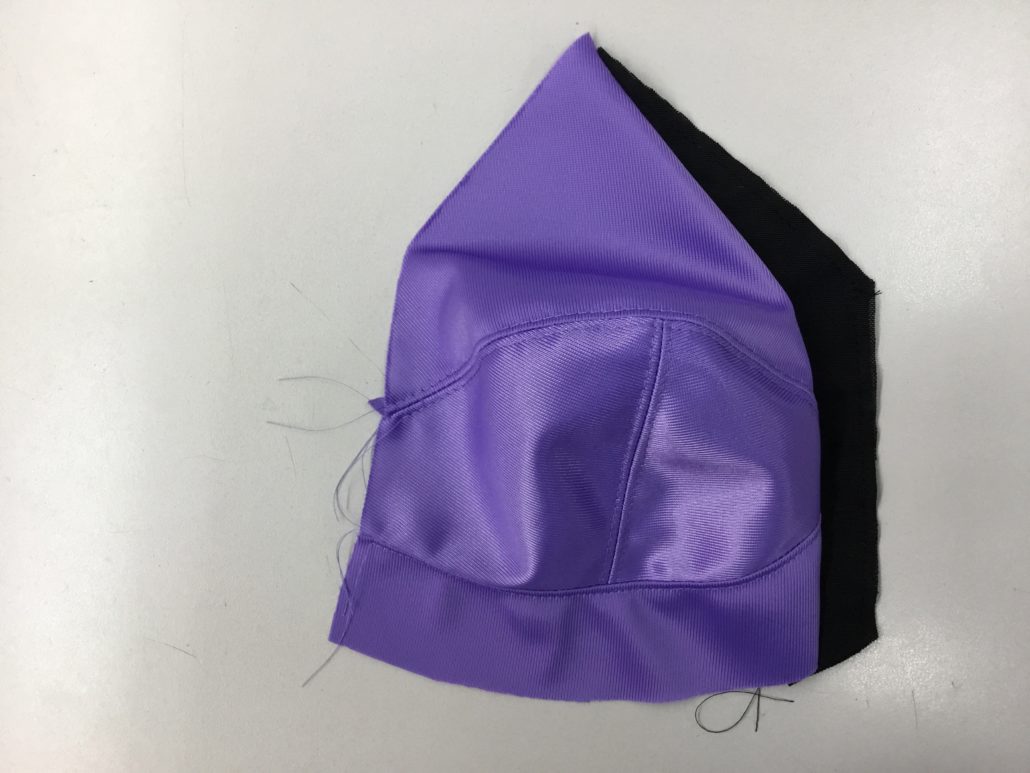
Here is the seam pressed to the underbust side and topstitched. You can see there is still a very short section of the inner lower cup still showing. If yours looks like this, you are on the right track!
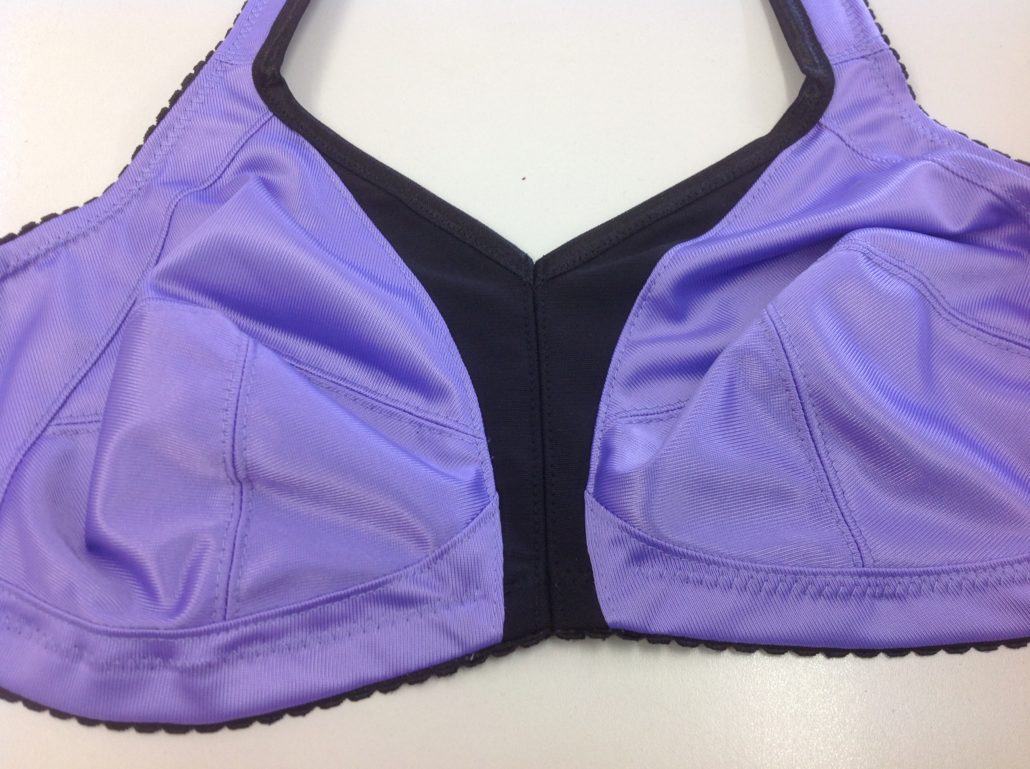
Now you can sew the front panel to the cup. the front panel was designed using a double layer of power net, so that the area between the breasts can breathe. We’ve stabilized the top (neckline) edge of the piece on the wrong side according the pattern instructions. You can use a piece of tricot tape, a strip of sheer cup lining or even a strip of selvedge cut from a woven fabric.
Press this seam toward the cup and topstitch.
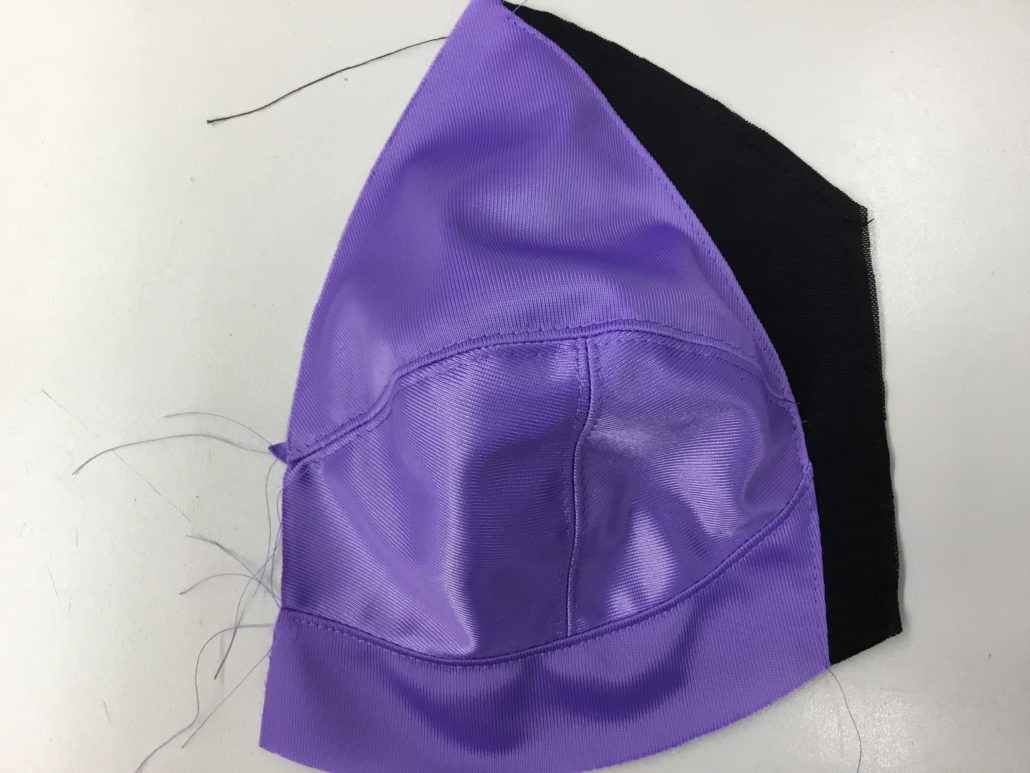
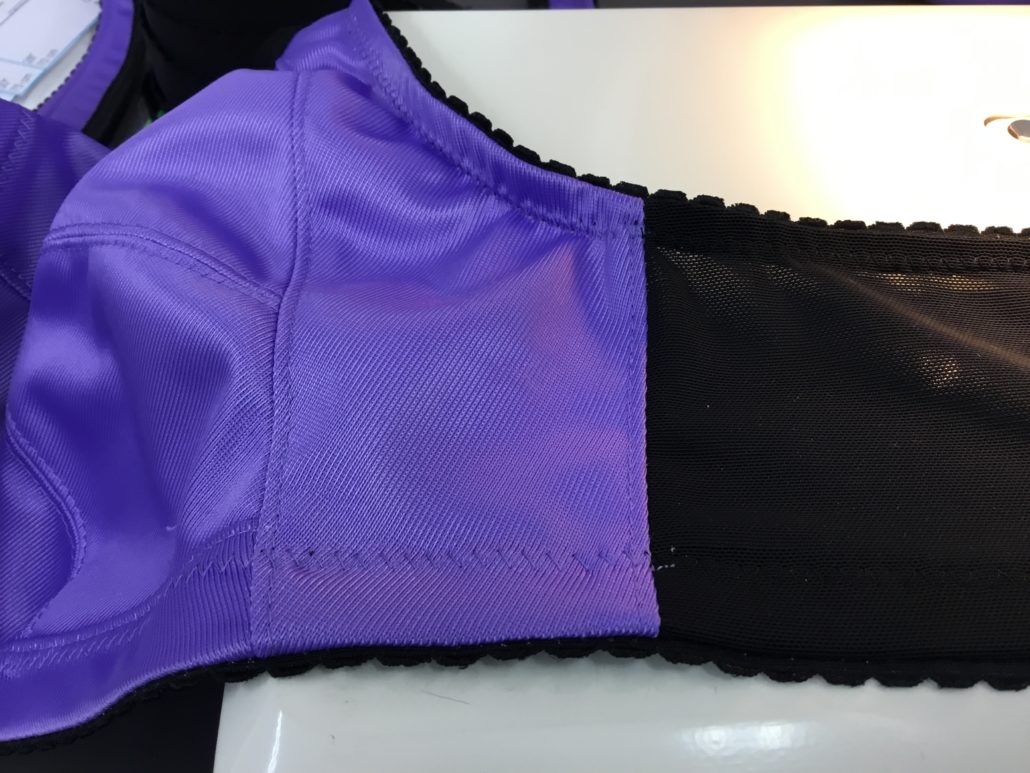
Now for the side panel. With right sides together, sew the side panel to the cup. press the seam toward the side panel and topstitch. You can see how neatly the strap connection meets the upper cup and the front panel.
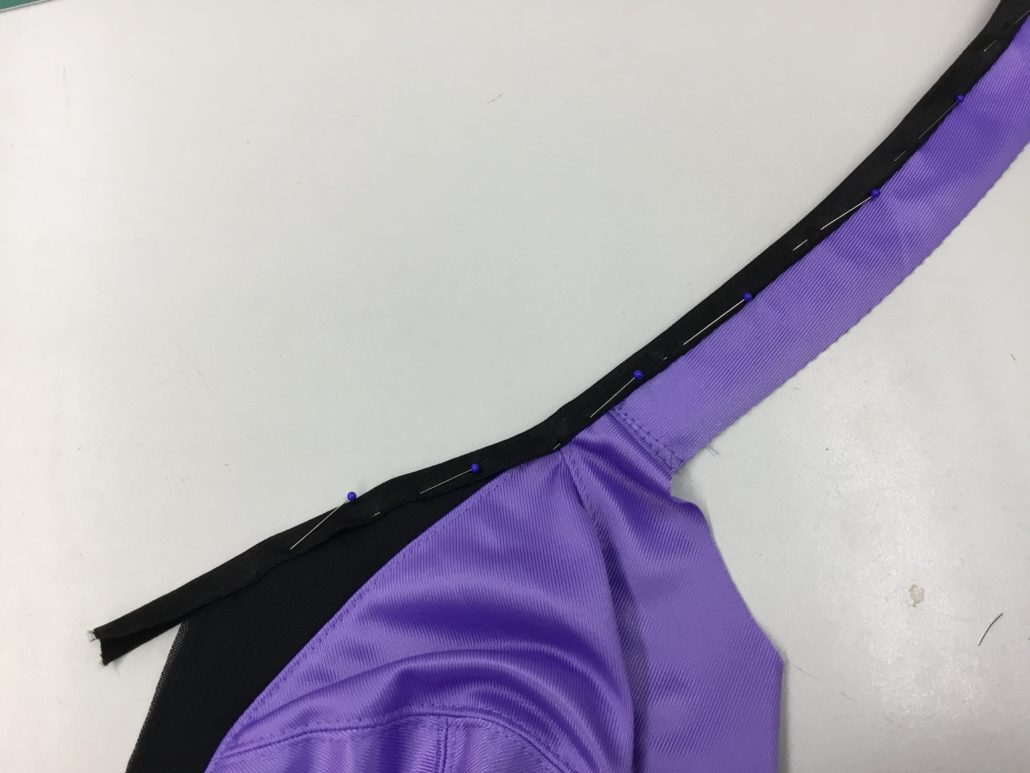
Add the strap to the strap attachment point (we give you instructions for padding the straps in the pattern). Then press the fold-over elastic binding in half along the crease to prepare it to be sewn along the neckline edge.
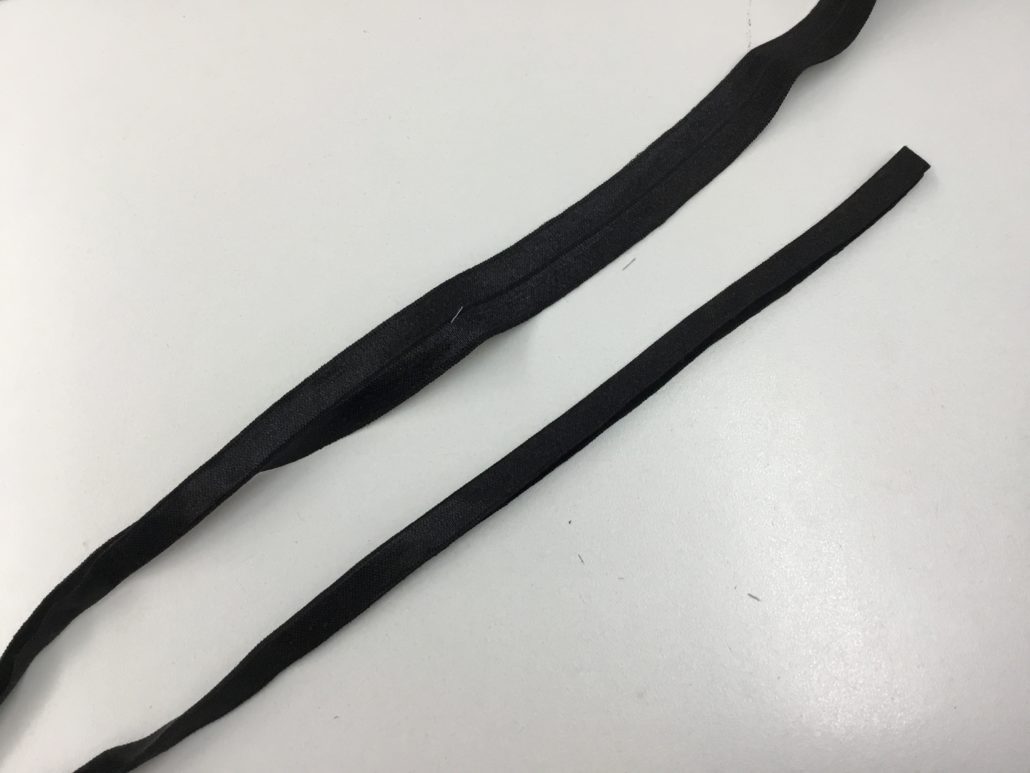
We use a glue stick to hold the fold-over elastic binding along the neckline edge and up the strap until we sew it (or…you could use pins)
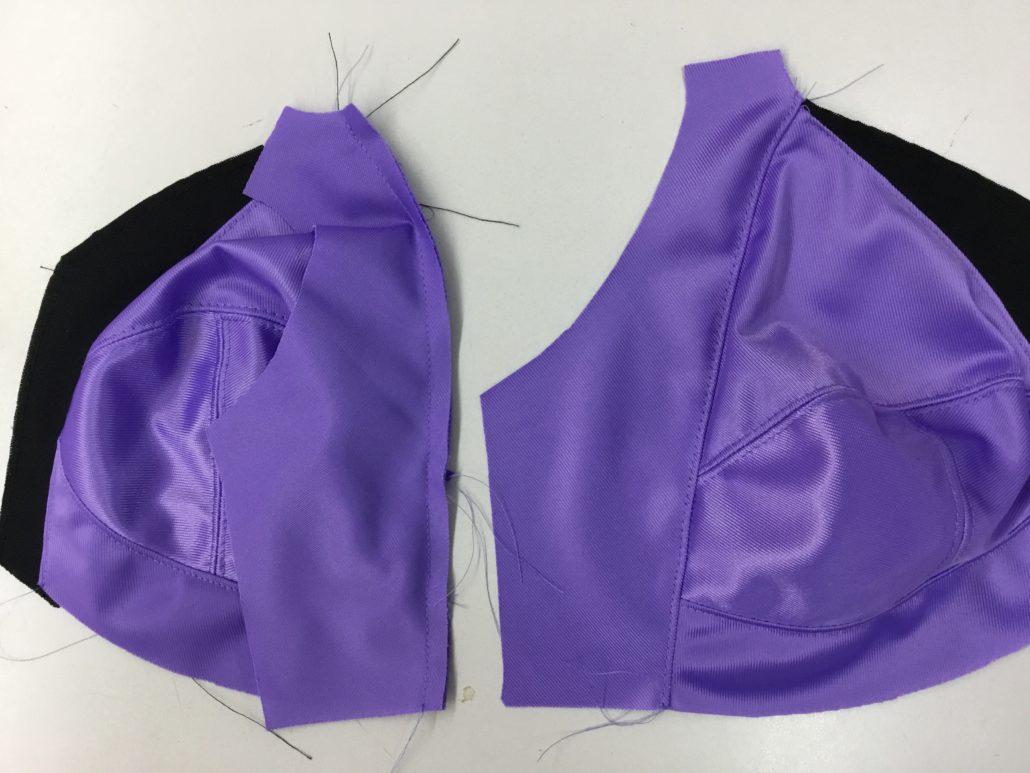
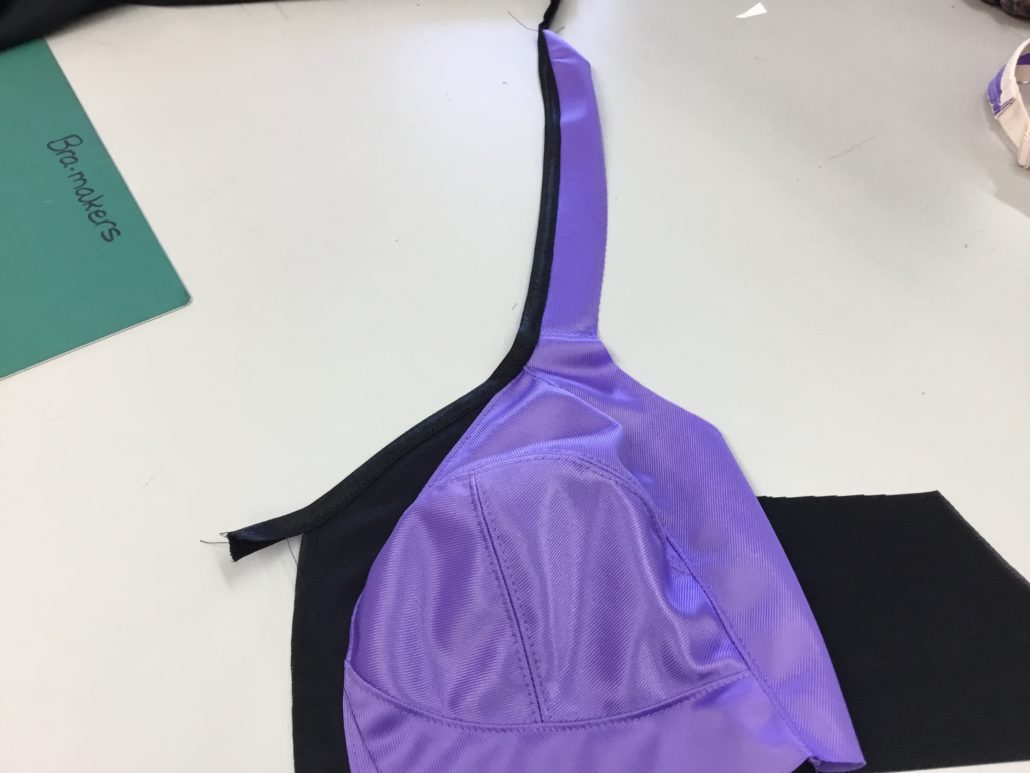
The back band is the final piece of the Ingrid puzzle. Sew the back band on, press the seam to the side panel side, and topstitch.
Your Ingrid bra is together. You should take a deep breath at his point – the hard part is over. All that is left to do is to apply the elastic to the upper edge of the bra. This is no different than sewing any other bra elastic.
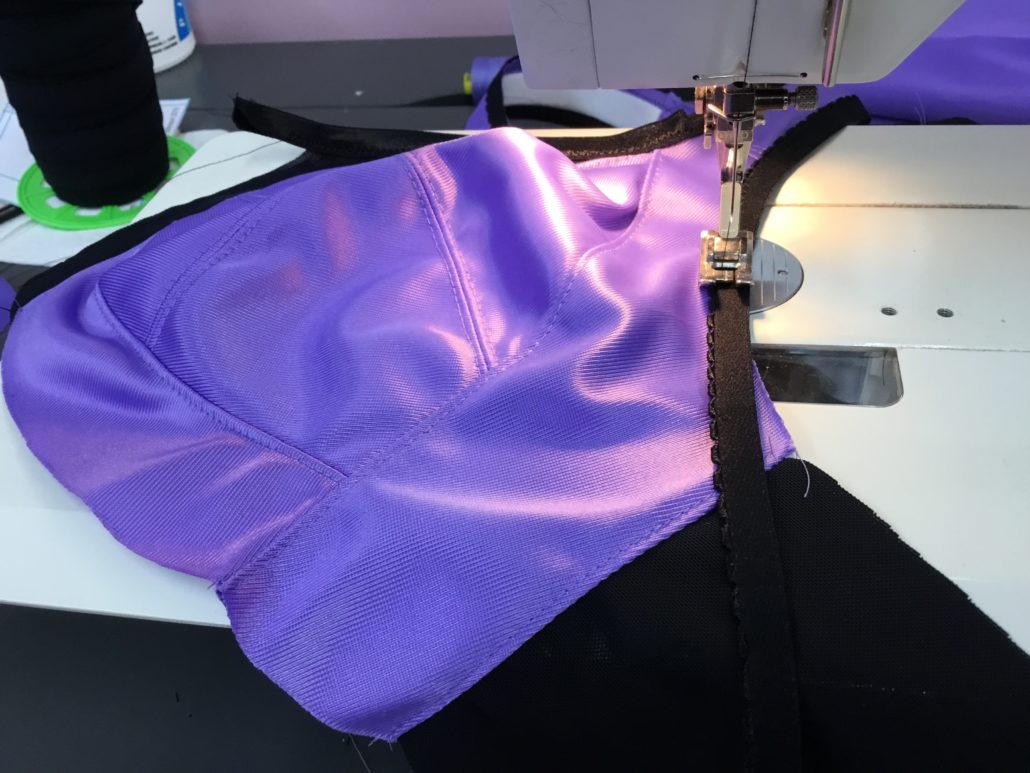
Sew the bottom band elastic on in the same way. Yes, the Ingrid is still in two pieces. We don’t sew the Ingrid into one piece until after the bottom band is sewn on. You might notice we changed thread colours at the seams. I don’t like it when the fabric changes colour, but the thread does not. It’s another step to do, but produces a much better result, in my opinion.
We cut two 10″ pieces of strap elastic and add sliders and rings to them as in any other bra. Sew the strap on the back, and add the hook and eyes. Then, finally…we can sew the centre front seam together, which will form a nice little Gothic Arch.
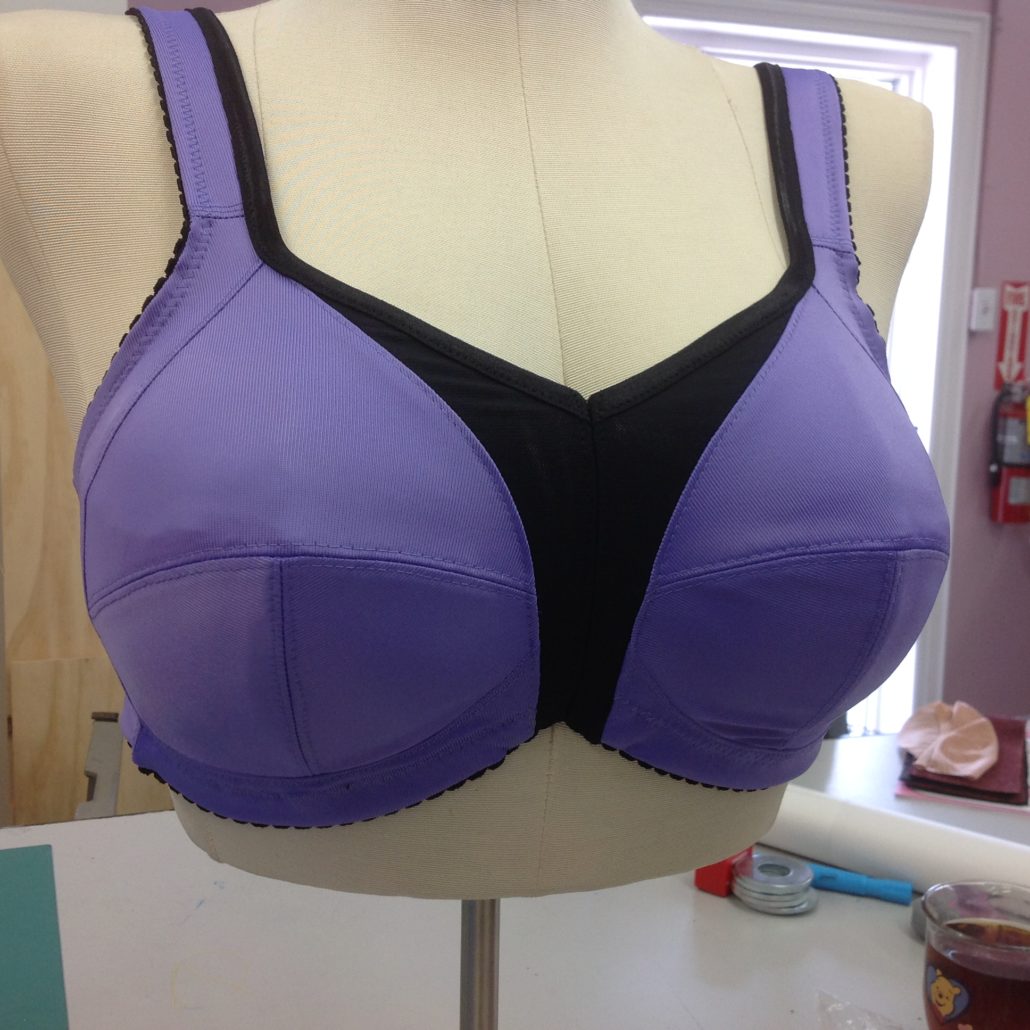
Here is Ingrid all finished. Now that you know how to sew Ingrid, I do hope you will share photos of your Ingrid makes on our social media. Use the hashtag #bramakerssupply when you do so we will be notified.


1. Mistake report: Ingrid Pattern r. 01/2019 printing
The direction of DOGS on the “Front” piece is horizontal to the wearer’s body on the pattern piece.
It is show being vertical to the wearer’s body in the cutting diagram. But the cutting layout indicates the pieces laid out with horizontal DOGS.
I’m trusting the pattern piece as more likely to be correct.
2. The Front pieces are cut out double, and based together to make a double layer piece.
Is there a structural reason for NOT cutting the “front” with the CF line of each piece on the fold?
Surely this would create a cleaner middle finish seam, And not have an extra layer of fabric potentiality visible where the seam is creating a dark line.(Very noticeable if one uses stable mesh) And it would also provide a cleaner look sitting on top of zipper tape as pictured in the option step 22. (Cutting on the fold affects seam allowance!)
The alternative, involves sewing the two layers together along the center line and folding them so the raw edges are between the two layers.
Can I lower the center front seam a bit?
I love the idea of this bra but I am having trouble getting the fit right. I can get the cups to fit very nicely but the bridge sits out from my chest wall by about 1″ and even looks like it wants to fold outwards. I’ve made Ingrid in 3 different sizes and in 2 combined sizes but the bridge never sits where I think it should. Am I striving for something that this bra is just not meant to do?
I’m getting the same problem. I have made three full bras and two cups for fitting. They look like the cups fit but when all sewn up, the bridge sits away from my sternum. The last one I made, the cup was too big but the bridge still sat away from the chest wall. To me it looks like the inner cup piece and inner part of the upper cup need to be wider by about an inch but redrafting that would make the overall bra too wide and then the straps would need to be redrafted. I would welcome some advice on this too.
Judith, I think I know what to do… ( this is very long)
I have Beverley Johnson’s bramakers manuals and in book 2 it has a few pages on adjusting the cup shape to make the bridge sit flat. You have to create what she calls a “Franken-bra”: make up the bra in the usual manner. You could skip the fold over elastic. Test the fit. If the cup depth is ok and there’s no extra flesh popping over the top or under the sides, draw a line somewhere midway at the centre front seam of the upper cup to the seam midway between the c and b point on the lower inner cup (you have to do this on both cups) the line will look like a diagonal from centre front at the top to the bottom point being further away from the bridge. The next bit is heart-breaking and hilarious at the same time: you have to slash that line in both cups :,( After all that work it seems painful. Then try the bra on again. The fabric will move apart to accommodate the extra breast tissue. I had to laugh, I felt like a pastry being released from a pillsbury can. You have to pin a scrap of fabric behind the slashes and then take off the bra to sew down the fabric. Try it on again for fit. Your bridge should be sitting flat against your chest now and your boobs will look like they are heading off in opposite directions. If you are happy with the fit , take off the bra and measure the gap at its widest point of the slash (if your breasts are significantly different shapes or sizes you will have to measure both cups.) You will have to go back to the pattern now to make adjustments. In her book, Beverley’s description of adjustments work for a classic bra and bridge. Because the bridge on this bra is different I couldn’t make her adjustment process work so I have tried making fit adjustments like I would for other clothing: our problem with the bra is not cup depth but cup width. There are certain parts where we need to keep the lengths the same, eg. The cup depth from point a to b on the inner cup as well as the side panel length and centre front length of the upper cup. So on the inner lower cup I measured the distance on the mock up from the centre front seam ( that bit above the c point) to the slash point, then marked that distance on the pattern and cut the pattern between that and point b (leave a little bit uncut so you can pivot) then pivot out the extra width you measured out when you did the slash-n-fit: mine was about 1&3/4″. Then you have to do the same for the upper cup: measure the distance from the centre front to the slash and cut the pattern from that distance up to but not through point E then pivot from point E by the same slash width. You will have to recreate the curves with a french curve and measure the corresponding amended lengths to make sure they are the same. Ok so that is where I am right now. But do you remember I said after the slash fit the boobs were pointing in different directions? That because when you opened up the bottom inner cup you moved the apex outwards. Beverley’ book shows how to move the apex back. Because the bottom cup is in two pieces for most people using this pattern, you will need to stick your adjusted inner cup piece and outer cup piece together between point A and point M then draw a line down about an inch. Draw another line perpendicular to that first line across both cups. Then you cut across both cups on the horizontal line and move the top piece towards the centre front by the same amount as the slash width (in my case 1&3/4″) tape it down and true up the curves from the top of the side point of the outer cup to the curve near point A and then point A to the seam point above point C of the inner cup. Then you have to make new cups and try a new bra on to test fit. (I haven’t done the last bit so will report back on that.) I hope that helps and Beverley if you are reading this please correct me if I’ve got something wrong.
Thank you Mary, I have both of Beverly’s manuals. I will check out all the Franken-bra details. Thanks again for giving me so much help working out the fit; I really want my Ingrid to fit.
I want to make sports bra for lady with big breast but cant get a pattern, where can i find one?
Hi there
I recently purchased your Ingrid. My BCD is 5” and band is 30”. I am a bottom heavy. The seam line hit perfectly on the nipple. But I got plenty of room on the top. Just wondering how can I adjust the pattern? Other patterns I used from other company usually make my nipple sit much higher then the seam line or else it’s too big. I seems have the same problem with all pattern company.
Thank you
can it be made from 100% cotton. have been wearing size 50DDD but I need a larger size now and unable to fine a pattern. Do go up to that size? Grandma
Yes, but our sizing doesn’t work by letters (DDD for example) which vary widely from company to company. Instead we work with the Bottom Cup Depth Measurement, which is far more accurate. measure the distance from your nipple in its supported location down to the crease below the breast. That, in inches, is your BCD Measurement. The band is easy to make larger, just split it vertically and spread the two pieces apart like you are lengthening a sleeve and tape some paper underneath.
I cut out all the sections of the ingrid, but as I’m constructing it, I can’t figure out what the “Lower Cup” section is for. The step by step doesn’t show sewing in a lower cup.
The lower cup is in two sections on the larger sizes and 1 section for the smaller sizes. The very first step is to sew the lower cup together (if in two pieces) and then the lower cup unit to the upper cup.
This seems like a great pattern for a sports bra.
Do you have a picture of the inside of the centre front? If you sew it last, does that mean the seam is exposed?
And will you offer this (or any of your patterns) as pdf?
Yes, the seam along the CF is sewn last so the seams are exposed. However a strip of seam tape of even duoplex would fix that…or you could put in a zipper. My plan is to get all my patterns over to their new format using the BCD method before I change them to a .pdf format. I’ve thought about that for years but the patterns are too big and unwieldy at the moment. I need to pare them down.
Love it. (Band 85 cm. Cup, 19.5 cm.
The straps are dropping from my shoulders, will be no problem on the second one.
Even I will make the brigde higher. For me the straps are far too long, need just 4 cm straps.
But I will the sew this bra many times, many colors.
I am so glad you like Ingrid. It’s been a long time coming!
thank you so much for the pattern. I have been looking for ages for a sports bra pattern that was not based on compression. Finally!!!!!!! Thank you so much
We’ve wanted a non-wired bra for those larger sizes for several years now! I hope you enjoy Ingrid!
How crucial is it to use powernet for the front panels? Does there need to be stretch there, or could I use woven fabric? Trying to avoid/enclose synthetics, for allergy reasons, so I would make this out of patchworking cotton and line the powernet in the back band with stretch bamboo. If the stretch in the front is essential then I would also line that with the bamboo, if you think that would work…
The power net on the front panels allows the upper cup to stretch a bit along the neckline edge, making it more suitable for those with a fuller upper cup. However some of our testers made it with all woven fabrics (cotton) and they loved it. A non-stretch upper cup will actually function better as a sports bra. Having a rigid upper cup will hold the upper breast from bouncing.
So, it is breathability and flexibility of the front panels that is the object and aim of using powernet? Yay! Am making my second Ingrid using all lightweight cotton broadcloth, except for the back band. Cutting the front panels on the bias should do the trick.
Am also lining the whole shebang in another light smooth cotton fabric. The order of construction will be a bit different, to enclose all the seams. Interesting puzzle.
Thank you so much for this pattern. First attempt was nearly perfect except I got the cups a wee bit too big. Second attempt looks to be a perfect fit, so far. Still love the Shelly for an underwire bra, but it will be nice to have underwear that won’t get me pulled out of a TSA line because I set off the metal detector.