The Ingrid non-wired bra pattern has quickly become a new favourite among our customers. It fits really well on most women without any alteration. However, women with sloping shoulders or narrow shoulders might need to move the strap. Here’s how to move the strap on Ingrid so they will be more toward the centre front. The first thing is to decide how much to move the strap. I will assume you have made an Ingrid and can judge how much the strap needs to move over. If you haven’t, the instructions are here. It’s really easy to see if you have the bra on. Ideally, the strap should align roughly between the dip on the shoulder and your seam on the lower cup.
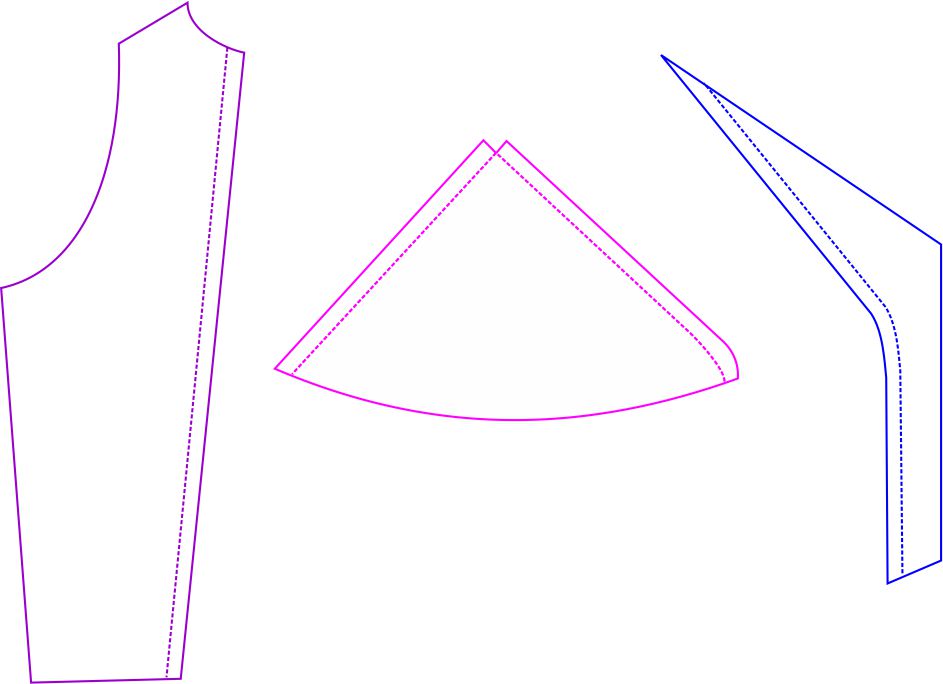
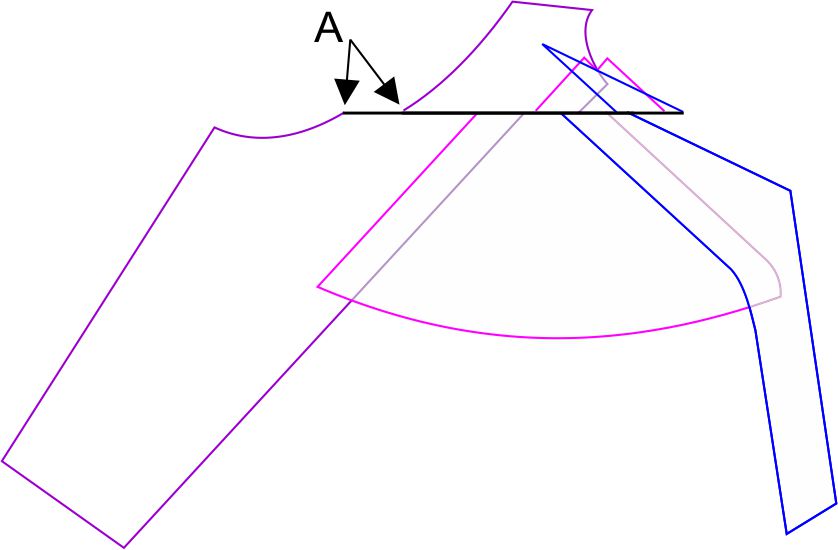
Trace off the upper cup (pink), the side panel (purple) and the front panel (blue) of the pattern with the seam allowances drawn in lightly. Here I show the pattern piece outline as a solid line and the seam line as a dotted line. My dotted lines are quite visible but I want yours drawn in lightly so you won’t get mixed up later.
Then tape the three pieces together as if they were sewn. Don’t make the mistake of overlapping them 1/4″ (6 mm) which is the width of the seam allowance. These pieces are actually overlapped 1/2″ (12 mm) so the seam line (sewing lines) are aligned. The pieces will look a bit odd at the cut-out section of the upper cup.
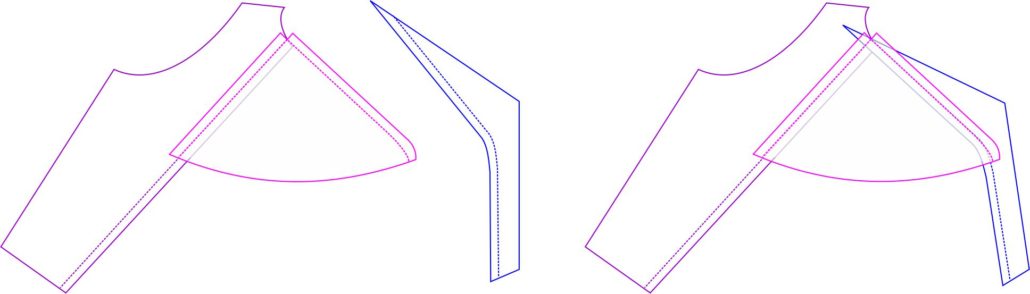
Once the pieces are together, we can forget about (or erase) the seam lines. That’s why I had you draw them in lightly. You can see how confusing they would get if they were all visible as in the left drawing. Another alternative would have been to cut them off altogether, then add them back when the alteration is complete. Now draw a line parallel with the DoGS line of the upper cup. Stay in the armhole curve of the strap tab but be sure to include the front panel. That sweet spot is about 1-2″ (2.5-5 cm) down from the top of the upper cup.
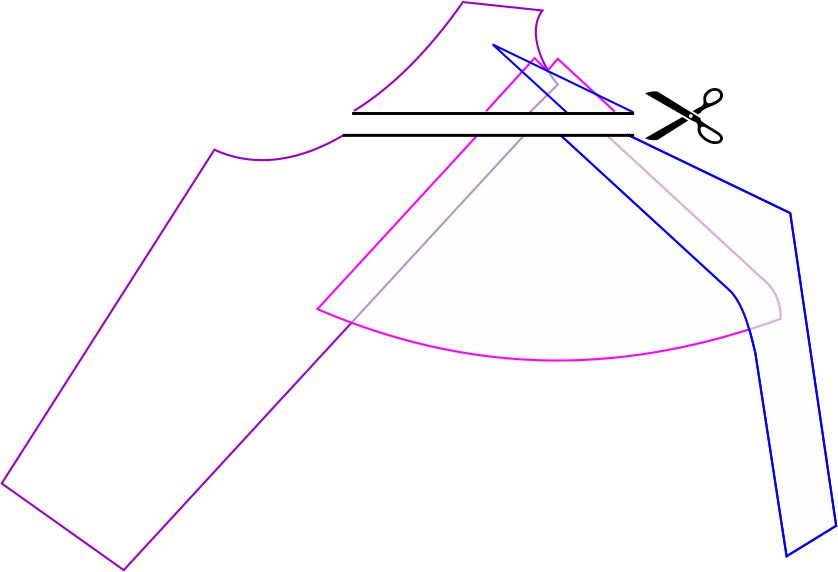
Cut the two sections apart. You now have an upper section and a lower section (hopefully with enough tape to hold them together).
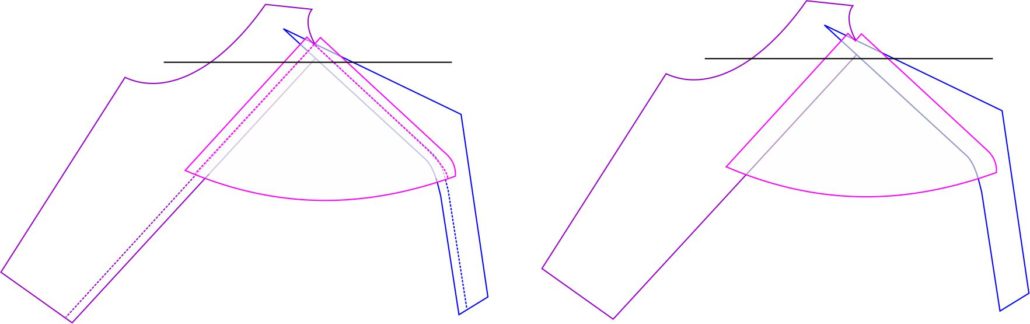
Slide the upper section along the line the desired amount toward the centre front. This will move the strap on Ingrid by 3/4″ (18 mm). The pattern was drafted as the right-hand side of the body, so that means I’ll be sliding the upper section to the right by 3/4″ (1.8 cm). Over it goes that amount (A) . Tape the two sections together again. At this point, it probably looks like a hot mess to you.
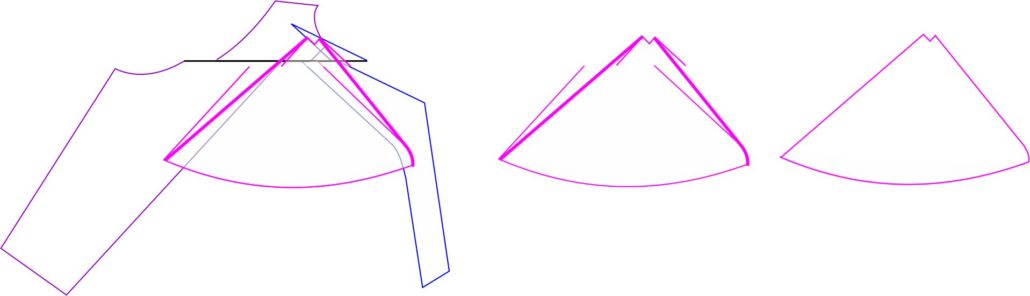
Now to re-connect the pieces. I join what I call “known point” to “known point”. That means connect the points on either side of the sliced line (points that haven’t been altered). You will find you are going to cut off some of the original pattern on one side of the line but you will be adding to the other side of the line. That’s exactly what we want. Let’s do this piece by piece. Here’s the upper cup. Join from the L-shaped cut-out to the curve along the front. Then join from the other side of the L-shaped cut-out to the bottom of the upper cup. Trace the new upper cup piece off.
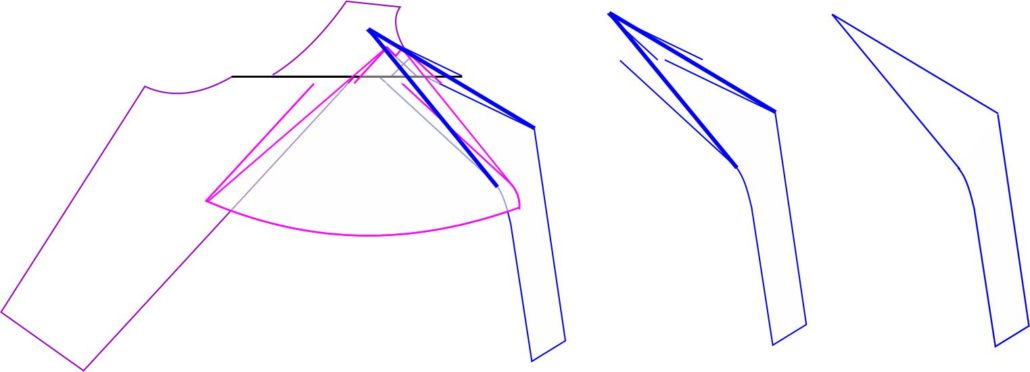
 Next, we’ll tackle the front panel. Join from the point at the top to the centre front seam. Join from the same point to the start of the curved area of the front panel.
Lastly, the side panel. The seam that connects to the upper cup is easy as that seam is a straight line. However the armhole curve may give you a bit of trouble. Use a French curve to draw a nice neat curve between the shoulder point and the curve at the bottom.
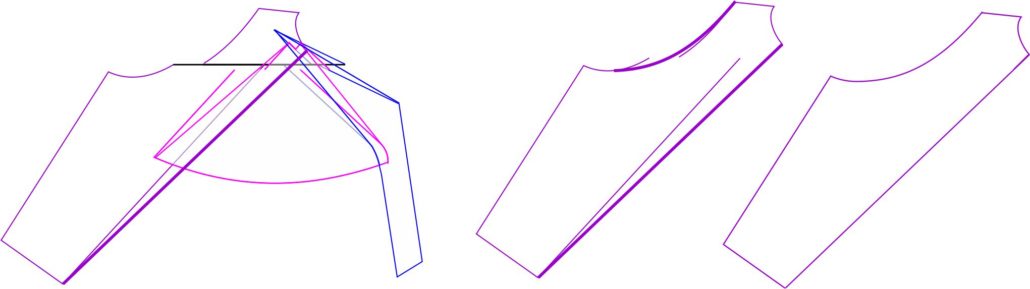
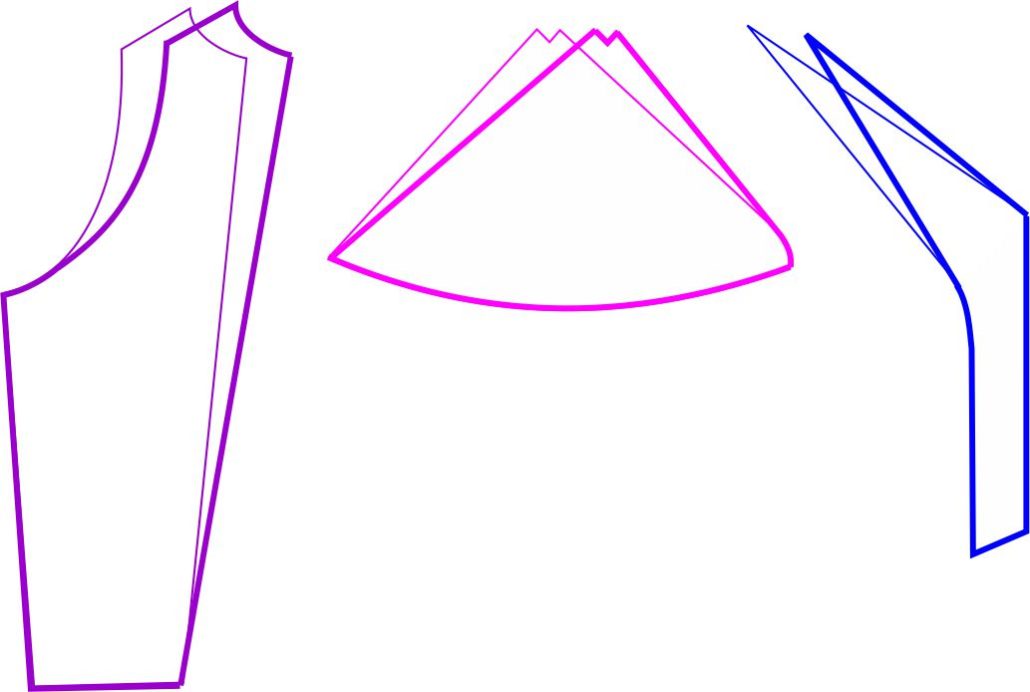
Here are the new pattern pieces compared to the original. The modified piece is the bold line. You can see how the top of the pattern piece has shifted 3/4″ ( 18 mm) to the right while the bottom of the piece did not move.
If you need to move the strap on Ingrid, I hope you will give this a try.


I love this pattern, but I still pretty much get a uniboob with it… How would I go about changing the fit to avoid this? Deeper cups? Wider or higher front parts? Also, how would I change the apex to be less pointy? I had to do that will most of your patterns…
Thank you!
I’m having the same issue. I just made the first one, and it’s comfy, not as flattering to look at as I’d hoped. Did you ever get it figured out?
Very helpful. Thank you. Could you show how to customize the upper cup to make it smaller for women with less volume there?
Thank you! I will try 🙂
Thank you, just in time.
Thank you.I would like to know how to add volume to inner lower cup.
This is exactly the tutorial I needed. I am making my muslin right now and am making it as drafted bu I have had to move 3/8” on all of the other patterns of yours. I was a bit befuddled as to how to do it if I needed. So thanks
I love seeing all these tutorials! Thank you!