How to Sew a Gothic Arch
Of the things you can do to your bra to make it instantly more comfy and more stylish, the Gothic Arch has got to be at the top of the list. Bot only is it attractive on and off the body, it can keep the elastic from rolling up. As a bonus, it makes the elastic sew on a whole lot easier. In an earlier post, I showed you how to recognise this wonderful alteration, but now I’ll share how to sew a Gothic Arch.
A Gothic Arch is only for a full band bra, so you will need the frame pattern piece of the full band bra to start. Then at the front, draw a line up from the curve along the bottom to carry over to the centre front fold line. Try to keep the bottom edge as parallel as possible. The ending point could be 3/4″ (18 mm) or more above the original centre front.
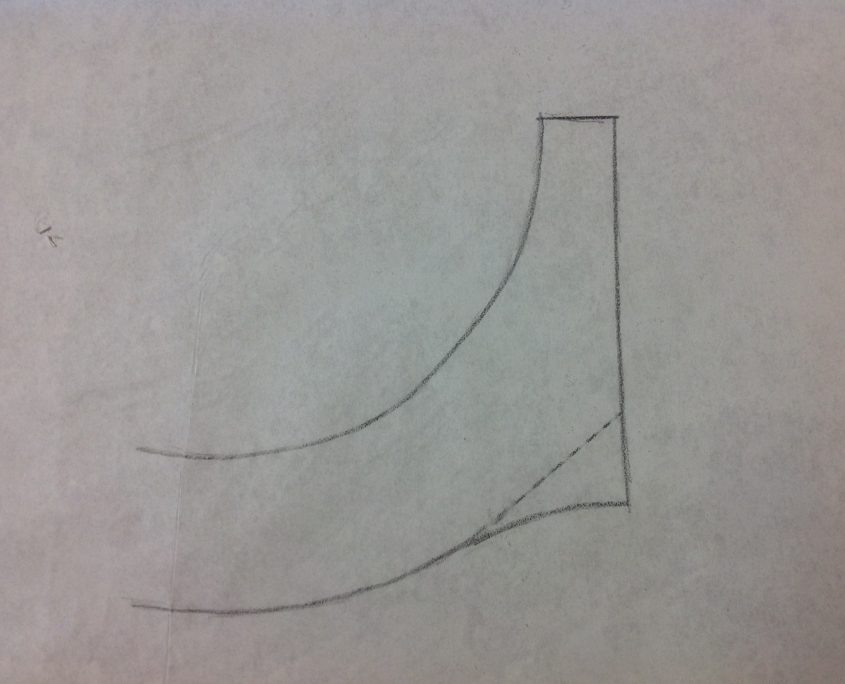
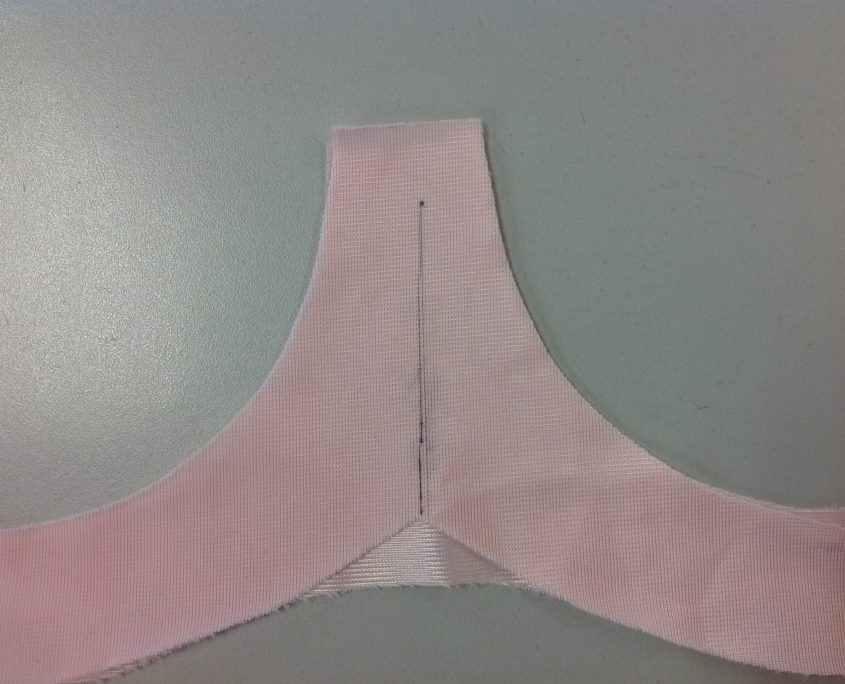
When you cut it out, this is what it will look like compared to the original pattern piece. It doesn’t look like we’ve done very much, does it? Just because it is small, doesn’t mean it isn’t powerful! Believe me, you will thank me for this little design element once you try it! Mark the centre front with a wash-out marker.
Now for the elastics
We are ready to sew on the elastics. You can use two short pieces of elastic or one longer one. Fold the elastic in two and position it along the bottom curve of the band, allowing the folded edge to touch the wire line of the cup. That’s so you have enough elastic length. Now mark the centre front line on the elastic itself, then machine baste the centre front front line where you have it marked. Trust me, this step makes a perfect Gothic Arch every time! You can sew the CF line in contrast thread if you want.
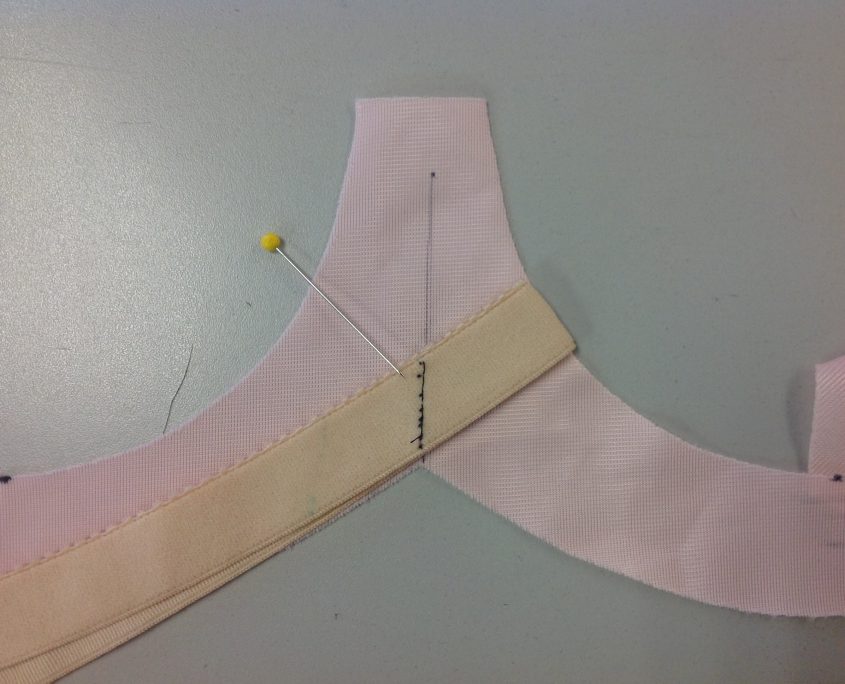
Now sew the elastic to the bottom band, zig-zagging right up to the centre front basting line. Do the zig-zag stitch on each side of the Gothic Arch. Now stay tuned for the magic….
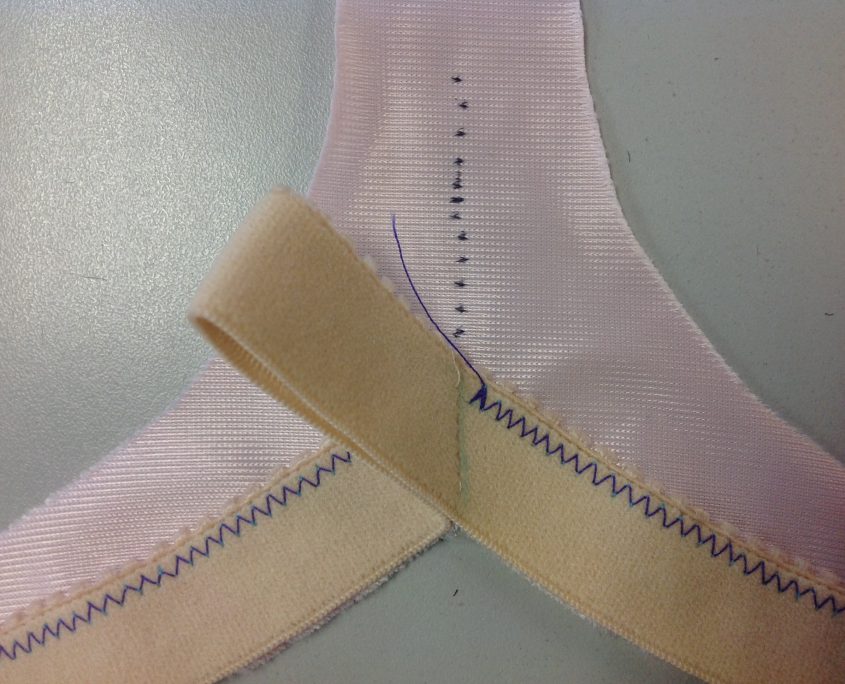
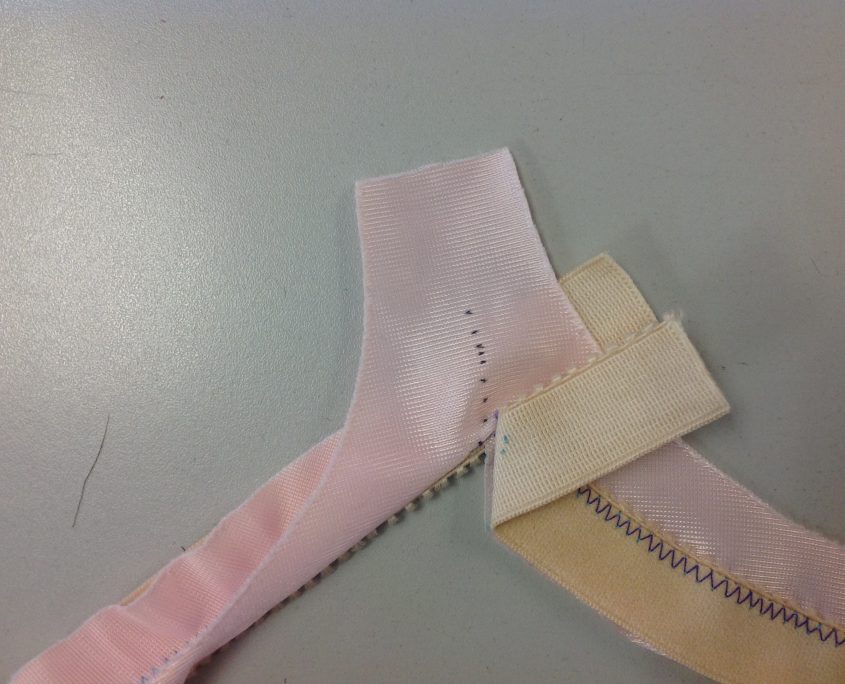
Unpick the basting and cut the fold of the elastic at the centre front. Turn the elastic back and admire your handiwork. Now hold your breath…you are going to cut along the centre front line to just below the top edge of the elastic. Don’t worry, it’s going to be OK!
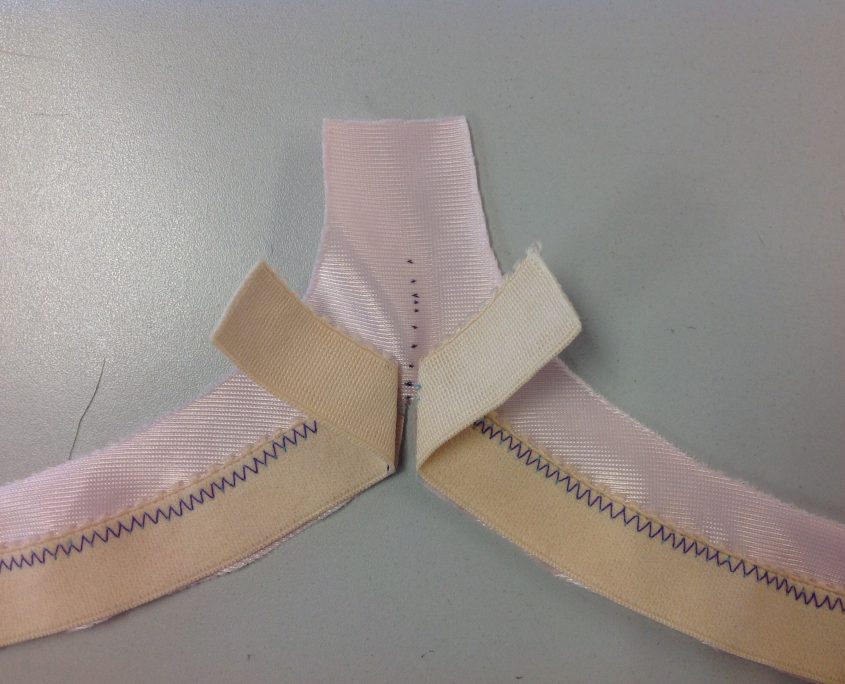
Now you can flip the elastics to the inside of the bra. When you do, you will see how perfectly they turn back. The elastics will form a nice, neat and flat Gothic Arch, meeting perfectly at the centre front (assuming you stitched right up to the CF fold line) If there is a little pleat at the CF after you turn the elastic, it means you didn’t cut quite far enough. It’s OK, you can go back in and clip again little by little until it lays flat.
And now for the big reveal…
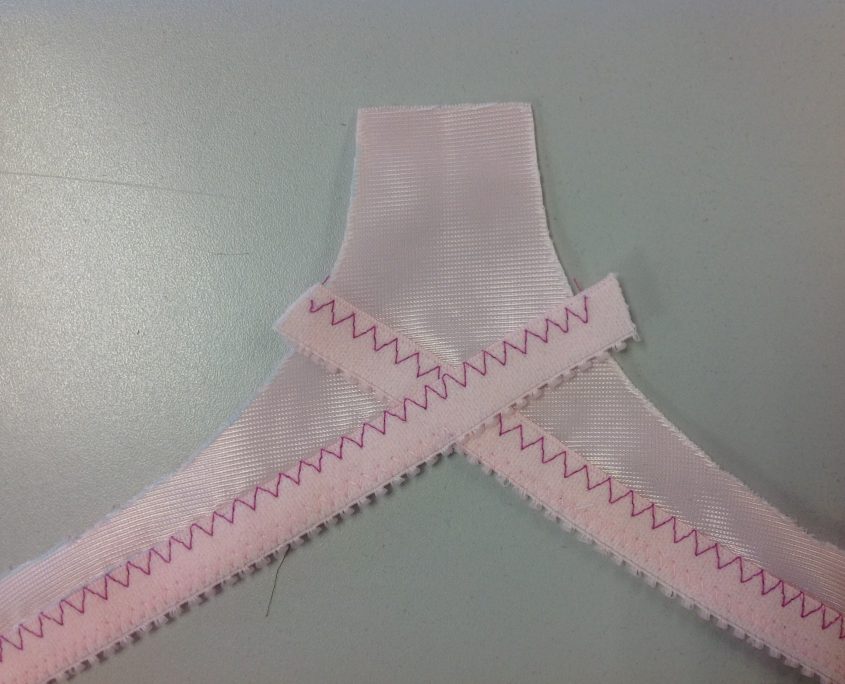
Now you can go ahead and stitch the opposite edge of the elastic in place. You can stitch each side separately like this photo. Remember once the cups are sewn in, the ends of the elastic will be caught under the channel to secure them.
Or, you can get fancy with your stitching and make a perfect mitre with your three step zig-zag

Depending on the bra you might be able to take the Gothic Arch up higher than usual. You can’t really see the cross-over, but it is there!
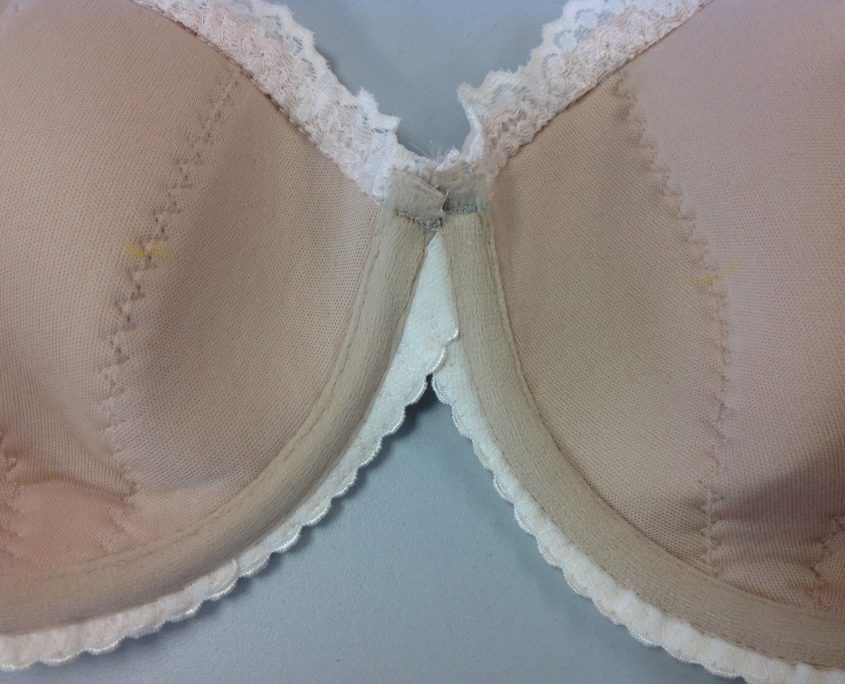
Or, you can try this technique I saw in a ready-to-wear bra. They didn’t cross the ends over to the wire line seam. They cut it off and stitched over the ends.
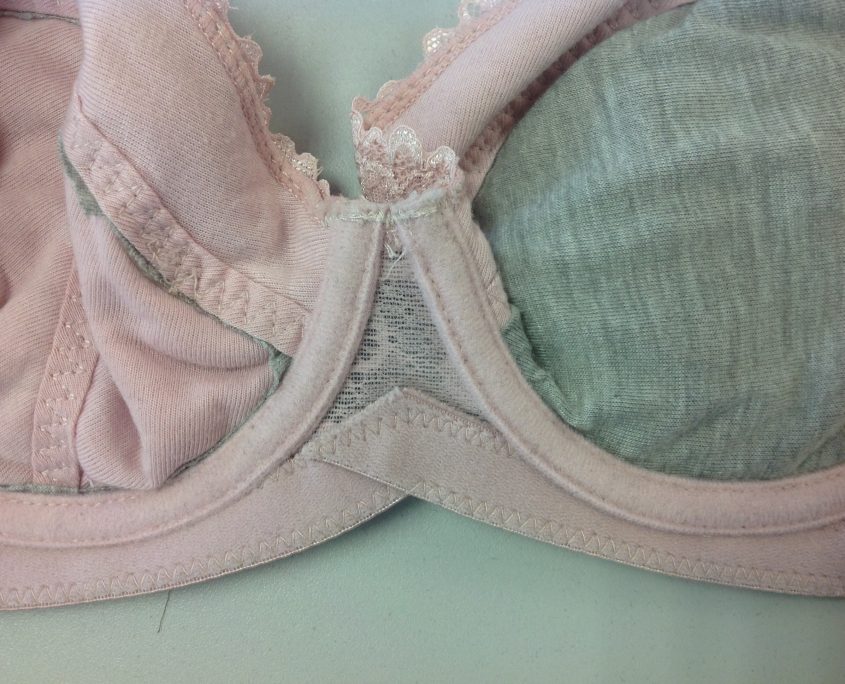
I showed this Gothic Arch without the cups sewn in for clarity, but in reality, likely the cups will be sewn along the way.
See you next Sunday!
Your Fairy Bra Mother
Beverly


Thanks so much for this clear, concise tutorial. I’ve now used it several times to convert a regular pattern to a gothic arch, which is so much more comfortable for me!
You are most welcome, Marie! I am so happy you find our tutorials helpful and interesting!
I love this. It actually looks easier than the instructions in the Craftsy class. Waiting for the next class impatiently!
We use the Gothic Arch all the time in our classes. It’s a great way to use up shorter bits of elastics too!
Great tutorial Bev!
Thanks.