Recently, I wrote a Stretch Satin Primer, detailing some tips on choosing and cutting wonderfully luxurious stretch satin. No post on how to work with stretch satin would be complete without some sewing tips. Here are some based on my experience.
Stitching Seams
You can use a straight stitch if you are sewing in the non-DoGS direction such as side seam. I use a 2.5 mm stitch length. As you can see, 1.5 is too small (tends to make the seam pucker), and 3.5 too large (you can see through the stitches when you pull on the seam)
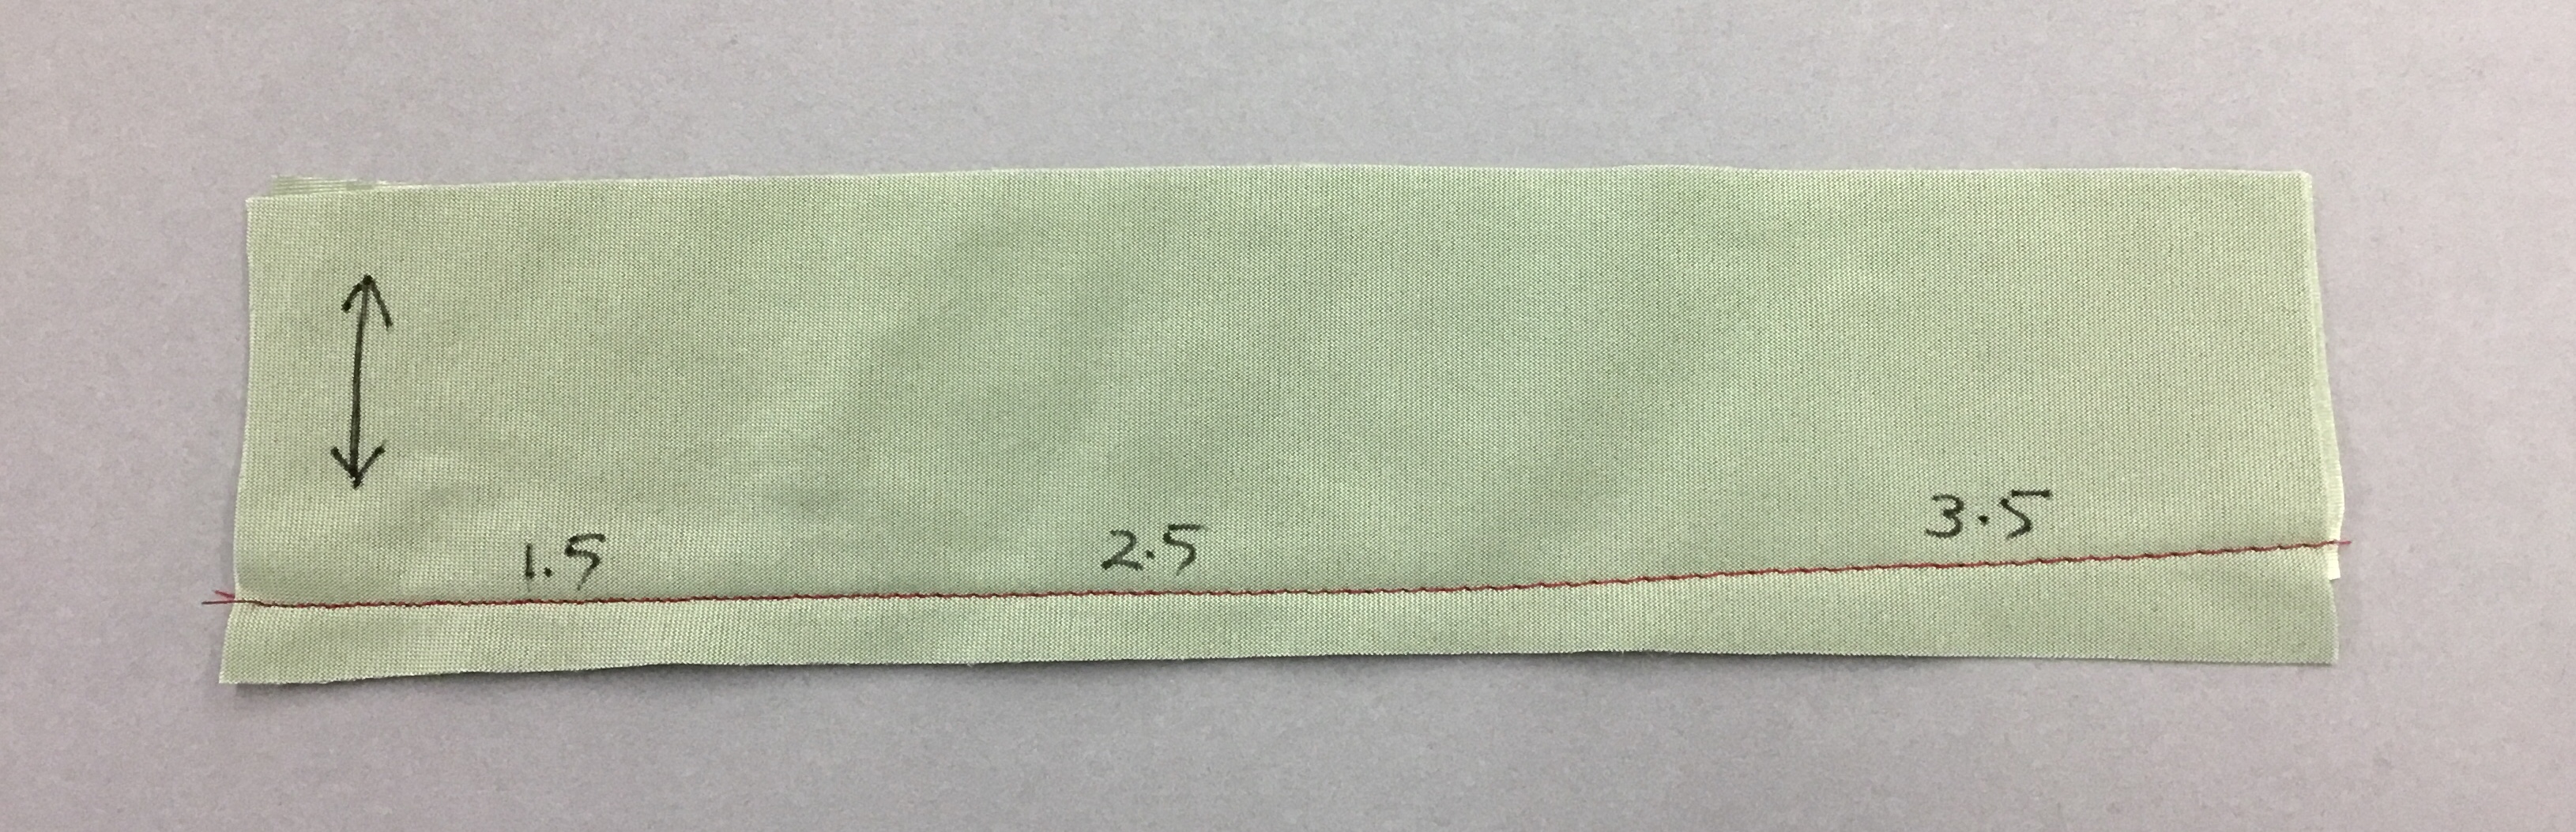
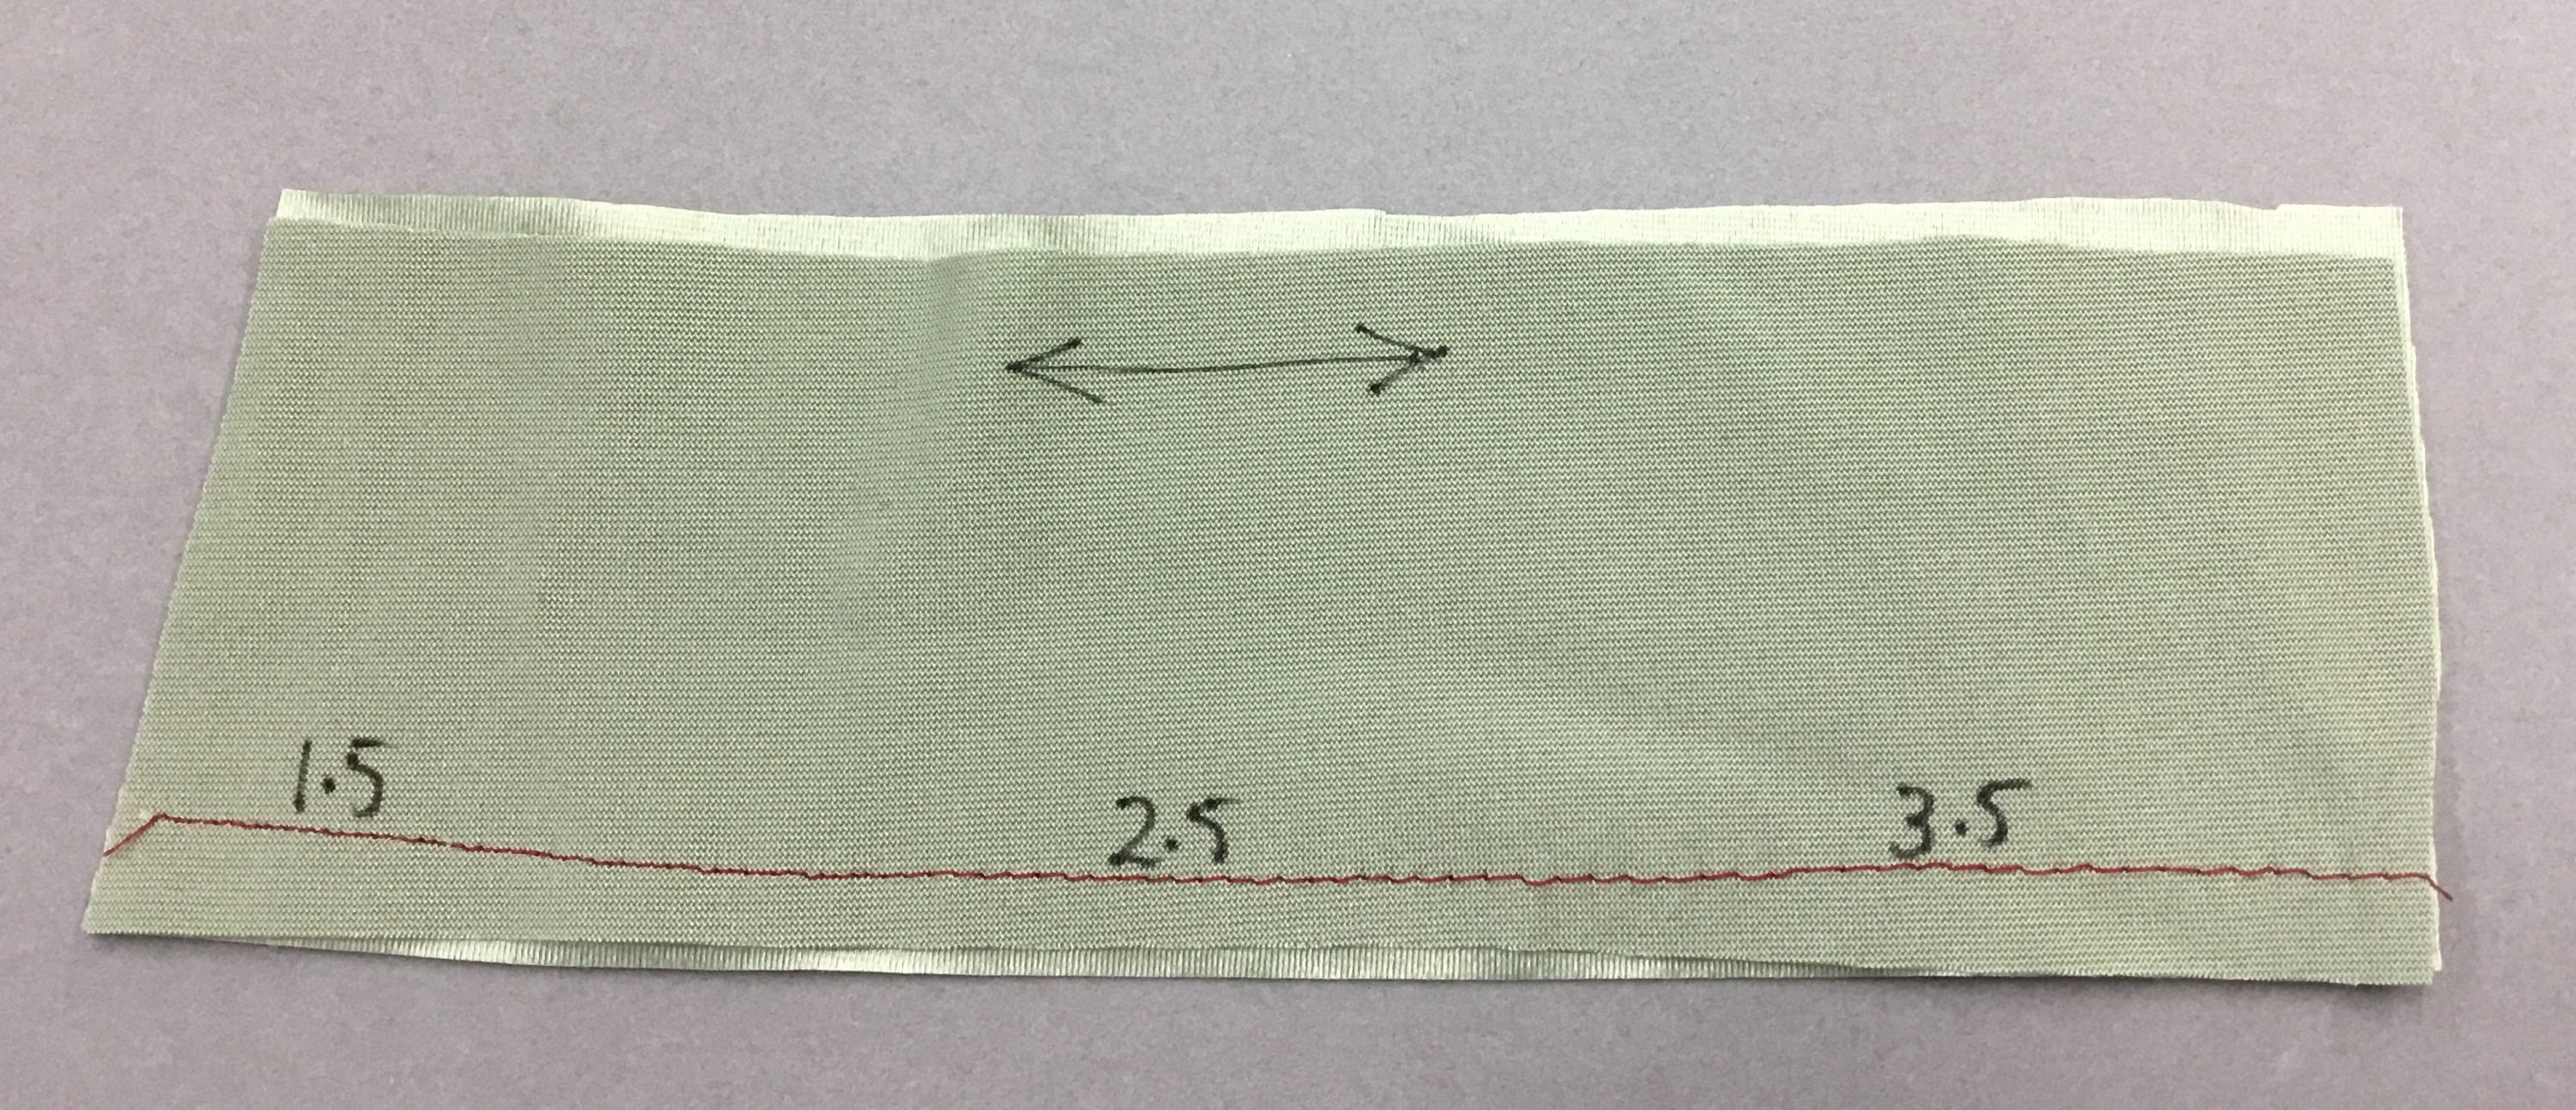
If I am sewing in the direction of the stretch, I can use the same straight stitch, but… you have to stretch the fabric slightly as you sew. You can see the 3.5 made the seam too loose.
You can always use a zig-zag stitch but mind its length and width. I tend to make the length and width equal in size, so it the length is 2, the width is 2 as well. In this case, the 1.5 x 1.5 was perfect with this lightweight fabric. I can still open the seam, the seam stretches well plus, it recovers to its original length. Shorter than 1.5, and the seam started to wave. That’s an indication that the stitch is too narrow or too short.
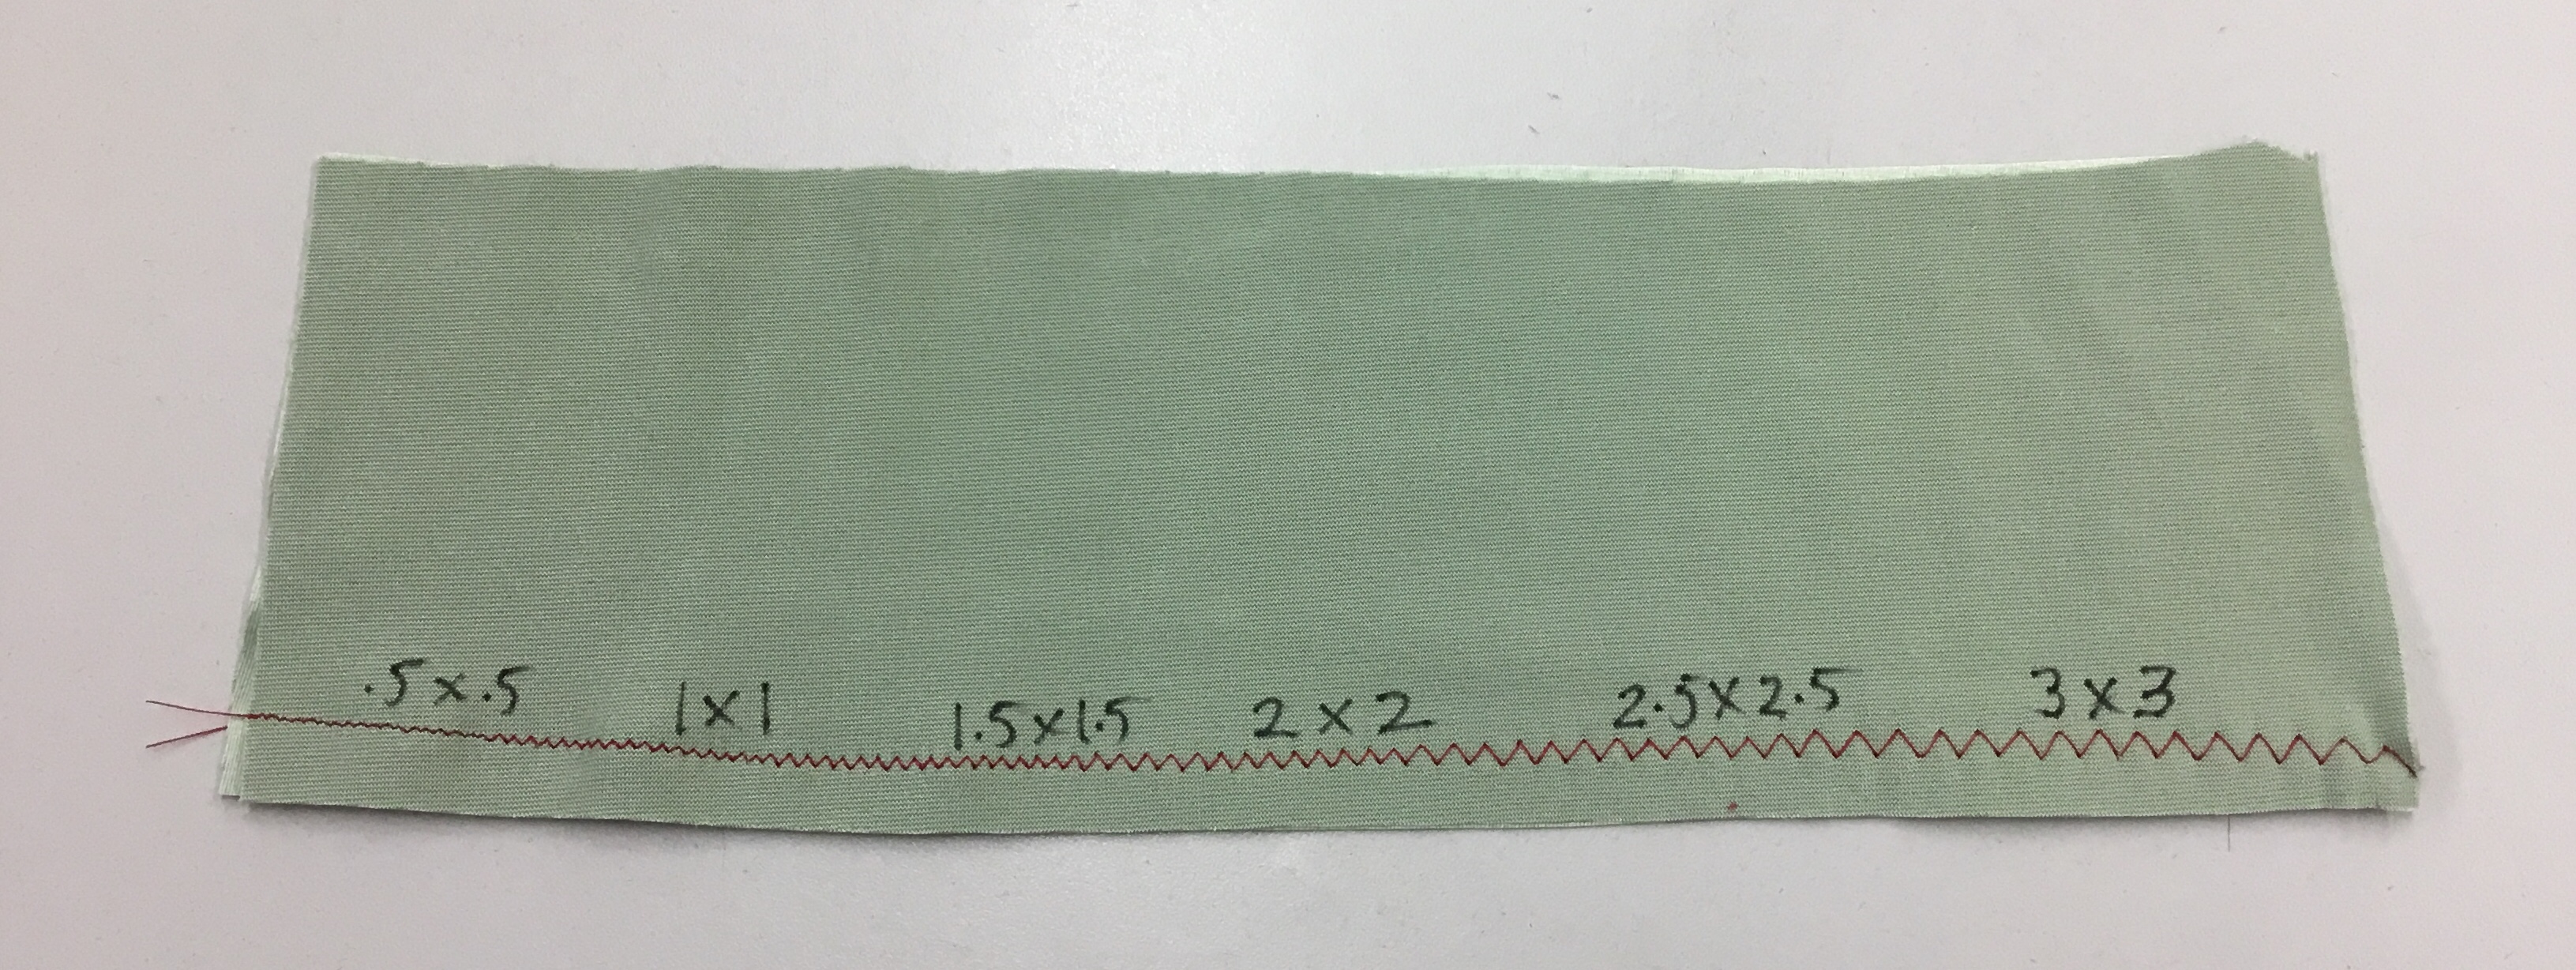
Longer and wider than 2 x 2 (this was 3 x 3) made the threads quite visible when I looked at the seam from the right side. That’s not going to be a strong seam.
Laminating the Layers
We’ve lined lightweight stretch satin with fusible interfacing on the wrong side (with DoGS aligned) and it was quite adequate for bra cups. I’ve also doubled the fabric with great success, with DoGS opposed – which will virtually eliminate the stretch. Use the DoGS aligned – to reduce the stretch but not eliminate it.
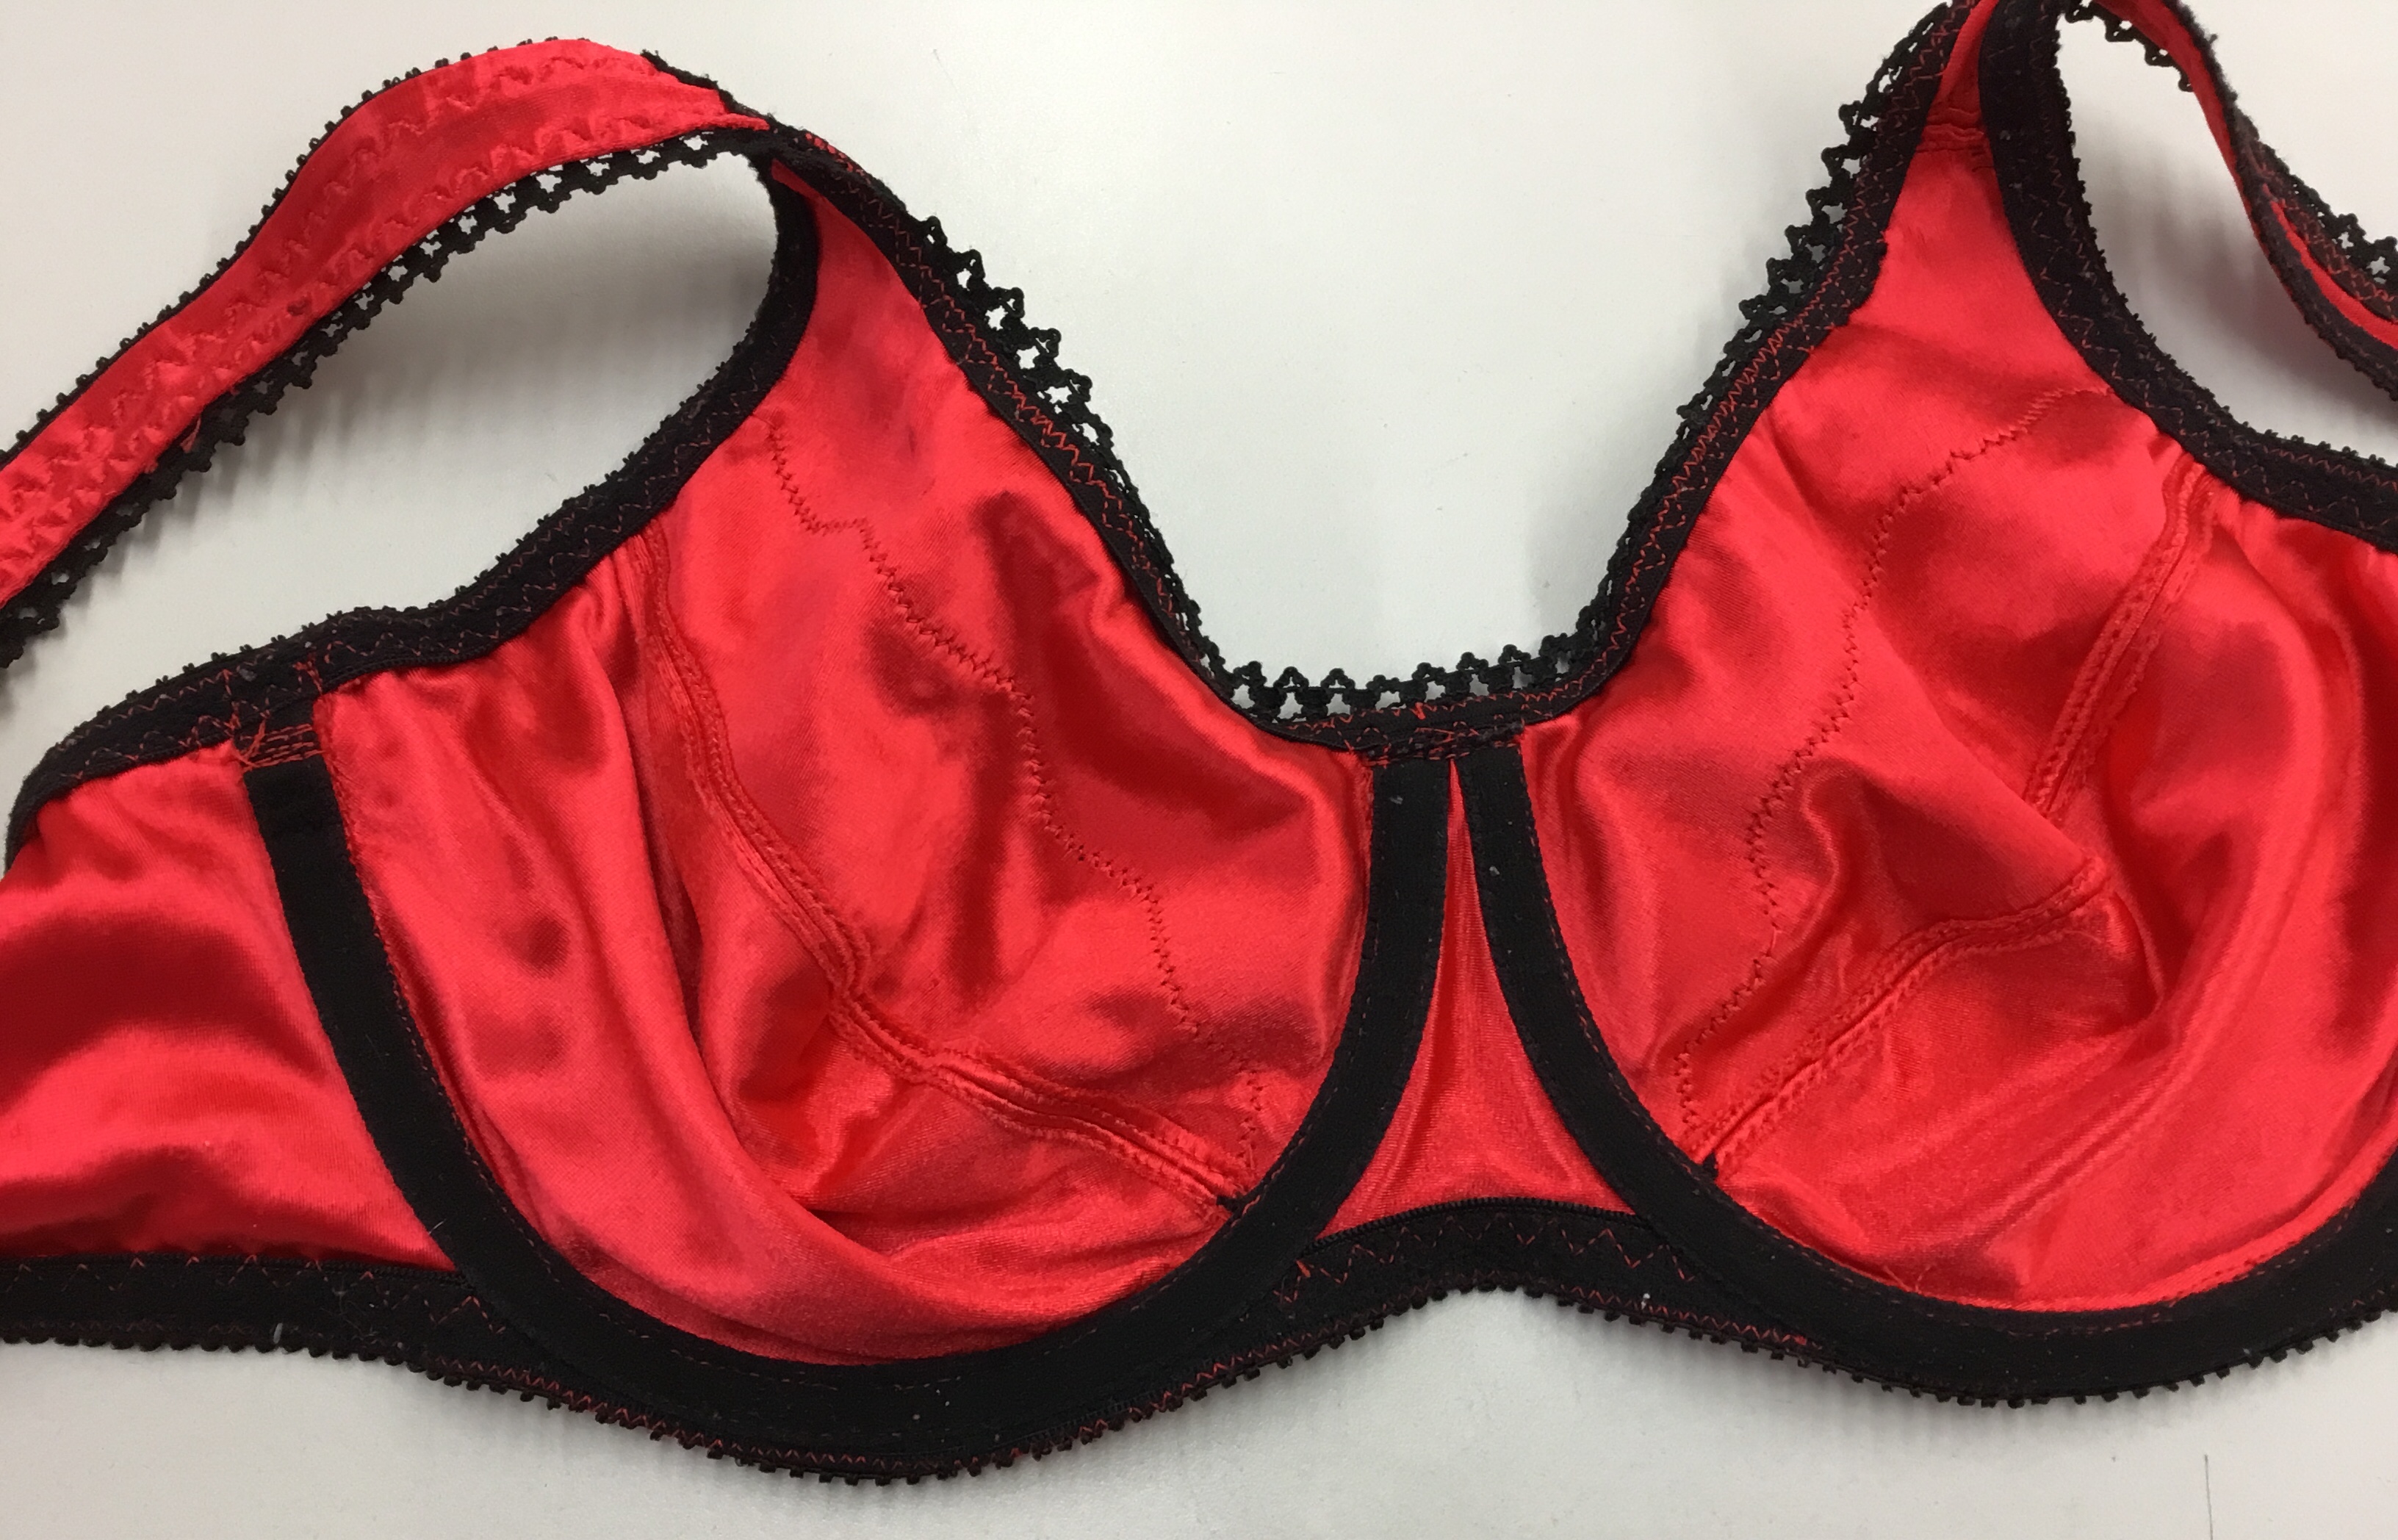
I spray basted two layers of satin in this bra, aligning the DoGS, then cut out the pattern. It is much easier to cut the fabric after spray basting a block of fabric (called block fusing or lamination). I treated the fused layers as one throughout the construction. The inside layer of satin feels wonderful against the skin. I wore this bra until….I outgrew it 🙁
Sewing Elastics
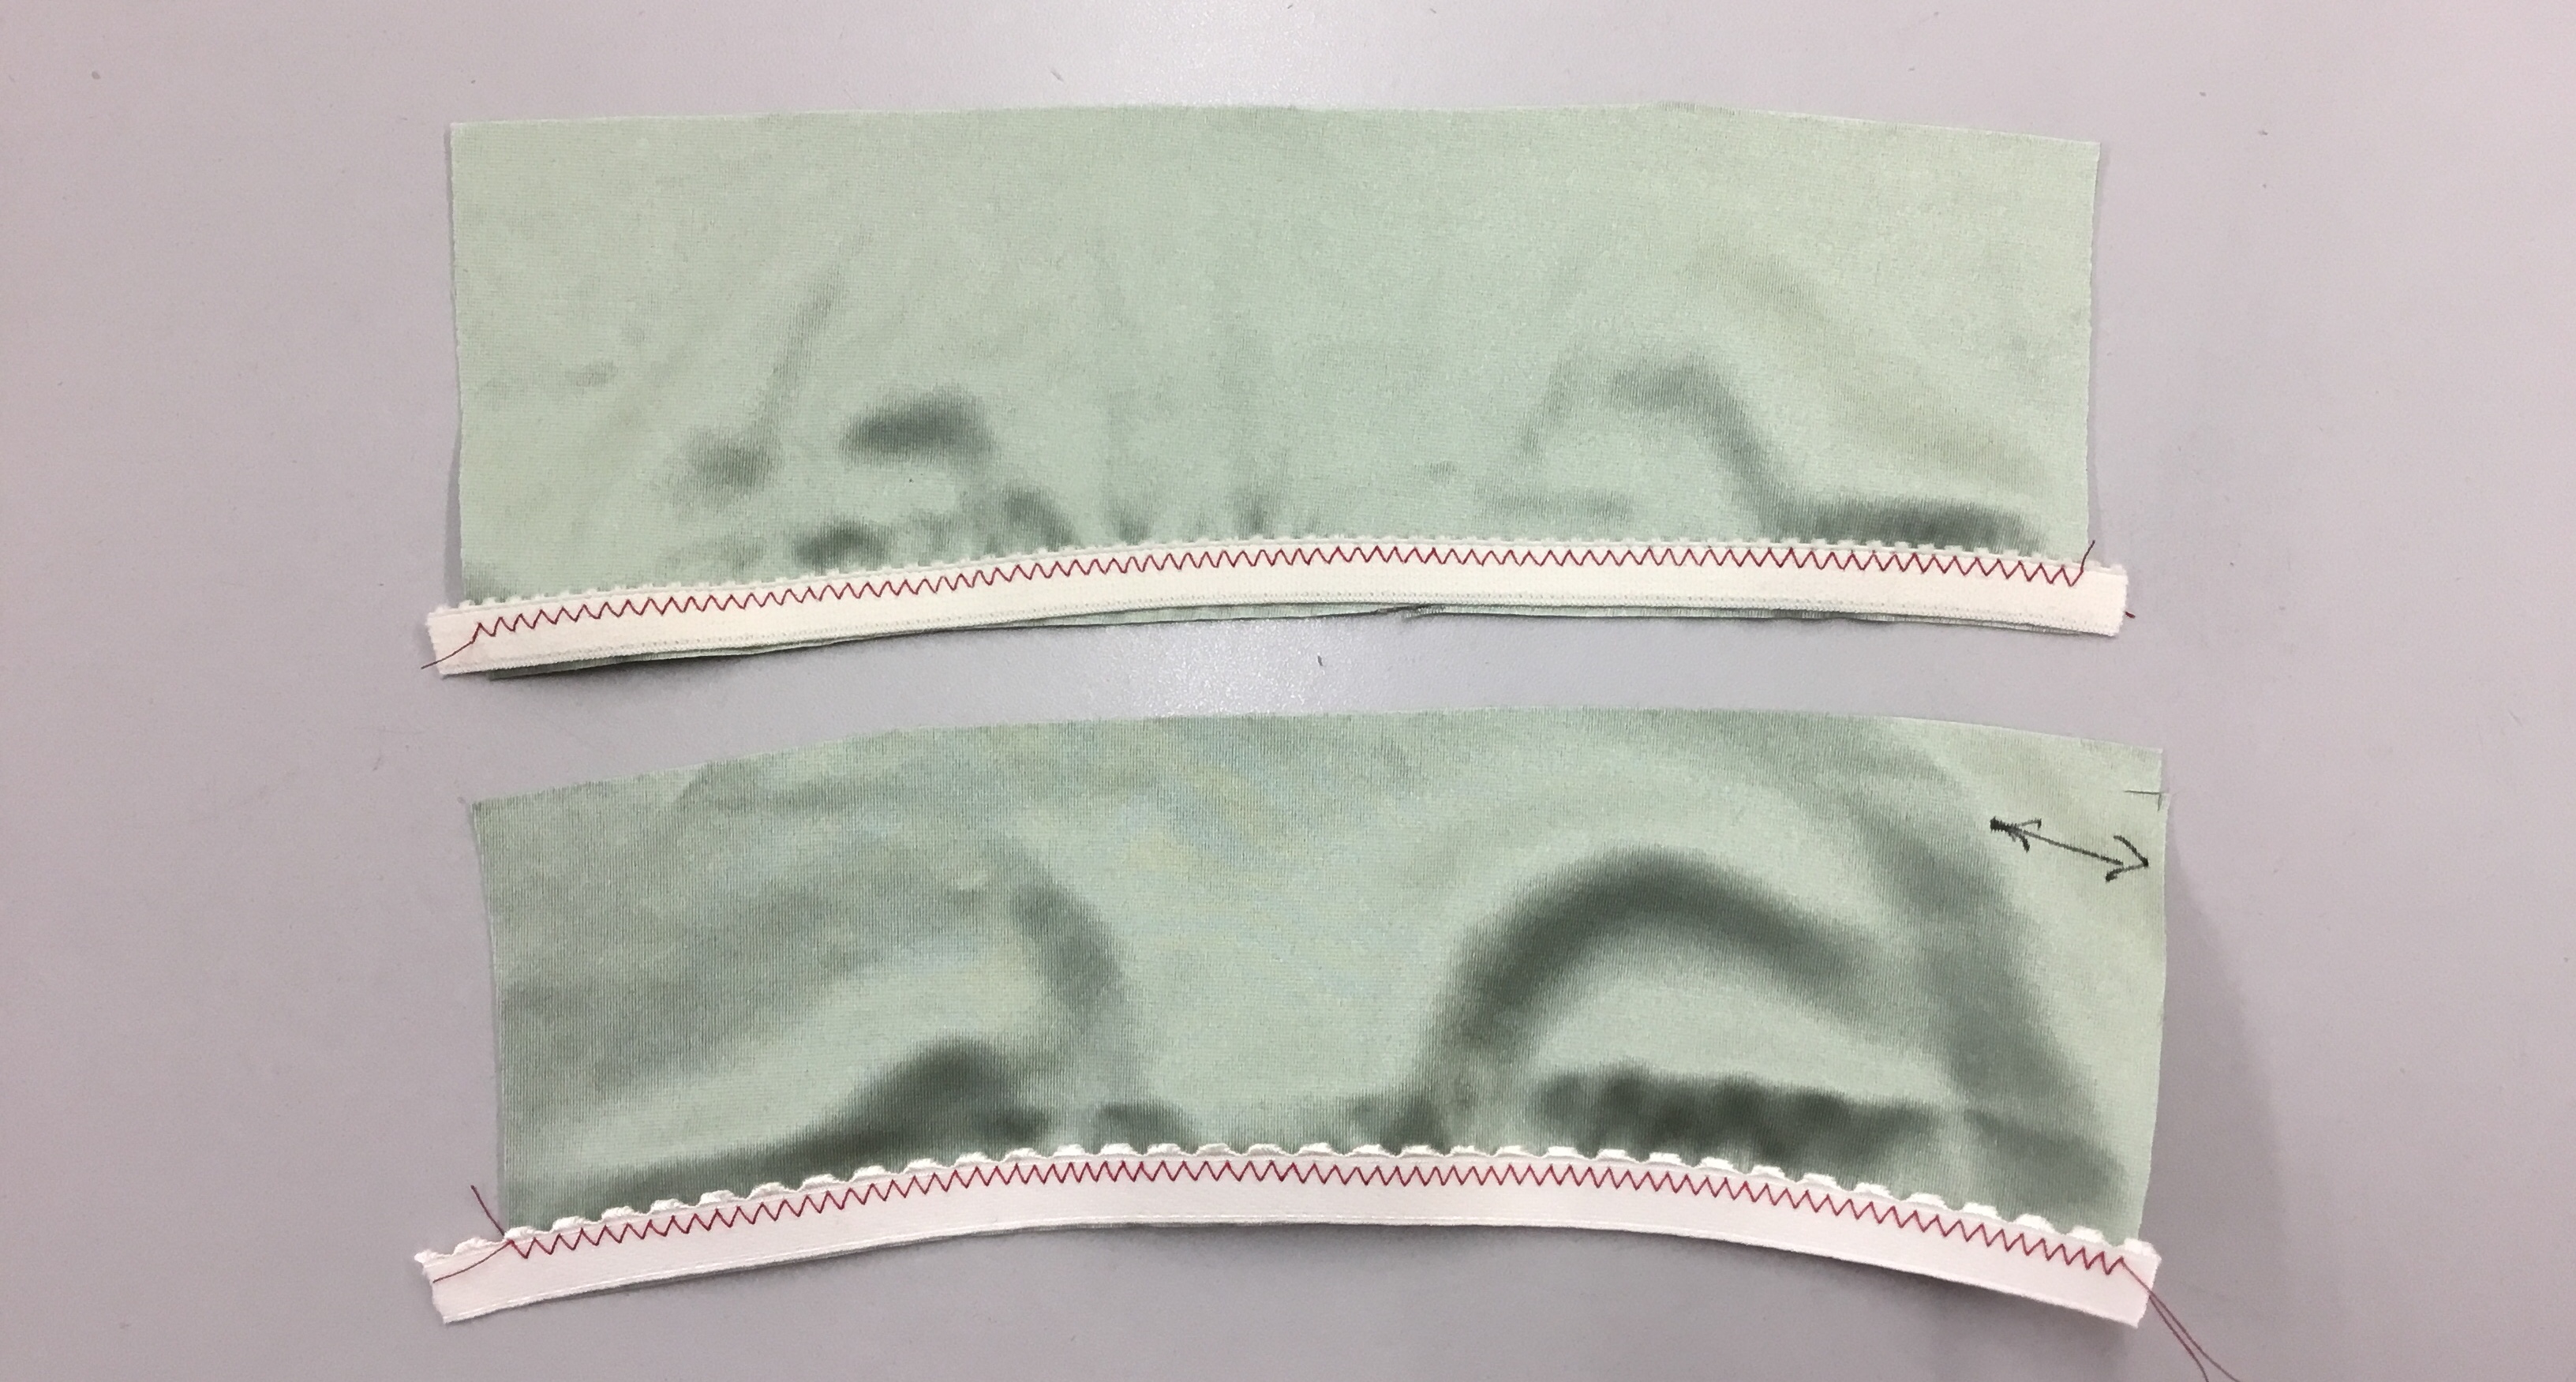
When sewing elastic to stretch satin, some people say to leave the elastic stay flat on the fabric. With stretch satin (especially lightweight satins), that’s not necessarily the case. Here is a rectangle of lightweight satin with the soft elastic sewn to it in the first pass (typically bras and panties require two passes). I did not pull the elastic (or the fabric) in any way. You can see the fabric has stretched a little and the edge has grown larger.
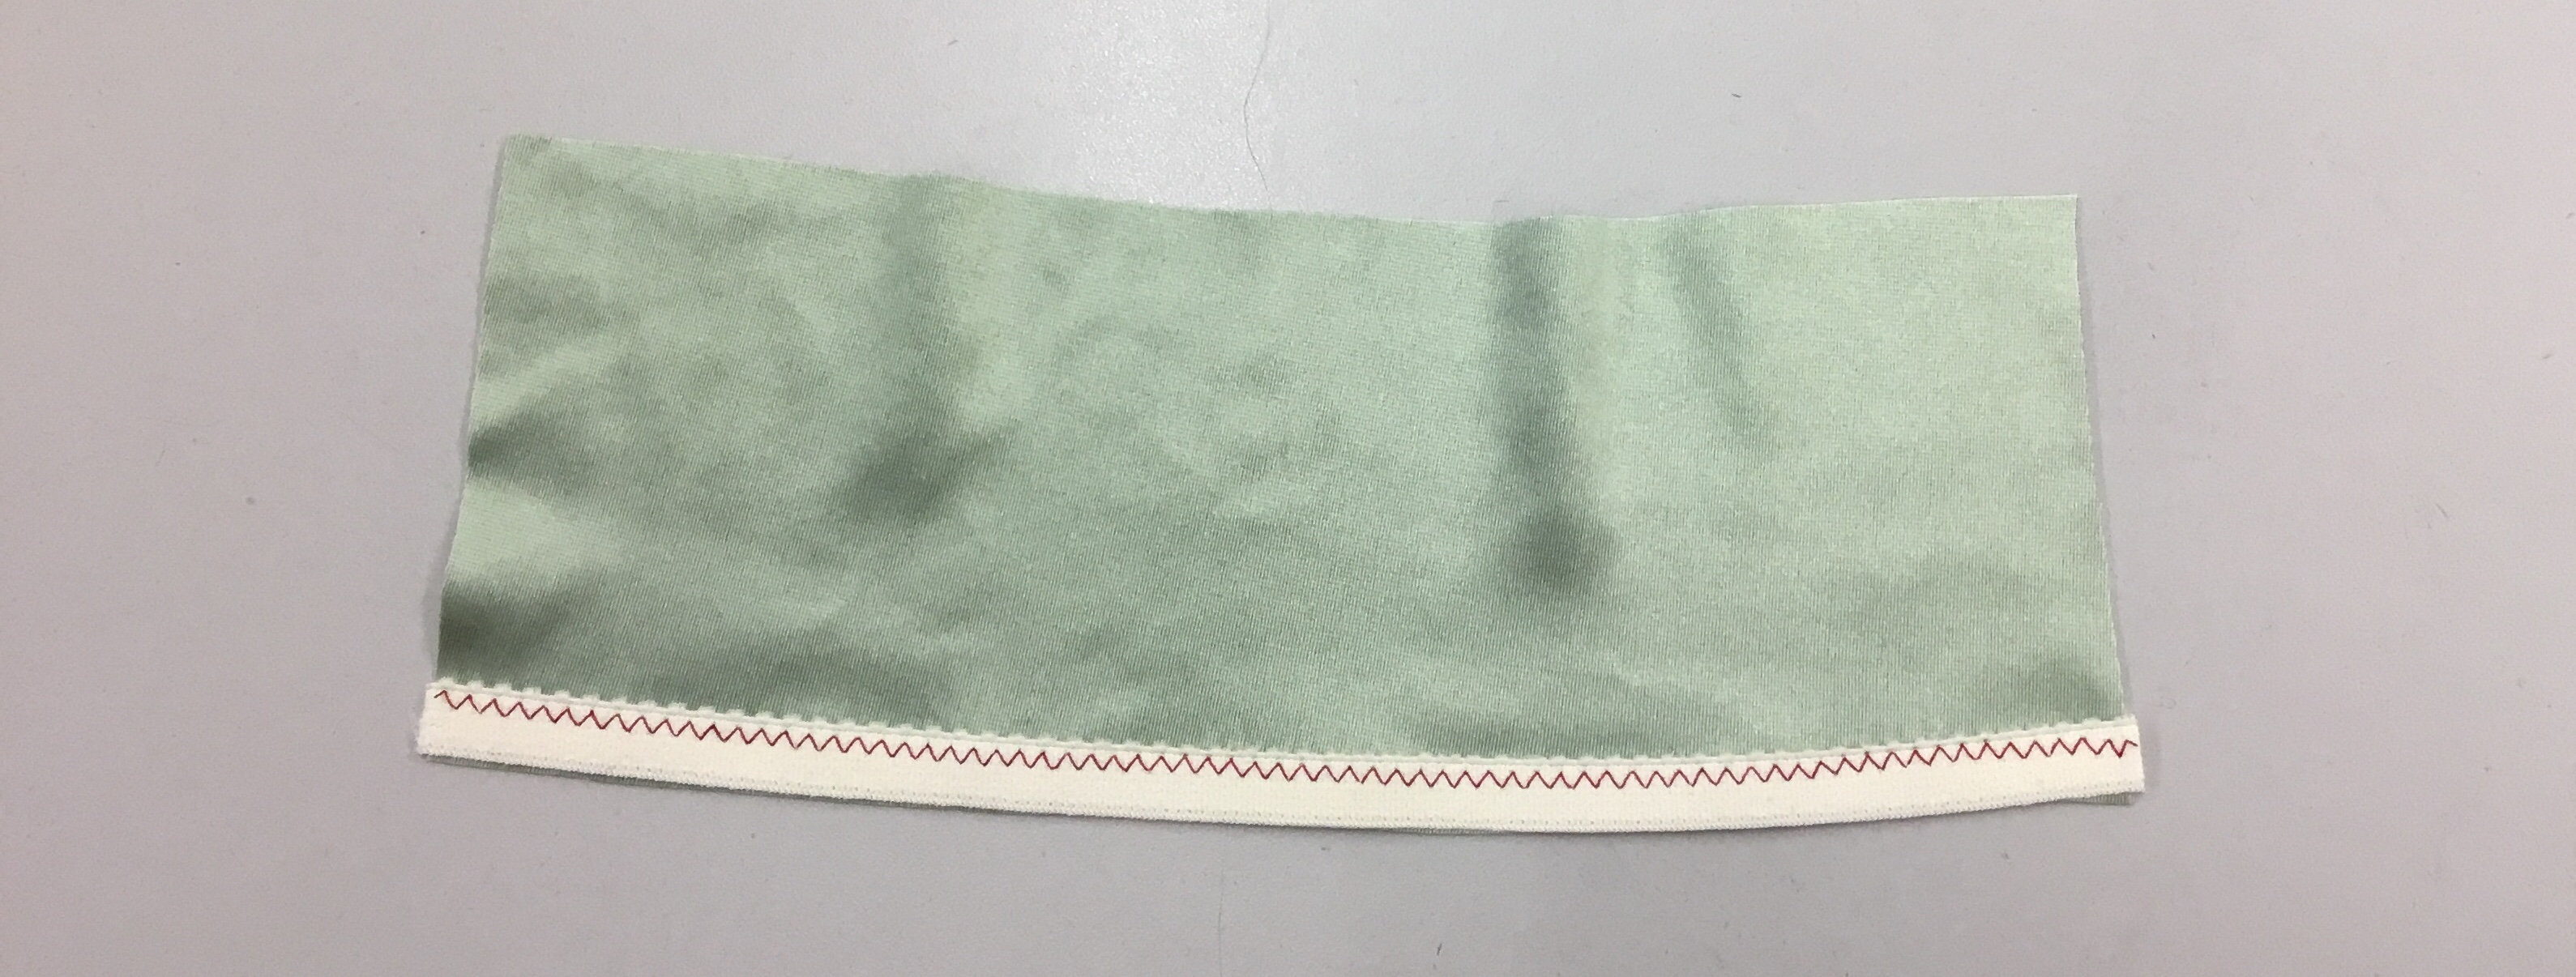
This is the same fabric, using the same stitch, with the firm elastic instead of the soft. Again I did not pull. This time, the fabric was more cooperative and it stayed relatively flat.
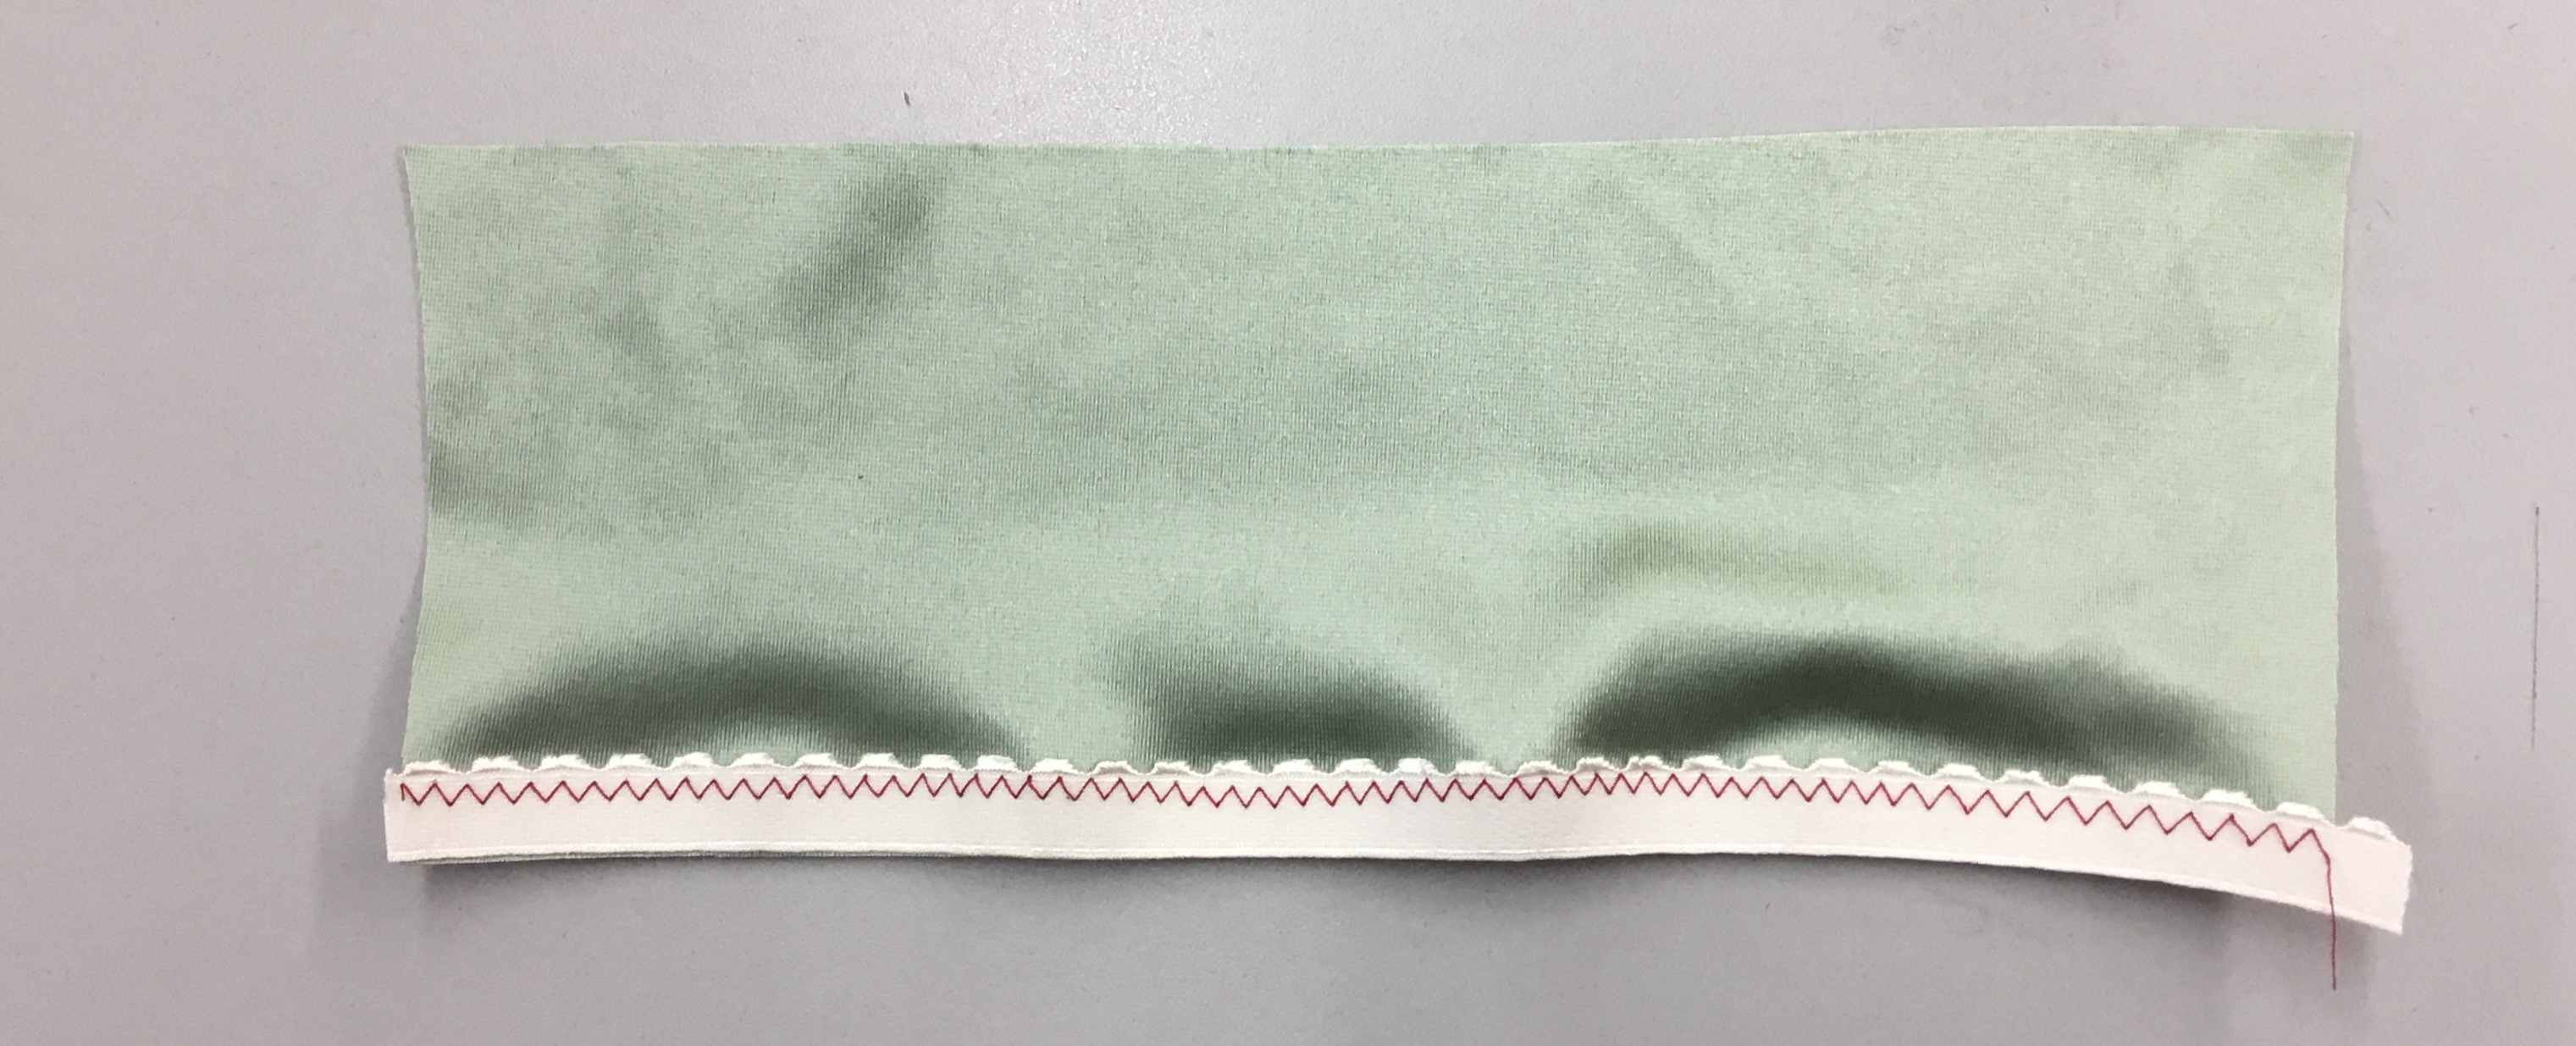
Here are both samples after the second pass is finished. You can see in both cases, the length of the elasticated edge has grown. This could look really bad on the waist or legs of panties.
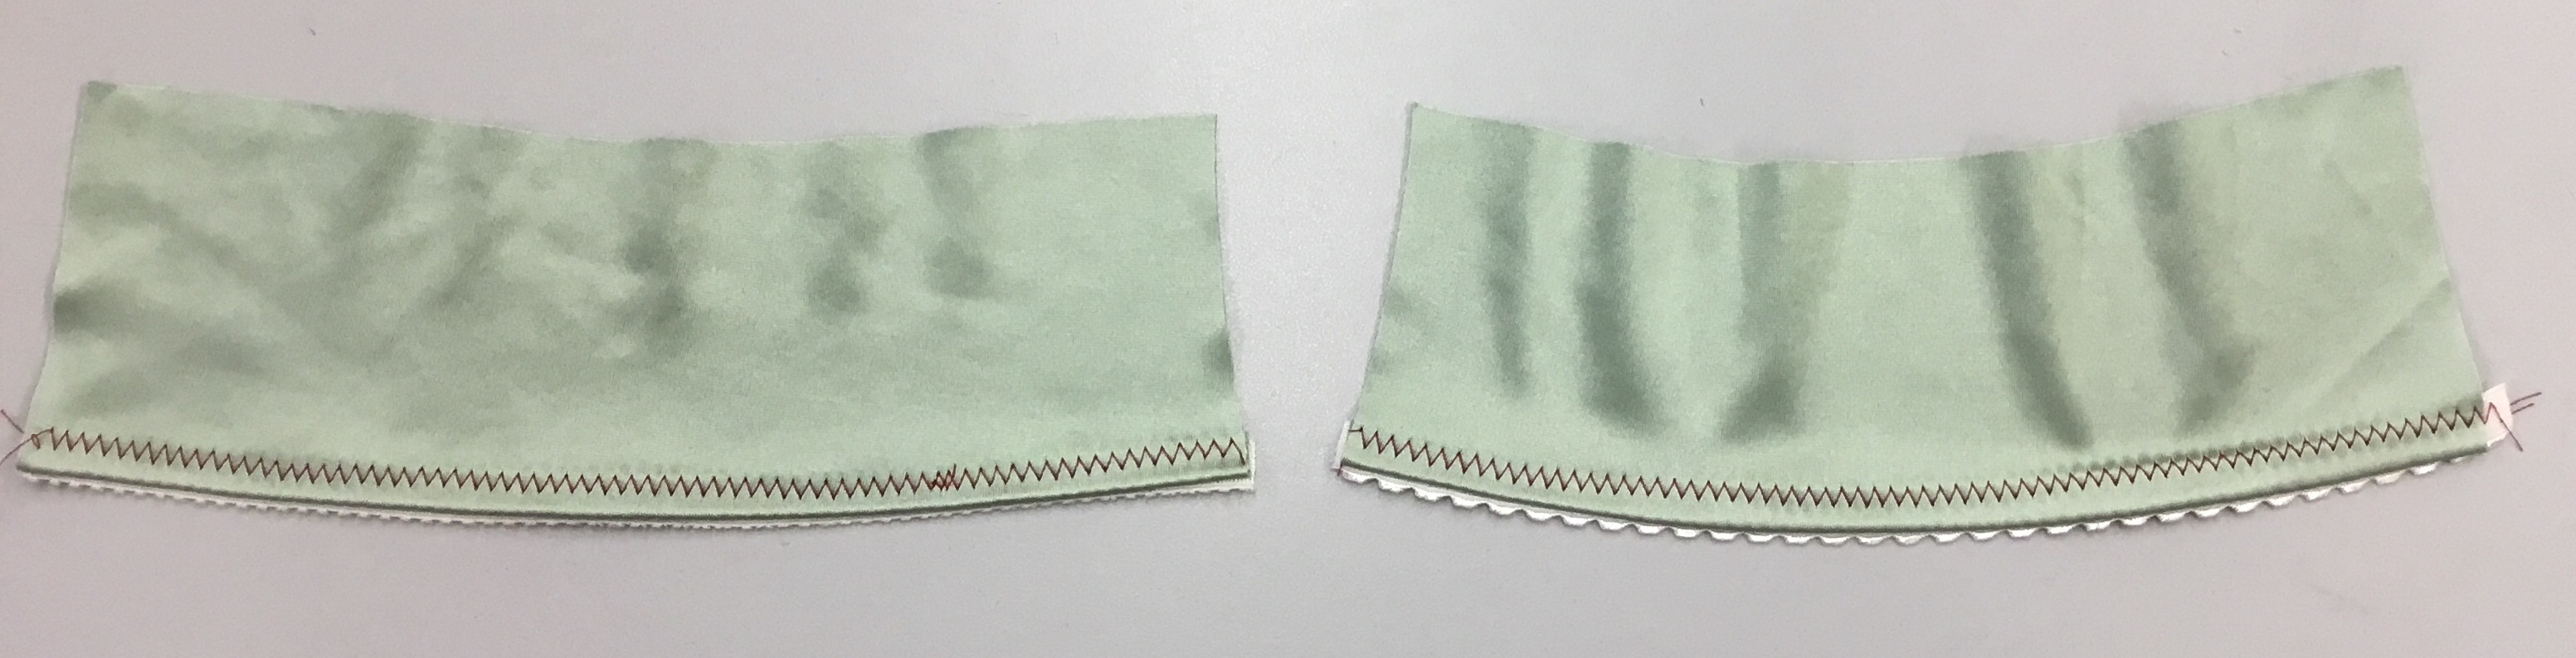
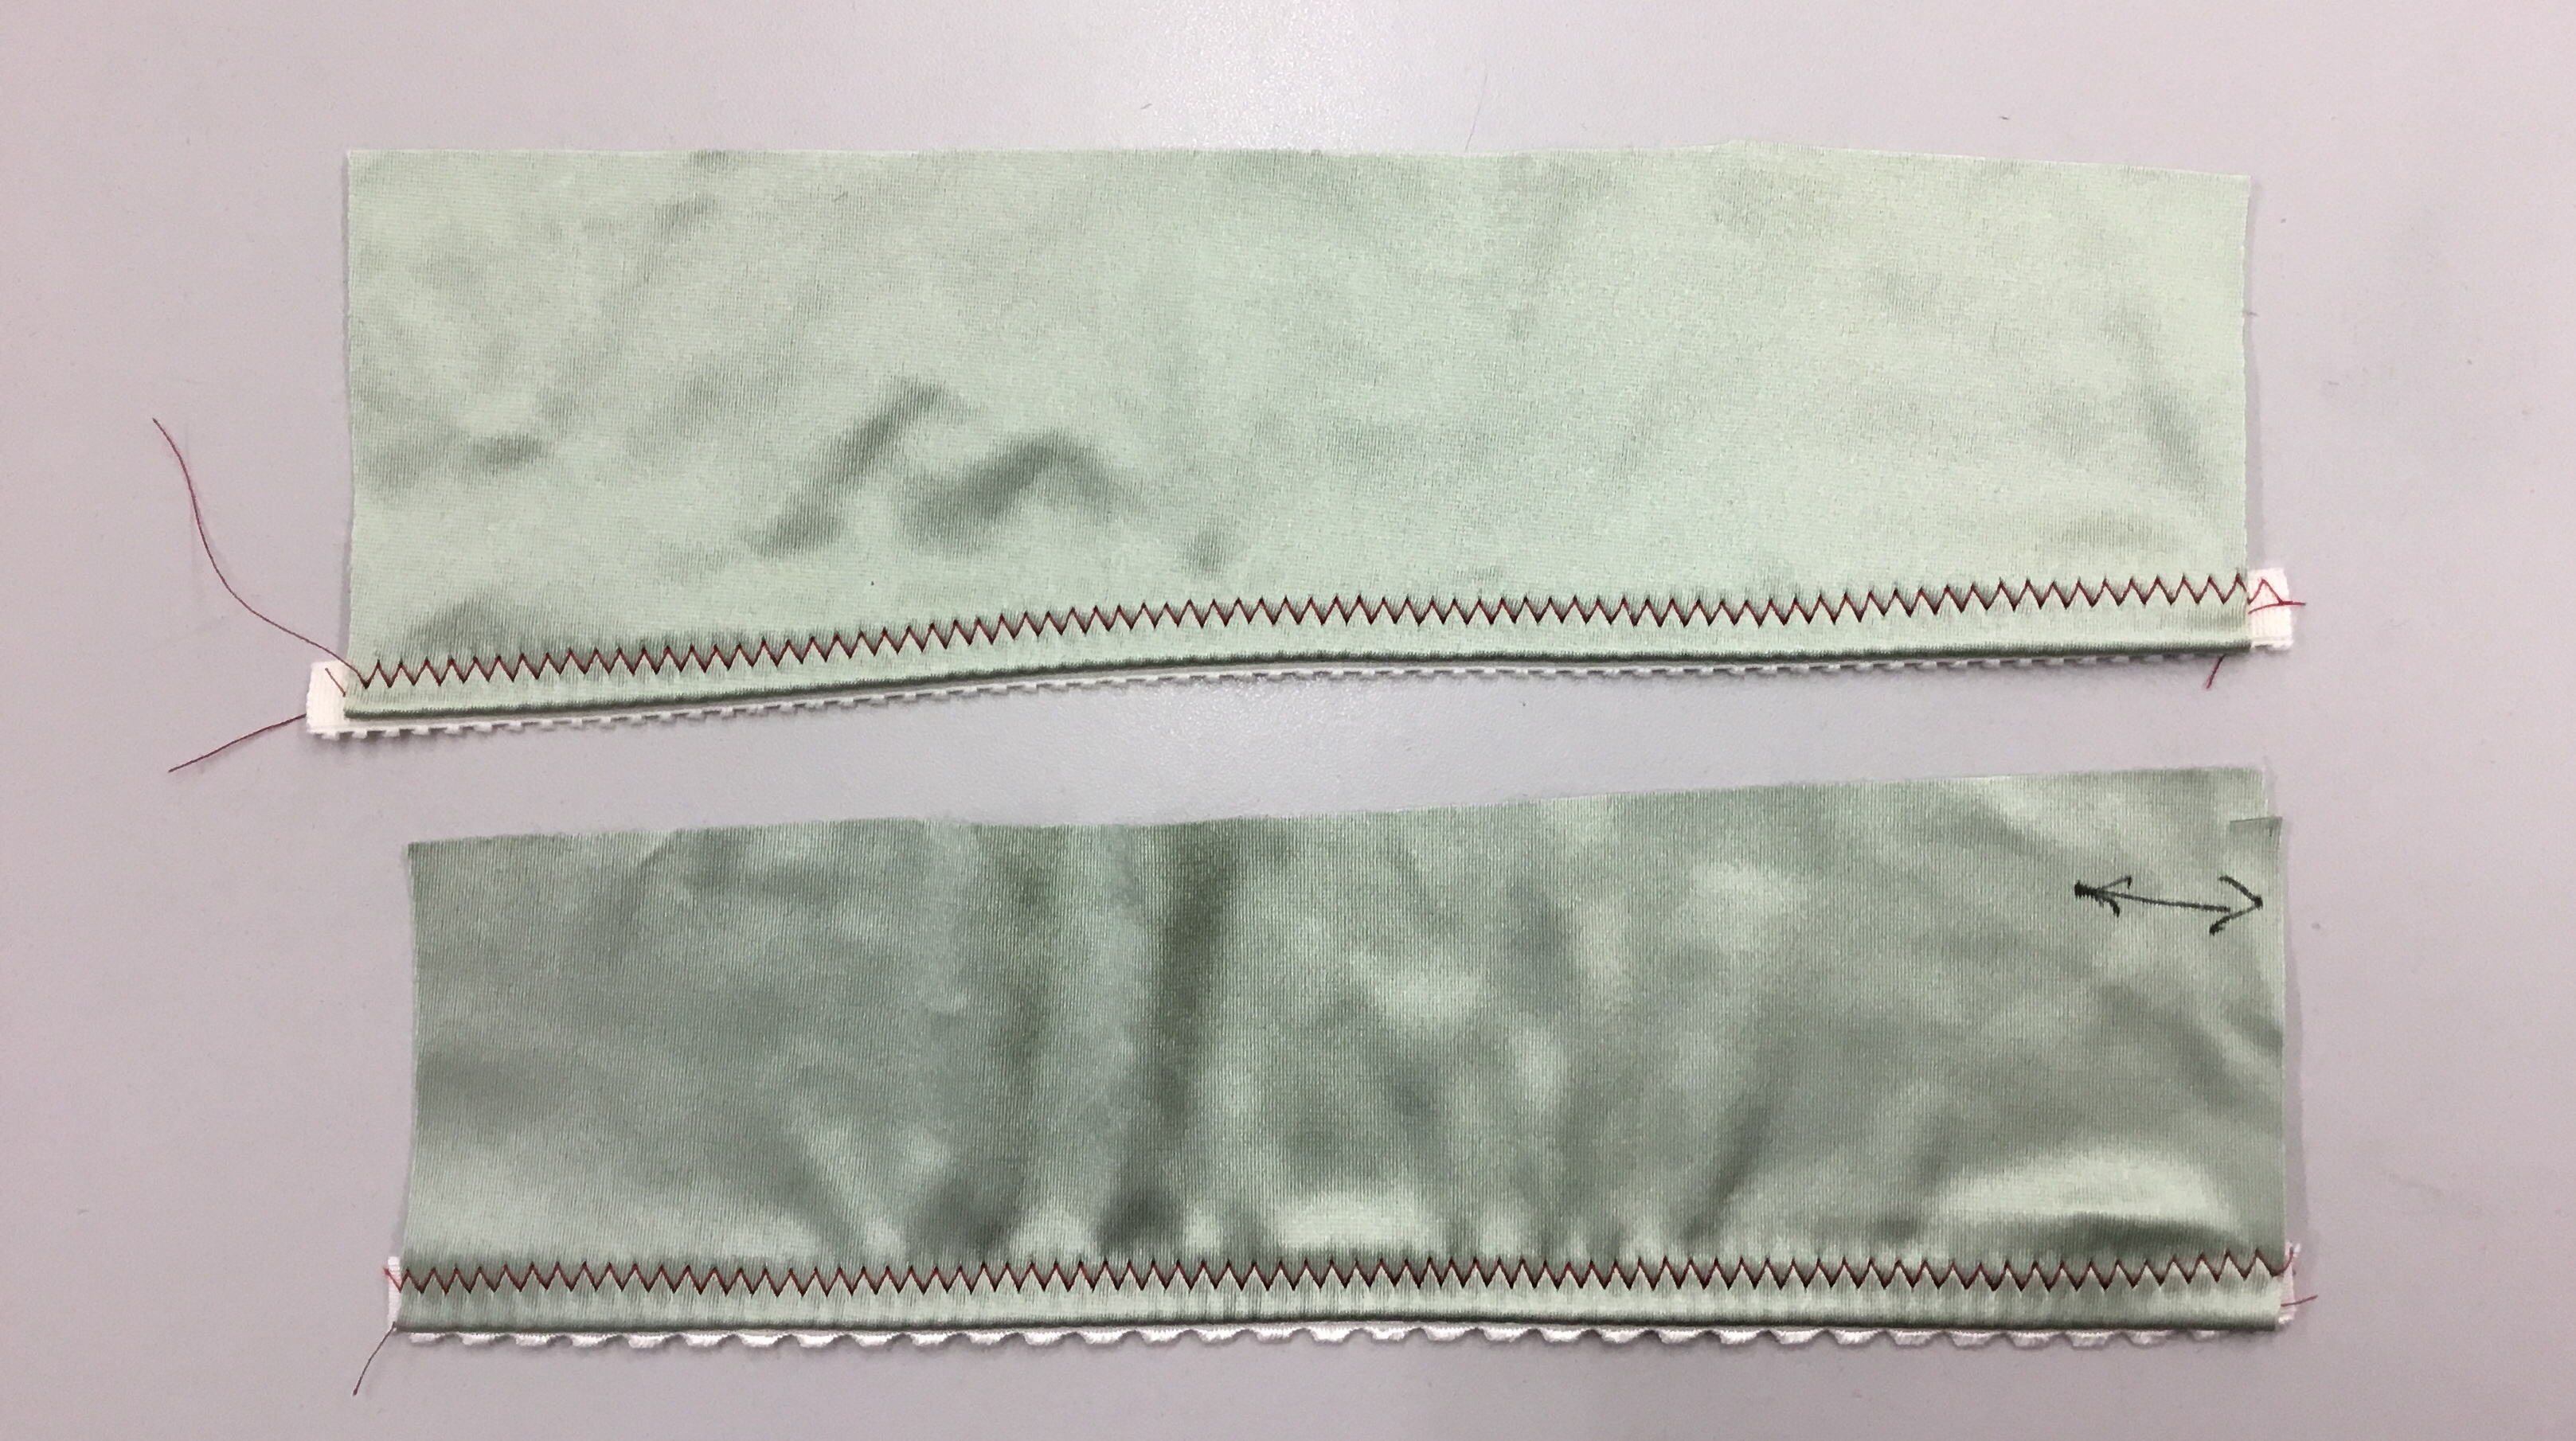
Now, here are the same elastics… except in this case, I pulled the elastic ever so slightly as I sewed it on. I call that “showing the elastic who’s boss”. I pull about 1/8″ in 3-4″ of fabric, just a gentle pull as it goes under the needle. You can see the fabric now curves downward, and the edge has actually shrunk a little bit. Don’t worry about that – it is perfectly normal.
And here are both elastics second pass. The added stitching has caused the stitches to correct themselves and the fabric is now flat. Much better!
I hope you have enjoyed how to work with stretch satin. Once you know these few tricks, you will have better success with this wonderful, but tricky fabric! As always, I welcome your comments!
Your Fairy Bra Mother,


how would i use his in a beanie lining to keep elastic
Thanks for these tips. I used stretch satin to make my wife a camisole, trimmed with stretch lace, and these tips will help me make her a better one the second time round.
It is quite interesting to see people’s faces when my wife tells them that her hubby had made this or that project, but then i enjoyed sewing for many years now, and still learn a lot.
Thank you for the sewing tips for using stretch satin! Can’t wait to start.
Good to know!