This past month, we’ve been focusing on basic bra-making and sewing skills. If you have a tip or know of an easier way to do the basics, we want to hear about it. As in all of our monthly challenges, you threaded your way through this Back to Basics challenge wonderfully! Some of you gave us multiple tips and all of you gave tips we can all use. In fact, this is a VERY long post, chock full of wonderful tips, tricks and techniques. Thanks to you, I’ve learned a few new tips I am going to try out in my own bra-making!
Cassy – Canada
Charlene – Canada
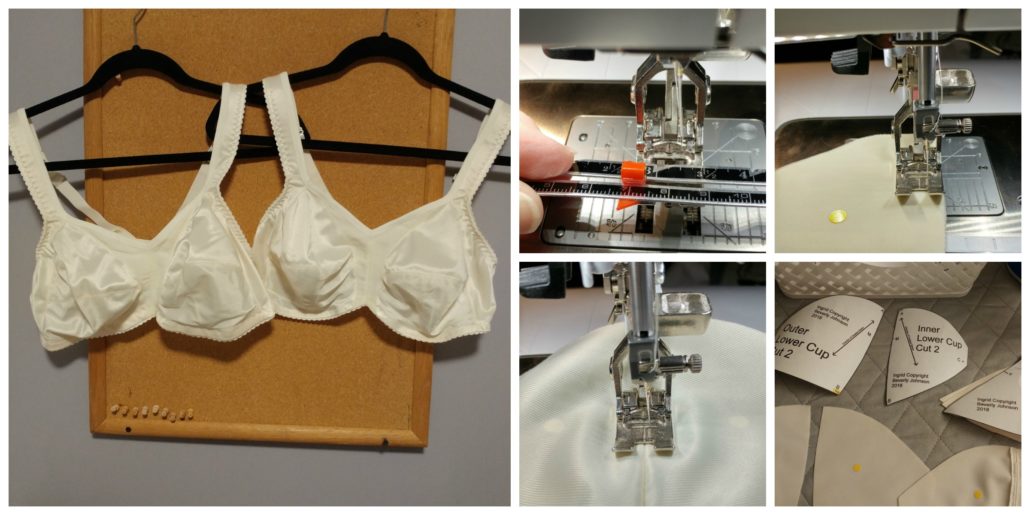
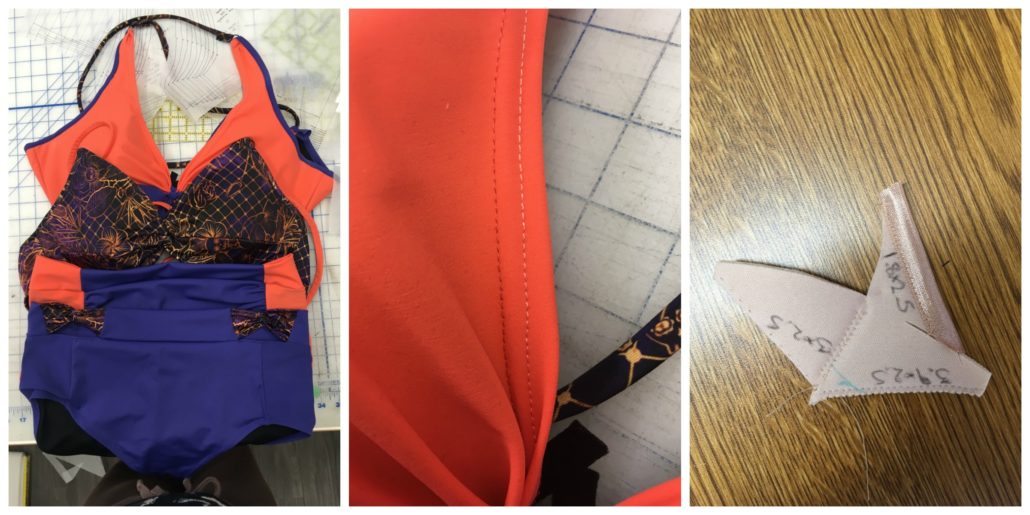
This is Charlene from Saskatchewan again. This time I am doing a bra for my sister, basically a Heather in duoplex instead of sheer cup lining. This the first horizontal seamed cup I have done for her and I think she is in for a nice surprise. I may need to do another one in sequins for her to wear to hip hop class, knowing her. (Future blog post? Hint hint) I can’t say I have exactly mastered any techniques but there are certainly some that make my life easier.
1. Pinning. Any curved seam gets pinned so it can be eased and matched. Some of the straight seams too, because the duoplex is so slippery.
2. Basting. I baste layers with contrasting thread to keep them aligned and stable for the seams and elastics. I have experimented with all kinds of temporary glues and I just find basting more reliable.
3. The right stitch. Besides of course the straight, zig zag and three-step zigzag, I also use a blind stitch on the open side of lace on the upper cup, and anywhere else it doesn’t get caught by seam or elastic
4. Straps. I have moved to a folded strap, because sometimes the elastic does make me itchy. I do them both with and without the underarm elastic, but no neckline elastic. In this case I stitched one side to the cup then flipped, folded and topstitched before doing the underarm elastic.
5. Channeling. I don’t topstitch the channeling anymore (sorry, Beverly!) I get a smoother, more accurate stitch doing the outside edge of the channeling from the wrong side. As long as the tension is correct it looks all right, and I don’t accidentally close off the channeling or miss it altogether!
That little bit of coral peeping out is Active Cotton covering the band elastic and inside of the frame. Helpful Hint: encourage assistants to play somewhere other than cutting table. Ok, I see I’ve gotten very wordy again but I hope you enjoy my little dissertation! Happy February!

Christel –
Hallo, the bra is my own design. I made the pattern myself. Because fold-over elastic offers too little strength, I put picot elastic in between the fabric and thefold-over. That is my advice.

Christine – Canada
My skill/method I use to make sewing quick and straight is: I use the line on my clear sewing foot (to guide along seam) and adjust my needle position to stitch a parallel line when opening up the seams. This way I know they are equal to the left and right of the seam. I find it easier to watch the seam at the centre line on the foot and let my machine sew.
Parallel, straight lines are very pleasing to the eye and make the final product look ‘professionally’ done!

Desiree – Holland
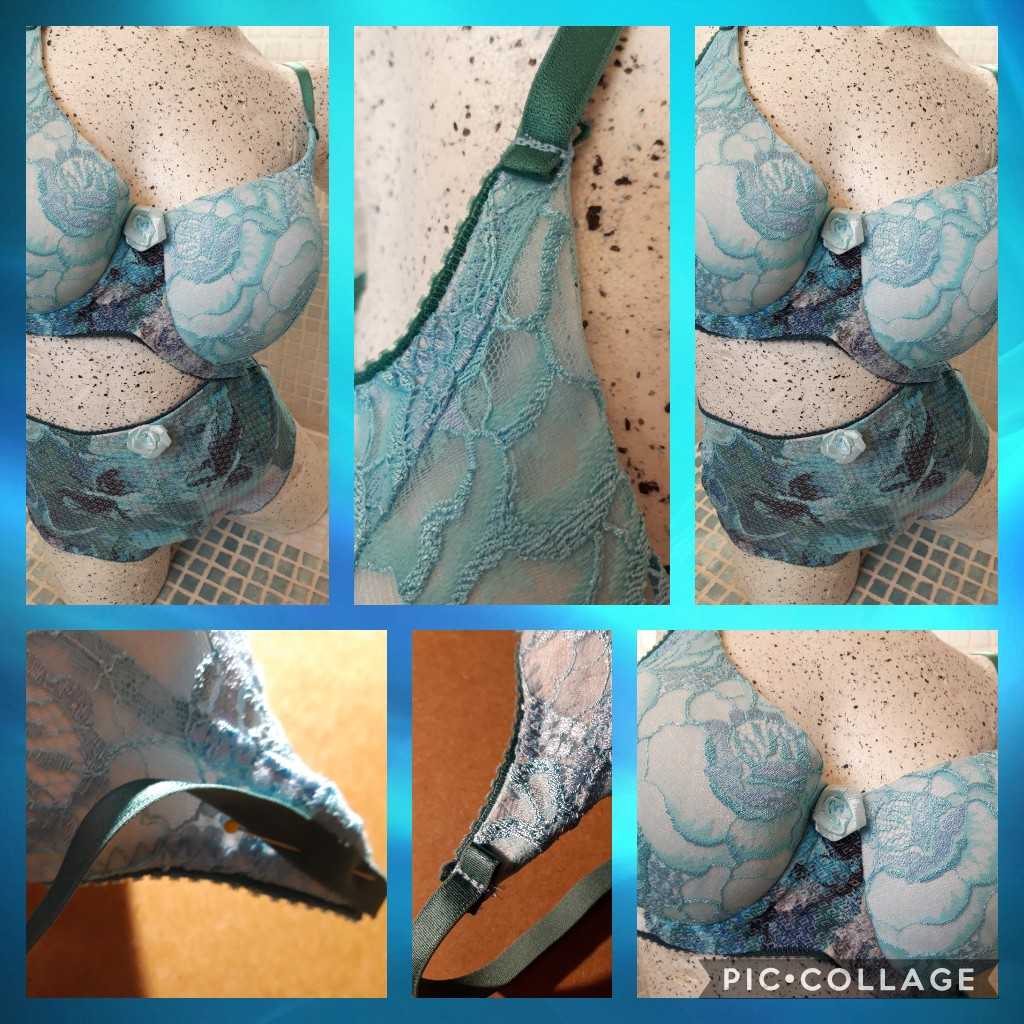
Good day. Attached is my Back to Basics Challenge entry. To attach the shoulder straps I use a reverse technique, hope the pictures will show. I learned this from a commercial bra photo. Happy with this finding because it reduces a lot of bows and florets on the not-so-pretty connection seams. Greetz,
Diane – Canada
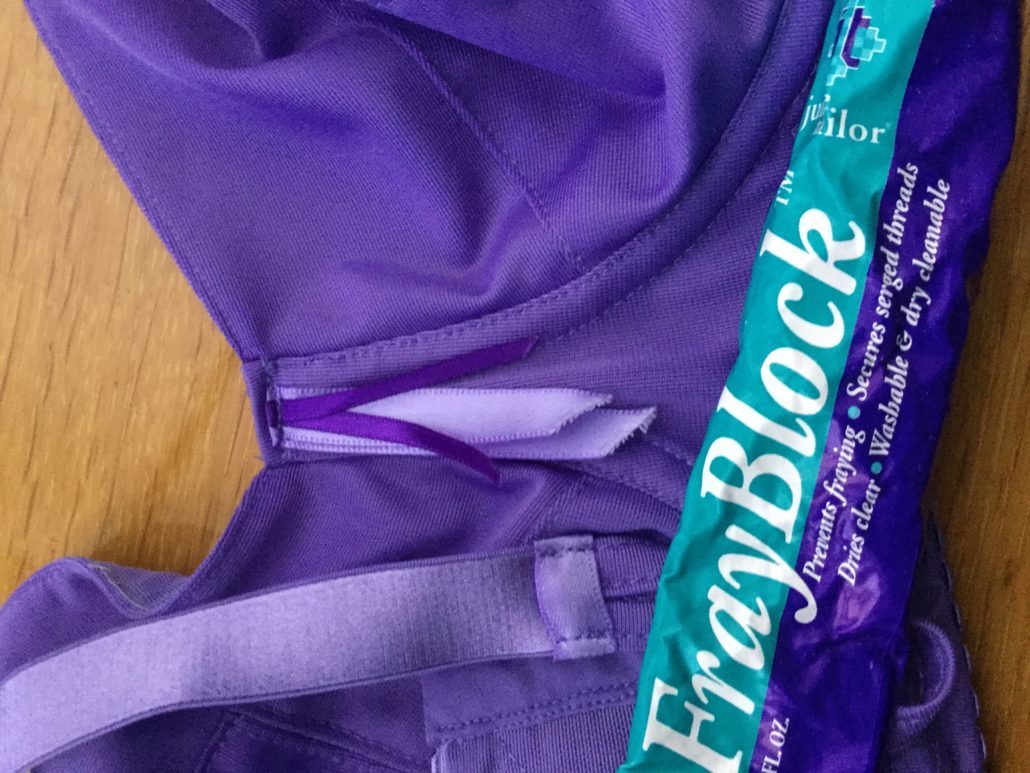
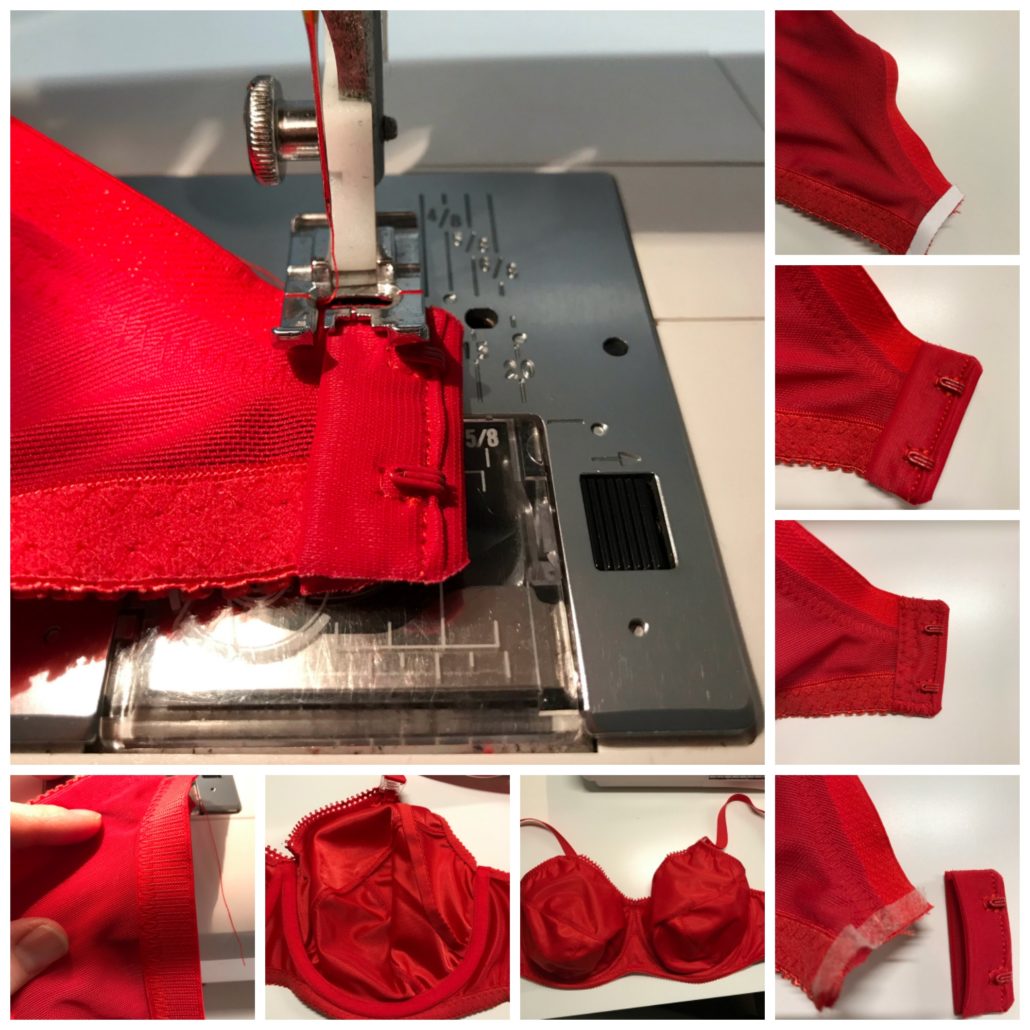
To the team atBra-Makers Supply, It is difficult to come up with something that has made my bra making better without it being directly attributable to Beverly Johnson. Here is my submission which was influenced by a lovely boutique bra I used to have in my rotation (so I can’t even claim it as being original to me). Nevertheless, instead of bows, I frequently use one or two ribbons folded with the ends cut on a slant. Frayblock helps keep the ends from fraying through multiple washes. Ribbon or fold over elastic can also be used to cover joins. I like to secure the ribbon with a small machine stitch rather than hand sewing as it allows the ribbon to lie flat. Bye for now,
Esther – USA
I am new at bras (Bramaking 101 in January after 4 tries on my own) but I still have a few tricks to offer:
1. For decades I have been sewing shirts three at a time, doesn’t matter what the fabric design is, but they must use the same color thread. Bras look to be the same, 3 in a batch is faster than 3 separately. I have redrafted the classic to a horizontal cup and a shellyesque powerbar version, and made one of each so I am now good to go. One each of 3 styles, all with the same frame and back.
2. I have traced the class pattern pieces to copy paper, but each cup style is a _different_ color paper. Otherwise it would be too easy to try to put a horizontal upper cup with a diagonal seamed lower one….
3. Make a fold on each cup pattern piece parallel the DoGS. This way if you flip the piece when laying out 3 sets of cups, you still keep track of the DoGS.
4. There are several blogs that discuss dying bra parts, but none of them make the crucial fiber artist connection that nylon apparently dyes like a protein fiber. In the spinning/weaving/fabric dying world, there is a great divide between protein fibers (silk, wool, alpaca, basically any critter) and cellulose fibers (cotton, linen, rayon, basically any plant). Synthetics are normally not considered. Given everyone using acid dyes and vinegar, nylon is obviously a synthetic acting like a protein, so any dying information from Google for protein is useful. The Procion dyes from Dharma Trading are chameleons, use Gaubers salts for cellulose and vinegar for protein. Rit has both mixed so you are always throwing half of it away.
5. Given the above, if you would like to play with colors but don’t want poisons around your kids, pets, or kitchen, KoolAid drink mix or generic equivalent is a food safe protein dye and doesn’t need added vinegar (citric acid is the first ingredient). I haven’t tried it yet on nylon, but it did a lovely permanent job on my first handspun 25 years ago. The only catch is that Duoplex is polyester not nylon, so you have to use 50 denier nylon tricot lined with cup lining instead. But all the elastics and Powernet are nylon, and dyeable white hooks and eyes are available. One of my 2 local independent fabric shops that still has dressmaking carries the nylon tricot. There are multiple “how to dye wool yarn with Koolaid” blog posts out there and some have very nice color charts. They might not be identical colors, but will certainly play nicely together. I would dye everything in one batch and then shop for thread that matches the 50 denier. Add metallic rings and sliders. When I get the bra drawer filled a bit I plan to experiment with lemon-lime…
Jodi – USA
Kathleen – USA
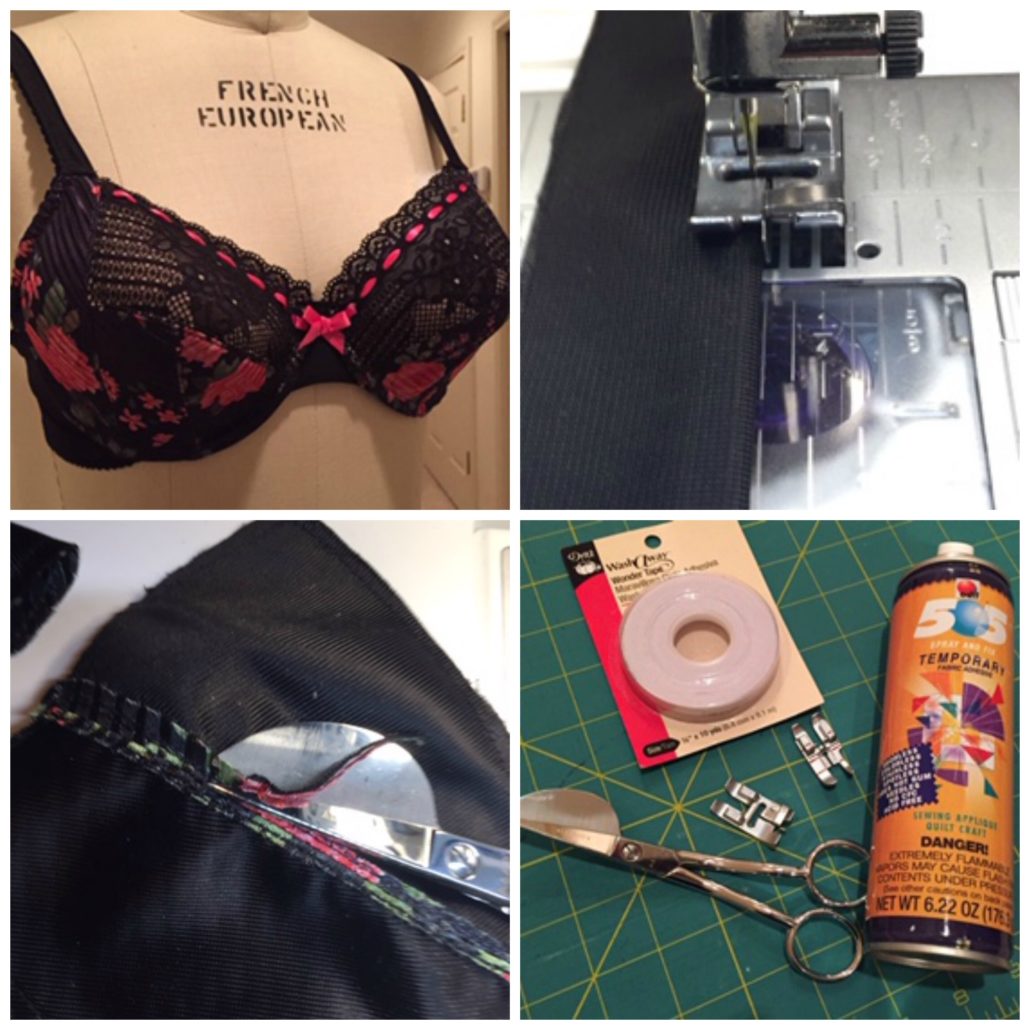
Back to basics. This one, a not so basic bra, is made using my favorite essential tools. The flimsy floral was backed with Duoplex with a quick squirt of temporary Spray Adhesive. The Quarter Inch sewing machine foot is essential for accurate seams, and the Stitch in the Ditch foot makes that narrow top-stitching a snap. Basting the back closure to the band with Wonder Tape makes that dreaded last step so much easier. Using the Pelican Applique scissors with the curved edge down helps prevent snipping a hole in the fragile fabric underneath. I can’t “build a bra” without these.
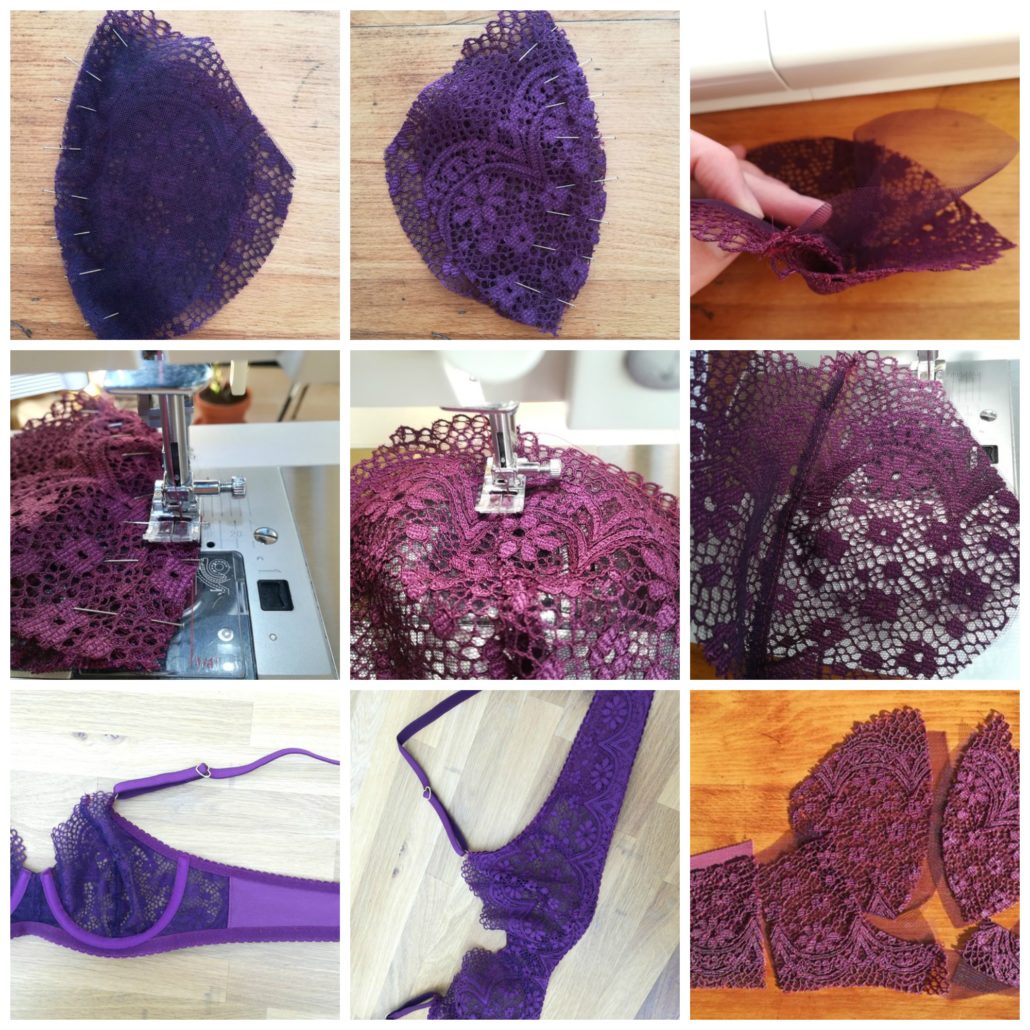
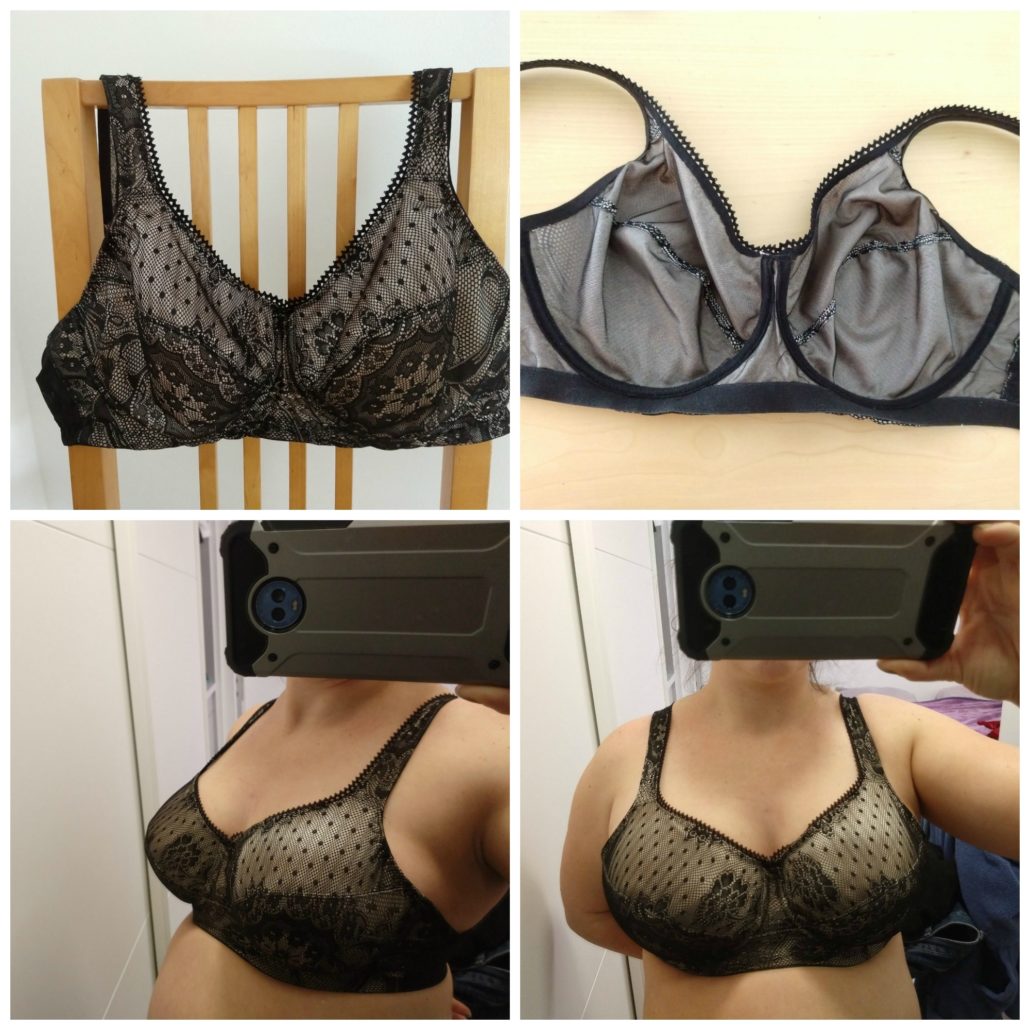
Louise – Belgium
- Tulle inner cup right side up
- Tulle outer cup wrong side up
- Lace outer cup right side up
- Lace inner cup wrong side up
Louise – Canada
Michelle – Canada
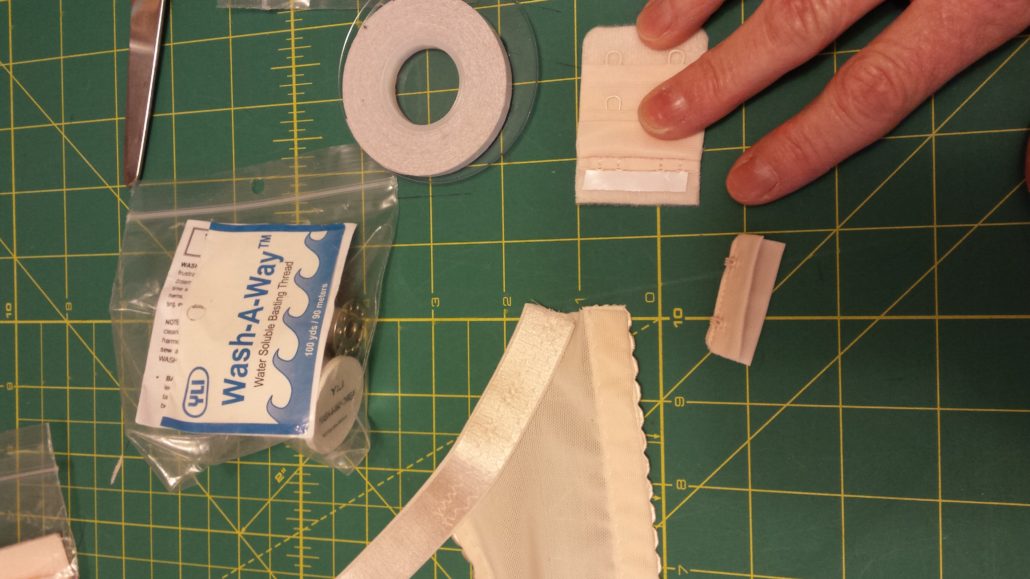
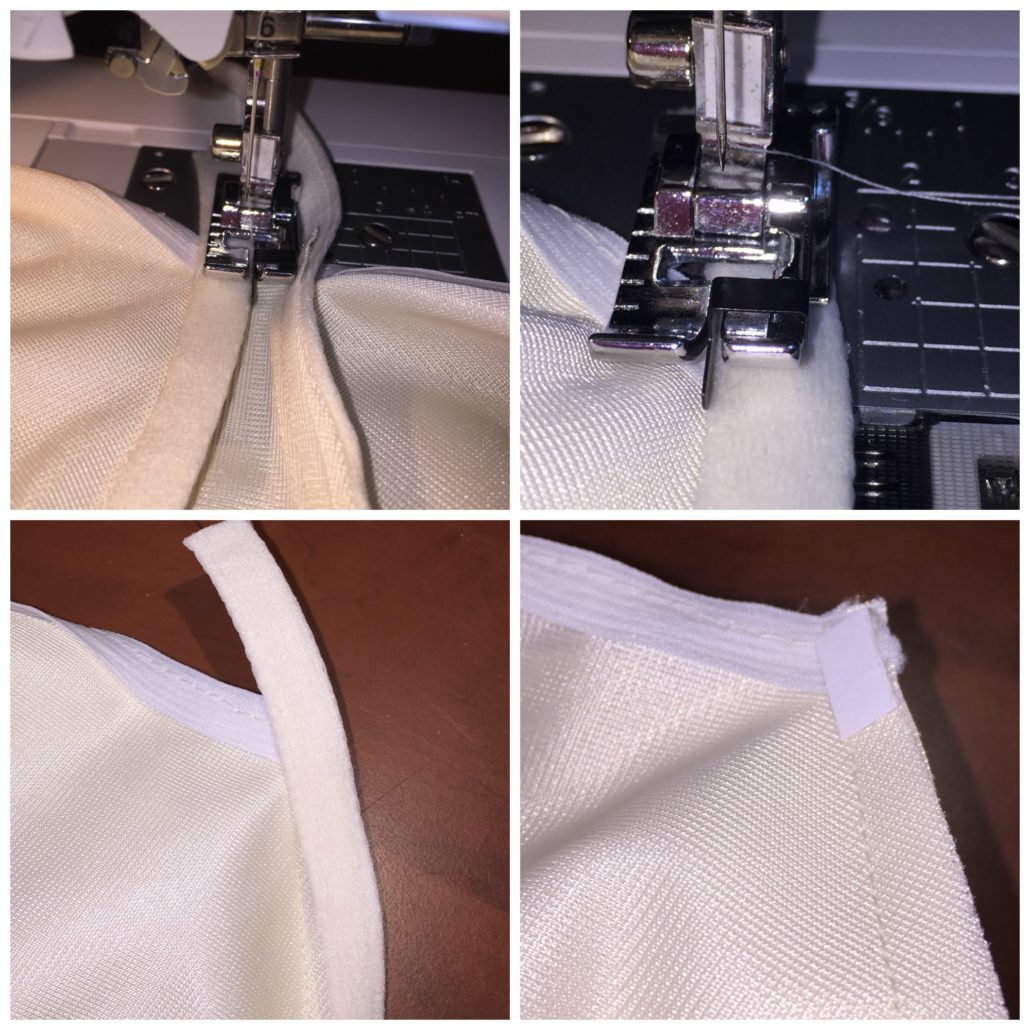
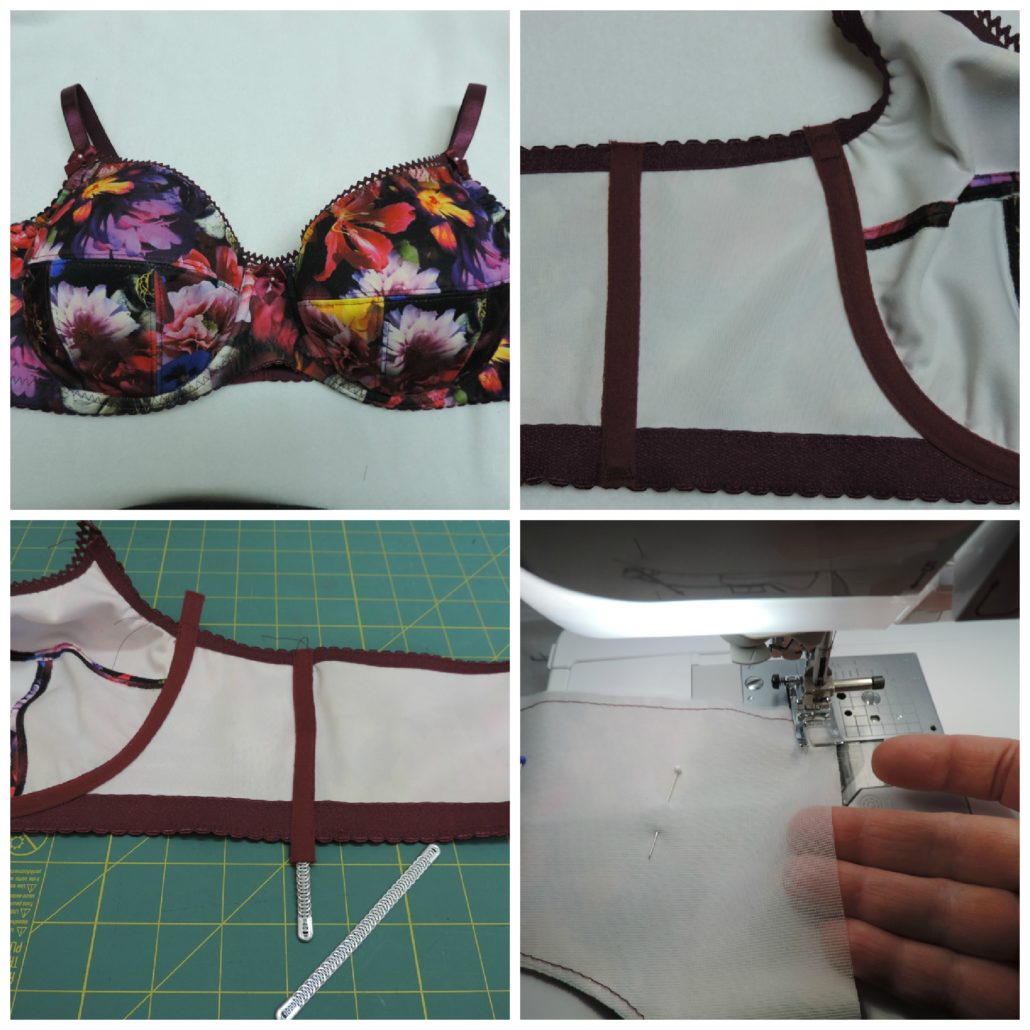
My Back to Basics challenge entry this month is all about getting the neatest finish possibly. This tip is using Wash-Away tape to hold the channeling in place to sew it. My second tip is all about sewing the channeling on as neatly as possible. I use my Stitch-in-the-Ditch foot to attach the channeling both really close to the edge, and neatly too.
Rachel – Canada
Roni – Israel
Sonia – Canada
Virginia – Canada


Water soluble thread, what a game changer thank you!
I have been making bras for about 4-5 years now. Nice to see that I can still learn new tips and tricks in the sewing process. Thanks for a great Back to Basics Challenge. Lovely work by all the participants.