Cloning a Seamless Cup
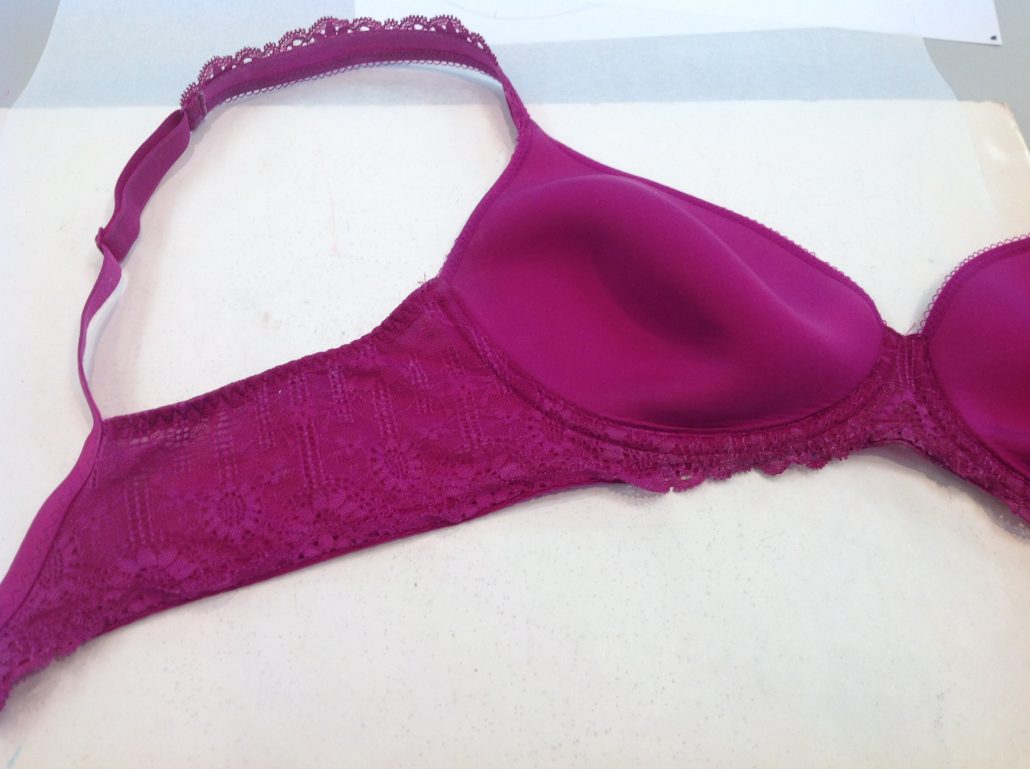
It is very rewarding to clone a bra you love from RTW (ready-to-wear). You already know it fits. Besides, Cloning a Seamless Cup can save you time and money if you can get the fit on the first try. In order to clone as explained in my blog post here, you need to be able to lay your bra cup flat. But what happens if you lay out your beloved seamless foam bra and the cup won’t lie flat, even with the wire removed?
That means your cup has been molded into that shape at the factory and since you likely don’t have a molding machine in your garage, you won’t be able to duplicate this cup. Or can you? Actually, you can, as long as you are willing to have a seam (or seams) in the cup to provide the shaping that the molding gives. Let’s see how to do it. First as I mentioned you have to remove the wire. I measured it against my set of wires and found it to be a 42 regular wire.
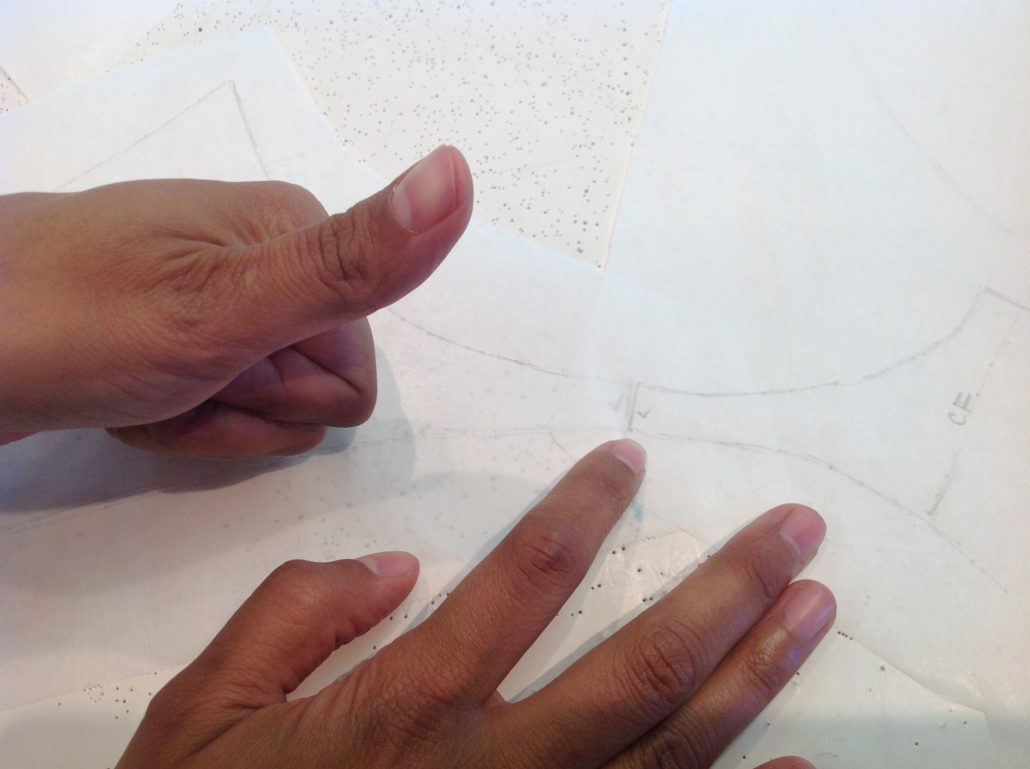
Place some see-through drafting paper on a foam core board. You’ll also need some pins with heads on them (otherwise they hurt your fingers!) We are going to pin the parts of this bra out to their “pre-sewn” flat shape. In other words, how it looked right before someone picked it up to sew it.
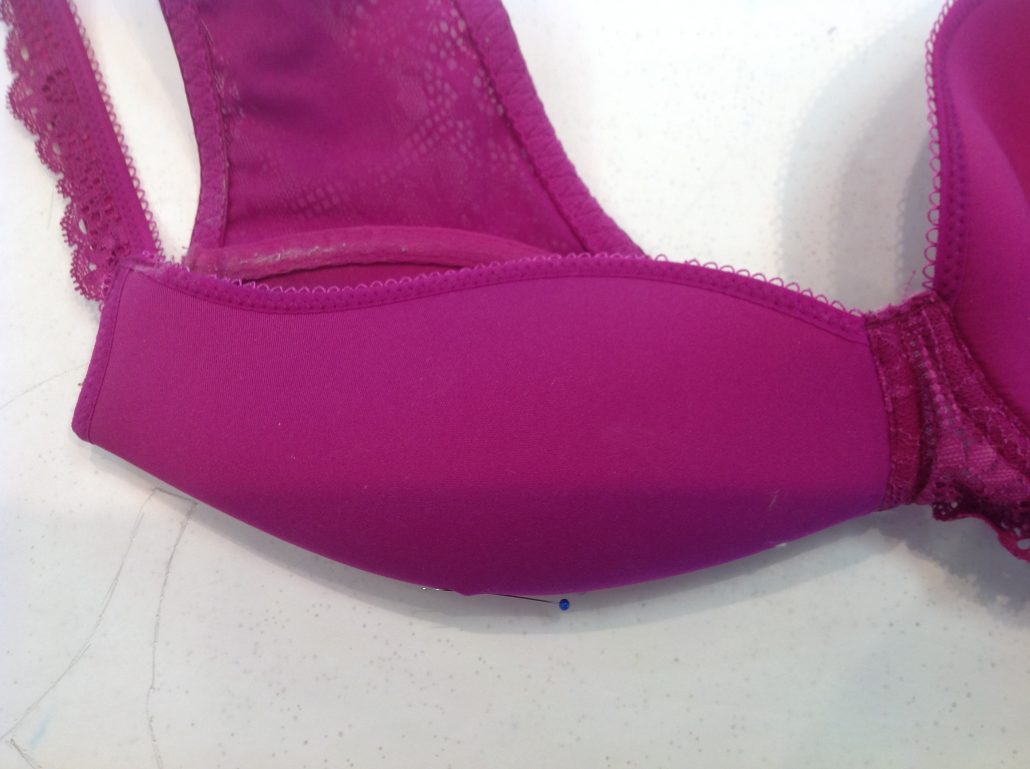
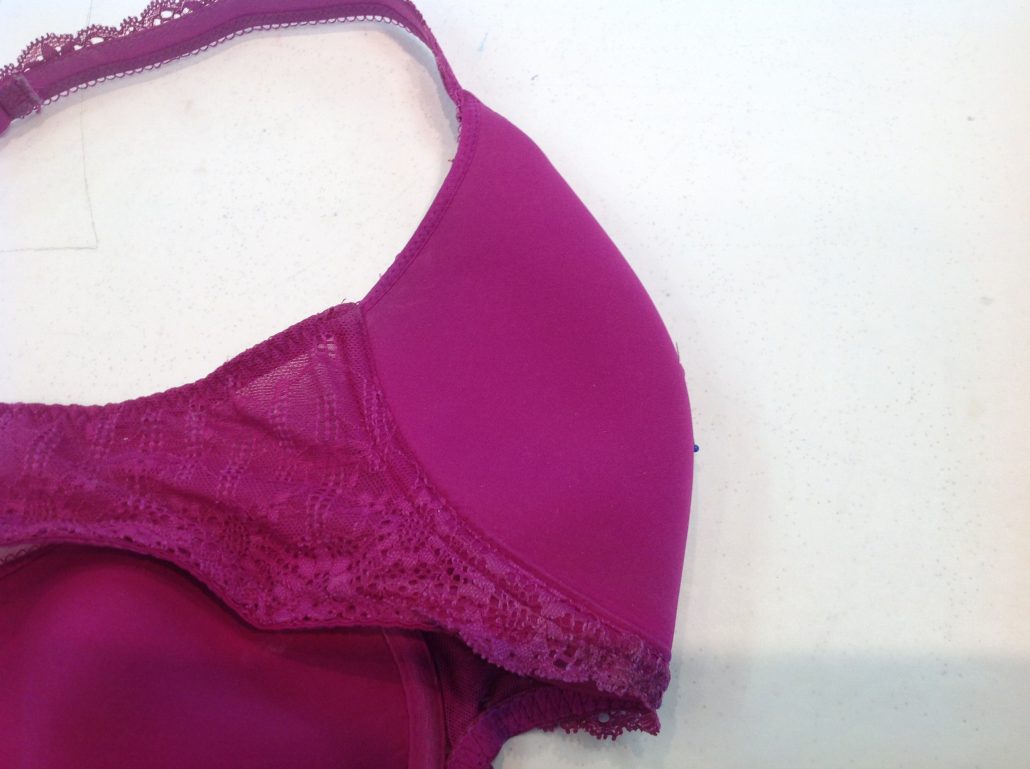
Notice the seam that is at the middle of the bottom of the cup. That’s where the seam ends between the back band and the front frame. Usually the seam is more toward the back but in the bra, it is directly under the cup as you might be able to see here. You can feel it as a raised bump along the bottom of the wire line.
We can start by pinning out the back band. I pin on the seamlines (where one fabric joins to another), and all around the outer edges. In the case of pinning lace, I only pin along the deepest valley of the lace and make a (more or less) straight edge.
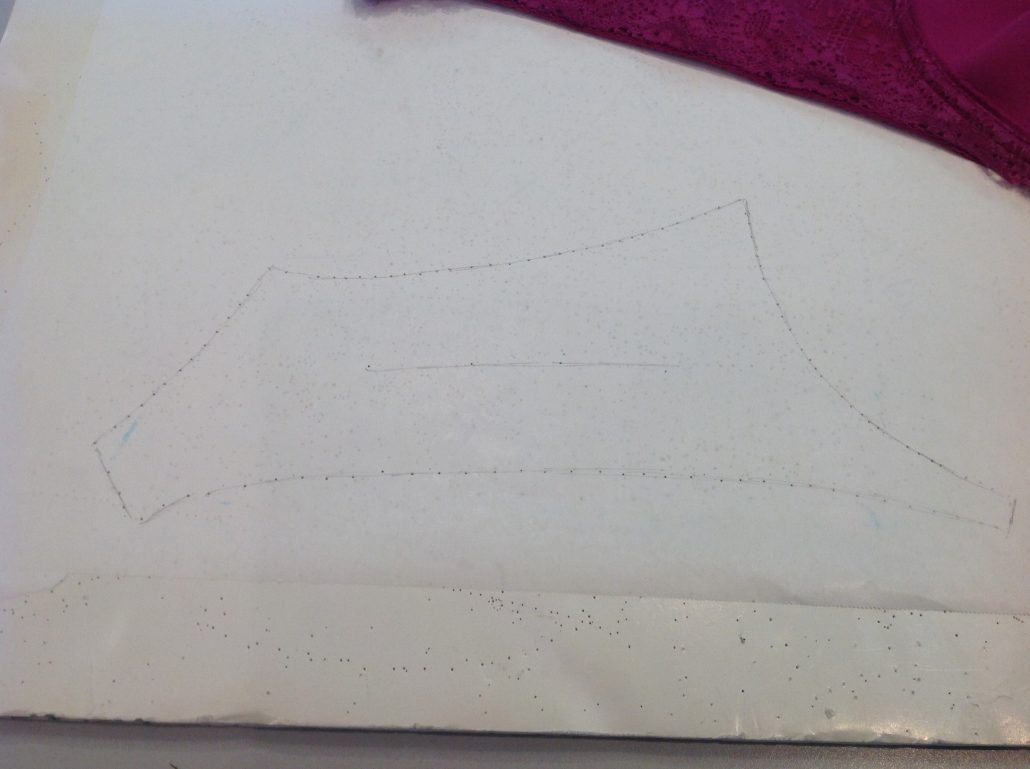
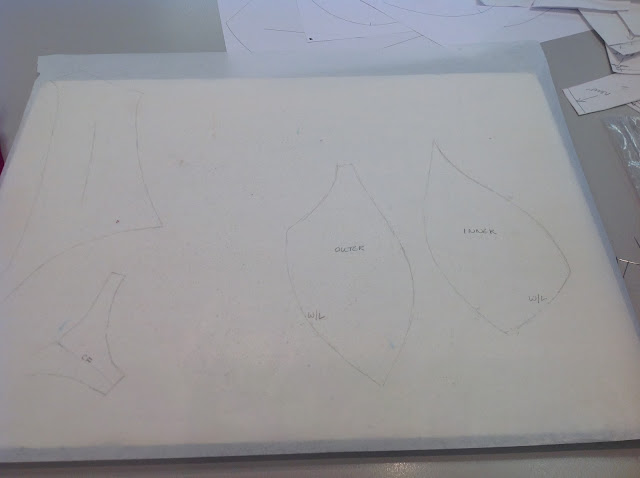
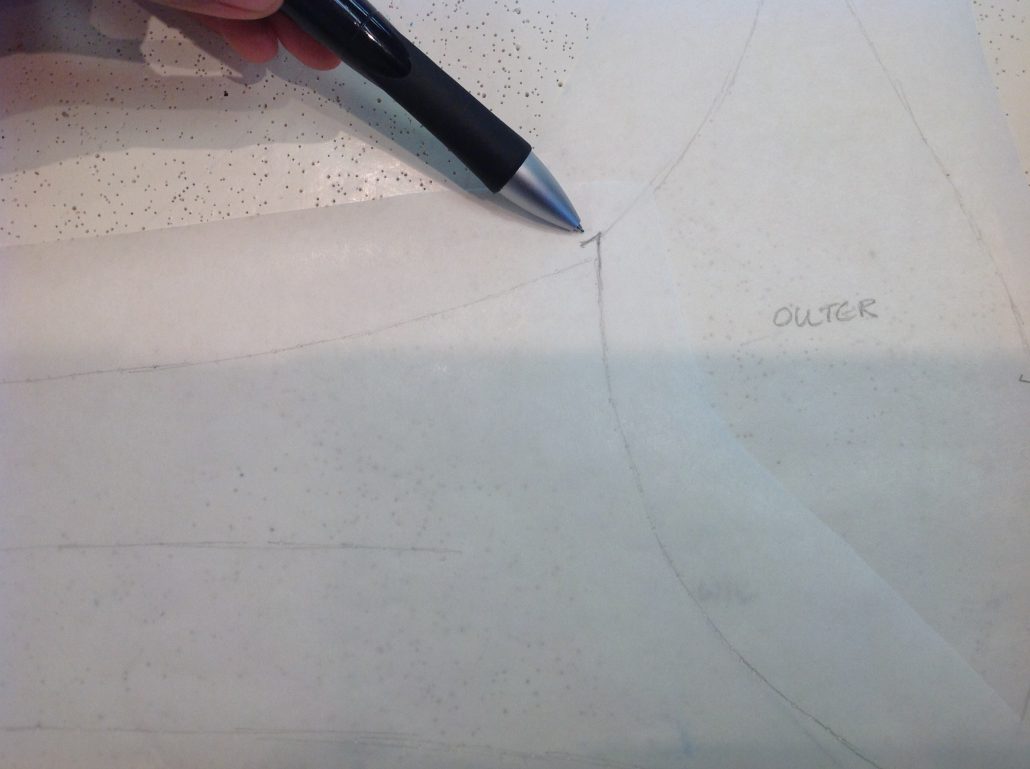
Once the piece is pinned, I go around the edge with a larger pin (a hat pin or a floral pin is really ideal) to punch the pin marks and leave a nice hole in the paper that you will be able to see once the pins are removed. Then I “sketch” the shape from pinhole to pinhole. Don’t try to be perfect at this stage – you just want to create a pencil outline you can see. I also marked the DoGS.
Pin out the bridge. If you removed one wire, make sure you only pin out half the bridge as the second wire will distort the shape of the bridge somewhat. better to pin out half and make the second half an exact mirror image.

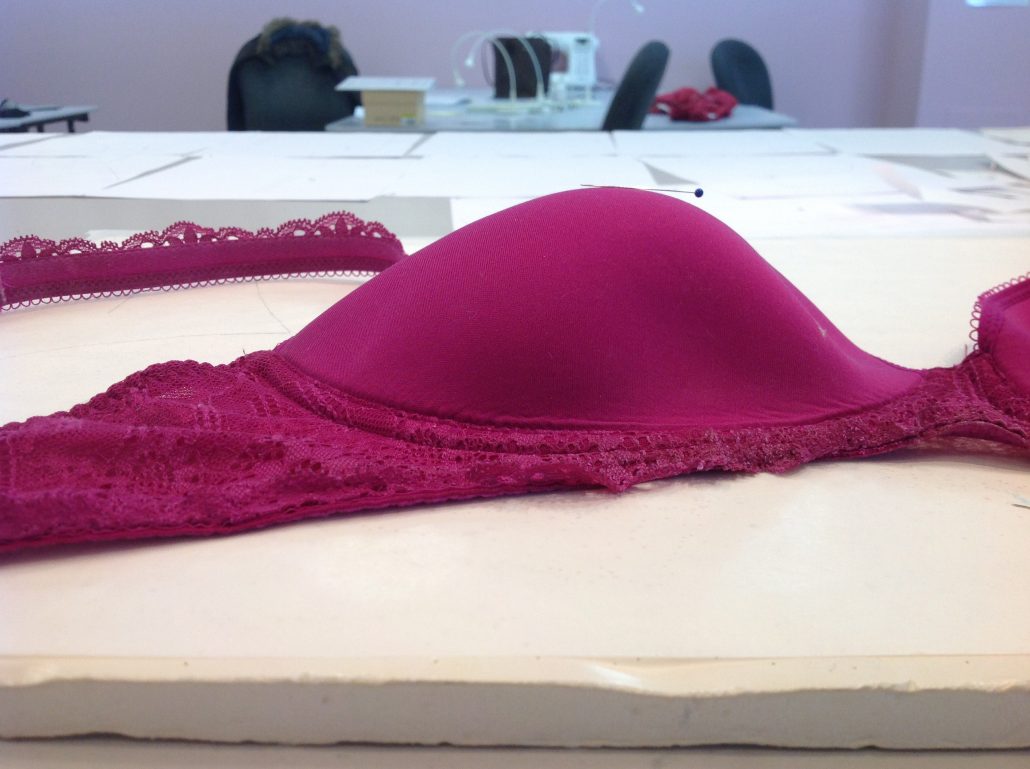
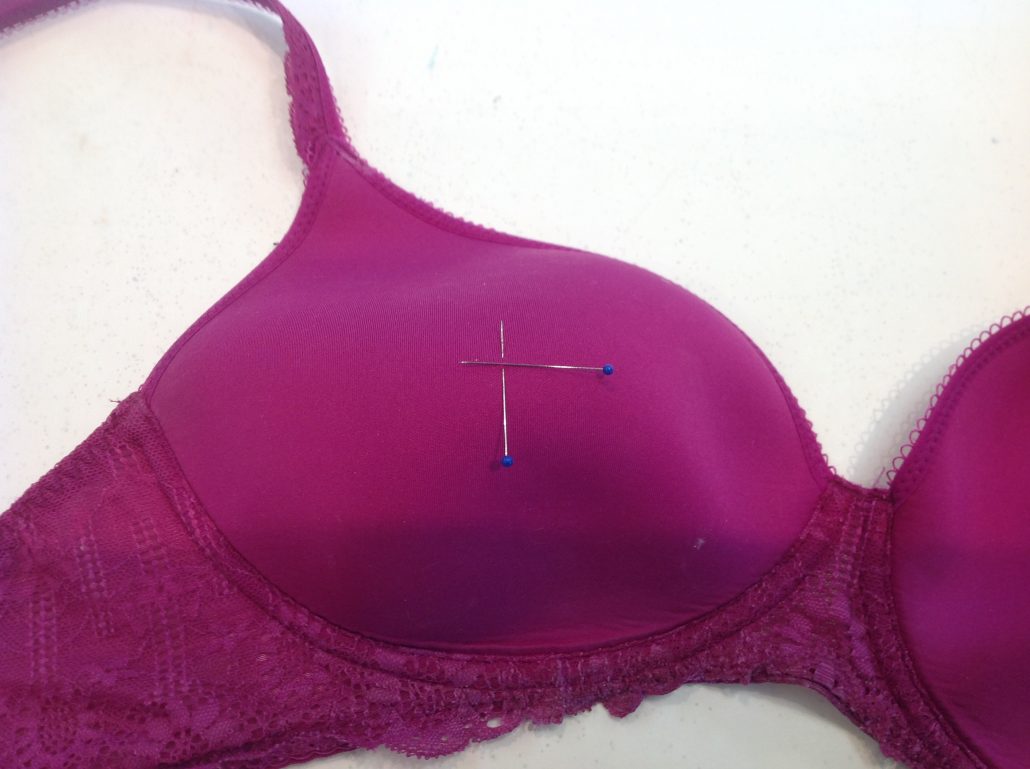
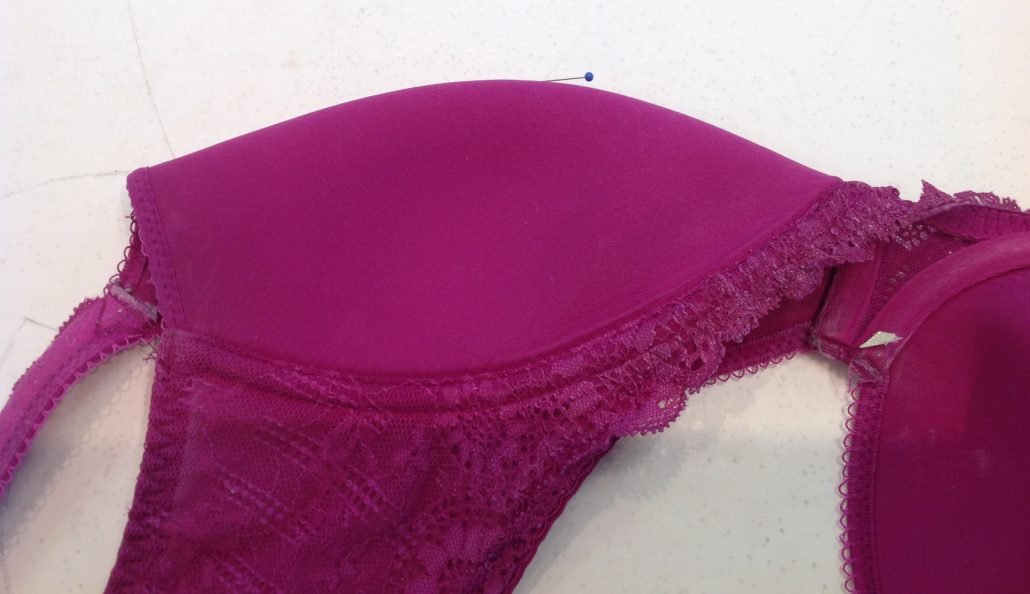
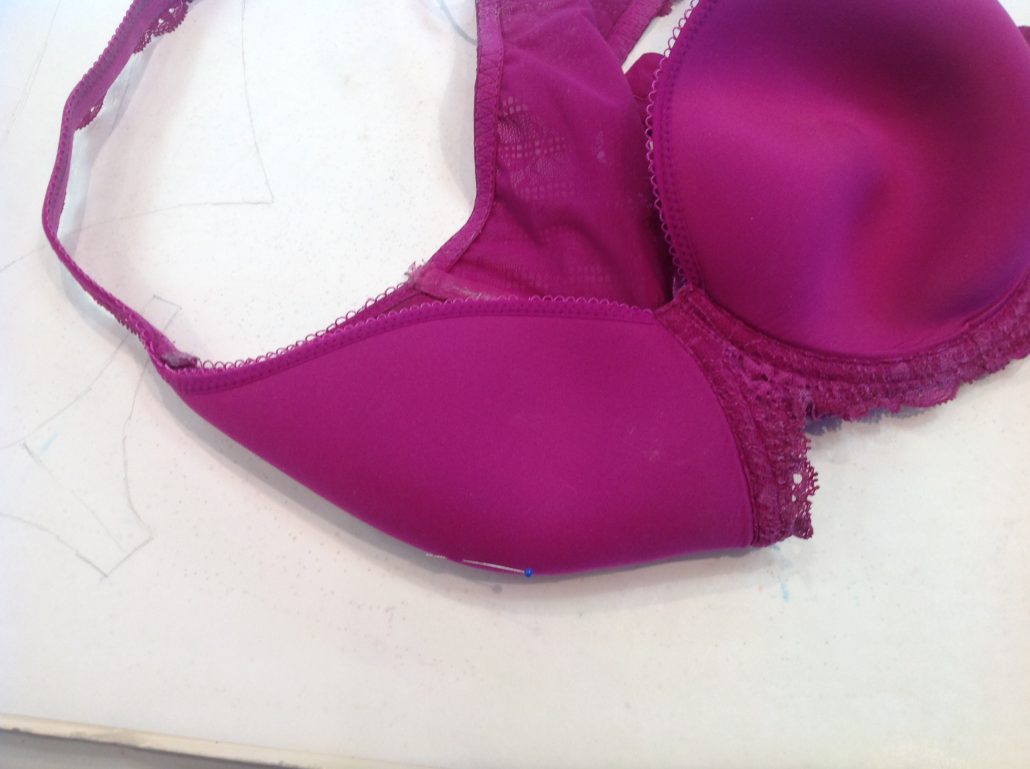
Once I finish the band and front frame, it’s time for the cups. I need to find the apex of the cup. Not easy since there’s no seam to guide you. Lay the bra on the table and get down at eye level to the bump of the cup. Using a fine pin, move the pin across the cup until it reaches the apex (high point) of the cup, or just until you cannot see the pin anymore. Put a pin there just catching the threads of the cup.
Next, turn the cup a quarter turn and repeat the process. You should have two pins that intersect at the apex.
Now you can decide what style line you want – diagonal, horizontal or vertical. I folded the cup making sure the fold touches the apex pins and make the cup lie as flat as you can. If there are big bumps you cannot get out, either:
- you may not have found the apex. The cup should lie flat if the pins are right at the apex.
- you may have to divide your cup into more than two parts. The more seams you have, the more shaping you can have in your cup. This happens more often on the larger cups or the Omega shaped cups. Seams are your friend!
First I tried a diagonal seam. A diagonal seam starts in the underarm seam, runs through the apex and ends in the wire line seam. Here’s what the lower cup would look like in a diagonal cup.
And the upper cup. It’s ok, but not really the look I was going for.
 The horizontal is not going to work at all. This cup is fairly low in the front and the horizontal seam would end up cutting across the neckline edge. Not a good look as you can see here. Forget that one.
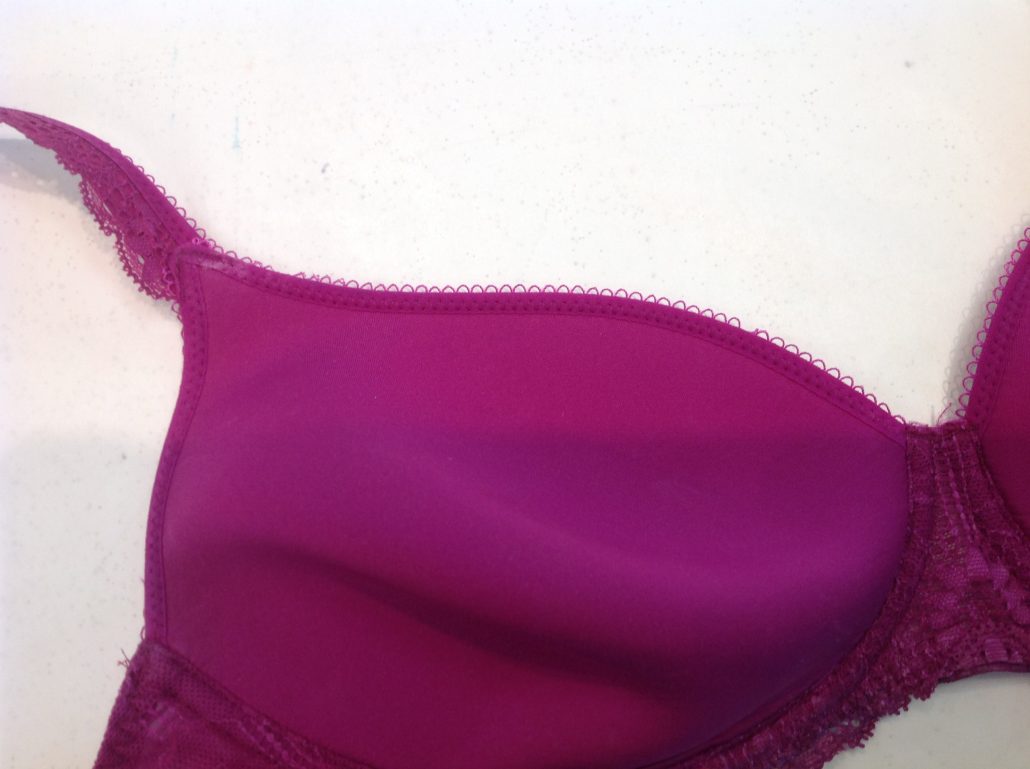
Here’s a vertical seam and I chose to run it from just to the inside of the strap running downward. Ah…much better. Here’s the shape of the outer cup.
And here’s the inner cup…looks good
Now you can pin along the fold to keep the two parts from shifting around. Then pin in the well of the seam to get the shape of the outer cup. You can see where we tried out different style lines on this cup. We used a wash-out marker so we could see the difference between them.

And flip the cup to pin around the inner cup. it’s actually quite easy!
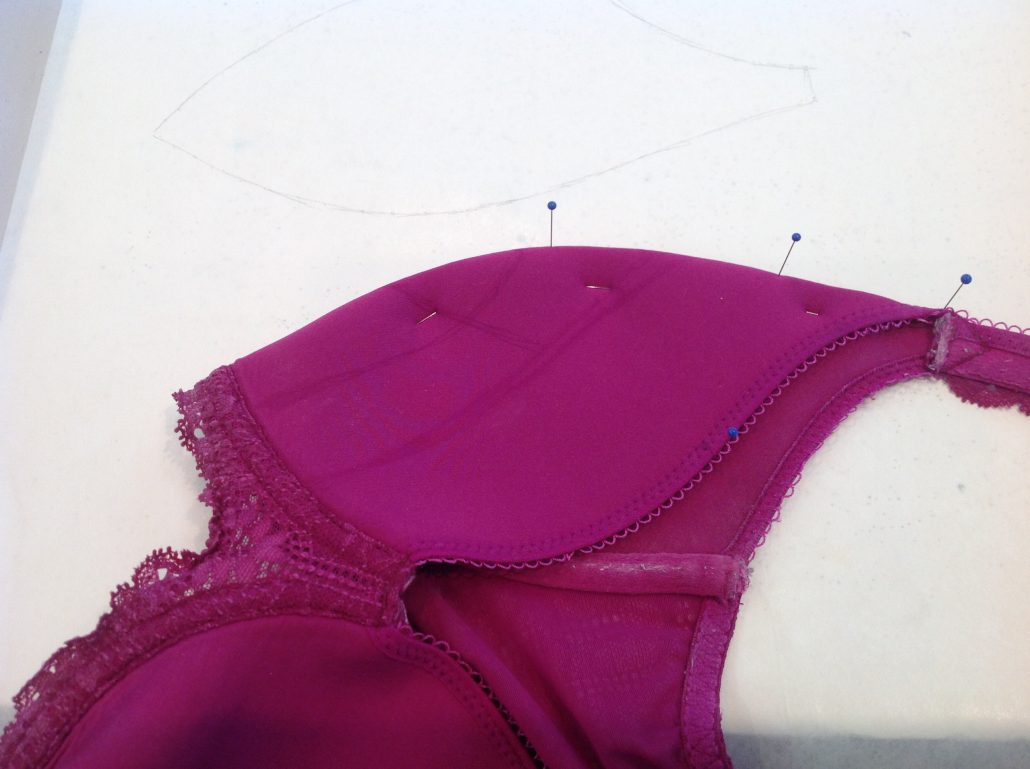
After all the parts are pinned out and sketched, they should look something like this
Time to True the Seams!
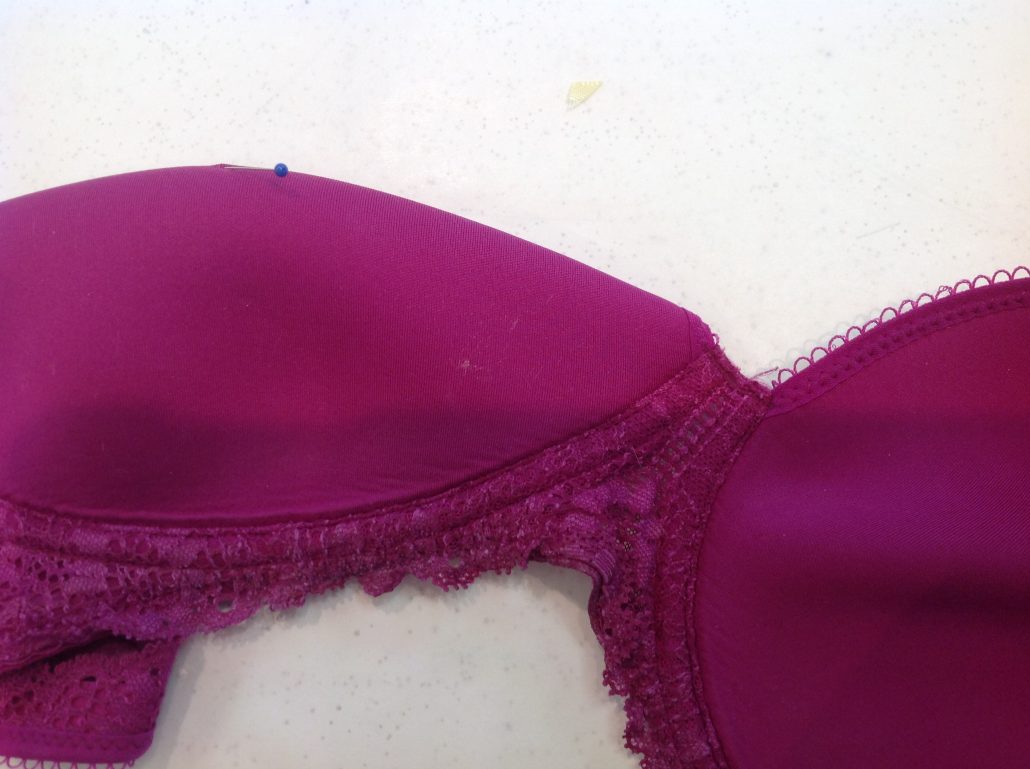
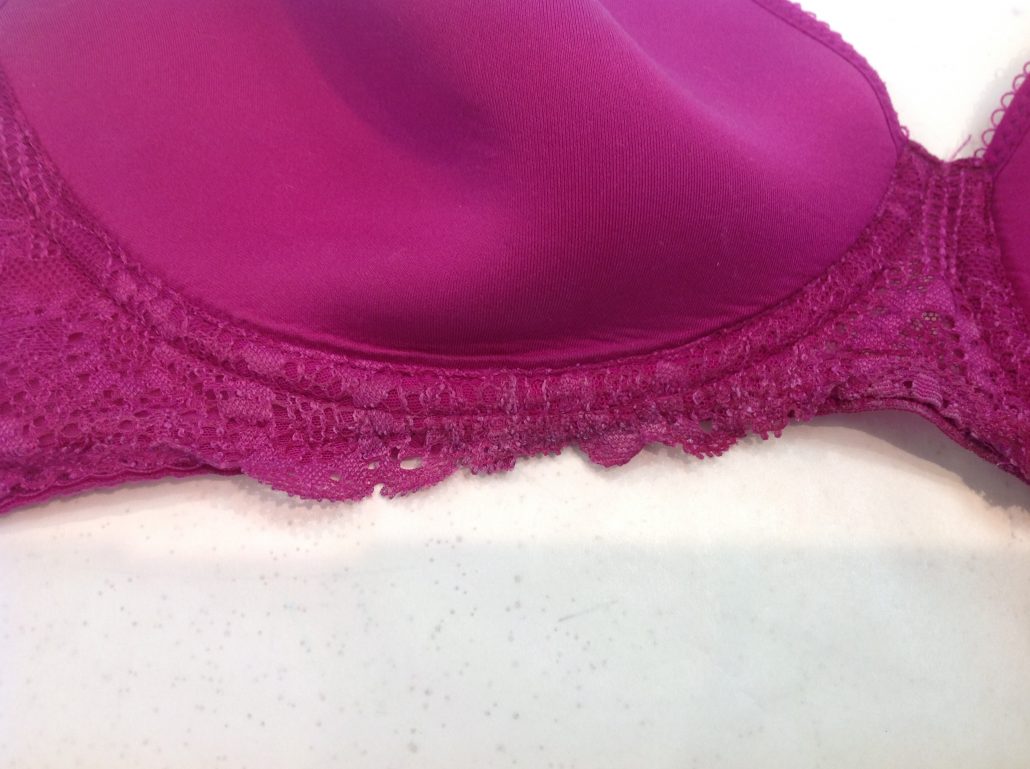
Time to true the seams. Make sure the seams that are going to be sewn together match in length and the curves look smooth. This little seam at the bottom cup gets a thumbs up!
Continue until all the seams are trued up. This is where art meets engineering. If two seams are not the same length, I tend to lengthen the shorter one unless the longer one looks weird when I put the two together.

So here I raise the height of the back band. It is quite possible that I didn’t pull the back band quite enough when I pinned it out. The back band stretches and the wire line does not, so I am trusting the wire line to be the more accurate of the two.
Finally I make the bridge into a piece I can cut on the fold at the centre front.

Now that I have my seamless bra cloned, we will sew it up out of similar fabrics. In this case, cut & sew foam will be perfect for this bra. We are even thinking of duplicating these straps.
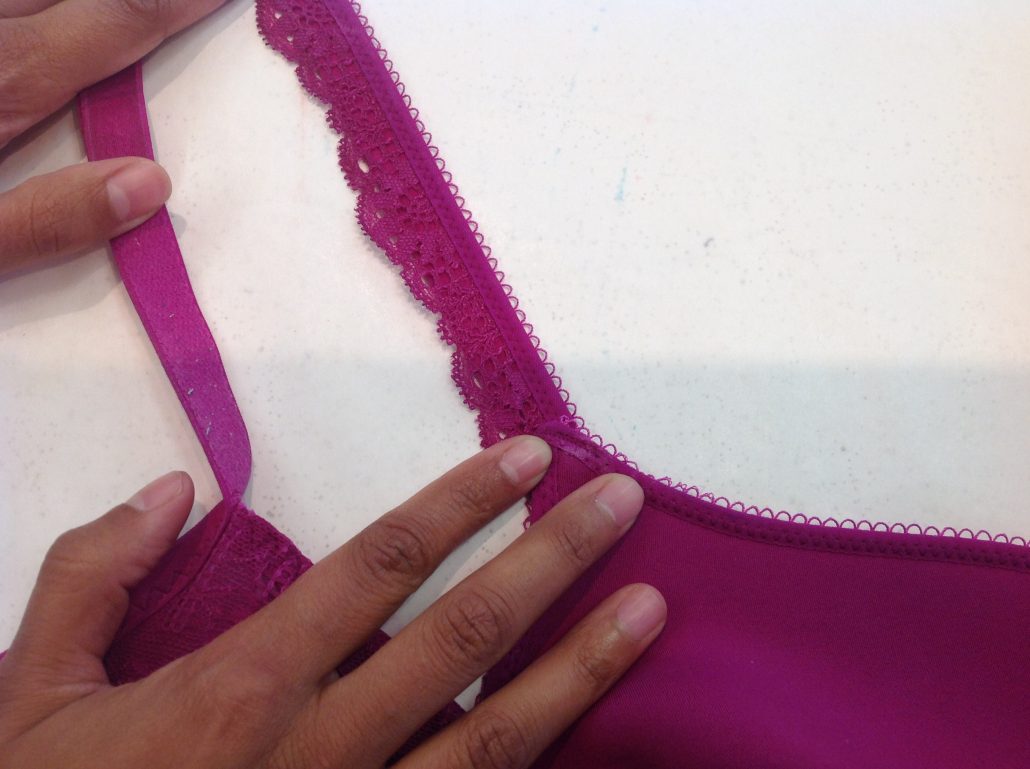
They have strap elastic, with narrow lace edging along the strap with the raw edge of the lace tucked in behind some fold-over binding. Very interesting! You can see the strap elastic underneath.
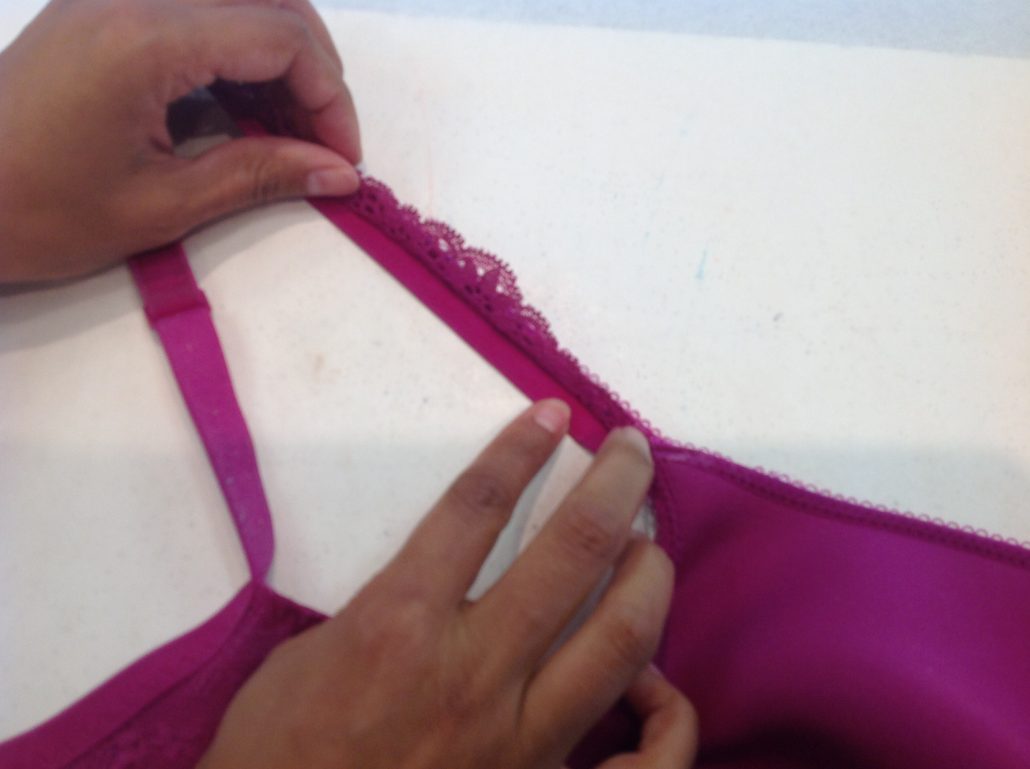
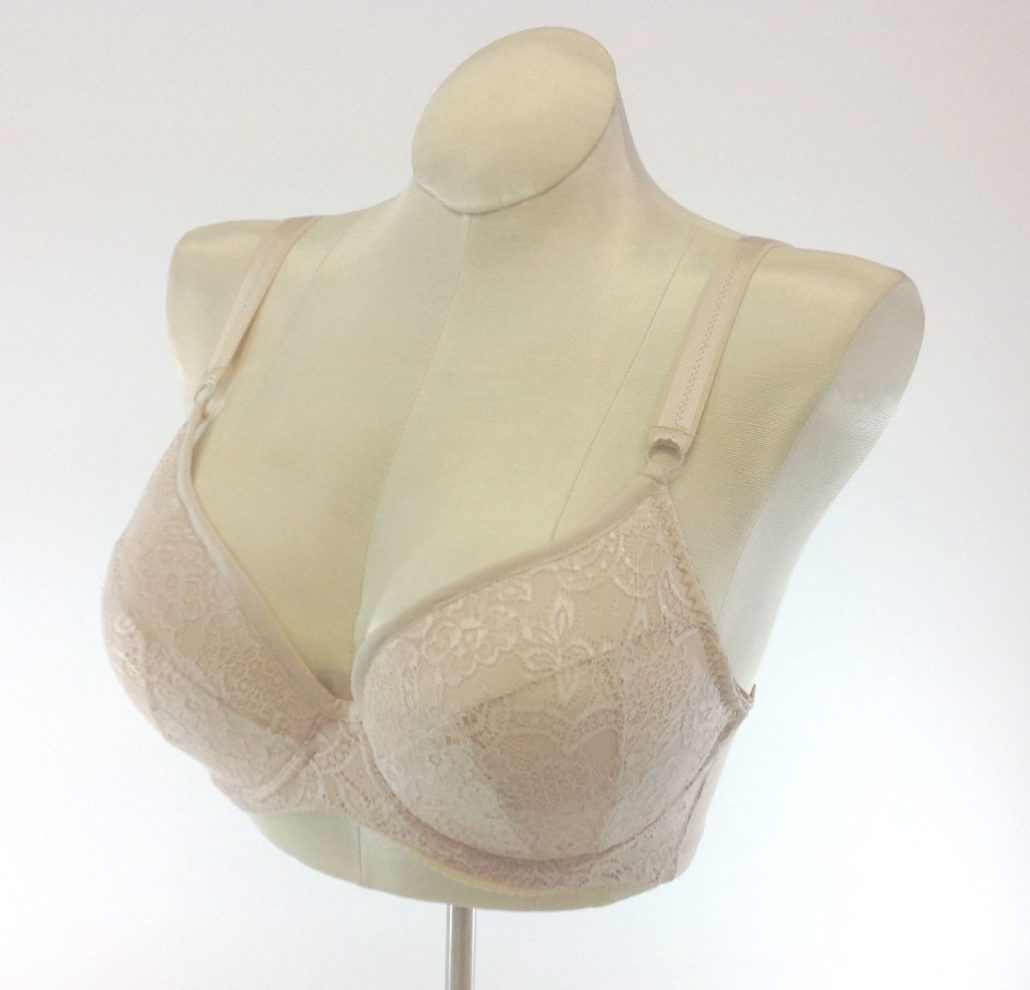
Here’s the finished bra as designed and sewn by one of my students, Ruhee of Rubies Bras. In the end, we chose an off-set vertical seam for the client and a peach lace to cover the foam lining. We used fold-over binding along the neckline edge.
So that’s how Cloning a Seamless Cup bra is done. Now tell me…have you tackled cloning yet?


What a blog! Thanks for sharing your great detail about the open cup. I Am very impressed.
I tend to have a lot of pain if there is a seam that crosses the nipple and my ribs hurt whenever I try a wire, so I mostly buy seamless, soft cup bras. Would it make sense to use two layers of fabric and criss-cross the DoGS to get a stable shape? Would the copying process be significantly different?
You can cover a seamless pre-formed foam cup at home but there is no way to make a truly seamless fabric cup at home because the fabric cups in RTW are moulded to that shape with intense heat. You can make cut & sew foam cups but there is still a zig-zag seam over the nipple. Have you considered nipple covers to lessen the sensitivity in that area? We have used two layers of fabric with DoGS opposing with great success, but it still has seams.
This was very helpful and I thank you. I have a sports bra with a one piece cup that fits my new girls really well (had a BR 6 weeks ago) but need it in a cooler fabric.
Good morning, so I am fairly new (6months) in learning how to make bras and I found your ‘cloning a seamless cup’ blog containing wonderful instructions but I was somewhat confused when the completed bra posted at the end of the blog was not the bra for which the instructions were given. It would have been nice to see the actual cloned bra with the vertical seam, as the pic of the shown bra (though is beautiful) appears to have more than one seam.
I truly appreciate you sharing your secrets!!! g
Thank you for this informative and detailed post! I was wondering if you also added a (1/4″) seam allowance to the parts you traced? Thank you.
Did I forget to mention that? yes, I did add seam allowances to the lace, but not the internal seams on the Cut & Sew Foam. Those get zig-zagged together
I am really enjoying this blog. My skills are not keeping up with my wants, though! I want to be making fabulous fitting pretty bras right now!
You will get better with every bra you make! Just try to remember not to put “everything” on one bra!
Thanks for all these details. Your new blog looks really good, and I am enjoying reading so many posts. You are a busy lady, Beverly! Your Craftsy classes have been referred to many times in the last couple of weeks as I keep sewing bras to improve my techniques and fitting.
Thanks Donna. I made the switch from Blogger to Word Press so everything is in one place now however I get frustrated beyond belief because I cannot see the damn small print, and WP insists on putting the type in grey, which makes it worse. I also haven’t access to all my photos on my laptop so it takes me 5 times as long to do one task. Grrrrr……