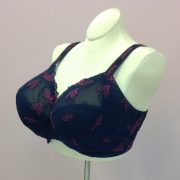
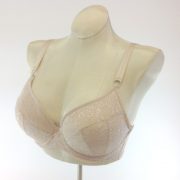
After my last post about Cloning Ulla, I wondered how the pattern of the cloned bra compared to my Pin-up Girls Classic Bra pattern. As you know, the Ulla bra company is known for their large cup sizes so it would be interesting to see what makes them tick. Besides, when it comes to bra theory, I figured I could learn something from dissecting Ulla.
My customer loves her Ulla bra (even at the high price) and I am sure she will love the bra the cloned pattern will make. But I still have to know:
- How are the pattern pieces similar in shape?
- How are they different?
- Could I turn my Classic into an Ulla?
This is the stuff that keeps my brain occupied when I should be sleeping! So upon rising, all I could think about was dissecting Ulla!
My Classic bra pattern (like all my patterns) are fairly basic patterns. I call them “springboard” patterns because once you have the fit of the pattern, you can use that pattern as a sloper to create every other bra on the planet. No, that’s not bra magic, that’s a plain fact. If you know how to dissect RTW (ready-to-wear) you can create any of its looks you like!
First I have to know what size of the Classic to start with. The 34K Ulla size on the garment label isn’t much help, as the Classic doesn’t have that size. No matter. I still can find this pattern size in the 90 sizes the Classic does have.
I use my tried-and-true BCD method of measuring an existing bra. That’s the Bottom Cup Depth, measured from the apex seamline to the wire line seamline directly below it on the body. It should be the deepest part of the lower cup.
I measured the Ulla and found it to be 7″. Then I measured my Classic Bra patterns. The size that matches a 7″ BCD is 44H, so I traced that out. If you’ve taken my Craftsy class, there is a chart in the Class materials list that has the BCDs listed and the Pin-up Girls bra sizes they equal.
Trace out the upper cup too. In the dissecting Ulla project, I am just comparing the cup shape so I didn’t do the frame and band. Mark the seamlines (1/4″ or 6 mm) in along the cross cup seam and mark the notches at the apex and the wire line. they are critical to this process.
Next draw lines from the apex to the edges of the cup. The Ulla is a horizontally seamed cup and the Classic is a diagonal, so the first step is to convert our Classic to a horizontal seam. Horizontal seams are a great choice for the larger bust as it offers more opportunities for shaping around the apex. Kudos to Ulla on that one!
Number the small curves created by the lines. I do this so I can put them back in the right place! I’ve numbered them in a clockwise direction. The upper cup CF is #1, the lower cup is #2 and #3 and the upper cup outside is #4. Set the curves aside for now. Don’t throw them away – you will need them in a few minutes!
Now we can change the style lines to a horizontal orientation. I measured the distance as best as I could on the Ulla to be sure when the dissection was done, that I was comparing melons to melons, so to speak. I also split the lower cup at the point below the apex.
Then I put the curves back where I took them off. it is too hard to change the style lines on paper when the curves are there, that’s why I take the curves off and put them back when the job is done.
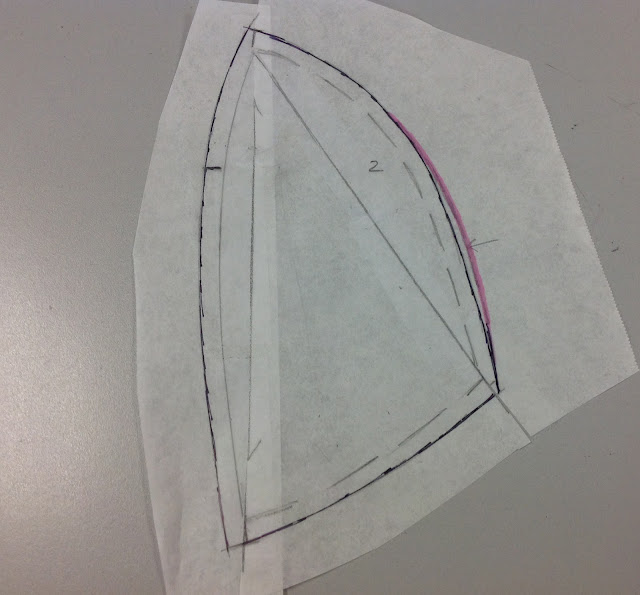
Here’s how the Classic stacked up against the Ulla. On the inner lower cup, the two were virtually identical. The Ulla is in the Pink, so you can see there is about 1/8″ (3 mm) more curve to the Ulla than on the Classic.
On the outside lower cup, there was a difference. The Classic is more of a straight line while the Ulla is definitely more curved. I like the push-in effect the straight line gives, but in the case of Ulla, that cross cup seam is very round.
The upper cup was quite different. The Ulla and the Classic are almost the same on the inside cross cup curve – mine is actually a little more curved than Ulla. However on the outside cross cup curve, Ulla is quite straight while mine is curved – almost a reversal of the cross cup seam on the outside lower cup (above). Makes me wonder if I switched curve #3 for curve #4, would they be more similar? Technically as long as you put back the volume you took away, the cup will still fit. So I could switch those two seams around. Something for another day!

My upper cup is a lot higher at the front, yet the straps are along the same plane. Ulla’s neckline edge is a bit shorter too. Ulla comes up higher under the arm than mine.
This was very enlightening for me to see how the Classic compared to Ulla. I am delighted that the Classic was so similar to the Ulla in many ways, and this certainly gives me ideas for another bra pattern!
Have you ever been involved in “dissecting Ulla” or cloning any other RTW bra to find out what makes it tick? Please share your experiences – I’d love to hear about them!


You do not need a pattern to clone a bra – my last post Cloning Ulla explains how to do it. But I wanted to see how my pattern compared against Ulla, and since I had the Ulla pattern from the cloning I did, I was able to compare them to write this post. But no, it is not necessary to have the Classic (or any other bra pattern) in order to clone a ready-to-wear bra
Beverly, you don't need to create all of those sizes, you could just do one in my size 😉 😀 Love the way your pattern brain works for us!
I'm still trying to understand bra theory as you put it, so I'm not understanding why you need to use an existing pattern (the Classic bra) to create the Ulla pattern. Can you tell me why this helps with re-creating the Ulla?
Yes indeed – I have dissected a bra to make my own pattern! There aren't may modern sewing patterns for small chested gals like myself, so I have the most success by cloning a RTW design. My experience is definitely much easier than underwire – it's super easy to rub off a soft bra!
Thanks for the comparison – very interesting!
I know, I know! I have several patterns roaming around in my head that need to come out! But one like this is definitely on the list! The thing that slows me down is the size range of Pin-up Girls bra patterns – there are 90 in all and each one has to be checked and double checked for errors before it can be released. It's a daunting task!
I saw your turquoise bra made from that same cloned pattern, and it was drop-dead gorgeous! It DOES fit better than the original! I did notice, when I cloned this one, that the DoGS were going in a different direction than I would have expected. I love having the opportunity to learn from RTW and I know you do too!
I started going dizzy when you cut the patterns apart-lol. This is over my head, but good to know. I wear a large cup also (g/h). I know now why it's hard to find a cup that fits. The closest I can get is a Woman Within front hook posture bra. Comes up high under the arms,covers the girls well, but needs more support. I need a wide band (50) and a larger cup. That's hard to find. I'm sure there are enough of us out here that would benefit from a new bra pattern from you Beverly…hint, hint.
I have Beverly! My very favourite bra to wear is the Elomi "Caitlyn". When my purchased bra died, I dissected it and made up a pattern. It took some experimenting with fabrics, but my cloned bra fits better than the original. Yay! The interesting thing I found with the dogs, was that they did not point to the apex ( lower cup) but were on the horizontal, across the lower cup. The upper cup dogs follow the neckline, and the powerbar is parallel to the strap attachment. I find it interesting to see how bras are engineered too!