The Giraffe Print Bra
Here’s the features of the Giraffe Print Bra bra:
- cups are made of cut & sew foam
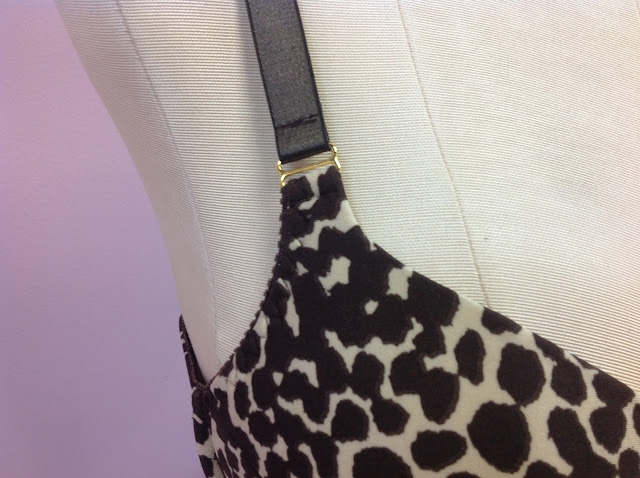
- cup cover is a seamed stretchy giraffe print
- cups are a partial band and demi cup style
- strap area has been extended upward and is a curve
- neckline edge features a roll-over finish
- straps are attached to the front with slider
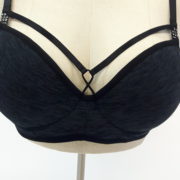
- slider used as adornment on front bridge
- back band is two ply
Let’s start by looking at the pattern preparation. How about that curvy strap tab and demi-style neckline edge? In order to prepare the strap tab area for the slider connector, we need to change up the strap tab area of the pattern. Your pattern for the upper cup may look like this – the strap tab is clearly too short and too wide to accept a slider or other connector. We need to add some height to the tab but also narrow its width so it can fit into the slider.
We do that by drawing a line from the apex notch to the mid point of the strap as shown here below at the left. Then draw a line parallel to the strap about 1″ (25 mm) above the original. The new strap tab width will be the width of the slider you are using plus 2 seam allowances. In my case, that would be 5/8″ slider + (2 x 3/8″ elastics) = 5/8″ + 3/4″ = 1 1/4″ (or 15mm + 9 + 9 mm= 33 mm – SO much easier in mm!)
We also wanted a demi-cup in the Giraffe Print Bra bra. That means the bra is shorter in the front – which means you need shorter wires. I like to work with wires in available sizes so I don’t have to cut them. I mean, I realize that they aren’t difficult to cut however why cut them when there are so many perfect lengths in stock? At Bra-makers Supply, our wires are sized incrementally, both in diameter and length , with 15 mm or 5/8″ being the increments between the front tips of most of the wires. In other words, there is 15 mm (5/8″) between the height of the Extra Long and the Long, and 15 mm between the Long and the Regular. Those 3 wires – Extra Long, Long and Regular have exactly 15 mm difference in the height of the front tips (assuming you are in the same size wire of course!)
So if I am already using an Extra Long wire in my bra, and I want to make a demi, I will use the Regular length wire in the same diameter and that will allow the front of my bra to be lowered by 1 1/4″ (30 mm) without having to cut a wire. Is 1 1/4″ enough to make a demi cut? Yes, it is! That amount is a LOT in that small area! Even 5/8″ is a LOT to lower (you many want to start with that!) Once I’ve decided on the wire length I am using, I need to shorten both the bridge and the upper cup by the difference between the original wire height and the new wire height, in this case 1 1/4″ (the difference between the Extra Long and the regular wire)
I need to lower the front edge of the upper cup as well. Notice that I used a gentle curve to keep the amount of coverage over the breast mound. I love the look of a lowered front, but…I don’t want to girls to hop out! Keeping some of the breast mound curve will prevent that from happening. The front will be lowered but I still maintain a full coverage cup – the best of both worlds, in my opinion!
Now let’s look at the actual construction. The cut & sew foam is our FF-30 pre-finished foam padding also called poly-laminate foam, foam sheeting, or foam by the yard – and it’s in the ivory colour. We sewed it together at the cross cup with a regular zig-zag (usually the width is about 3 mm and the length about 1-5-2 mm) This is where testing the stitch on a scrap pays off – you don’t want the stitches to stretch the foam, but you don’t want to see daylight through the seam either!

You can clearly see the roll-over finish on the top (neckline) edge. We allowed 1/2″ (12 mm) for the turn-over allowance so we would end up with a 6 mm showing of fabric. This is cut & sew foam so I tend to use a wider roll-over on the edge. If this were a pre-formed foam cup, I would use a smaller seam allowance and thus a smaller roll-over edge, but for cut & sew, the 1/4″ ( 6 mm) edge rolls over well and lays nicely without waving or cupping, on this fabric and foam combination.
You can also see a slider used as a connector between the strap and the cup. The strap is made from 5/8″ (15 mm) strap elastic. If I wanted a non-stretch strap but I still wanted to have the look of all-elastic straps, I would sew stable twill tape, or ribbon to the back of the front half of the strap (wouldn’t velvet ribbon be luxurious?)
To add a bit of bling to the front of the Giraffe Print Bra, I put a slider on the bridge piece just before it was sewn to the bra. It is only decoration, but it’s cute (and I did have one lone slider in my collection for some unexplained reason!)
In the above photo, you can also see the seam across the cup of the cover. I didn’t topstitch this seam – I liked the look of it without any stitching, and the fabric laid flat without it. Hey – stranger things have happened in the world of sewing!

This giraffe print was very stretchy (some would call it flimsy!) so it wasn’t strong enough to use for the back band all alone. No problem. We lined the back band with power net and used the flimsy fabric over top. I spray basted the 2 layers together, treating them as one layer during the rest of the construction.
I hope you have enjoyed this peek behind the seams of the Giraffe Print Bra – there are lots more to come, I assure you! But before you ask…NO, there isn’t any more of this print available! Sorry about that! But you know, there are LOTS of other suitable stretchy prints just waiting at your local fabric store!










Ha! I was just going to ask if you had any of that print left! I like the slider on the bridge – it IS cute.