Can We Make a Seamless Swim Bra?
The summer is here! And what better way to celebrate summer than with a custom swimsuit you make for yourself? I have no doubts that your hand made suit can rival the suits you buy in the shops. The question is, can we make a Seamless Swim Bra like we see in expensive suits? Yes, we can!
Recently a student who was in our Swim Week class brought in a swimsuit she had purchased from a website in England. She paid a pretty penny (or should I say pence?) for this suit, not to mention the shipping, customs duty and the HST to get it here as well!
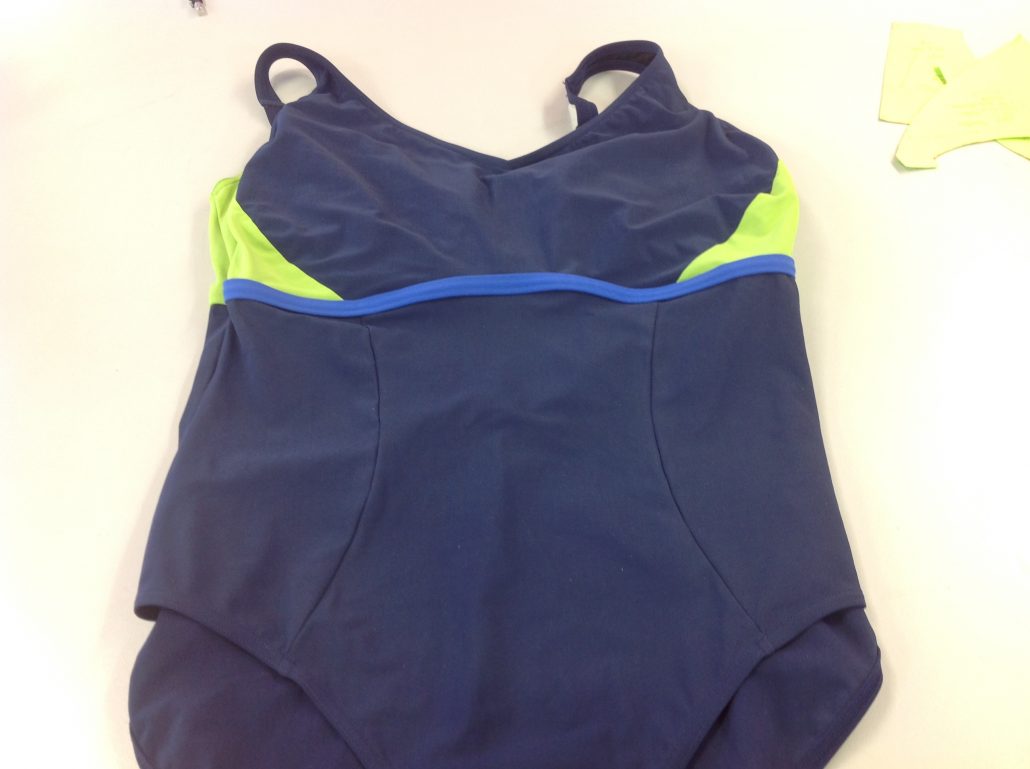
It’s interesting enough, and i quickly saw that the bottom part could be made easily from princess version of our Denise swimsuit pattern PB-2901. The top part from just under the bust to the shoulder could be made from the Denise regular version, then the two sections could then be joined with a seam under the bust. In this case the seam also included a band of royal blue fabric with elastic inside.
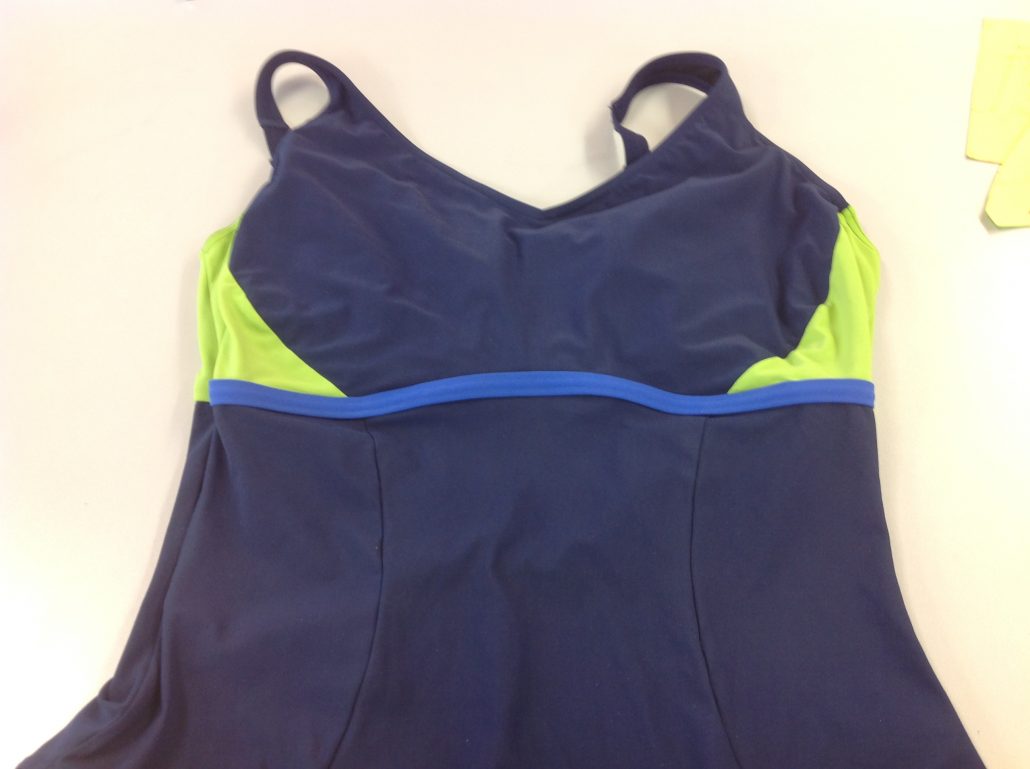
The back was interesting too with the colour blocking. Notice the royal blue band does not extend to the centre back
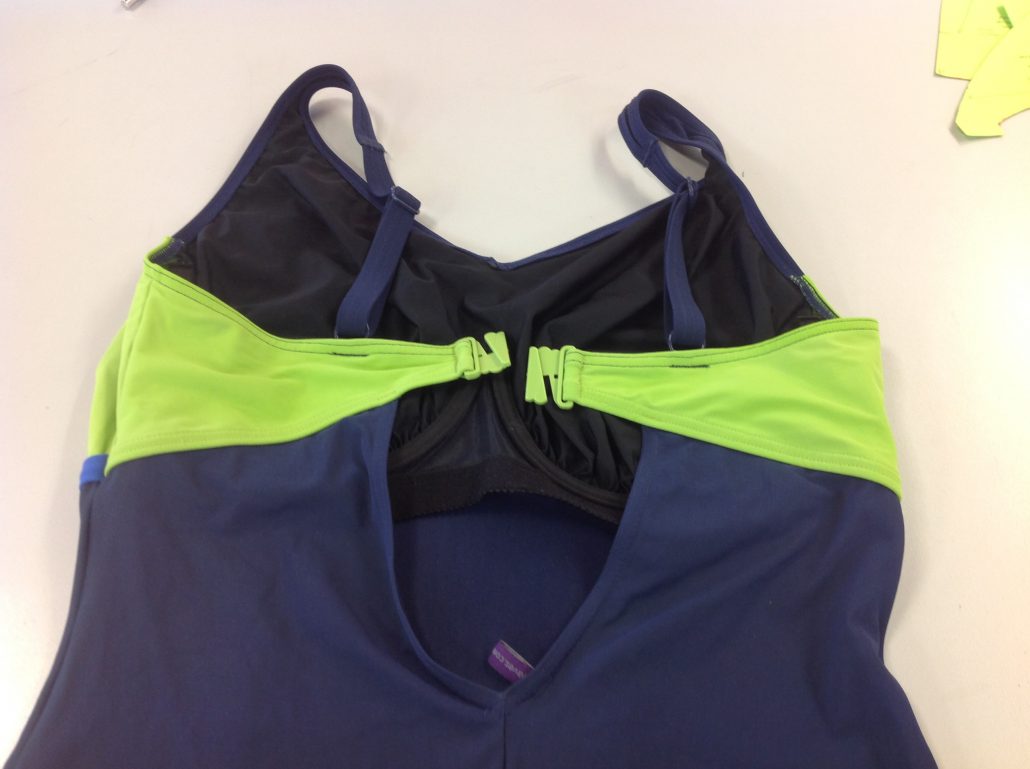
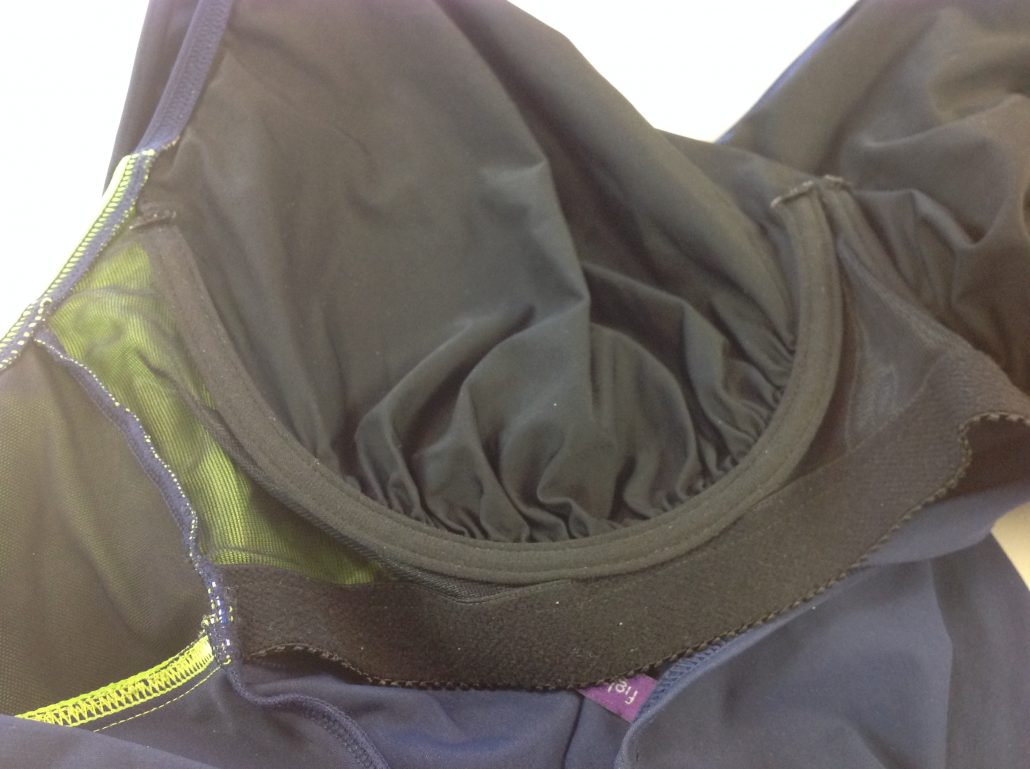
But it wasn’t the outside that was my student wanted help with, but the inside. Let’s peek inside to see the interior support system.
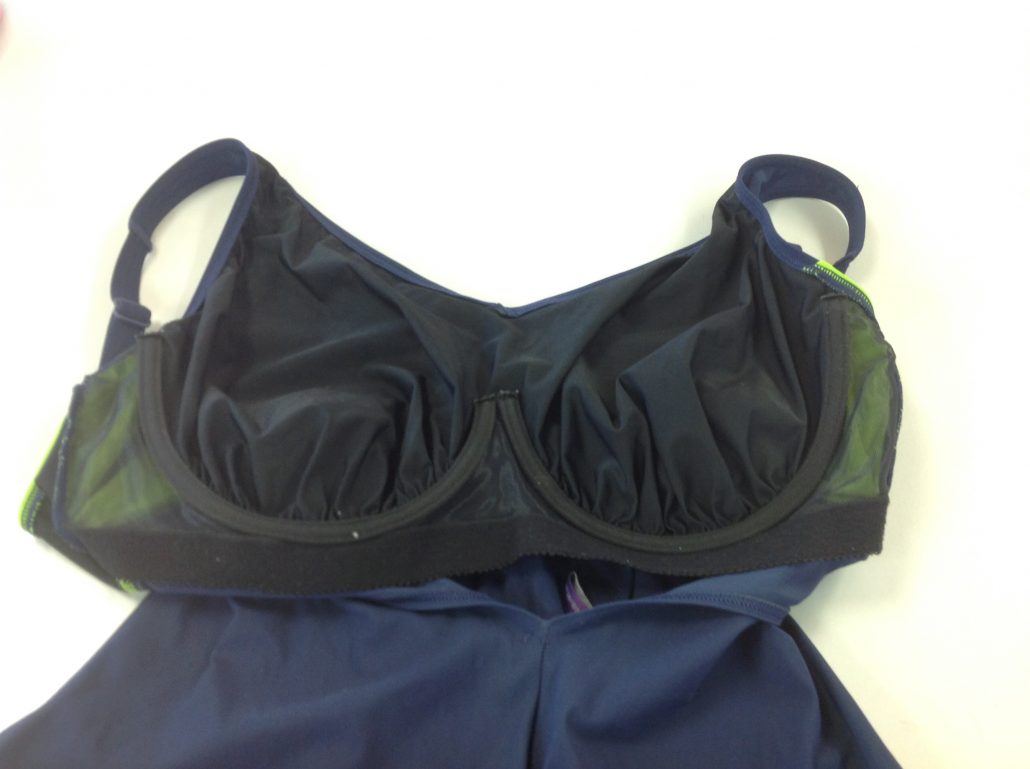
This suit had a seamless underwired bra inside the suit. The fullness to accommodate the bust was achieved by gathers at the bottom of the wire curve. So it is seamless and not made from foam.
Let’s Get Started
Want to see how ready-to-wear did this? I am happy to oblige…
First, we compared the wire size to the one in the original suit. Of course, if you know your wire size already, you are ahead of the game here!
Lets look at our Denise pattern again. Trace off the lining pattern piece, as we won’t need the darted front. Now mark the position of the wire line on the pattern. The best way to do this is to mark the wire line height when the suit is on the body.
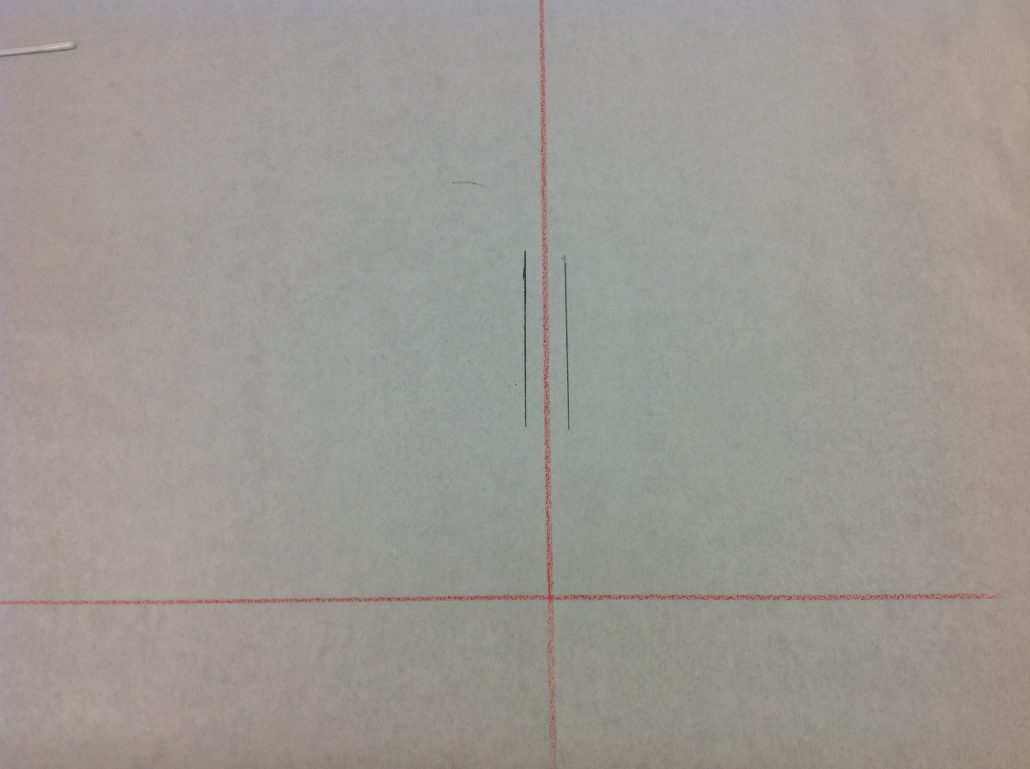
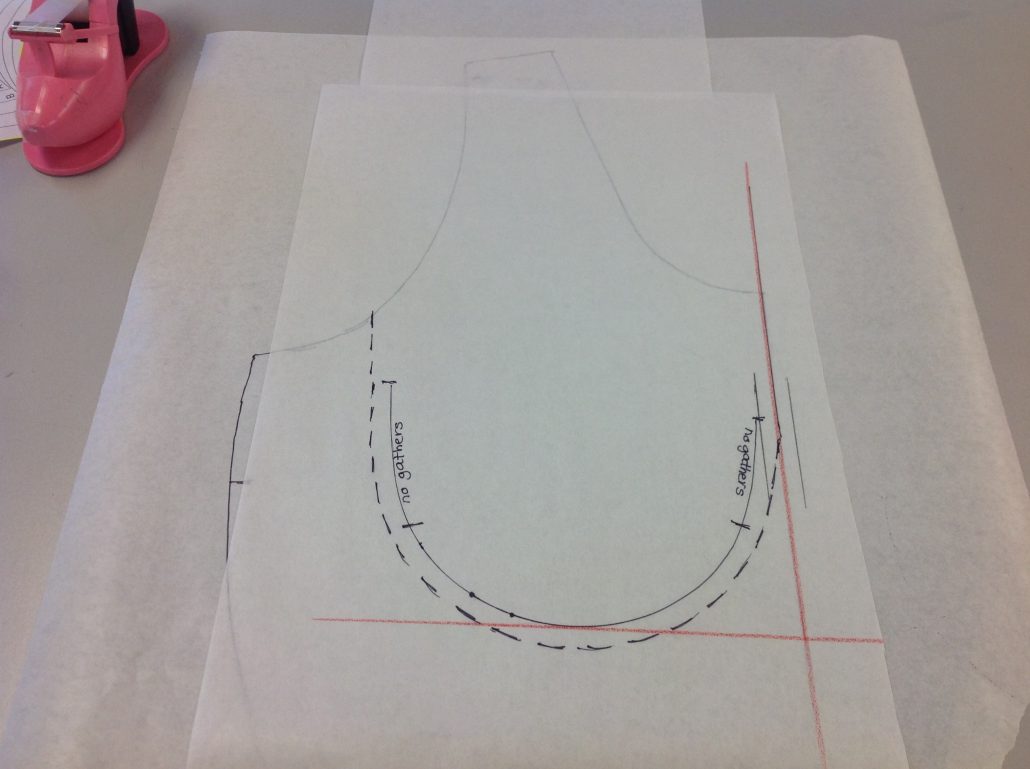
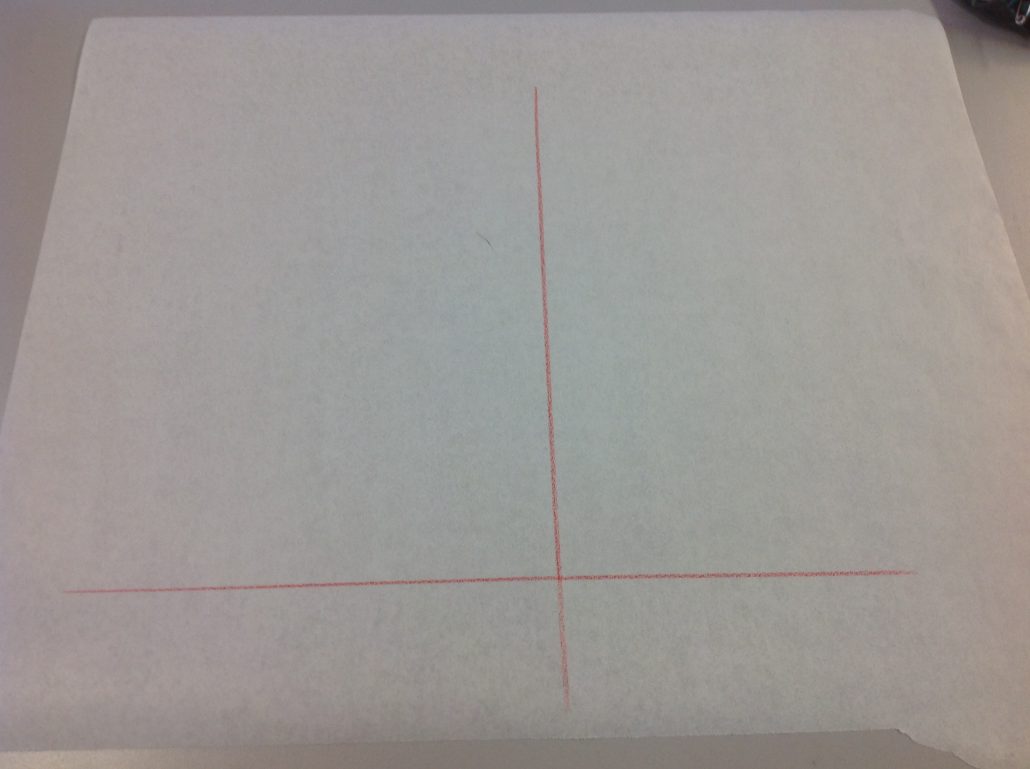
To make the cup pattern, on a separate piece of paper, draw a horizontal balance line with another perpendicular to it.
On one side of the centre line draw a vertical line half the width of the bridge away from the vertical balance line. i show two lines here…ignore that line to the right of the vertical line!
Place the wire down so it touches the bottom line and the centre bridge line, trying to keep the “bowl” of the wire as even as possible.
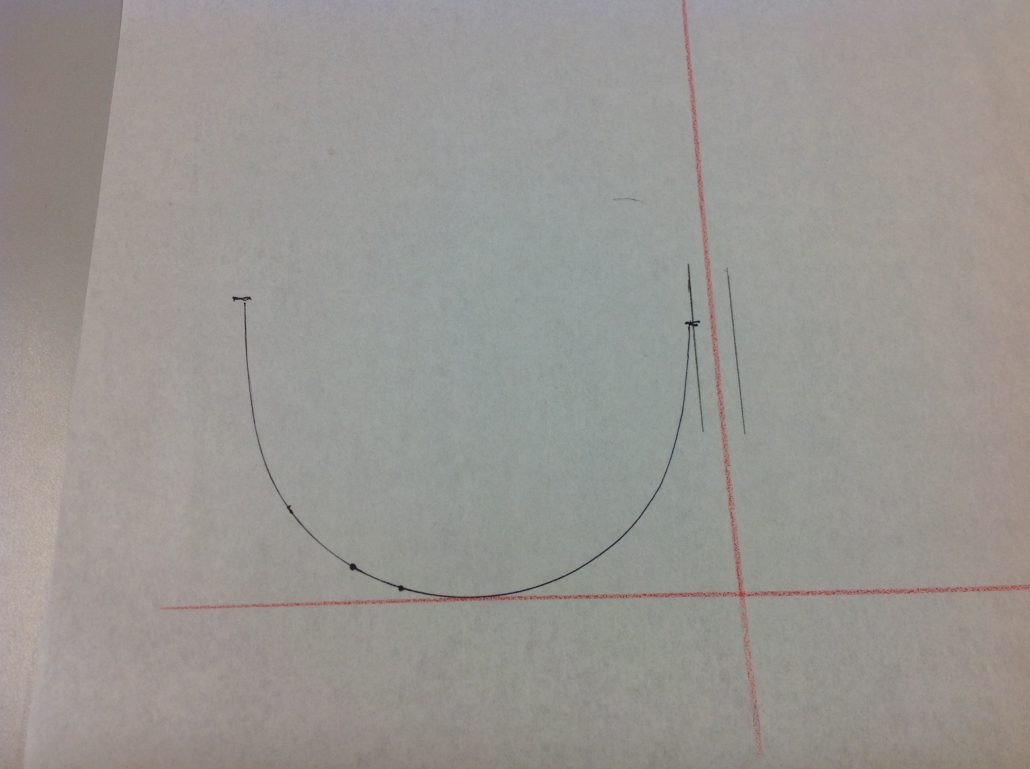
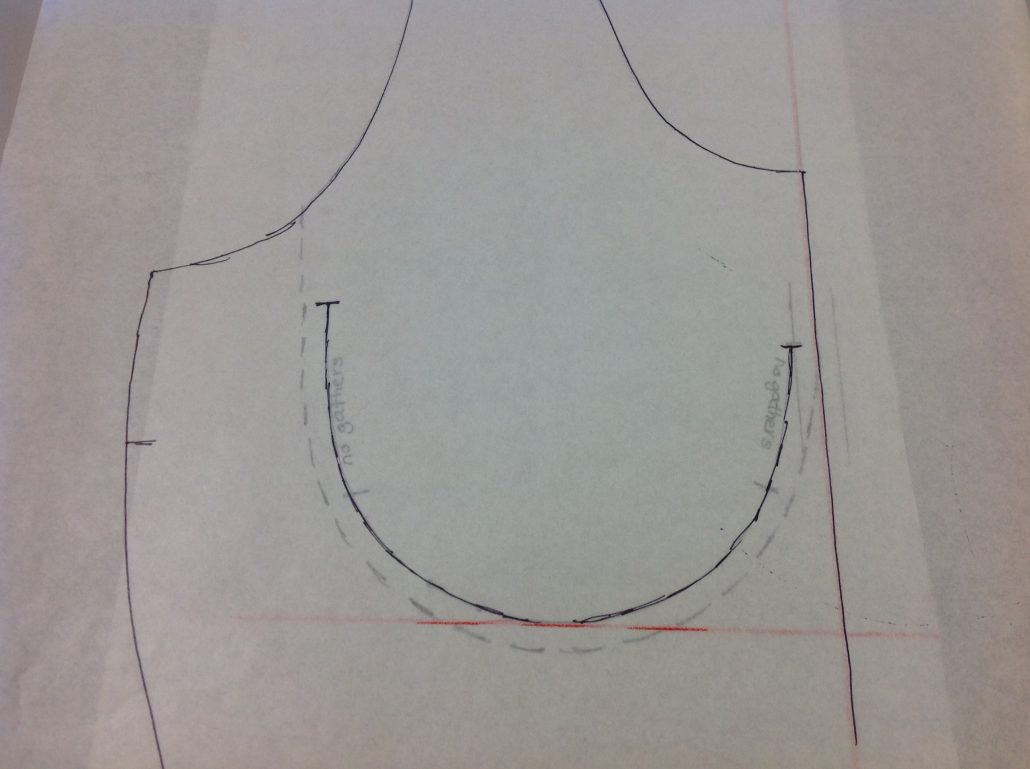
Draw a 1/4″ seam allowance around the wire line. It will likely touch the centre line. I continued the seam allowance straight up as well. You’ll see why in a minute!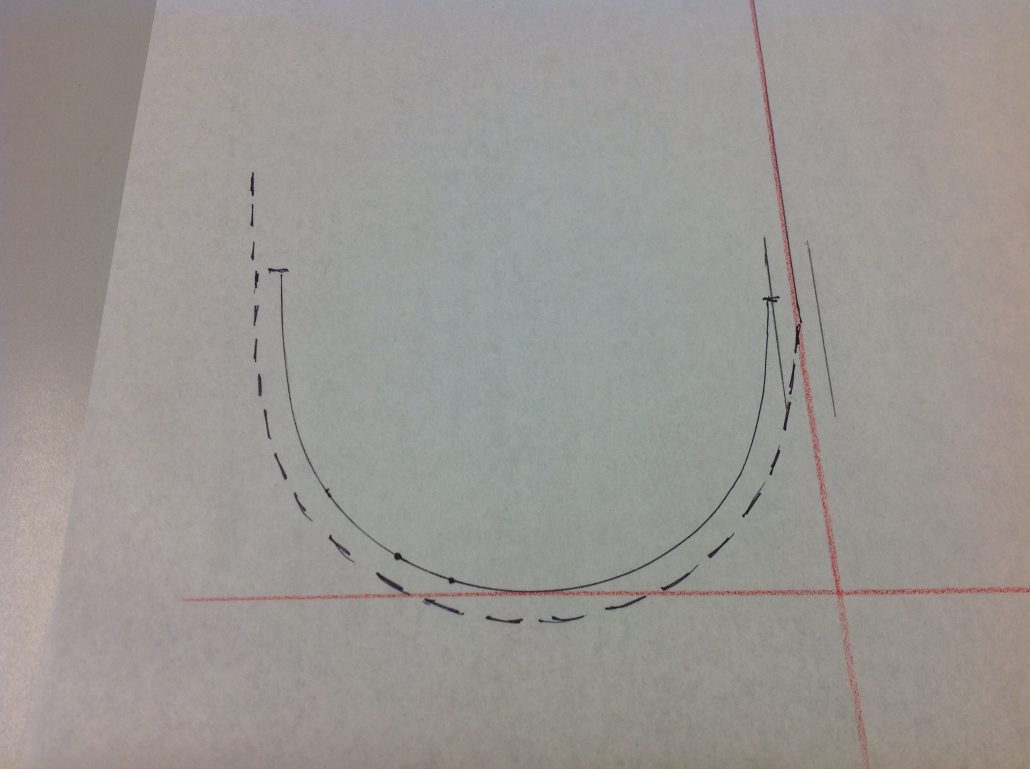
![]()
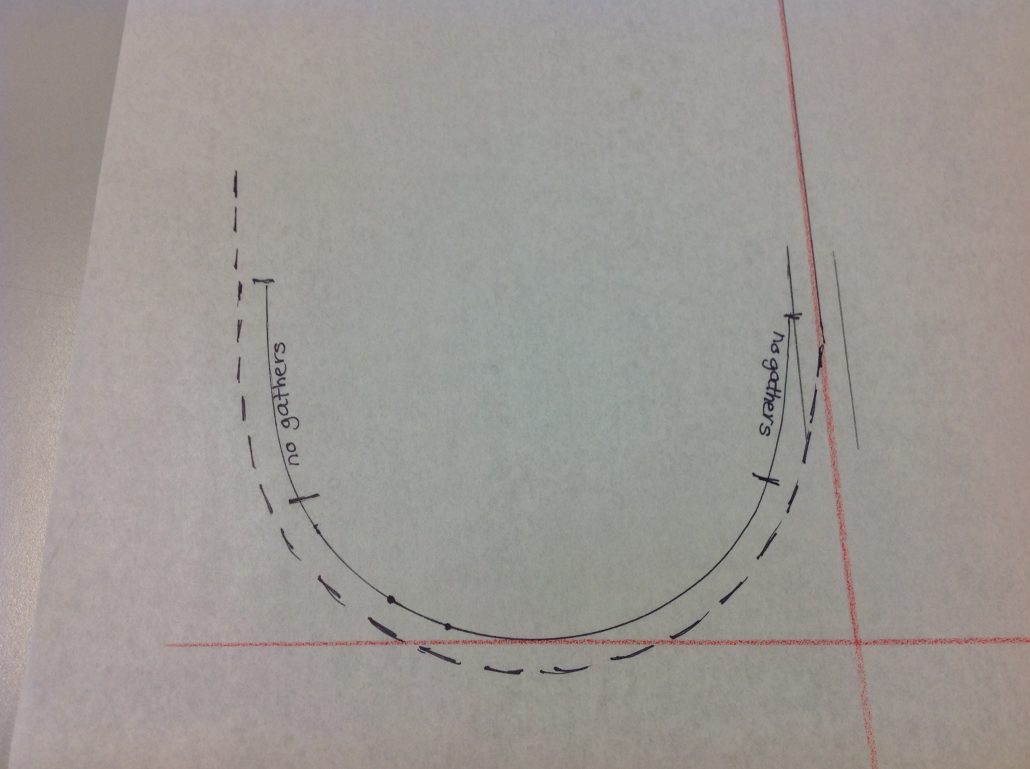
Measure down on each side to where the vertical arms of the wire start to curve in on the bottom. These will be the areas where no gathering will happen. The gathering will happen between the two notches along the bottom curve.
Place the paper with the wire line drawing on top of the paper with the lining outline, matching the marked line on the lining to the marked balance line on the cup paper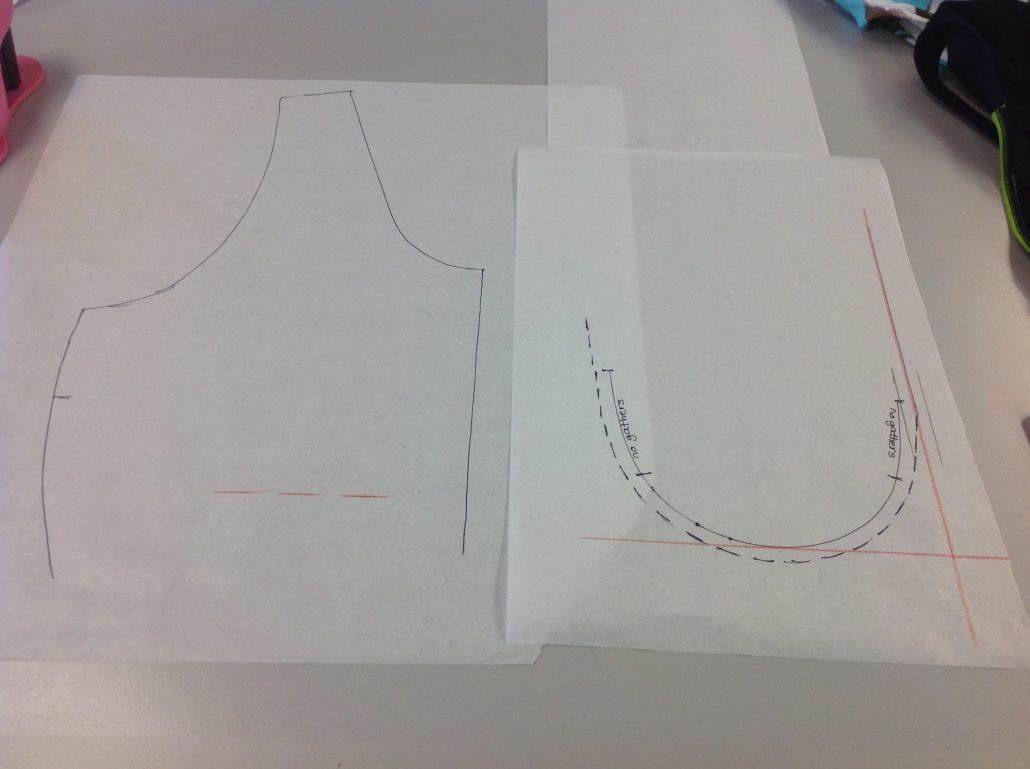
![]()
Like this…
![]()
Here’s How to Draft the Cup
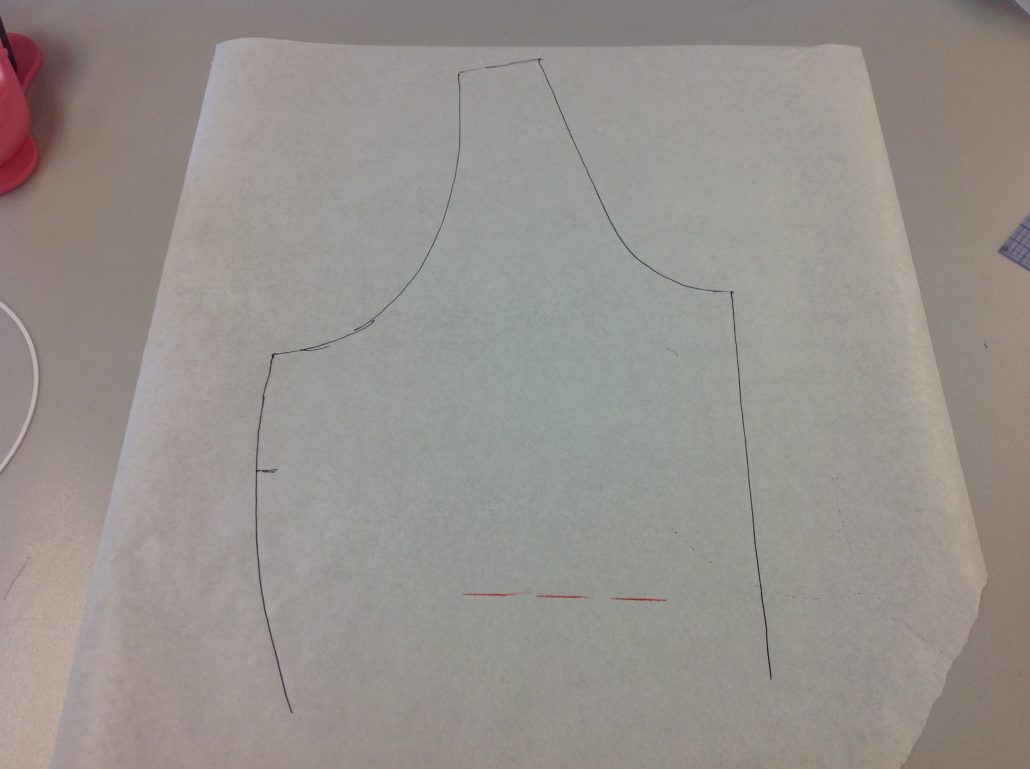
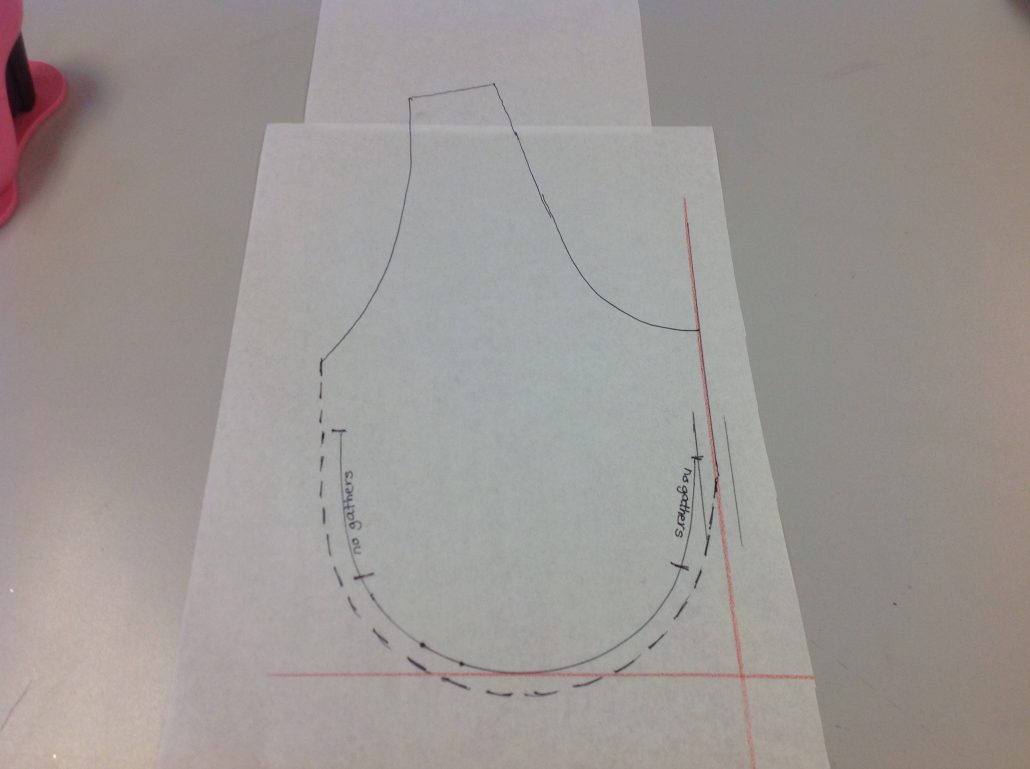
Trace the drawing of the wire up to the armhole, and around the strap area and back to the centre front line. Trace a second copy of this shape and set it aside for the frame.
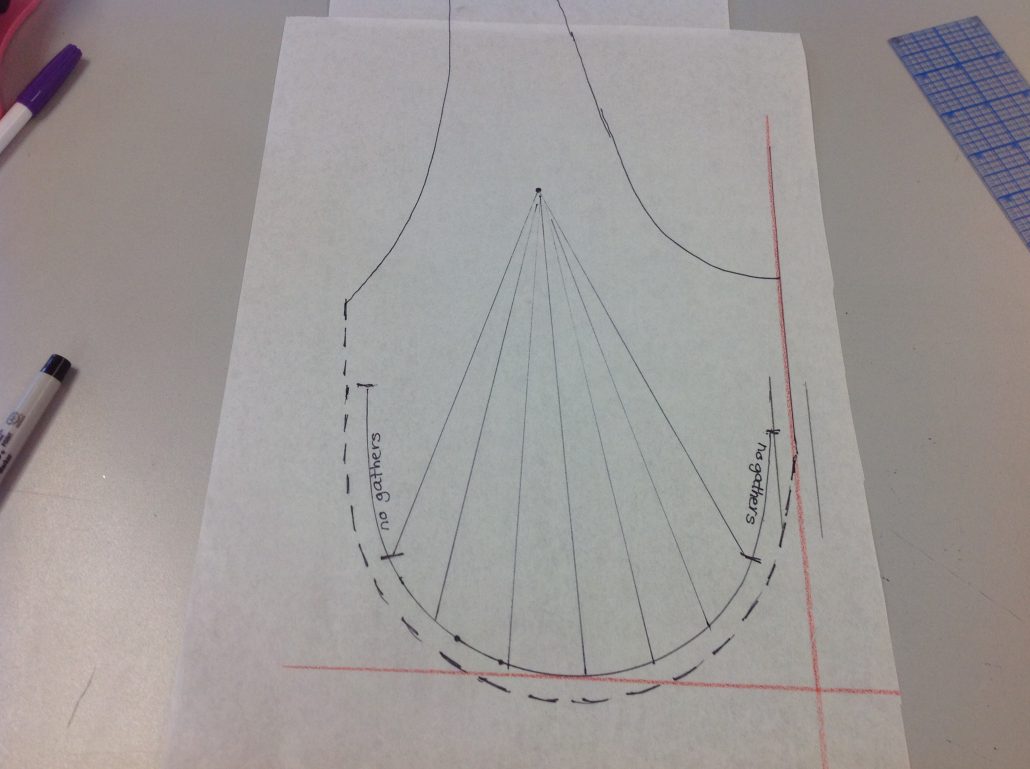
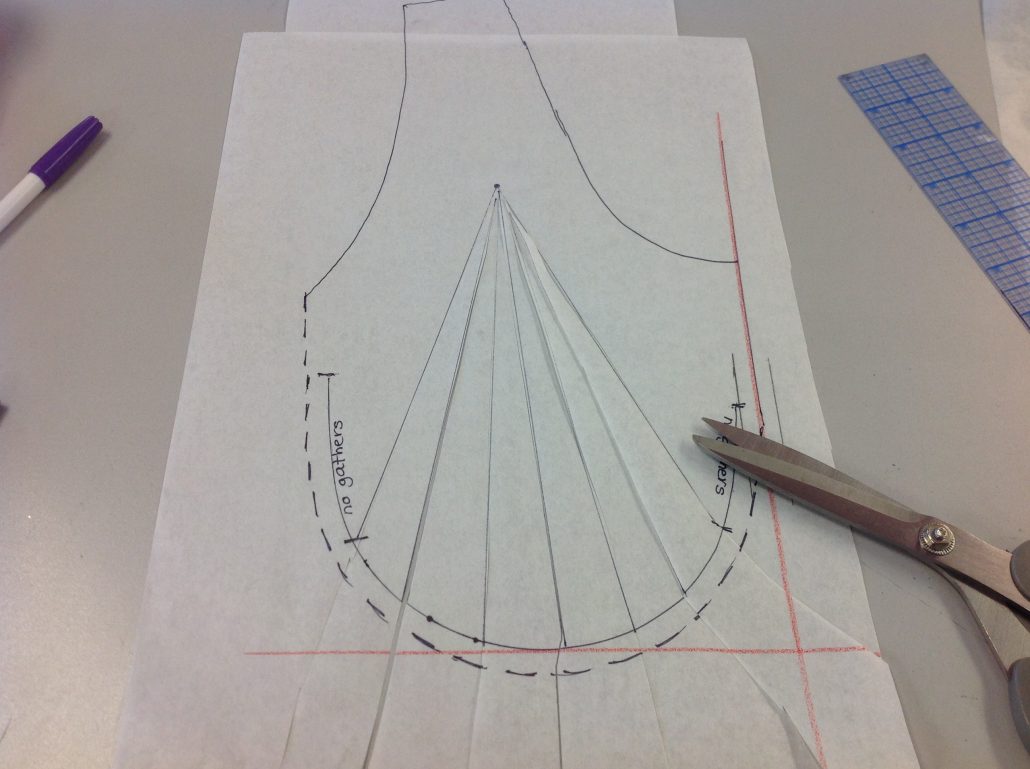
The first tracing is the cup shape, but in a flat form. We will now add the fullness for the bust. Draw lines from the “gathering area” at the bottom of the wire line up to the centre bottom of the strap. How many lines? Draw 1 line for each cup size, so a B cup would need 2 lines, D cup would be 4 lines and G cup in this case needed 7 lines. Distribute the lines as evenly as you can between the gathering space.
Cut from the bottom to the point on all lines
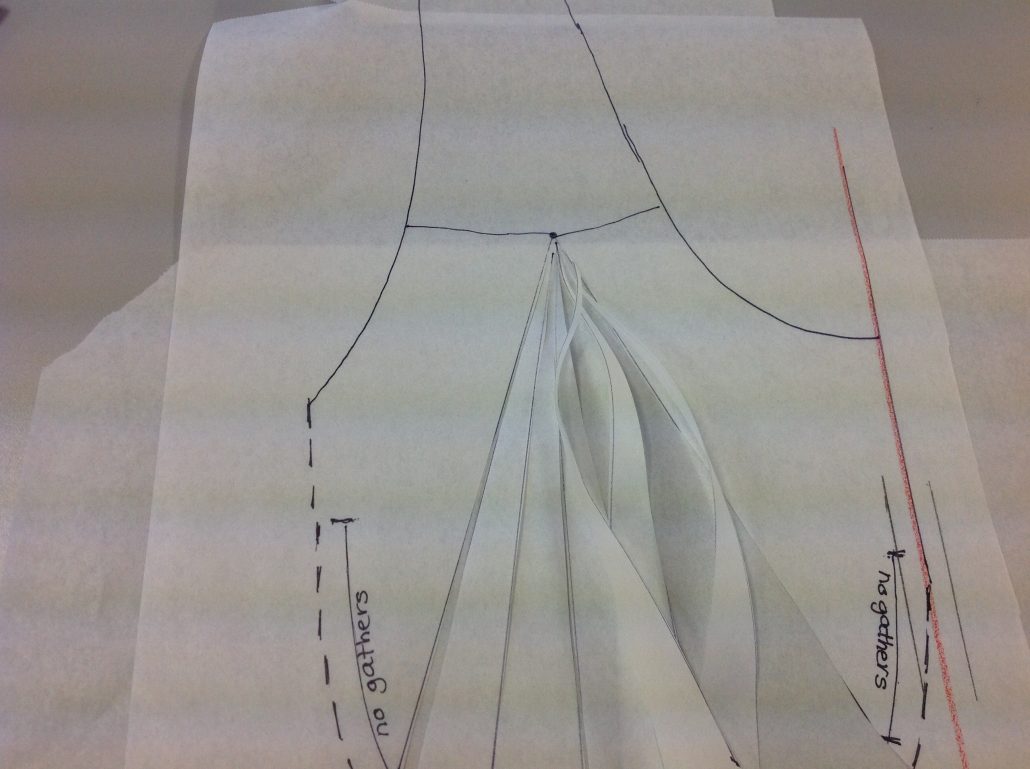
To help spread the lines for the gathers, draw two short lines to each side of the strap. Put a piece of paper underneath.
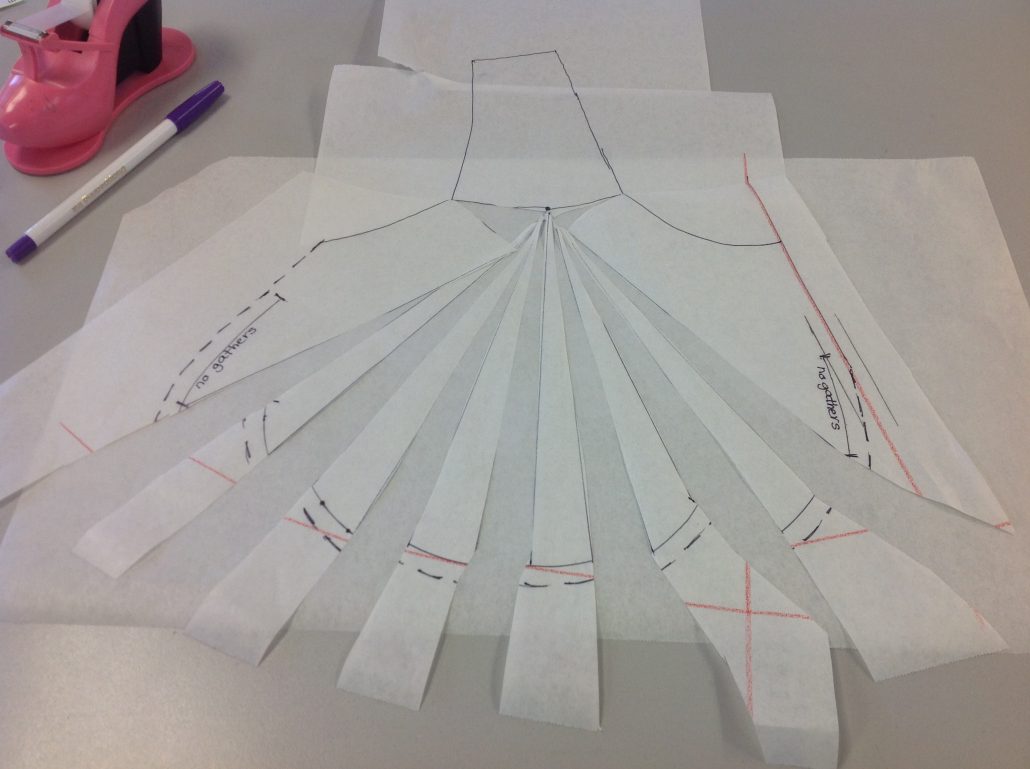
Spread the lines 1″ part (2.5 cm) measuring at the wire line. You will see the short lines acting as a hinge to allow the pattern to be spread apart. Once you get them spread the way you want, you can tape the wedges down.
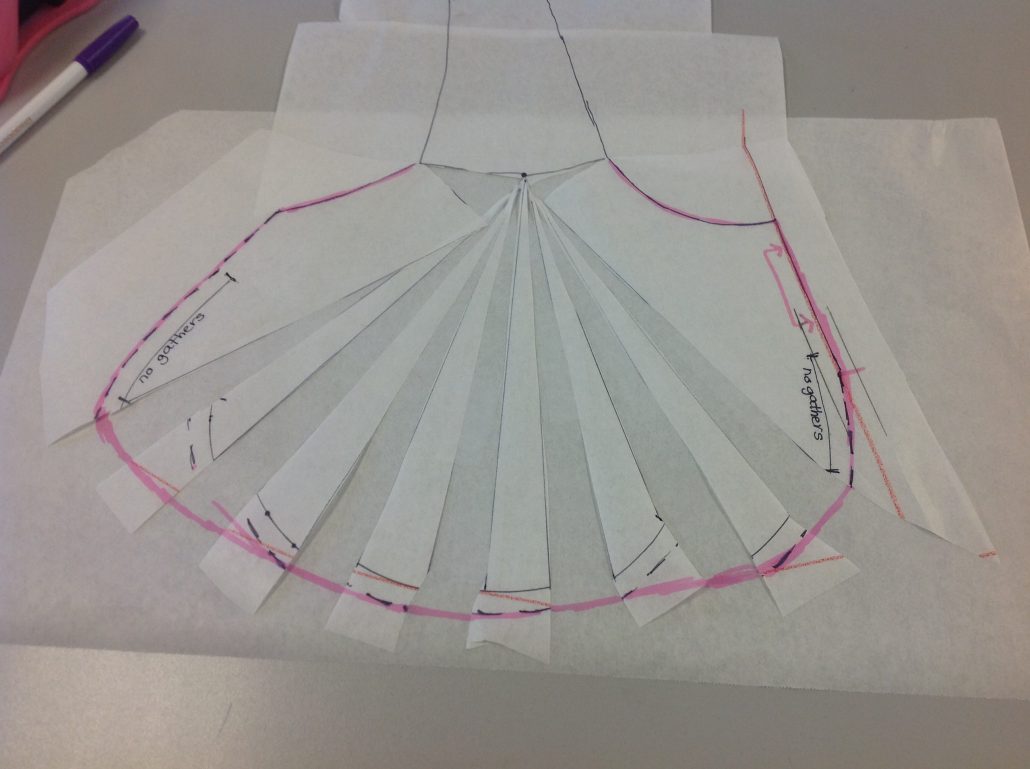
Connect on the outermost point of the dotted seam allowance as shown. This is where art meets engineering to make that bottom curve flow smoothly. It will still look weird though! Continue tracing around the strap.
Here’s the finished cup piece, which will be cut on the fold at the centre front. Mark the gathering and no gathering areas and any other marks you may need. The cup pattern is finished so you can set it aside.
Let’s Go Back to the Frame![]()
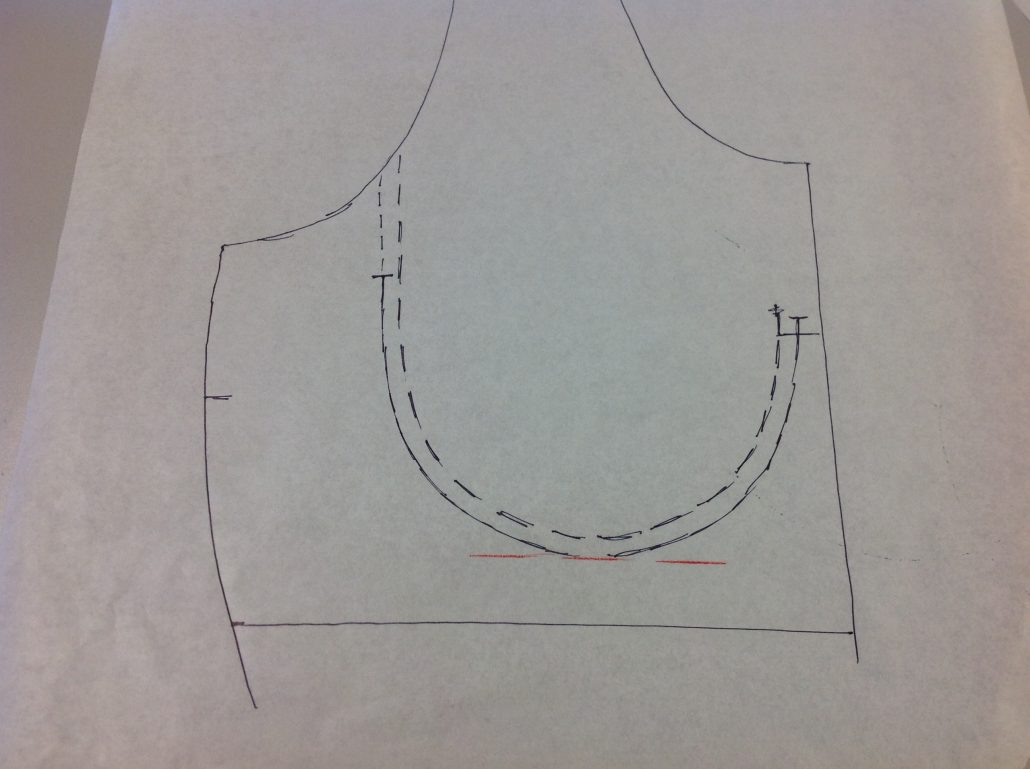
Lets go back to that second tracing and make the frame. Trace off the solid line of the wire , not the dotted line as this was the seam allowance for the cup. We won’t need that.
Draw a seam allowance on the inside of the wire line, all the way up to the underarm. Then, draw a horizontal line under the frame drawing 1″ down (more or less). Connect the top of the wire line to the CF line.
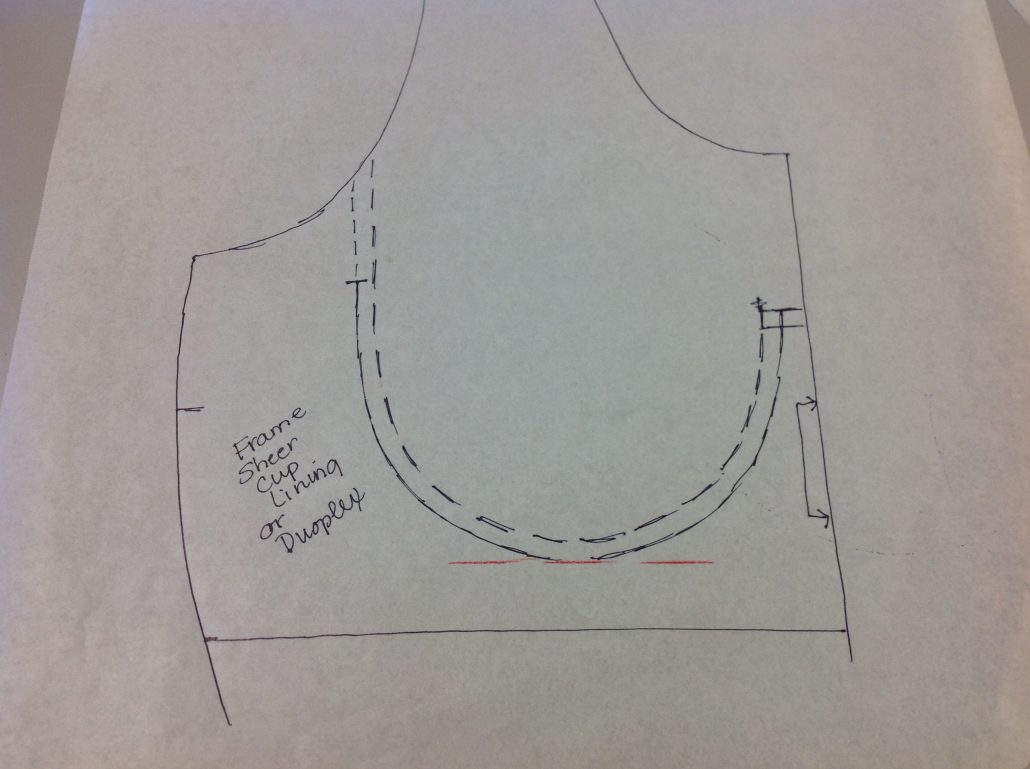
The frame could be made from sheer cup lining as it was in the original or duoplex. You need something stable that will stand up to chlorine and dry quickly. Mark the fold line at the centre front.
Here’s the frame cut from sheer cup lining. I was surprised to discover that the original suit used sheer cup lining, but it makes sense. It would be strong and it would dry quickly.

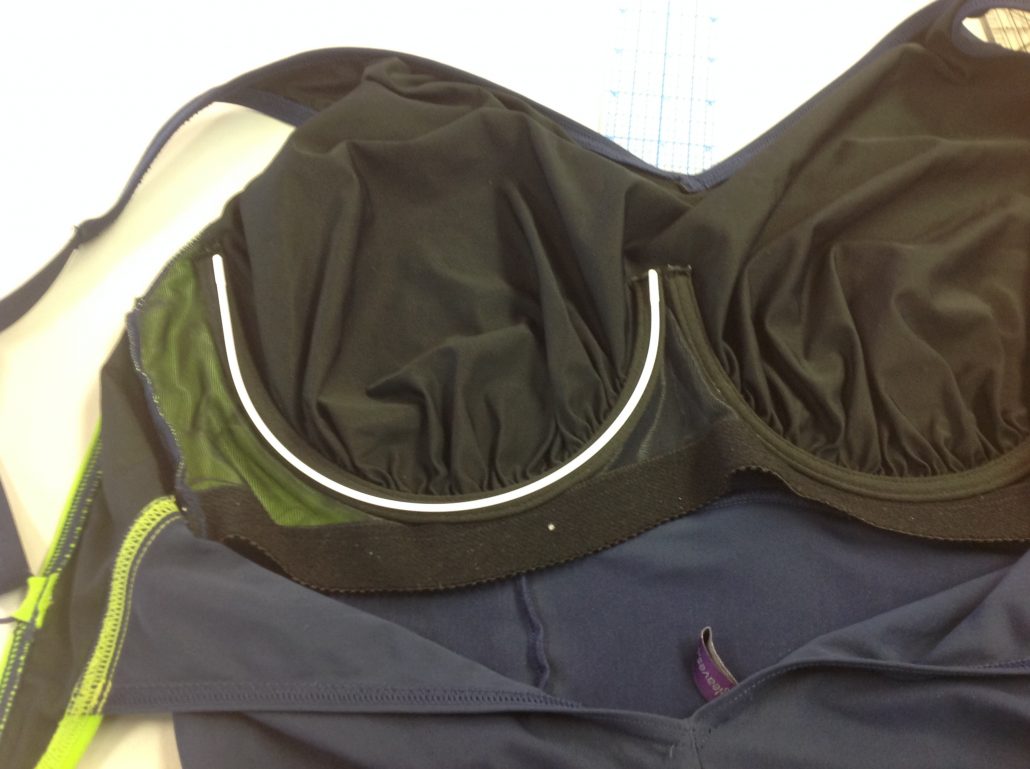
Here is the gathered cup in the frame, partly finished as you can see. It’s not quite finished but our student had to leave us! We were able to try it on her in a partly finished state and it was going to be a perfect fit!
Here’s another look at the interior swim bra.
So, the next time the discussion comes up – Can We Make a Seamless Swim Bra – I hope you will show the one you made proudly. Give this method a try and let me know how you do with it. I would love to see pictures which you can share to our Facebook page (Bra-makers Supply – Beverly Johnson)


So, then I add the wire at the end? Seems like the blog doesn’t go all the way to the end.
Would that be a good option if I wanted it to offer bounce support or should I use something like the Kerri sports bra under for that purpose?
Thank you!
Yes. I just gave an overview of how to draft the pattern. The swim bra would be made as a regular partial band bra in that regard. This provides light support. If you want more support, you could use your regular bra pattern or the Ingrid. Either will work
This is the perfect design for a tankini top I want to make – simple tank top style in a pretty fabric (from Bra Makers Supply, of course!). Since the pattern is a classic tank top style, there’s no back closure. I’m thinking that a front-close swim bra would be perfect – and much easier to get into than a back close!! My plan would be to make the back in powermesh, following the pattern of the tankini, and it would be cut as a partial band rather than a full band. The fabric is a white print, so will be fully lined, plus the swim bra. So my questions are:
1) should it be a free floating bra, attached only at the neckline/armhole/straps (sort of like a supportive version of a shelf bra), or should it be attached at the side seams and the back is “normal” or has that power mesh underlayer? (FYI I’m an F cup so support is necessary!)
2) should the whole band/back be powermesh and stretchy like a normal partial band bra, or should I use the sheer cup lining as a “frame ” from the wire to the side seam, particularly if the whole thing is free-floating (ie not attached to the side seams)
2) Is there any reason that a modification of this design would not work with a front clicker? (I have enough space)
If you are using this for a front closing version, and there is no reason not to do it if you have the “real estate” to use… then it could be attached to the side seams to offer more support. Only the bottom edge could be free-floating. The reason for this is that the gathers for the bra would be rather bulky sewn into a seam under the bust. I would use power net under the fashion fabric for the most supportive back.
A marvel of engineering. I am so impressed!
I’m looking forward to making one of these swimsuit bras for myself!
Genius, Beverly (as usual)! I didn’t think a seamless lining was possible for a G cup! Intriguing, and thank you so much for the step by step details. It’s like having you here, or me there, whatever. P.S. I’m still hungry and still no one has called me from Victoria’s Secret.
I was impressed by this method as well. We actually have a fabric that I have been using for my knit tops that would be able to be used for these seamless cups.
I am going to try this method for myself too – I prefer not to use foam if I can help it.