
If you are under the age of 40, you can be forgiven for not knowing what a Bullet Bra was (and is). After all, its heyday was in the late 40s and 50s. Those of us, of a certain age, however, will know exactly what we mean by a Bullet Bra. With its distinctive cone-shaped 4 piece cups and circular stitching, it was “the” bra for any sweater girl of the times.
But can we re-create the Bullet Bra for today’s woman? In today’s fabrics? The answer to both questions is a pointed YES we can! And our Design Team did exactly that!
The Draft
To make the iconic bra, you can use the Classic bra cup made from foam. Trim the cross cup seam allowance from the foam.
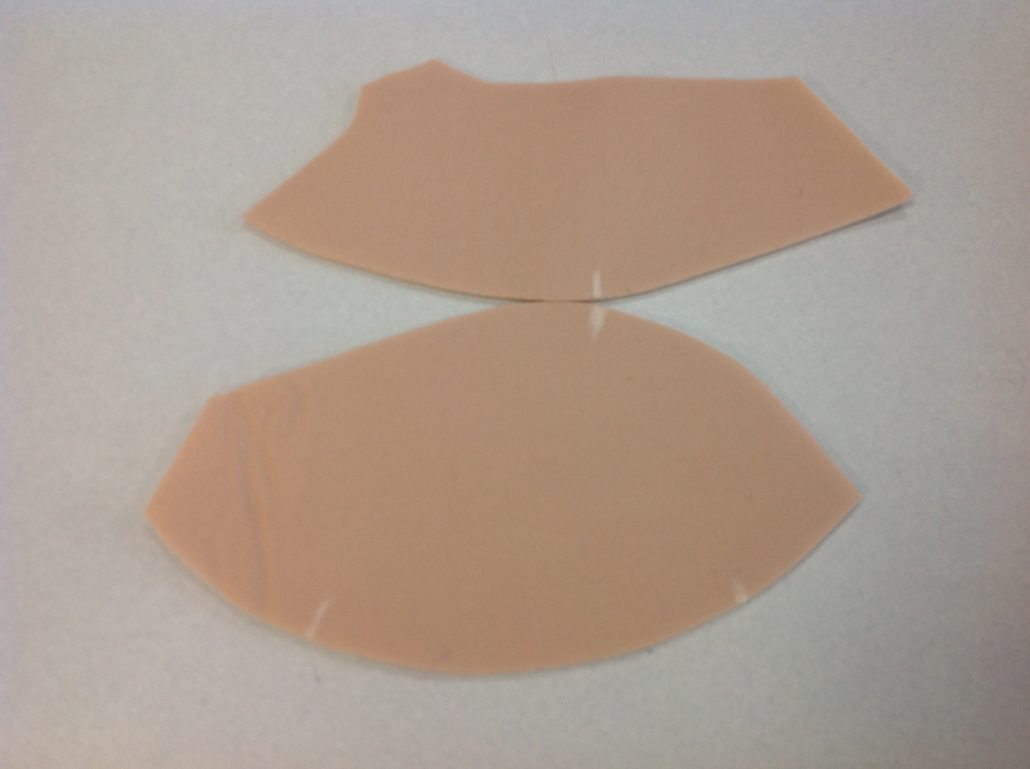
Use a zig-zag stitch (width 4 mm and length 1 mm) to sew over the edges that have been butted together on the machine bed. The resulting foam cup will provide the perfect 3-dimensional bra cup, enabling you to visualize the ideal seam placement.
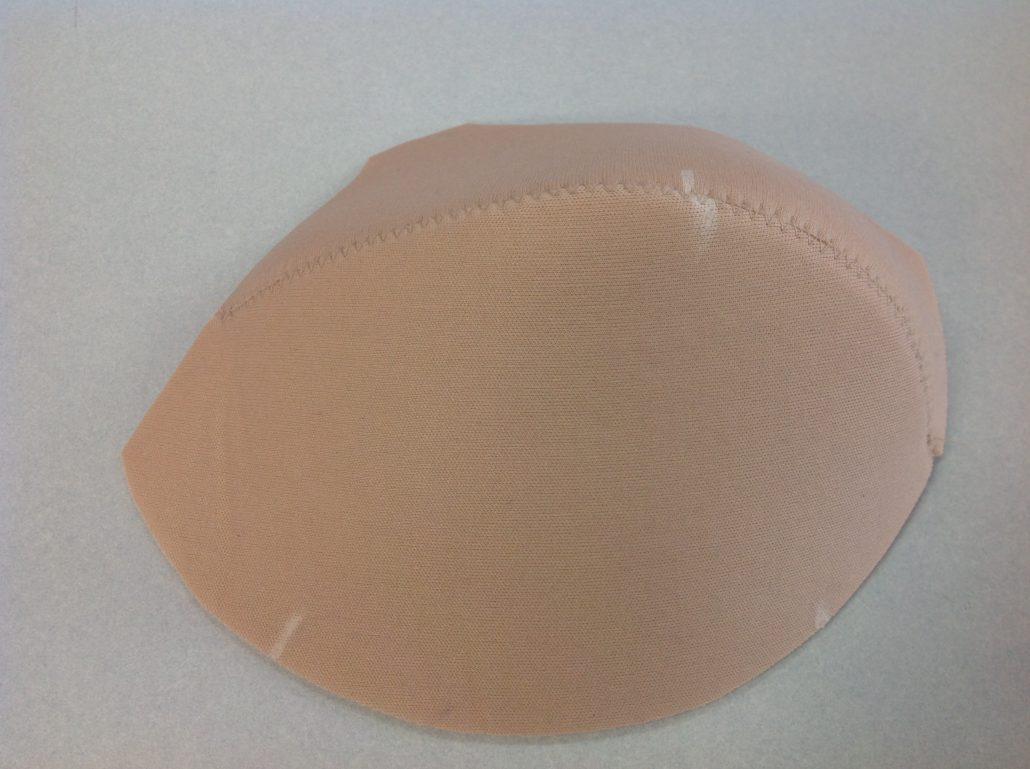
Draw the seamlines on the bra. We used a wash-out marker to draw the lines and it took us two tries to get the lines where we thought they should be. The lines should intersect at the bust point.

Re-cut the foam into the new shapes. Our Design Team made sure there were notches on each of the pieces – it is too easy to get these pieces flipped over or turned upside down.
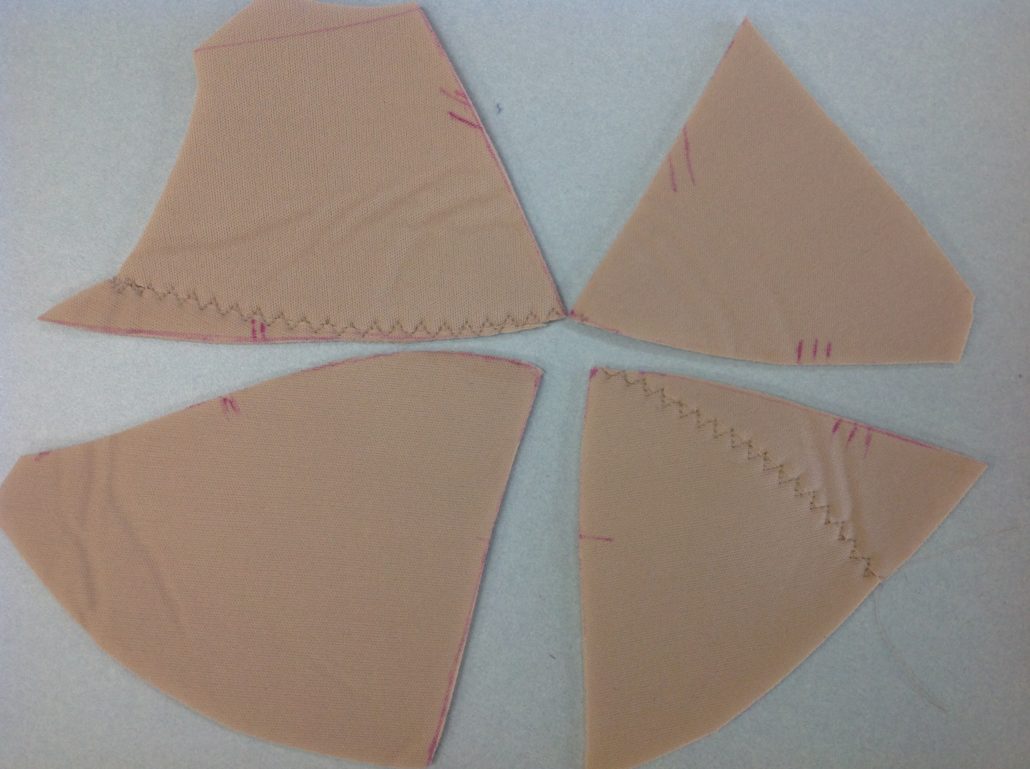
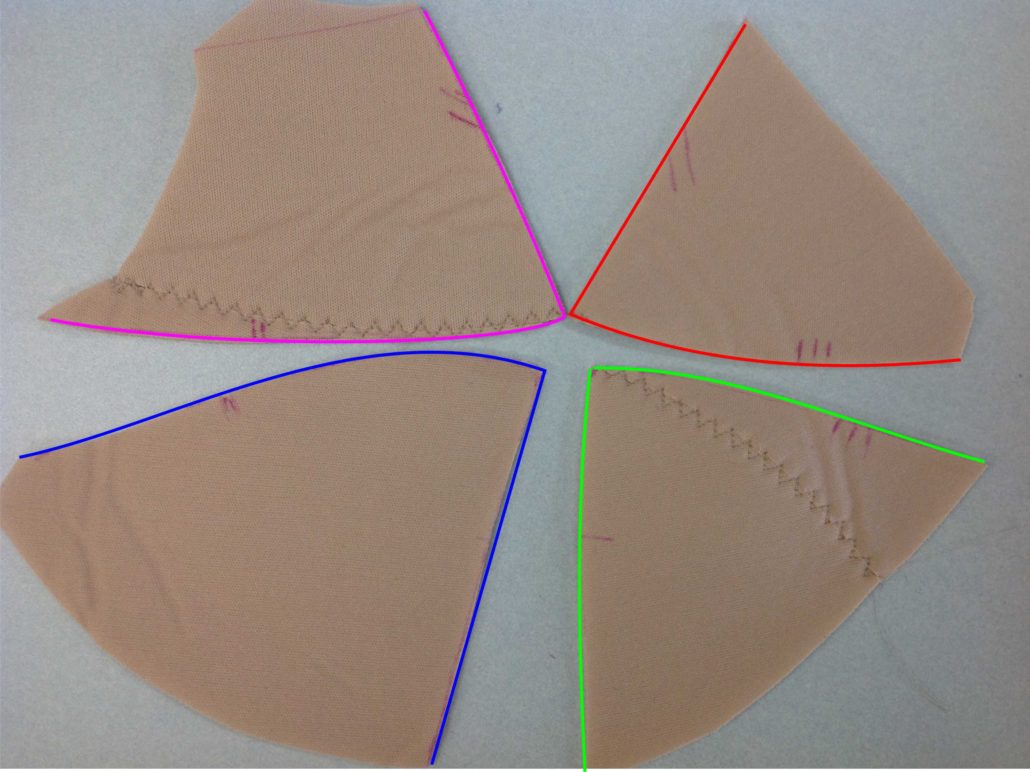
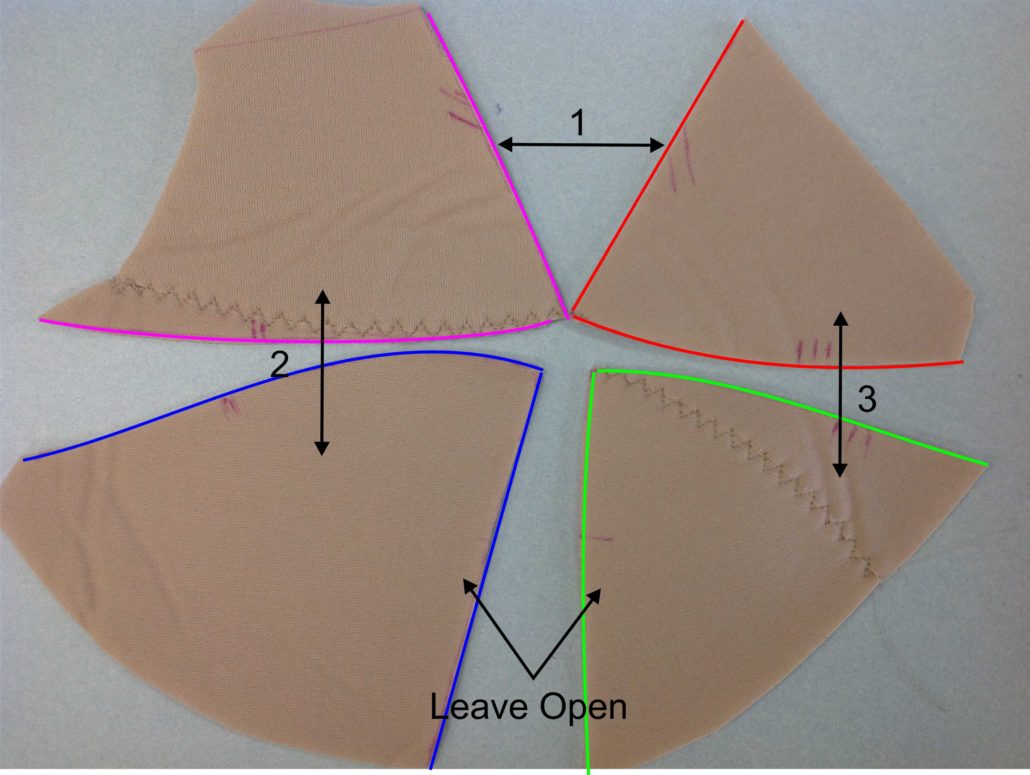
Trace the shapes to a pieces of paper, then add the seam allowances to each of the four pieces along the cross cup seams. I’ve indicated those by the coloured lines.
Cut the new pattern pieces from your chosen fabric. Our Duoplex works exceedingly well. Then sew the two upper cups together (1). Sew one lower cup piece to each side of the upper cup (2 and 3) so the seam that connects the two lower cups is left open.
Around and Around we go…
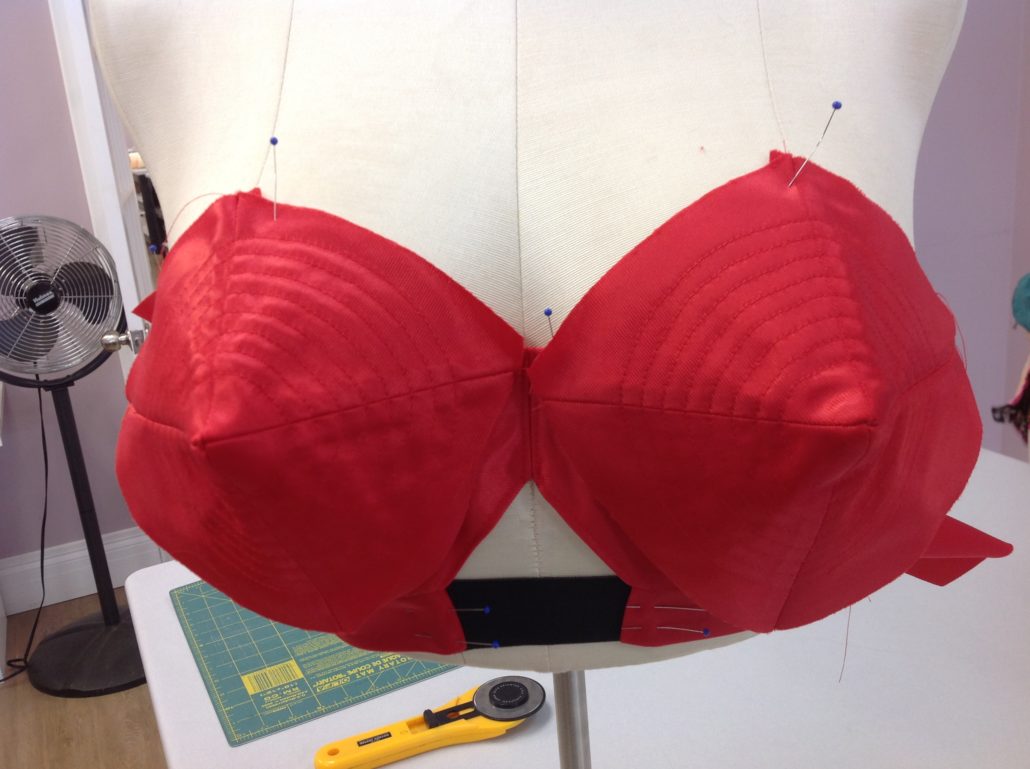
To do the circular stitching that defines a Bullet Bra, use a small circular object (we used a pattern weight here) to draw the starting circle. Position the circle so that the centre of the circle is at the intersection of the seams.
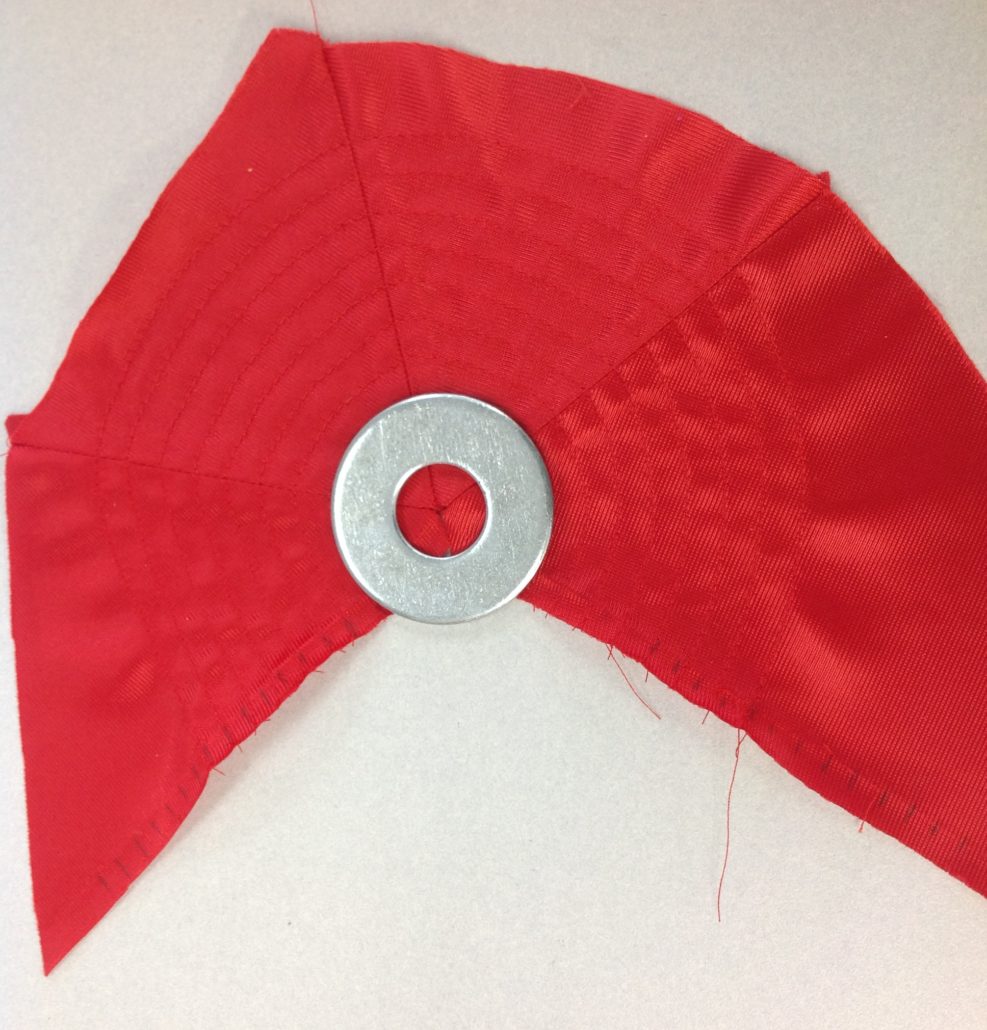
Use a straight stitch to move around the first circle, then stitch away from the first line by the width of your presser foot (about 3/8″ or 1 cm is ideal)
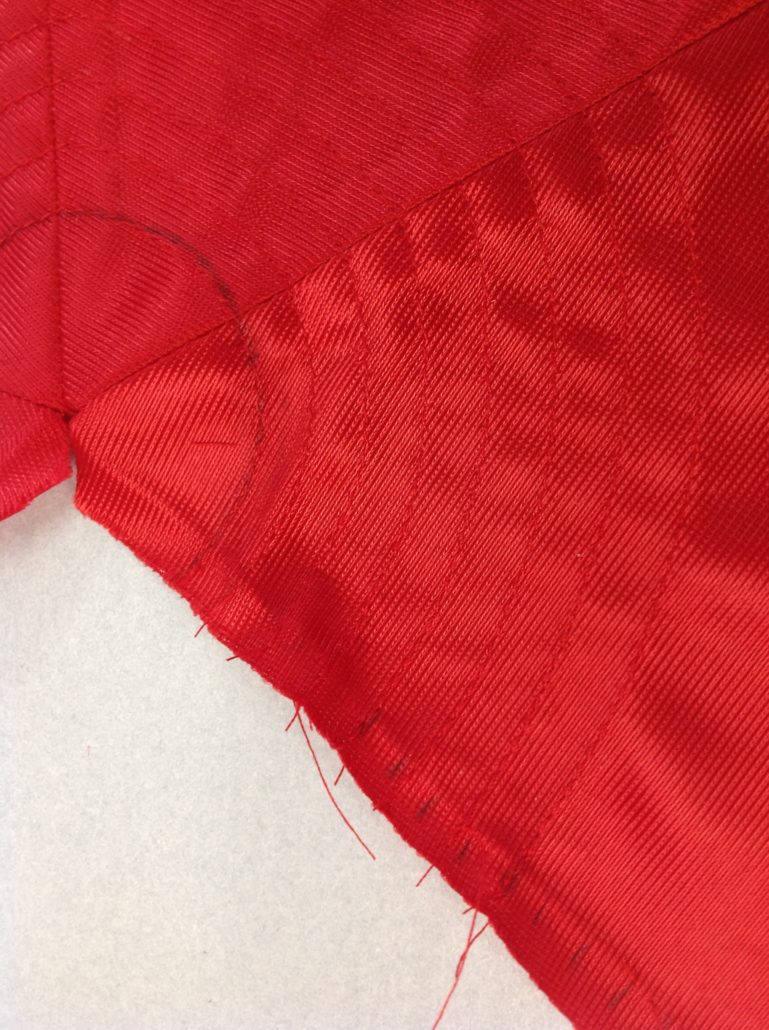
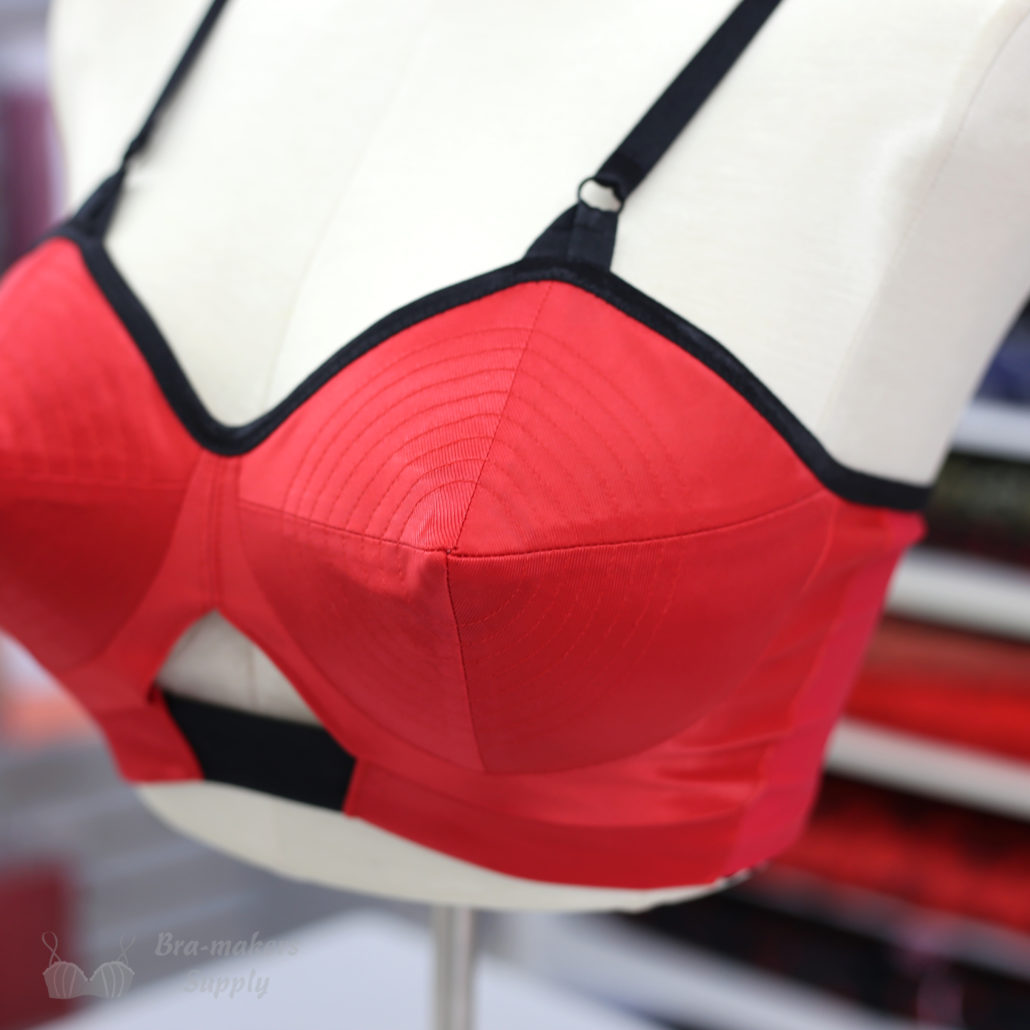
Once the circular stitching is done, you can close the lower cup seam. Yes, it will be that pointed! Exactly what you want.
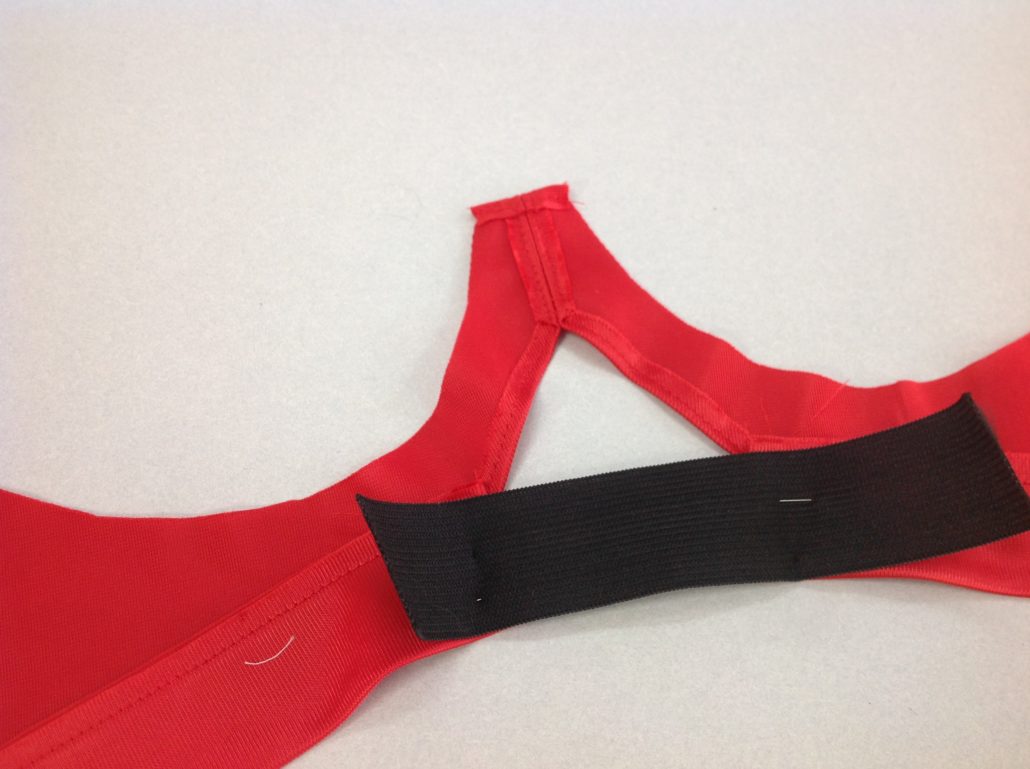
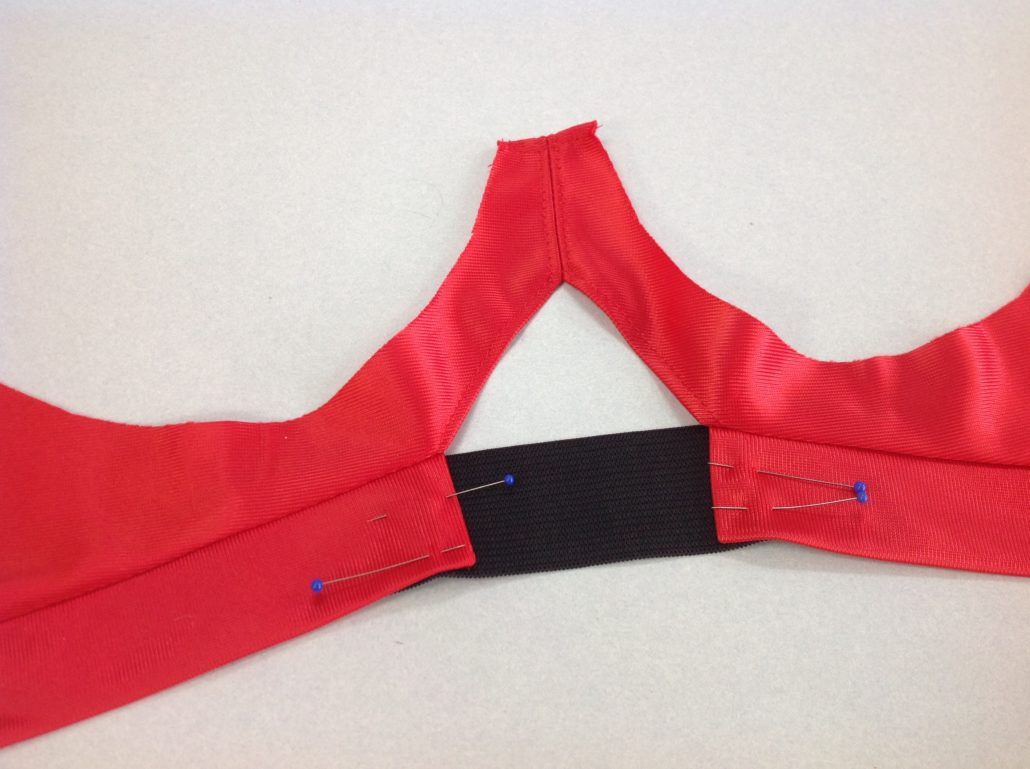
For the band, our Design Team cut away some of the front bridge area and turned it over to finish the edge. Then they cut a 1″ finished band (finished width x 2 plus seam allowances) to sew along the bottom edge of the front frame.
From the right side
They then continued to sew the bra as they usually would, sewing the cups into the band.
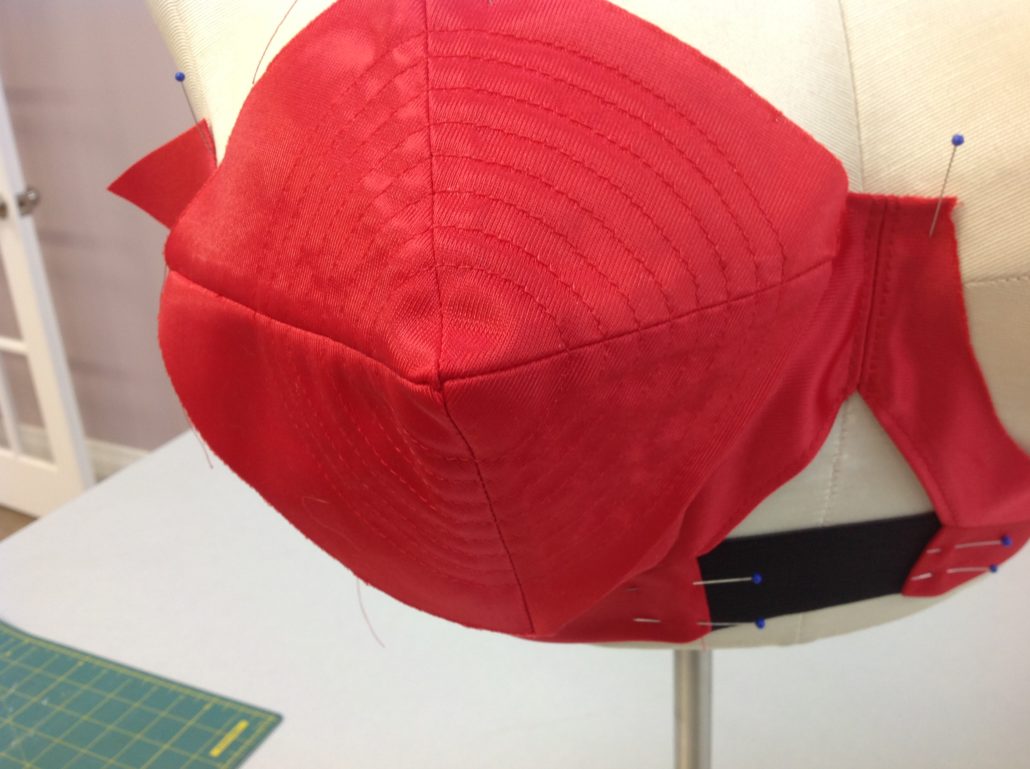
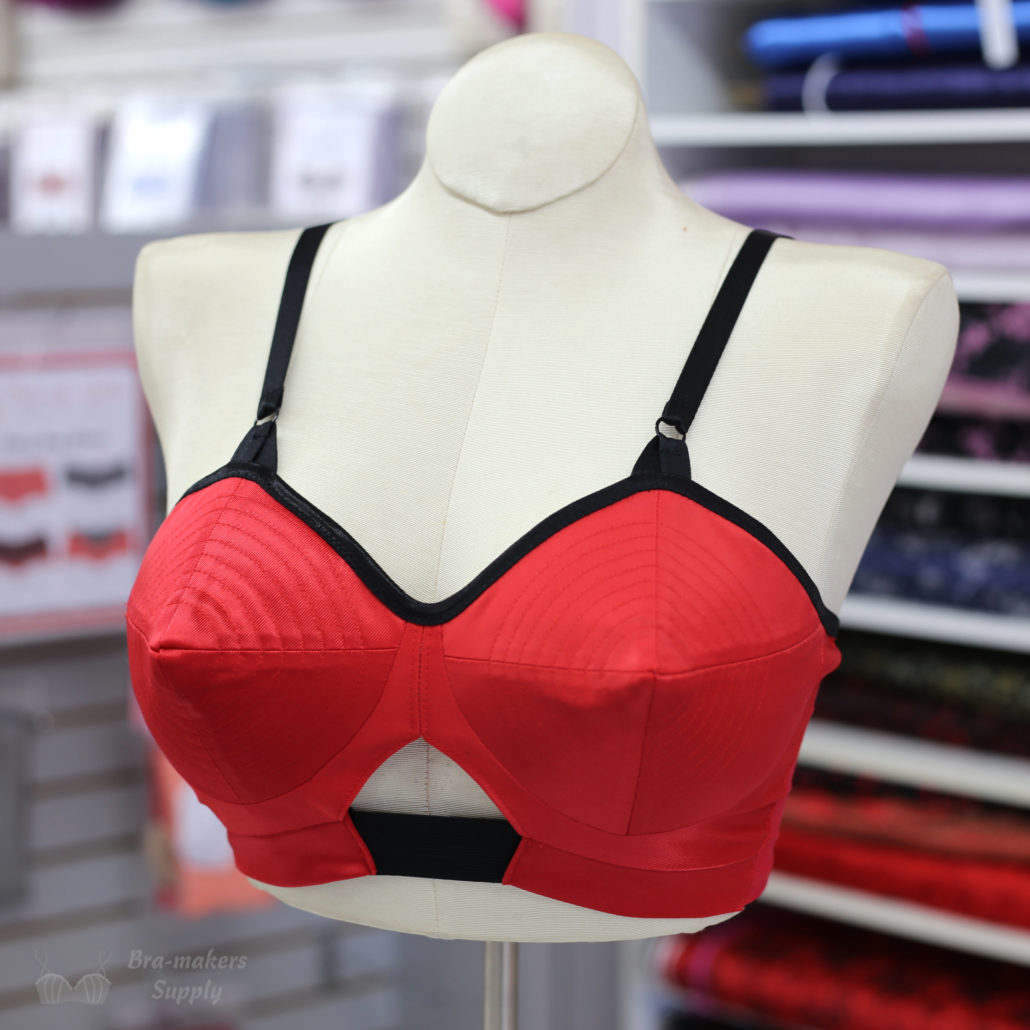
And completed the bra. Notice the front strap attachment is a piece of strap elastic folded over a ring. The extra-wide base of the strap attachment adds extra holding power.
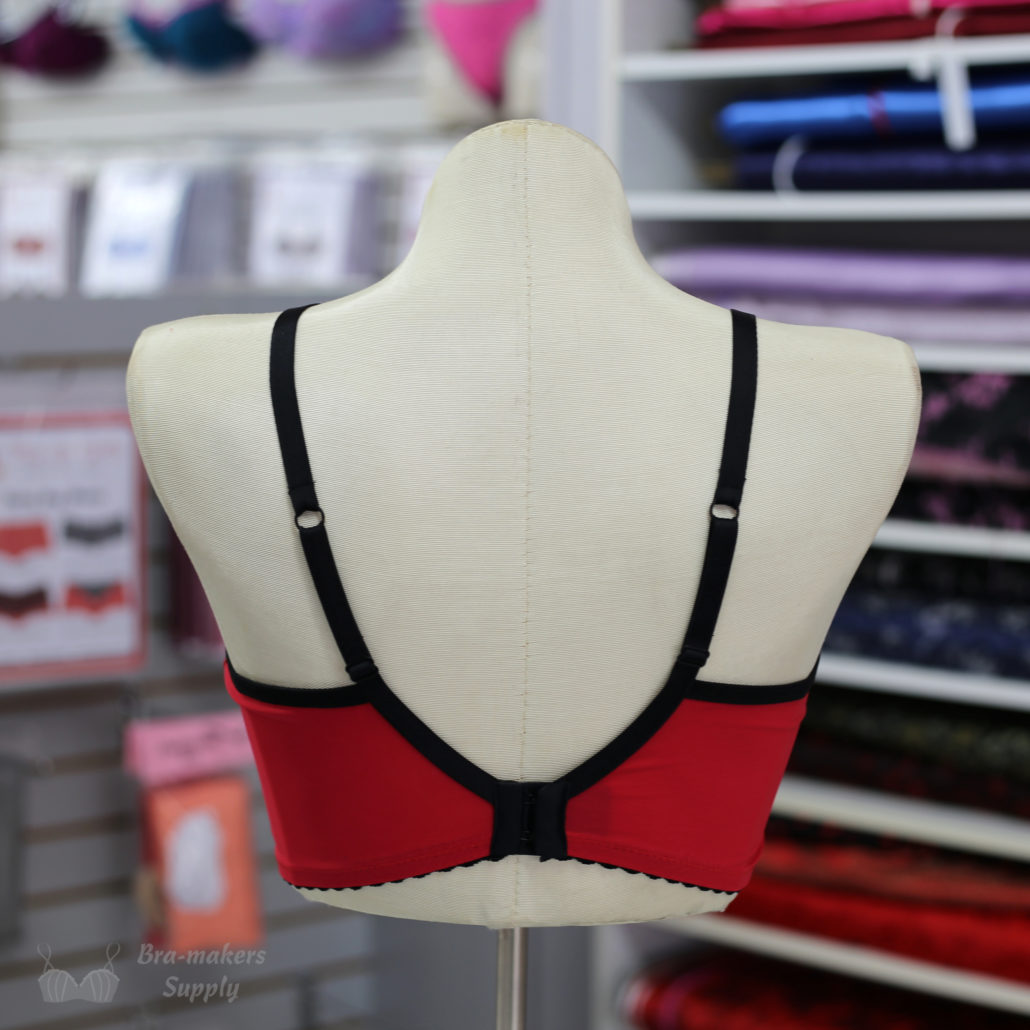

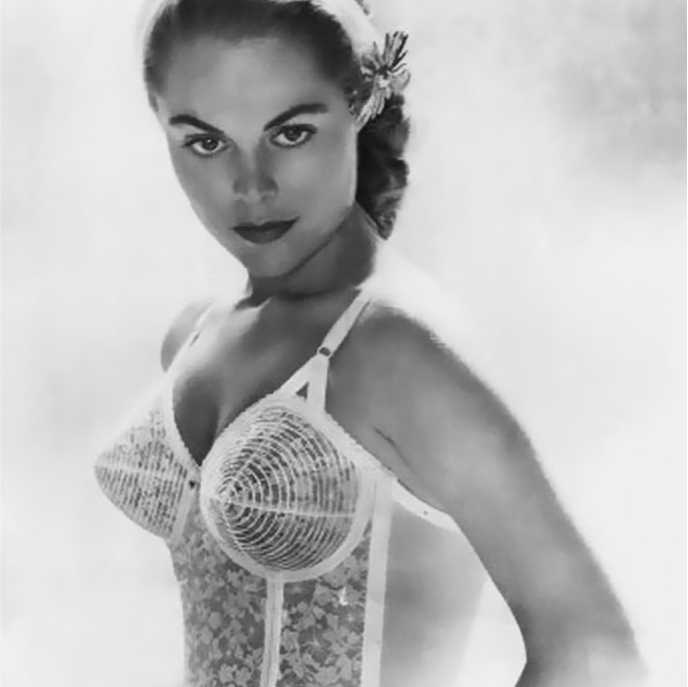
This is an example of the original Bullet Bra. Do you think we captured its essence in our modern-day interpretation? Let us know in your comments!


What an inspiring blog post- THANKS
I’m going to make one out of pantyhose material.
Thanks for this magnificent tutorial. Does just the Duoplex keep the shape without any lining or foam inside? Just want to ask because I want to try doing it!
Yes, it does for the most part. If your breasts are firm or very round (like our mannequin) you might want to do as we did and add a foam cone to the apex area.
Beverly Johnson
Hi Pilar,
You can also buy bullet bra pads, that act as a sort of ‘liner’ to help fill out and create the point in fabric bullet bras. Because this bra is made of foam, they should stay pointy when on. (FANTASTIC tutorial btw and I am totally going to make some for myself. If you have fabric bullet bras bras the website, What Katie Did sells them and where I buy mine from. (https://us.whatkatiedid.com/products/bullet-bra-pads-falsies?shpxid=dbd711a1-3334-40fc-8fcc-cd2a587197a9)
Hope that helps!
Barbe
Wow, thank you for the great tutorial Beverly, it looks like a really fun project. I was just wondering which way the DOGS should be orientated when cutting out the cup pieces?
The DoGS could slant toward the apex on the lower cup as they do on any split cup. On the upper cup, keep them going horizontal for the best support.
I love this! Could you use an underwire with this style?
In the original version, no. However since we are re-vamping a Classic and we have not changed the wireline, the answer is YES! Go for it!
With your great directions, I’ll give it a try – sewing it, that is. I’m not sure how wearable it will be.
It is surprisingly wearable! But beware you could take Bobbin’s eye out by accident!
She’ll probably want one of her own. OMG. She’d need three, wouldn’t she?
Oh yes, she would! That’s a challenge in itself, isn’t it?
I’m getting ready to order the Bullet Bra Kit, and wonder if wires are used – ? They don’t seem to show in the pictures. Also, how wide is the Tube Elastic?
No wires are used in our version but since the wireline did not change, you could use them if you want. The tunnel elastic is 1″ wide, as I recall. I am glad you are making this!
Me again. I’m working on the foam pattern, and wonder if the quadrants should have straight lines or slightly curved? Mine curves on one seam only, on the horizontal, from apex to center. It seems like apex to bottom center maybe should curve, too. Then again, straighter lines make a pointier bra, don’t they?
The cross cup and the lower cup can be slightly curved but the vertical on the upper cup must be straight.We didn’t add to the points at all – they naturally ended up like that.
Thanks, Bev. Now to get at it!
I look forward to your creation!
Can’t imagine anyone wearing that kind of bra — but from the lady in the picture, it seems somewhat comfortable in spite of the ‘imposing look’.
This bra look fabulous, and the directions are amazingly clear and detailed. You have truly captured the Bullet Bra Spirit!. Does this bra have the same projection and uplift that traditional Bullet Bras were known for?
Oh yes. Our duoplex is every bit as supportive as the early Bullet Bras. Bonus – you don’t have to iron the modern-day version, but I remember ironing our bras in the 60s before Dacron came along.