Have you seen a Russian doll – where one fits inside the other? A matryoshka doll, also known as a Russian nesting doll is a set of wooden dolls of decreasing size placed one inside another. Recently we had a situation where we thought the principle of the Russian Doll might be a good solution for bra cups. Curious about Russian Doll Bra Cups? Read on…
We needed to come up with a solution for a lady with a difference in size between left and right of 3 Bottom Cup Depth sizes. That’s a lot! That’s a difference of 3/4″ (18 mm) from apex to the the wire line. But our lady wanted her bra to look even under her clothes. She also did not want loose “cookies” inside her bra. She just wanted to put her bra on and go. Our solution – make one bra cup to fit the smaller breast and two bra cups in the larger size. On the smaller breast, we put the smaller cup inside the larger cup. The cups became Russian Doll Bra Cups, except that we also added layers of padding between them. Here’s what we did.
Making the pattern
We already had the pattern to fit each breast. However, on the smaller side, the neckline was slightly lower than on the right hand side. We raised them to the same level so they would better on the body.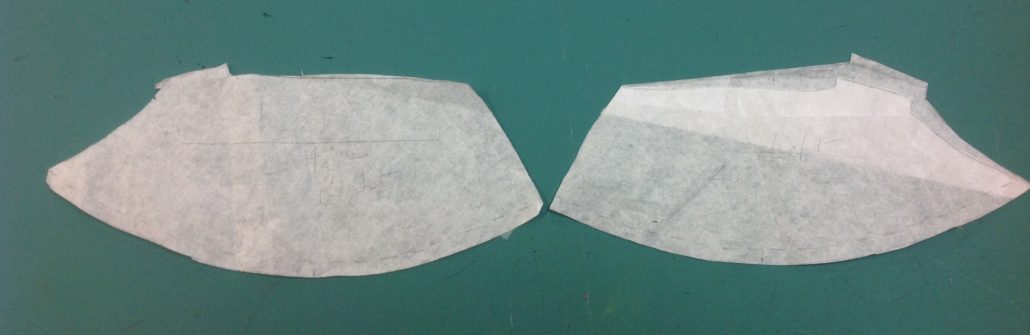
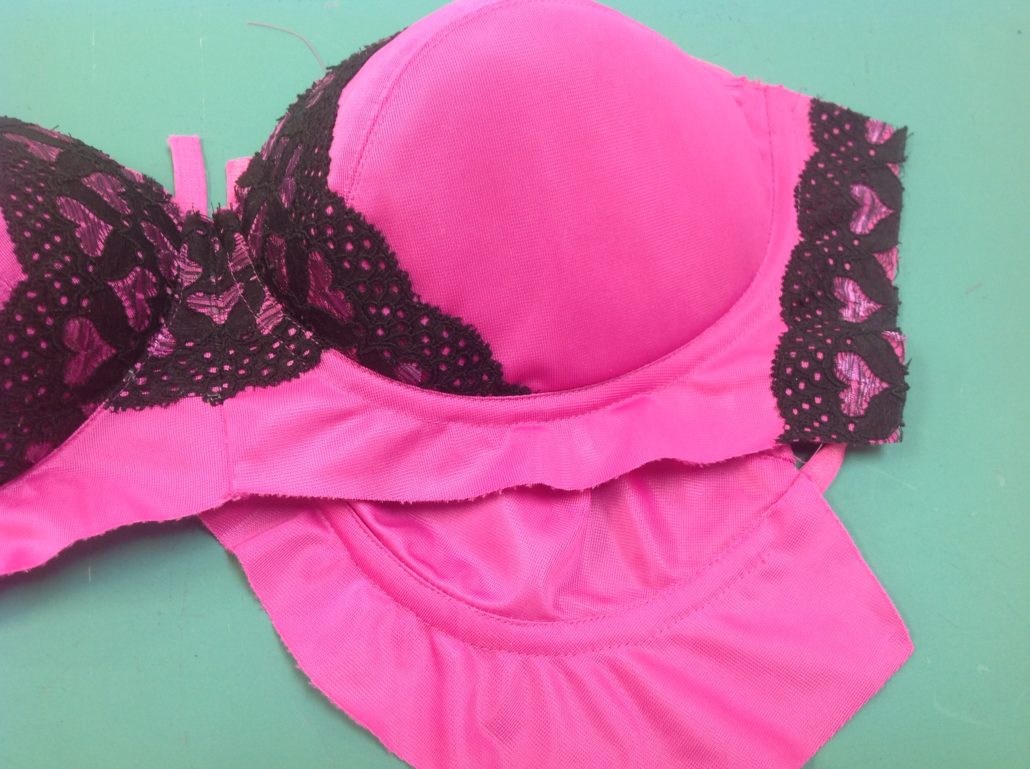
Next we made up TWO cups for the smaller side and one cup of the larger side. One cup on the smaller left side is made with the lace to match the larger right side, while the second smaller cup is made of plain fabric. In our case we use our go-to fabric, which is duoplex, but we have easily have used cotton spandex or cotton jersey, or anything else we wanted.
Here are the three cups from the outside. Notice that we split the centre front in the centre (yes, we added a seam allowance to the pattern before we cut it out!). This is so we can sew all the layers together at the centre front when the time comes. The butterfly lace treatment always looks good, and the lace details on the side seam add a nice touch.
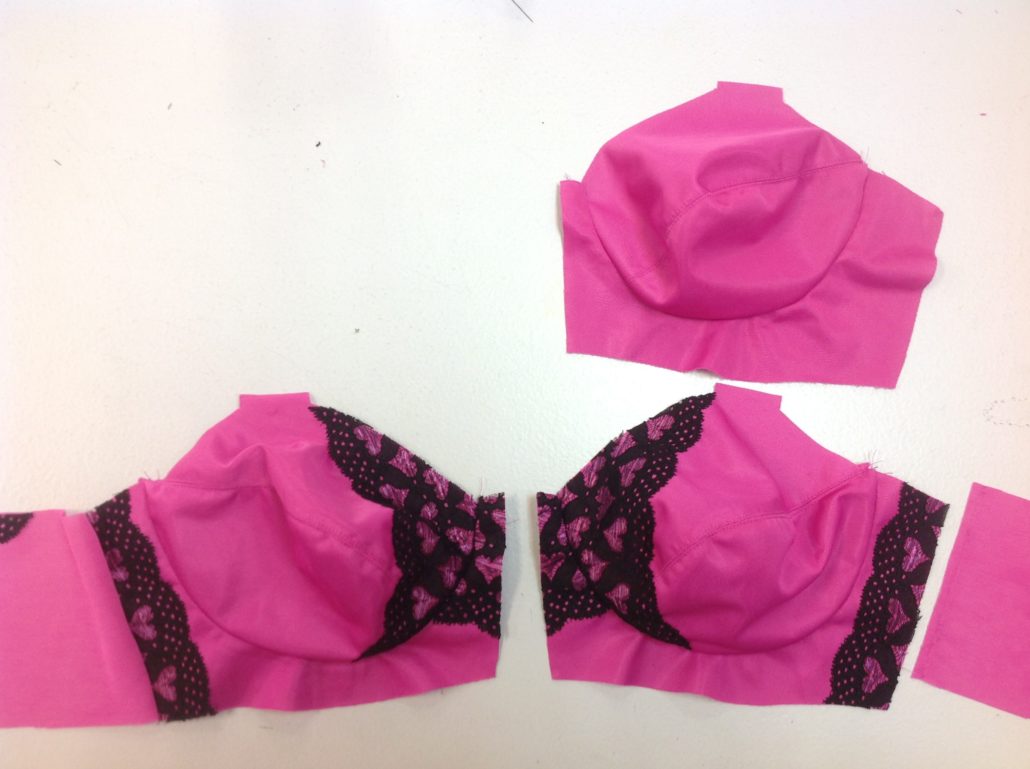
Add channeling to the inside plain cup. Then you can make the Russian doll aspect of this bra!
Let’s Make the Russian Doll Bra Cups!
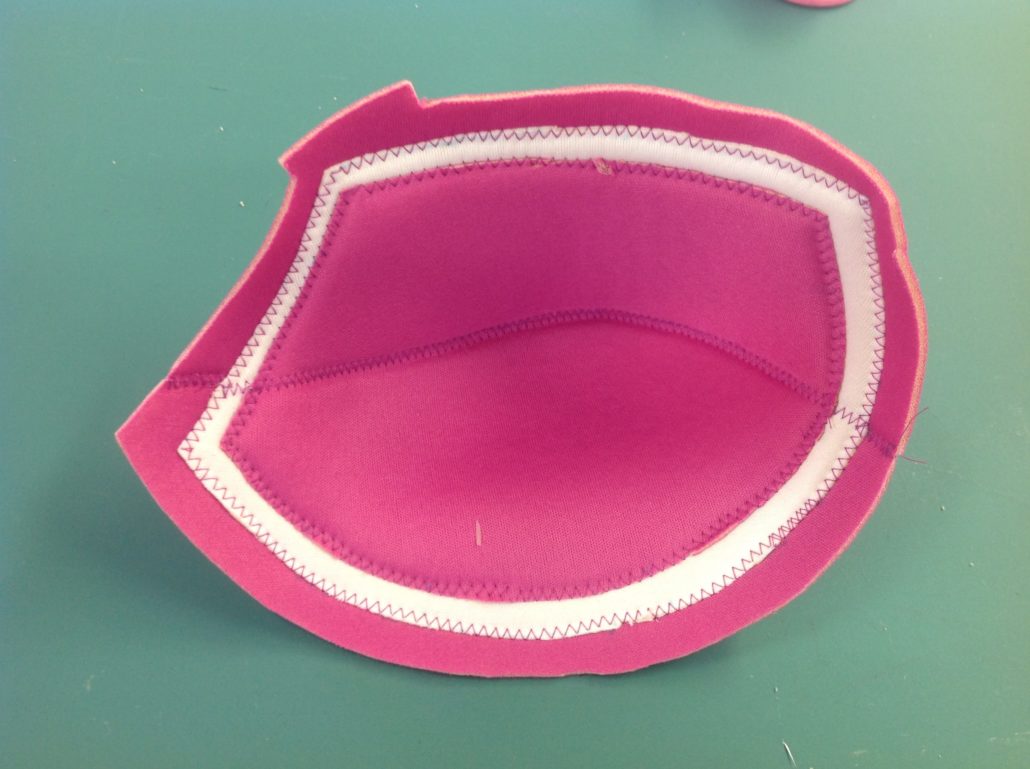
We determined that this client had a Bottom Cup Depth (BCD) one size different on one side than the other. Each BCD is 1/4″ and the layers of foam are 1/8″ thick. Therefore we can assume that we need two extra layers of foam to equalise the two cups. We are using a foam layer for the outside of both cups and here are the other two layers for the smaller side. Cut each layer smaller than the next by about 1/2″, making the layers look like a set of Russian dolls!
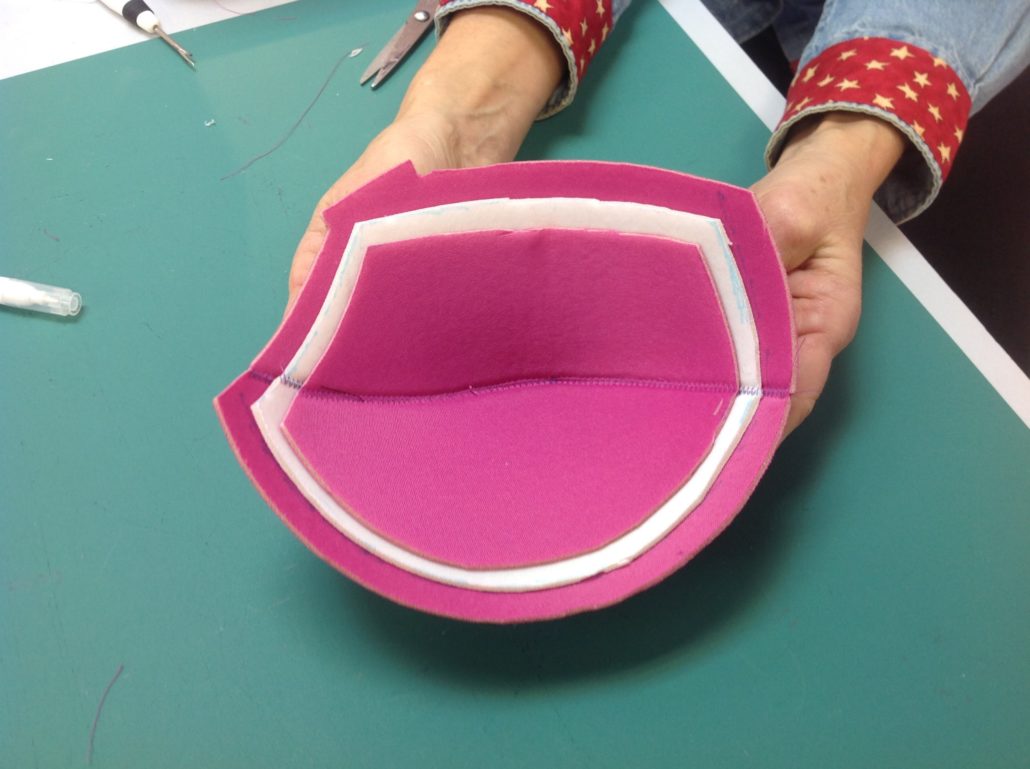
Now we can sew our foam bra cups together. We used a zig-zag stitch to keep all the layers from shifting.

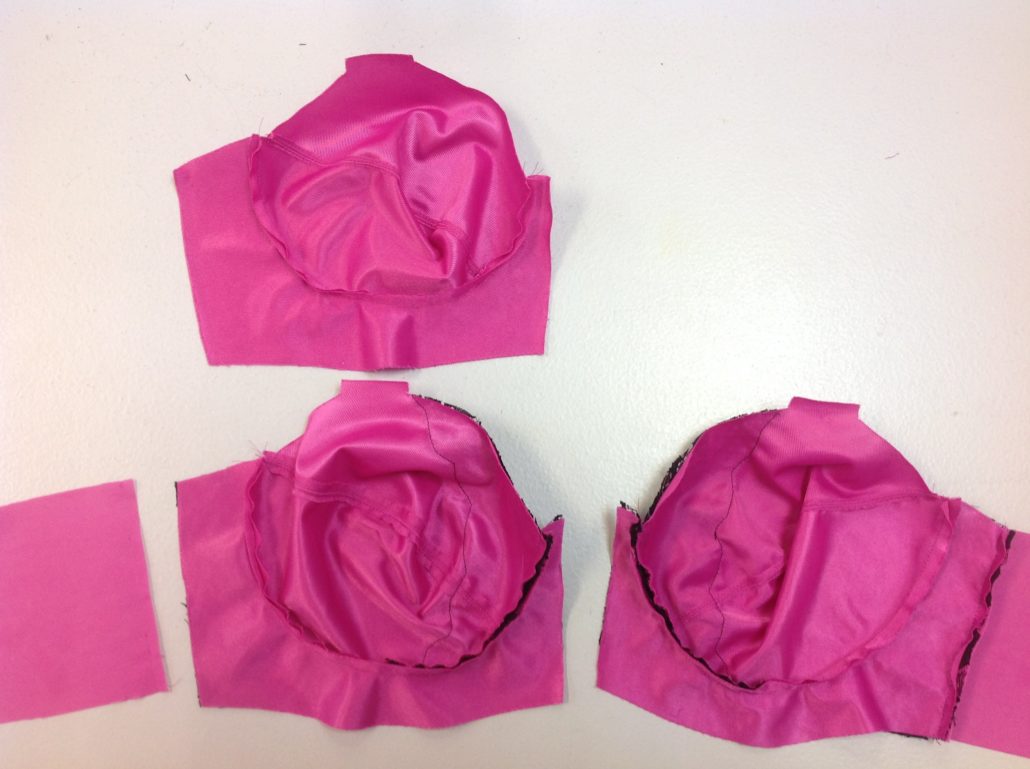
Next we put the foam cup layer inside the lace and fabric layer on the left side.
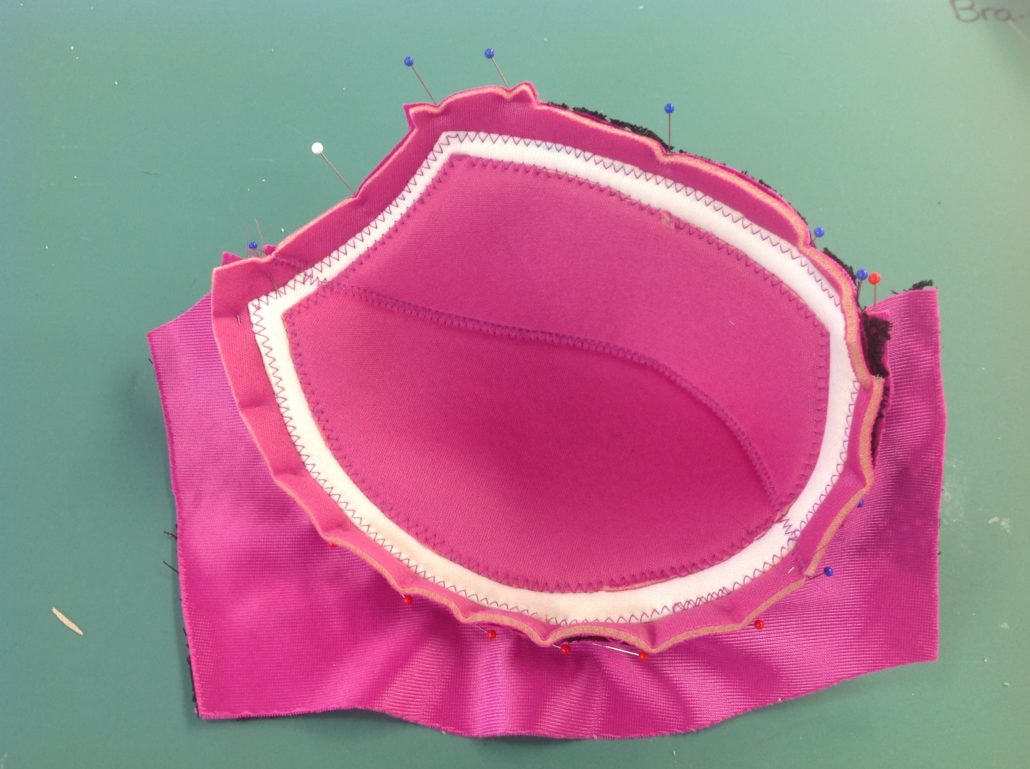
Next we sew a “fake channel” with topstitching to the foam layer cup. We don’t actually need real channeling because we won’t we using a wire and we don’t need to extra bulk. However we DO sew channeling to the inner fabric layer. That’s the layer that will hold a smaller wire to support the smaller breast on the left side.
Put it all Together!
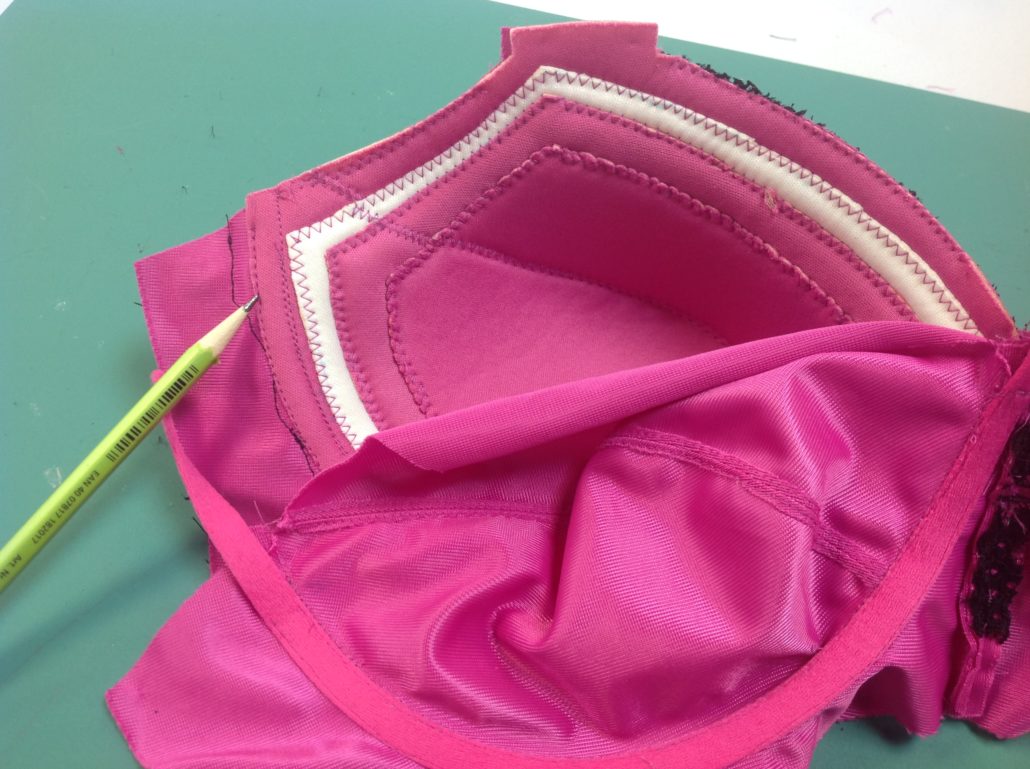
Now we layer the inner layer with the foam layer and sew those two layers along the front seam to the right hand side of the bra. Now do you see why we chose to have a seam along the centre font? Look at how nicely the heart motif matches up!
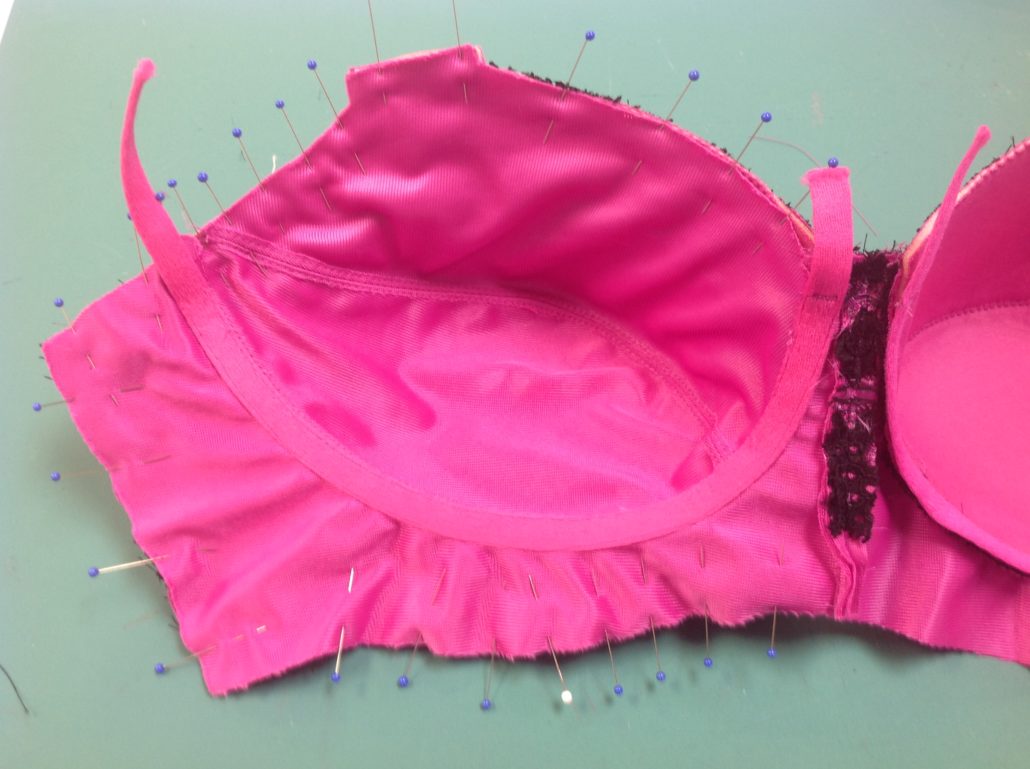
You can see the innder fabric layer is still loose. It is attached only to the centre front seam of the bra. We pulled it down so you could see it.
Now pin the two layers together along the underarm and neckline areas of the bra.
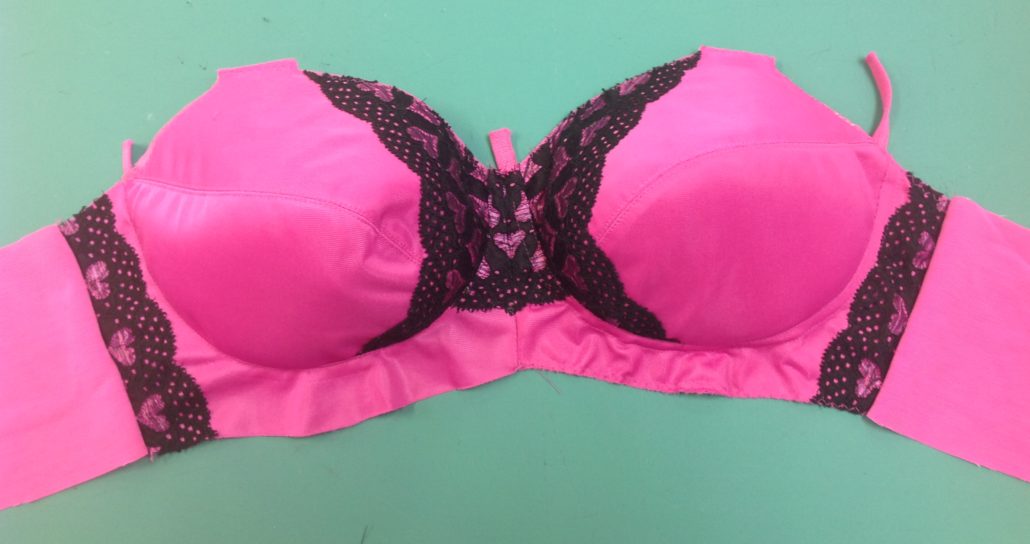
Now we sew the perimeter. Remember the inner cup is still unattached along the wire line. Why do we do that? So the inner cup can conform to the smaller breast while the outer layer lays over top of it, giving the appearance of equal size breasts. At this point, you can go ahead and finish sewing the side seams, straps and applying the elastics to complete the bra.


Now that sounds like a fantastic solution! I am just constructing my first bra but I know before starting there will be a difference in cup sizes. That is why I am learning to construct my own because I have never had a bra that fits both sides! If needed, I will figure out how to get to a bra camp…
Gawd, Bev, the lady in question must LOVE you for figuring this all out for her! What a Fairy BraMother you are!
We haven’t quite finished it but we are hoping it will be the answer she’s been looking for!
Interesting method. I like the ‘can do’ solution to so many different fitting challenges.